

Hi,
I found this diorama very weel executed and I don't see anything wrong with your positioning, building etc.
Keep up the good work
Best,
Julien
Hosted by Darren Baker
Italian "maiale" in harbour
Kinggeorges

Joined: August 31, 2005
KitMaker: 1,380 posts
Armorama: 845 posts

Posted: Saturday, January 19, 2008 - 01:12 PM UTC

Grumpyoldman

Joined: October 17, 2003
KitMaker: 15,338 posts
Armorama: 7,297 posts

Posted: Saturday, January 19, 2008 - 01:21 PM UTC
Looking good, I like the new layout.


t34-85
Joined: August 16, 2006
KitMaker: 232 posts
Armorama: 230 posts

Posted: Saturday, January 19, 2008 - 01:30 PM UTC
I don't want to sound like a pain in the butt, but if you allow me, I noticed a historical inconsistency. I don't think any American came in contact with any "maiale" while in Italy (the few left in Spain were interned), although one was shipped to the US for inspection, but it was provided by the Royal Navy. As far as I know, after the Italian surrender, the Royal Navy took the entire project over (including some Italian officers) to develop the "chariot."
Maybe you should just change the markings on the jeep and use a British figure? ;-)
BTW, your work is very nice.
Maybe you should just change the markings on the jeep and use a British figure? ;-)
BTW, your work is very nice.

okdoky

Joined: April 30, 2007
KitMaker: 1,597 posts
Armorama: 806 posts

Posted: Saturday, January 19, 2008 - 01:32 PM UTC
Hi Jan
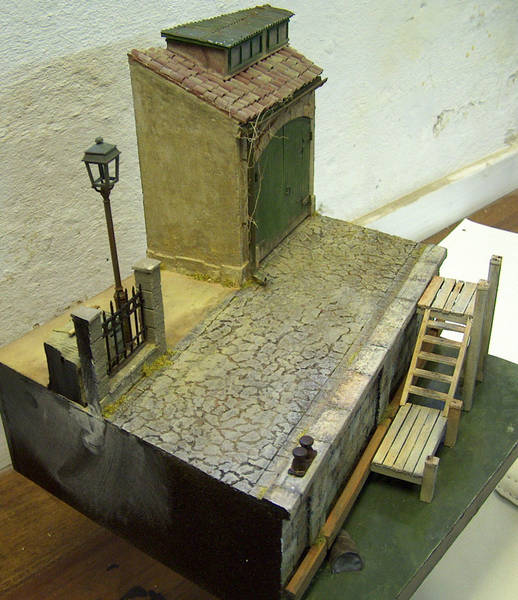
I am glad you went with the building as a part backdrop. I t is looking really nice with the doors, gutters and down pipes standing out well. That roof is smashing though it will be interesting to see how you stop off the roof light at this angle. Are you intending to make a small section of flat roofed area with a basic glazed front to the dormer.
There is a lot of ways that you could clad the dormer roof and cheeks, with wriggely tin for the roof and timber for the cheeks being the option I think I would have chosen. Lead sheet would be another that could be dressed down the cheeks as well as over the flat roof section. Verticle tiles of a flat profile for the cheeks could be used for a slight contrast of roof surface too.surfaces.
I don't see any problem with the proximity of the sub to the steps as any crane that might be to the left could have sufficient span to reach over the top and then to swing out over the steps and lay the sub into the water right beside and to the left of those very steps.
Great work
Nige
okdoky
Joined: April 30, 2007
KitMaker: 1,597 posts
Armorama: 806 posts
Posted: Saturday, January 19, 2008 - 01:36 PM UTC
Another way to face off the roof light would be simple louvres to provide simple venting of the warehouse.
Nige
Nige
MrMox

Joined: July 18, 2003
KitMaker: 3,377 posts
Armorama: 1,088 posts

Posted: Sunday, January 20, 2008 - 04:02 AM UTC
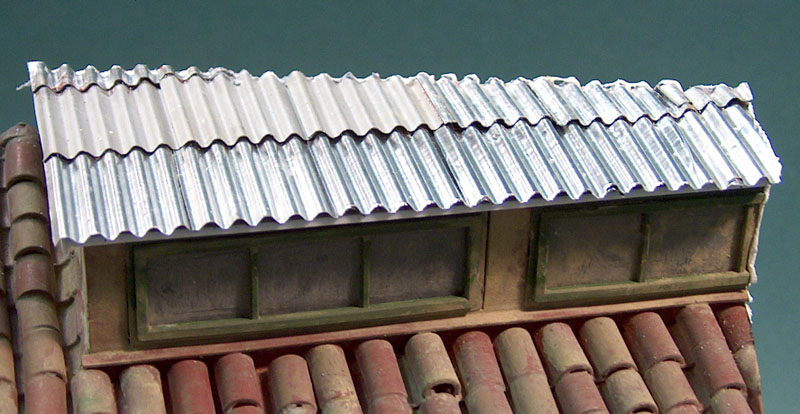
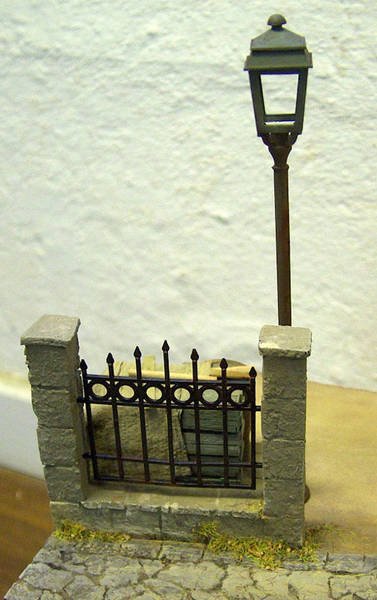
Another update - roofs still unpainted - anybody dare to guess how its done 
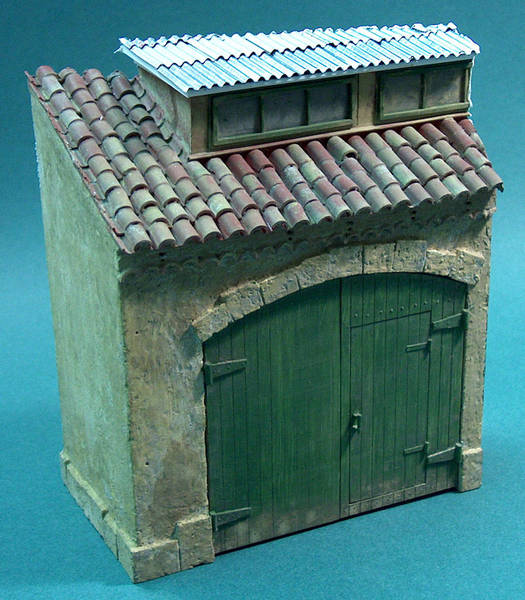
and a closeup
Cheers/Jan
and a closeup
Cheers/Jan


cheyenne
Joined: January 05, 2005
KitMaker: 2,185 posts
Armorama: 1,813 posts
Posted: Sunday, January 20, 2008 - 10:34 AM UTC
Tin foil ? , good finish !!
Glenn
Glenn
okdoky
Joined: April 30, 2007
KitMaker: 1,597 posts
Armorama: 806 posts
Posted: Sunday, January 20, 2008 - 10:43 AM UTC
Hi Jan
are you putting a couple of rusty plates on to keep the wrigglie tin down in high winds?
looks really nice
Nige
are you putting a couple of rusty plates on to keep the wrigglie tin down in high winds?
looks really nice
Nige
MrMox
Joined: July 18, 2003
KitMaker: 3,377 posts
Armorama: 1,088 posts
Posted: Sunday, January 20, 2008 - 08:14 PM UTC
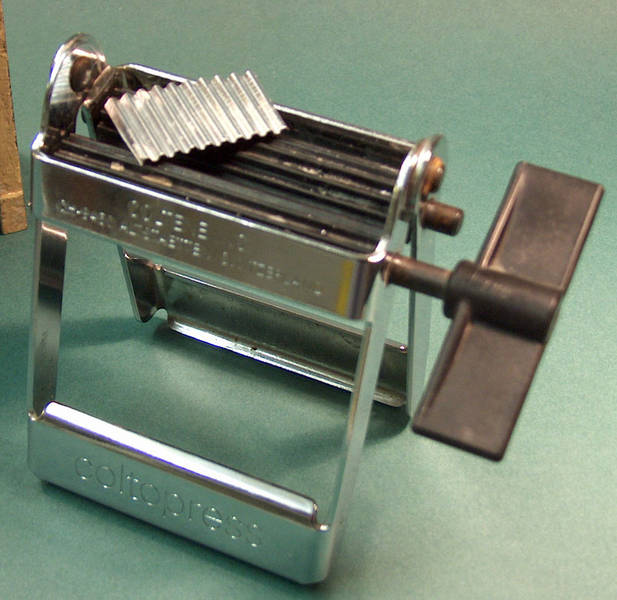
Tin foil - yes, or rather the stuff on winebottles - and a quite special tool, normally found in our bathroom and used to squeze the last toothpaste out 
I´m not sure about putting some steel profiles on the roof, its relatively small and I want to let the colors give it life with colorvariation from plate to plate.
When the roofs painted and the gutter fixed I think the storehouse is ready for some washes and wheatering.
I´m not sure about putting some steel profiles on the roof, its relatively small and I want to let the colors give it life with colorvariation from plate to plate.
When the roofs painted and the gutter fixed I think the storehouse is ready for some washes and wheatering.
SGTJKJ

#041
Joined: July 20, 2006
KitMaker: 10,069 posts
Armorama: 4,677 posts

Posted: Sunday, January 20, 2008 - 09:16 PM UTC
Nice diorama and good progress, Jan. Cool idea about the tin foil plates for the roof.
Godt arbejde - looking forward to see more
Godt arbejde - looking forward to see more

okdoky
Joined: April 30, 2007
KitMaker: 1,597 posts
Armorama: 806 posts
Posted: Monday, January 21, 2008 - 01:36 AM UTC
Hi Jan
No need for large steel profiles.
The fixings for the real wrigglie tin would normally be nothing more than a small plate say 50mm x 50mm with a bolt or screw into the timber trusses below spaced to suit the roof timbers and located either at the top of the curves or in the troughs depending on the spacing.
You could add a light rust staining and dirt around the plate and bolt caused by the contact of the differences in metals.
Nige
MrMox
Joined: July 18, 2003
KitMaker: 3,377 posts
Armorama: 1,088 posts
Posted: Monday, January 21, 2008 - 02:03 AM UTC
Ah Nige, now iI get the meaning - yes today you would use bolts or screws with a disc to spread the pressure -back then large nails would be the way to go - but I dont have much in terms of referances - so I dont know if square or round or any plates at all where used - might just stick to nails to be sure...
Something that have surpriced me is that galvanizing was used befor the war - so it would propable be correct to assume that these treated and painted - so some nails would be a good reason/excuse to ad some rust
Something that have surpriced me is that galvanizing was used befor the war - so it would propable be correct to assume that these treated and painted - so some nails would be a good reason/excuse to ad some rust
MrMox
Joined: July 18, 2003
KitMaker: 3,377 posts
Armorama: 1,088 posts
Posted: Tuesday, January 29, 2008 - 10:56 PM UTC
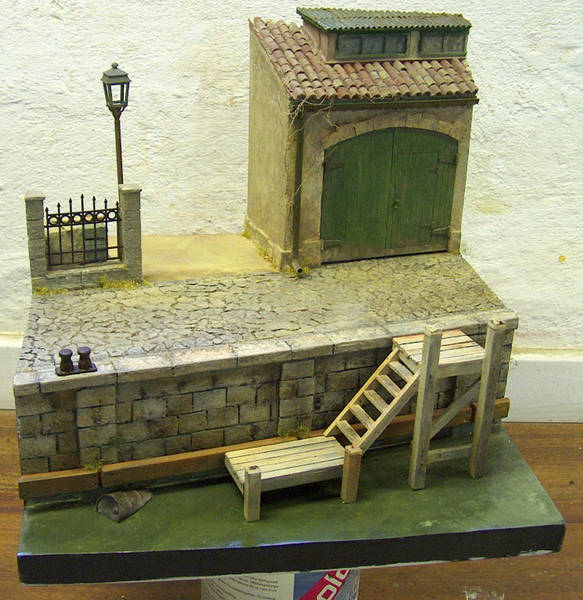
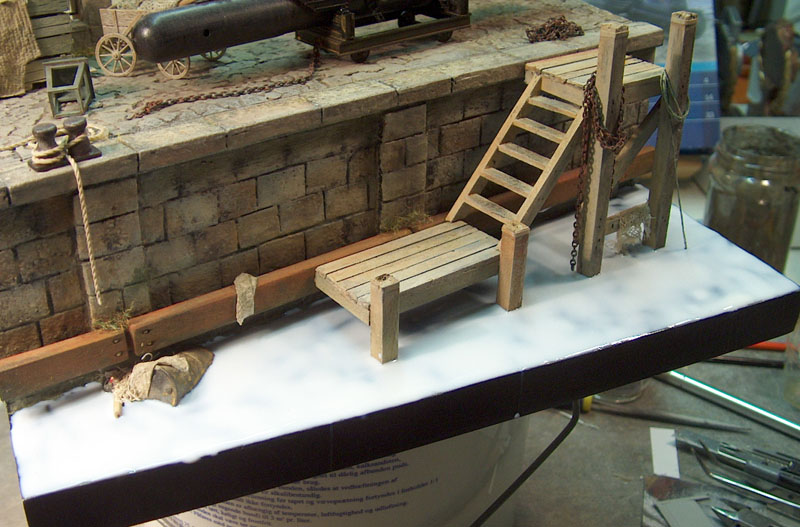
Slowly progressing, the basic structures are done exept for more washes and dusting...
Now on to all the bits and pieces normally found on harbours.
Now on to all the bits and pieces normally found on harbours.
Grumpyoldman
Joined: October 17, 2003
KitMaker: 15,338 posts
Armorama: 7,297 posts
Posted: Tuesday, January 29, 2008 - 11:43 PM UTC
Looks great so far.
I certainly hope you are going to write a feature on this one Jan.
I certainly hope you are going to write a feature on this one Jan.
MrMox
Joined: July 18, 2003
KitMaker: 3,377 posts
Armorama: 1,088 posts
Posted: Tuesday, February 12, 2008 - 09:19 PM UTC
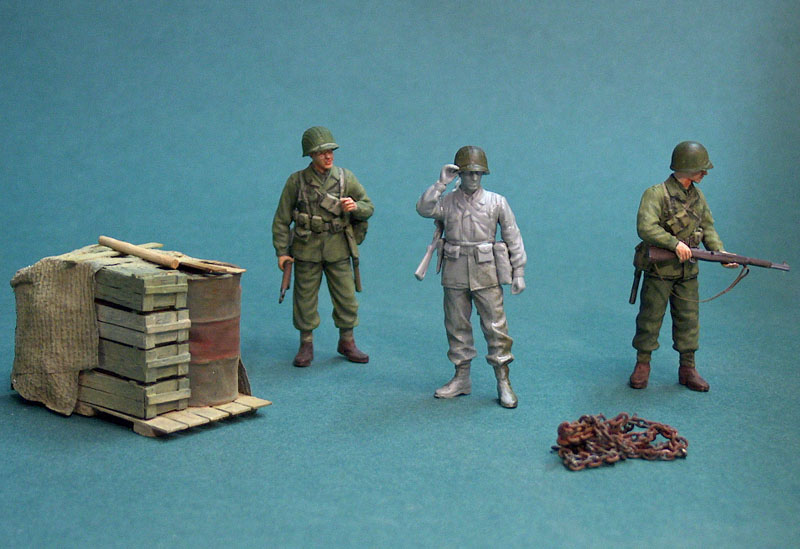
Maybe Dave .. if I ever get it finished
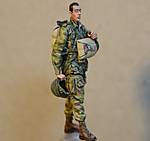
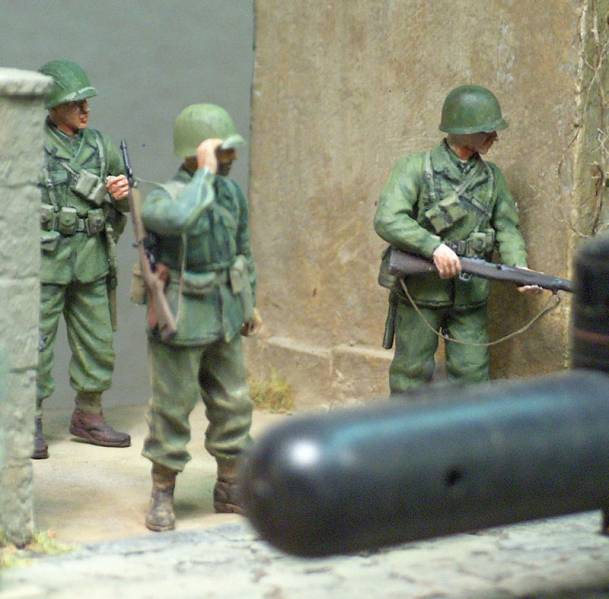
Well doing a little progress on the bits and pieces normally found around a harbour, and some slightly confused US soldiers.
Well doing a little progress on the bits and pieces normally found around a harbour, and some slightly confused US soldiers.

AlanL

Joined: August 12, 2005
KitMaker: 14,499 posts
Armorama: 11,675 posts
Posted: Tuesday, February 12, 2008 - 09:58 PM UTC
Hi jan,
very nice work.
Al
very nice work.
Al

spaarndammer

Joined: January 28, 2007
KitMaker: 1,945 posts
Armorama: 282 posts
Posted: Tuesday, February 12, 2008 - 10:00 PM UTC
Hi Jan,
your figures look really nice, the same for the stuff you put on the diorama. You can even put some gulls on your dio, that would truely give a harbour feeling.
your figures look really nice, the same for the stuff you put on the diorama. You can even put some gulls on your dio, that would truely give a harbour feeling.

Gunny
Joined: July 13, 2004
KitMaker: 6,705 posts
Armorama: 713 posts

Posted: Tuesday, February 12, 2008 - 10:29 PM UTC
Quoted Text
Looks great so far.
I certainly hope you are going to write a feature on this one Jan.
My sentiments exactly Jan!
Your dio is looking Primo, mate...I would sure welcome an "On Display" feature over at MSW, my friend (and the subject matter is perfect...
)Cheers,
~Gunny


roudeleiw

Joined: January 19, 2004
KitMaker: 2,406 posts
Armorama: 2,224 posts

Posted: Tuesday, February 12, 2008 - 10:38 PM UTC
Hi, the overall look and feel is really great. Superbe job!
Cheers
Claude
Cheers
Claude

MrMox
Joined: July 18, 2003
KitMaker: 3,377 posts
Armorama: 1,088 posts
Posted: Wednesday, February 13, 2008 - 12:37 PM UTC
Thanks guys!
Seagull is a must - but I guess it boils to if can sculpt one or find one ... seagull droppings are needed too
Seagull is a must - but I guess it boils to if can sculpt one or find one ... seagull droppings are needed too
MrMox
Joined: July 18, 2003
KitMaker: 3,377 posts
Armorama: 1,088 posts
Posted: Thursday, February 14, 2008 - 08:01 PM UTC
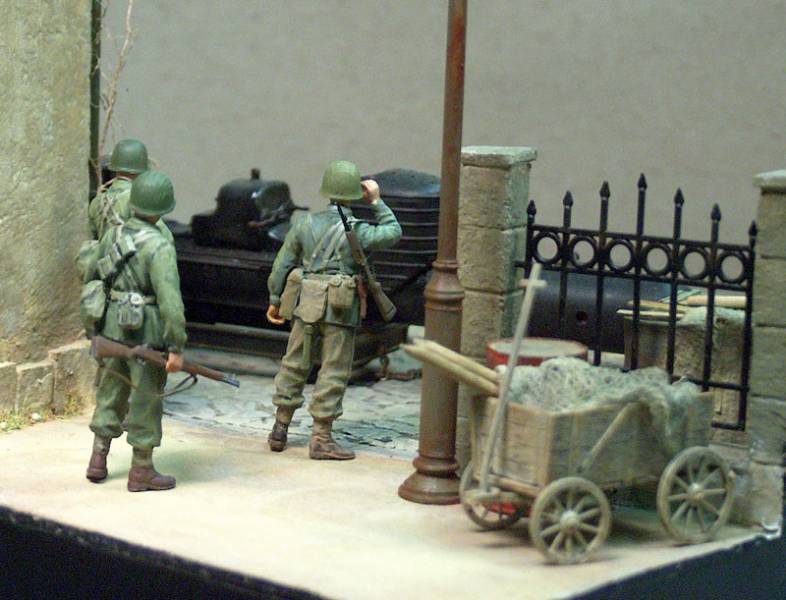
A little more to fill up, a Preiser 1:35 cart filled with gauze and some poles to illustrate some fishing gear. The gauze is glued with thinned white glue and painted and washed afterwards
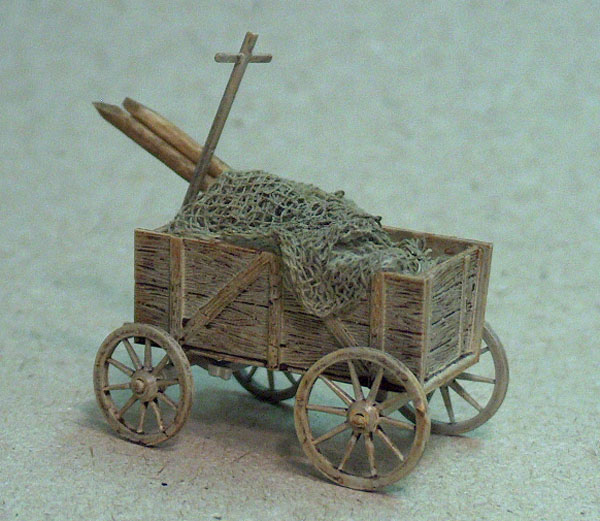
Added a layer of Acryllic Gel Medium - it dryes up transparant and can be shape a bit to illustrate small waves etc..
Added a layer of Acryllic Gel Medium - it dryes up transparant and can be shape a bit to illustrate small waves etc..
spaarndammer
Joined: January 28, 2007
KitMaker: 1,945 posts
Armorama: 282 posts
Posted: Thursday, February 14, 2008 - 09:02 PM UTC
He Jan,
it's becoming better and better, always looking for your updates!
However I have a bit of doubts on putting fishing gear on your dio. I guess fishermen were not allowed on military property, so maybe you should concentrate on putting stuff related to the sub on your dio.
Its just a thought!
Jelger
it's becoming better and better, always looking for your updates!
However I have a bit of doubts on putting fishing gear on your dio. I guess fishermen were not allowed on military property, so maybe you should concentrate on putting stuff related to the sub on your dio.
Its just a thought!
Jelger
MrMox
Joined: July 18, 2003
KitMaker: 3,377 posts
Armorama: 1,088 posts
Posted: Friday, February 15, 2008 - 04:16 PM UTC
Thanks Jelger - I had the same thought myself, but then again, its nearing the end of the war, Italy has officially surrendred and dicipline is slack or nonexistant - I guess that this were pretty confused - thats my excuse anyway

koenele

Joined: January 17, 2006
KitMaker: 4,194 posts
Armorama: 408 posts

Posted: Friday, February 15, 2008 - 04:23 PM UTC
really nice work!
looking forward to more progress
looking forward to more progress
MrMox
Joined: July 18, 2003
KitMaker: 3,377 posts
Armorama: 1,088 posts
Posted: Friday, February 15, 2008 - 09:39 PM UTC
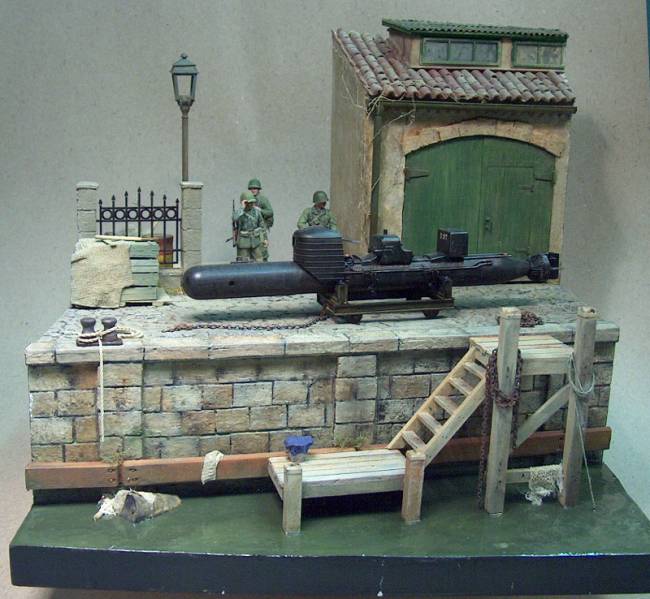
I feel I´m getting close, this is a layout I think is ok, still some washes to do and a little more bits and pieces in the corners.

 |

WEB HOSTING BY


Copyright ©2021 Armorama and Kitmaker Network, a subsidiary of Silver Star Enterprises
All Rights Reserved. Please read our Conditions of Use and Privacy Policy.
All Rights Reserved. Please read our Conditions of Use and Privacy Policy.