
Hosted by Darren Baker
AAVP7A1 WIP
AAVmarine1833

Joined: July 29, 2007
KitMaker: 63 posts
Armorama: 59 posts

Posted: Saturday, April 26, 2008 - 07:07 AM UTC
AAVmarine1833

Joined: July 29, 2007
KitMaker: 63 posts
Armorama: 59 posts

Posted: Saturday, April 26, 2008 - 07:09 AM UTC
Anrgy Go to my profile and click my photos there are 2 pic of vehicle with tac marks that should give you some ideas. if you need help let me know. 


ptruhe


Joined: March 05, 2003
KitMaker: 2,092 posts
Armorama: 1,607 posts

Posted: Saturday, April 26, 2008 - 06:04 PM UTC
Regardless of the Minihobby base it looks great.
I've got the Tamiya kit sitting in a box with about 1/5 of the mounting points made from styrene and glued on and awaiting further inspiration. It helps to see how you tackled the grills/screen and hatches plus cleaning up the UGWS turret.
Paul
I've got the Tamiya kit sitting in a box with about 1/5 of the mounting points made from styrene and glued on and awaiting further inspiration. It helps to see how you tackled the grills/screen and hatches plus cleaning up the UGWS turret.
Paul

bison126

Joined: June 10, 2004
KitMaker: 5,329 posts
Armorama: 5,204 posts

Posted: Saturday, April 26, 2008 - 06:43 PM UTC
That's an impressive work.
Please keep your M1 away a little bit longer and give this beast a nice weathering
Olivier
Please keep your M1 away a little bit longer and give this beast a nice weathering

Olivier
AngryDog

Joined: March 27, 2004
KitMaker: 1,114 posts
Armorama: 900 posts

Posted: Monday, April 28, 2008 - 07:53 AM UTC
Thanks Guys,
Thanks Joseph, I've saved the pics and waiting for the client's reply, Frenchy sent me a few as well
Paul, I hope to Feature it once complete , I'll include relevant info on what I used,etc.
Olivier, I'm painting the AAVP and M1 simultaneously, I don't have a spray booth yet...so I keep the messy bits to the last and together.. Too lazy to build a booth, so I'm pondering on a Mr Hobby Spray booth or Tamiya...but I kind of like Mr Hobby's because of it's simplicity.
Finally completed the scary parts of blending and toning down the camo, also tried to simulate a little "dust" build up along the camo edges...
Now to weather the underside, install wheels and tracks, securing the gear, clear coat, pigments.. then probably more contrast and weathering and then touch ups ...

seb43

Joined: August 30, 2005
KitMaker: 2,315 posts
Armorama: 2,158 posts

Posted: Monday, April 28, 2008 - 07:57 AM UTC
Great Work Nick
Keep us update
Cheers
Seb
Keep us update
Cheers
Seb
geoarta

Joined: October 28, 2007
KitMaker: 9 posts
Armorama: 3 posts

Posted: Tuesday, May 20, 2008 - 12:43 AM UTC
we need an update and we need it soooooooooooooooooooooooooooooooon
AngryDog

Joined: March 27, 2004
KitMaker: 1,114 posts
Armorama: 900 posts

Posted: Tuesday, May 20, 2008 - 06:36 AM UTC
Hey George,and fellows..
a little update ...I'm adding gear and weathering now..so in a couple days everything is finally be done and I'll post photos..
the decals were edited via photoshop and printed on white decal paper, given a coat of future floor polish....The actual artwork is much better than in this low-res photo.. (Yes it also means that in time there'll be AAV decals to produce)
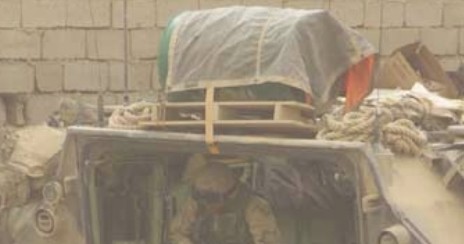
"BP" is for the fuel drum on pallet seen on some AAVs..

Frenchy

Joined: December 02, 2002
KitMaker: 12,719 posts
Armorama: 12,507 posts

Posted: Tuesday, May 20, 2008 - 08:47 AM UTC
Quoted Text
"BP" is for the fuel drum on pallet seen on some AAVs..
Frenchy

geoarta

Joined: October 28, 2007
KitMaker: 9 posts
Armorama: 3 posts

Posted: Tuesday, May 20, 2008 - 12:01 PM UTC
this one of the best work ever seen on an armor kit and specially on the AAV7 wich is my favourite armor subject
you dont see work like this everyday
keep us update Nick
you dont see work like this everyday
keep us update Nick

CombatKrieg

Joined: January 19, 2008
KitMaker: 517 posts
Armorama: 382 posts

Posted: Tuesday, May 20, 2008 - 07:04 PM UTC
Nice work, i like the camo... subtle. Where'd you get decal paper by the way?
AngryDog

Joined: March 27, 2004
KitMaker: 1,114 posts
Armorama: 900 posts

Posted: Wednesday, May 21, 2008 - 04:33 PM UTC
Thanks for the kind words George.
Russell, Mworkshop has it--it's a japanese brand really good deal as you get 3 A4 sheets for SG$20! I bought both white and clear. When I send this build for a feature, I'll post how I created the decals,etc.
BTW, I didn't have the correct vallejo color for the drum, so my girlfriend suggested to do a water color mix--so I borrowed my mum's water color (she sculpts flowers and I'm developing her website) and mixed with vallejo's green-the colors blended and worked like a charm--actually found that the paint went on easier!
However the green color of the decal around the BP and inside the yellow boaders were really too dark-so I hand painted that area to match the drum..not too bad eh for a shaking nervous hand?! Anyway, some pigments will further blend the green colors better.
geoarta

Joined: October 28, 2007
KitMaker: 9 posts
Armorama: 3 posts

Posted: Wednesday, May 21, 2008 - 05:19 PM UTC
wow and a BP fuel aboard!!!!!!


this topic becomes to hot as soon close to an end
pics pics pics


this topic becomes to hot as soon close to an end
pics pics pics

Frenchy

Joined: December 02, 2002
KitMaker: 12,719 posts
Armorama: 12,507 posts

Posted: Wednesday, May 21, 2008 - 05:44 PM UTC
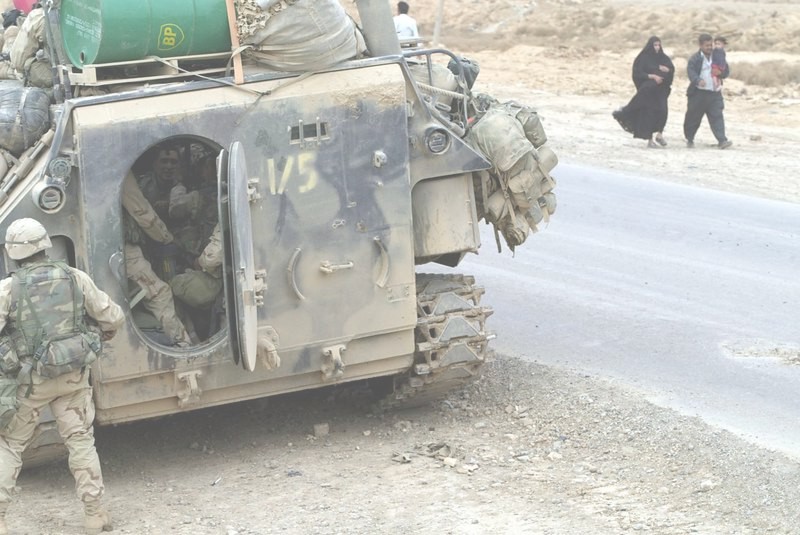
Good work Nick ! I was sure you would make good use of the pics !
Frenchy

Frenchy
AngryDog

Joined: March 27, 2004
KitMaker: 1,114 posts
Armorama: 900 posts

Posted: Wednesday, May 21, 2008 - 06:10 PM UTC
Thanks guys!!!
George, as in my pm--the camo net mentioned as in Henri's pic.
Thanks Frenchy, note that I scratched another version of the pallet as compared to your photo.
Also, the MOLLE gear has added rolled sleeping mat and below that what looks like a rolled poncho ? as compared to Hobbyfan's set.... Someone really needs to come out with proper MOLLE and Alice variants with separate straps!!
BTW, what is the black bag directly over the troops head? Looks like the sleeping bags in covers as in Tamiya modern US equipment set?

mazyen

Joined: June 21, 2007
KitMaker: 112 posts
Armorama: 79 posts

Posted: Friday, June 06, 2008 - 01:18 AM UTC
Hi Nick
Are you still around??????????
We are waiting.........
Are you still around??????????
We are waiting.........
AngryDog

Joined: March 27, 2004
KitMaker: 1,114 posts
Armorama: 900 posts

Posted: Friday, June 06, 2008 - 07:10 AM UTC
Still around Lee, still weathering....
BTW I dropped the beast upside down on my table..just slipped out of my hand..some stuff broke off but the damages were not noticeable once I glued them back.
In a couple more days I believe the beast will finally be finished..
so here's just some couple pics without weathering for a tease
I'd completely forgot to modify Hobbyfan's sleeping mats and molle, thus the bags are hanging sort of fragile to the rails....So I'd like to leave all the rolled sleeping mats off.... Do you guys think that it's a big issue to depict the molle gear without the mats? I am sort of "depicting" this beast with helmets and weapons laid on one side of the hatch...My client don't like figures..


BTW I dropped the beast upside down on my table..just slipped out of my hand..some stuff broke off but the damages were not noticeable once I glued them back.
In a couple more days I believe the beast will finally be finished..
so here's just some couple pics without weathering for a tease

I'd completely forgot to modify Hobbyfan's sleeping mats and molle, thus the bags are hanging sort of fragile to the rails....So I'd like to leave all the rolled sleeping mats off.... Do you guys think that it's a big issue to depict the molle gear without the mats? I am sort of "depicting" this beast with helmets and weapons laid on one side of the hatch...My client don't like figures..
AAVmarine1833

Joined: July 29, 2007
KitMaker: 63 posts
Armorama: 59 posts

Posted: Friday, June 06, 2008 - 09:36 AM UTC
WHAT you dropped it.  Any ways looking good. Cant wait to see the whole thing. Keep it up.


 Any ways looking good. Cant wait to see the whole thing. Keep it up.


AngryDog

Joined: March 27, 2004
KitMaker: 1,114 posts
Armorama: 900 posts

Posted: Saturday, June 28, 2008 - 04:22 AM UTC
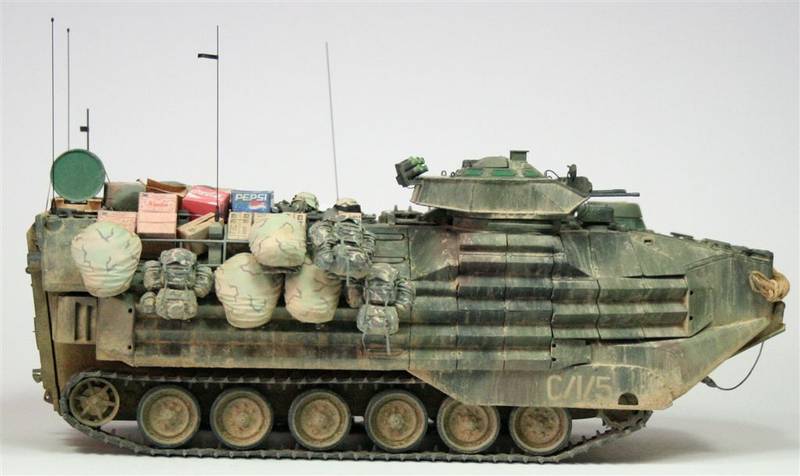
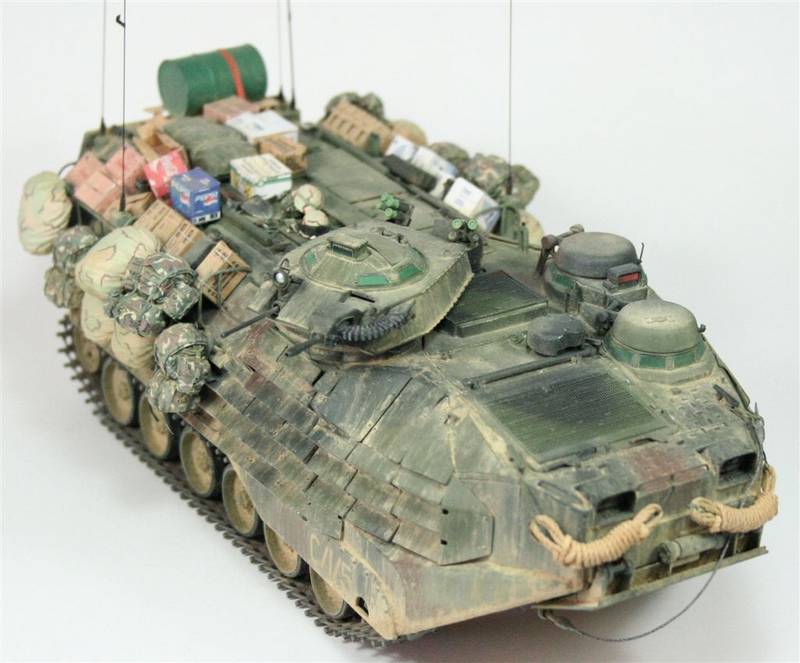
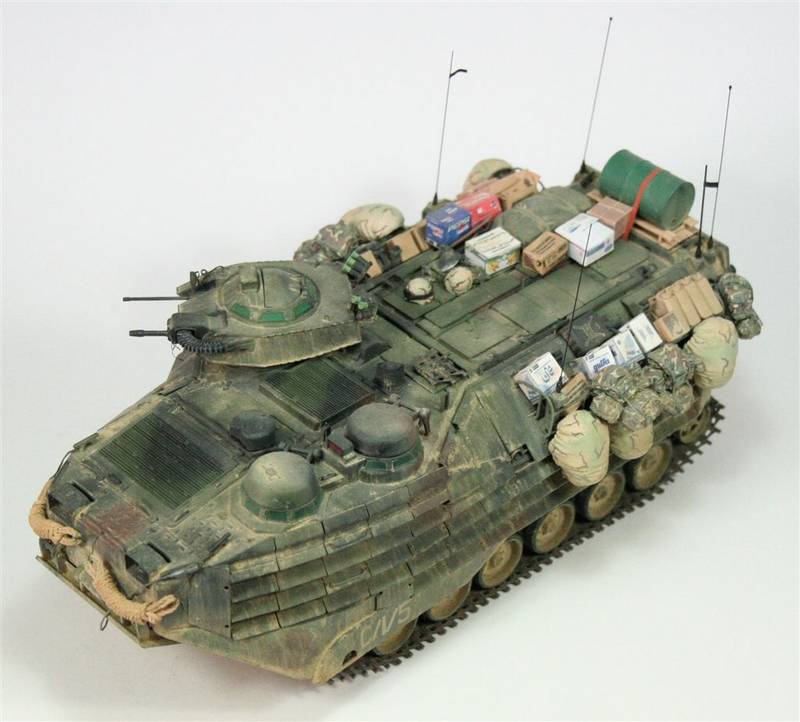
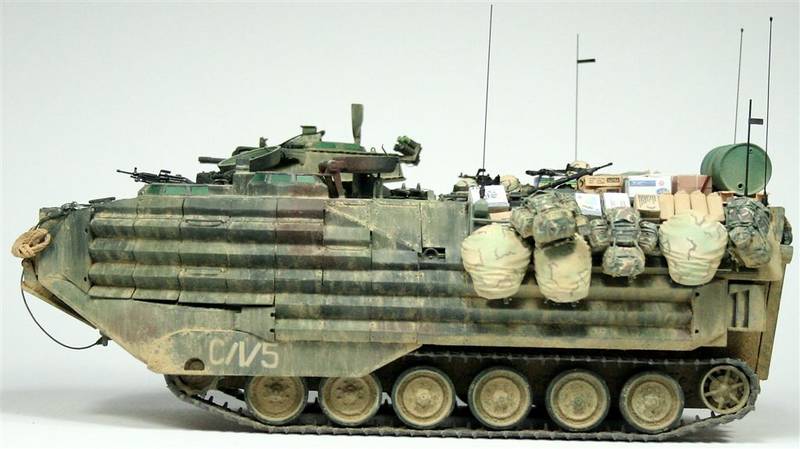
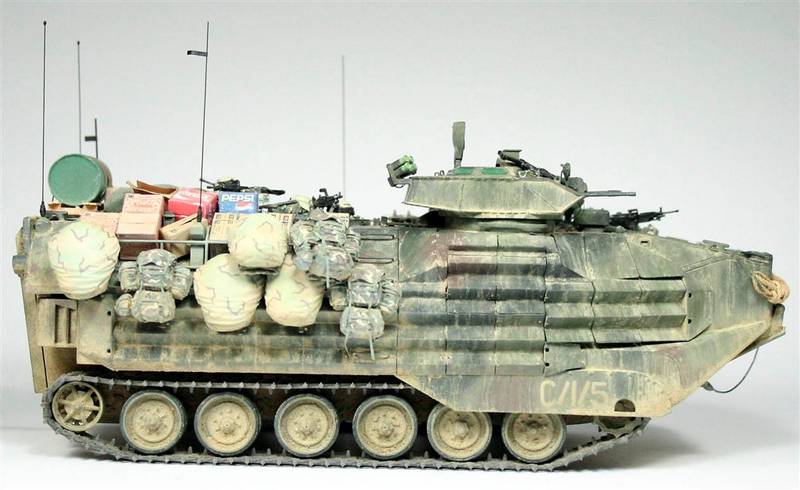
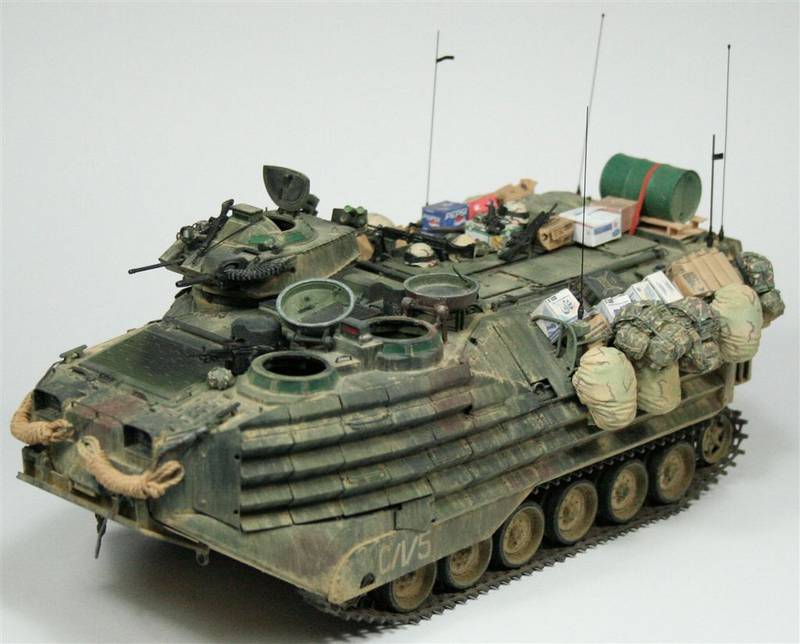
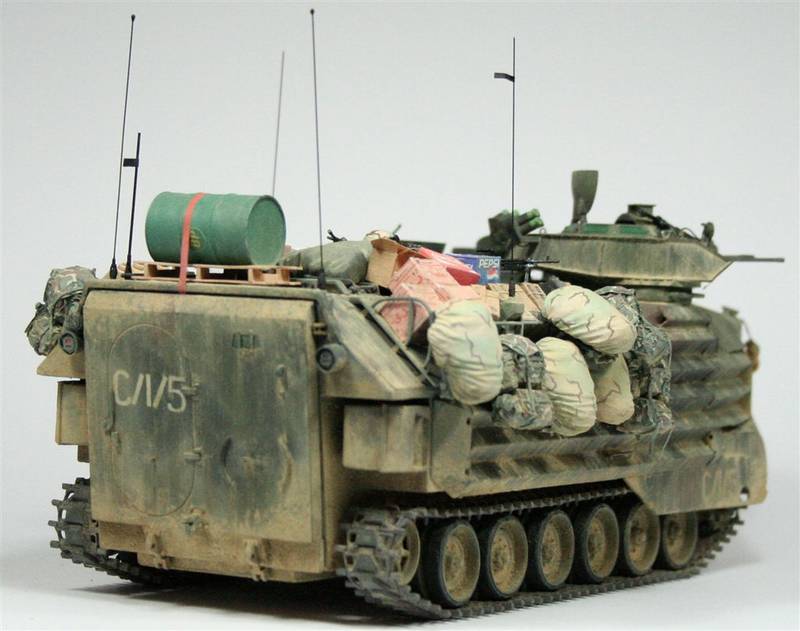
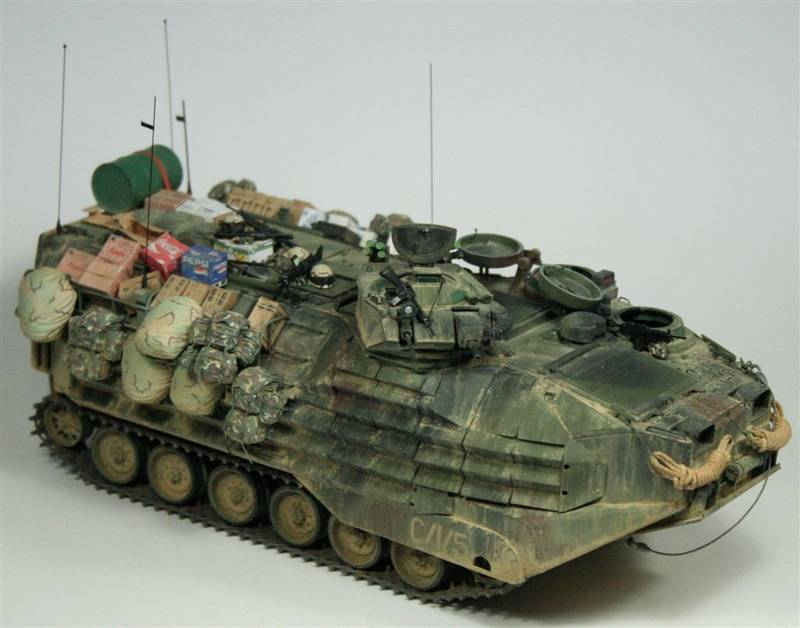
Finally done along with my Abrams...now they're both sitting in a box ready to be posted on monday..
Next up (armor that is)...Real Model's Stryker Rhino with Slat, an Infantry version with slat, along with uparmored humvees and SF version.. And a couple of Abrams with make-shift gunshields..
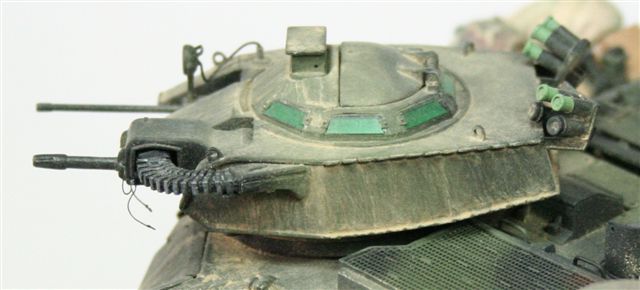
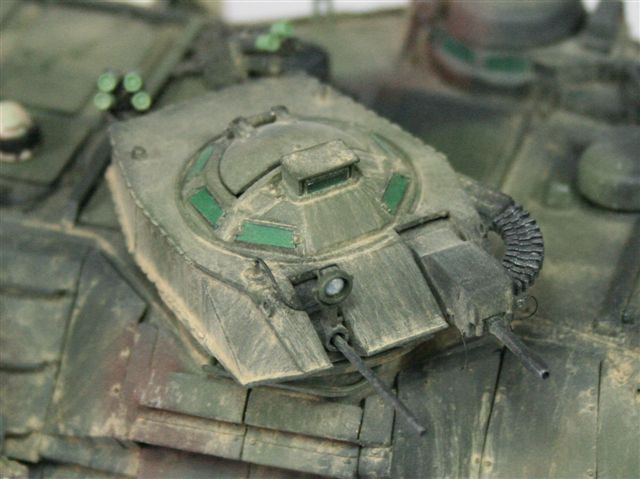
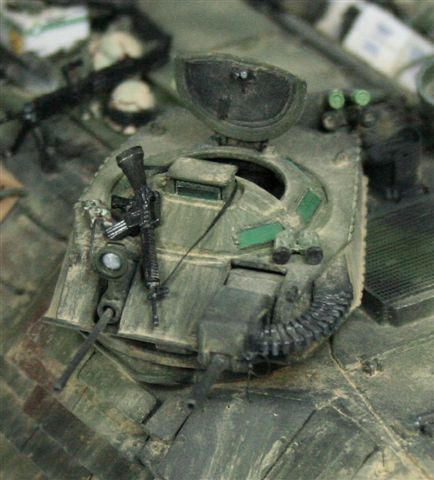
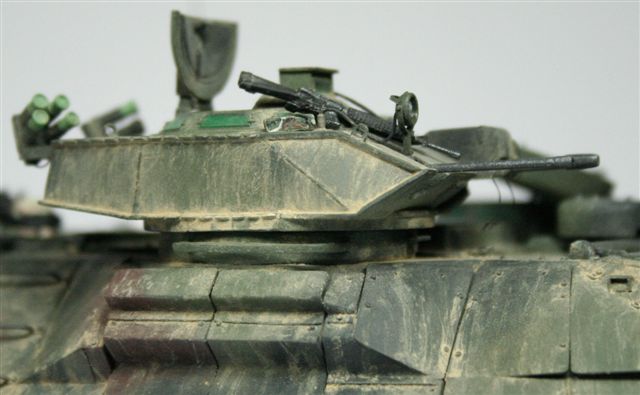
To the beast..
Notice that the pics show both with and without weapons..
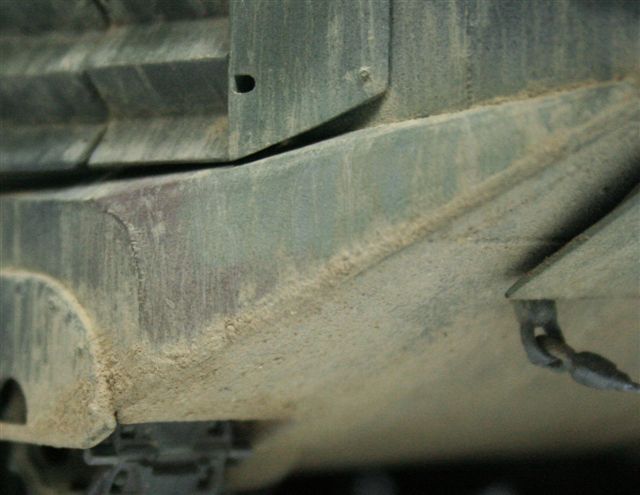
Weathering was done in my own method I discovered after trying a few ways..in the end I ended up "painting" the vertical streaks of sand....When I get some time off I'll gather the info and try to submit a feature..
Decals came out ok after a few attempts at coating them with the right amount of clear coat (future) before leaving to dry then dipping in water for application.
I left off the rolled sleeping mats..as they are actually kept under the top flap of the MOLLE or at other places where I found I would have to re-sclupt the MOLLE gear.....Looks like I'll be making a purchase from Real model for my next batch of AAVs
It was a difficult built but I enjoyed it....and I've a few versions planned after getting some interesting pics and deciding to spend a bomb on Hobbyfan's upgrades....However I only managed to get ONE Tamiya AAV locally...no luck finding them at any online store AND I need another FIVE!!!! So any of you guys willing to part with yours , be it built and you want to get rid of it or can point me to the right location to get it...Please drop me a mail!
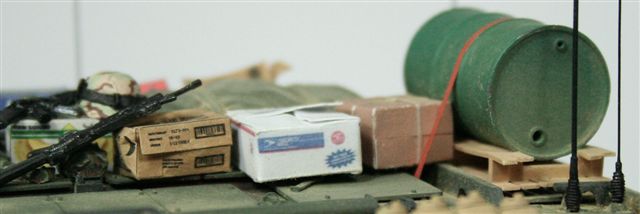
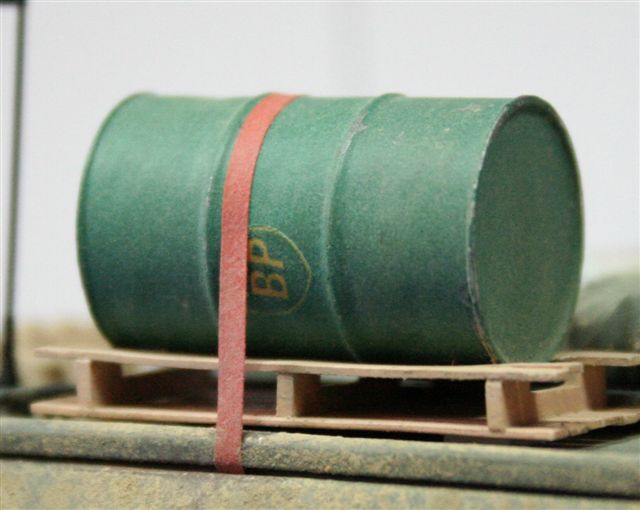
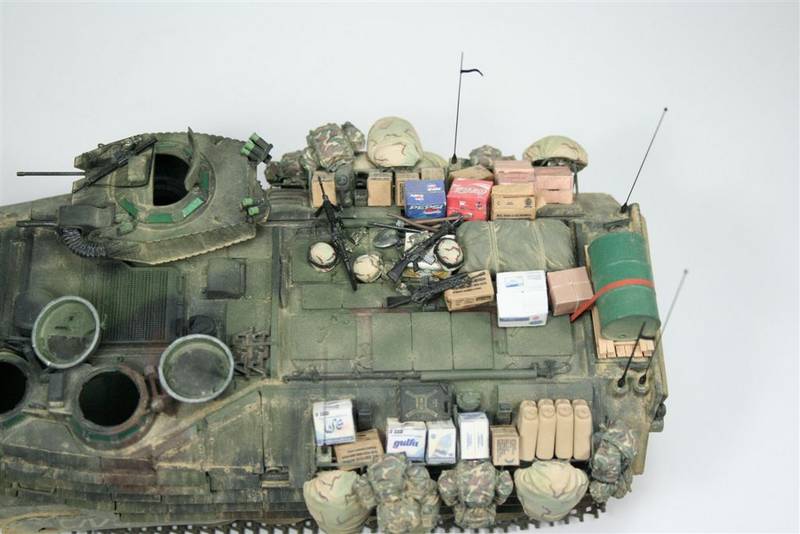
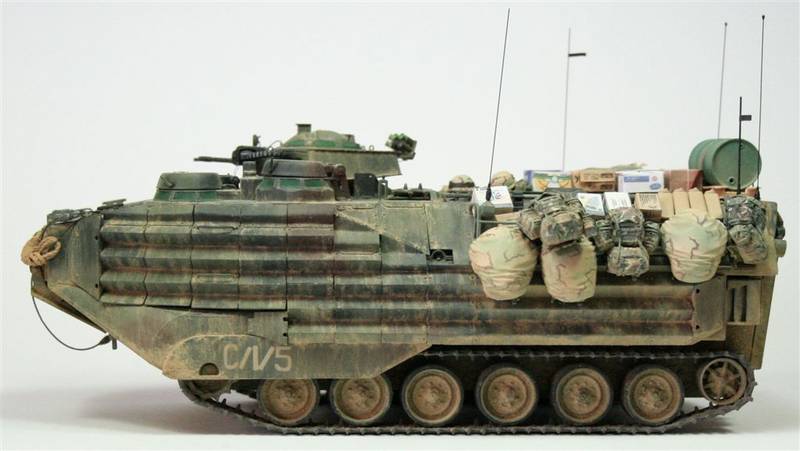


Frenchy

Joined: December 02, 2002
KitMaker: 12,719 posts
Armorama: 12,507 posts

Posted: Saturday, June 28, 2008 - 06:05 AM UTC
Great work Nick ! Very impressive !
Frenchy
Frenchy
pzcreations

Joined: May 24, 2006
KitMaker: 2,106 posts
Armorama: 1,116 posts

Posted: Saturday, June 28, 2008 - 06:10 AM UTC
Oh come on! these arent models! you took the real thing and shrank them down didnt you?  well, maybe not, but they damn sure do look real!
 well, maybe not, but they damn sure do look real!
f1matt

Joined: August 13, 2006
KitMaker: 1,021 posts
Armorama: 805 posts

Posted: Saturday, June 28, 2008 - 06:14 AM UTC
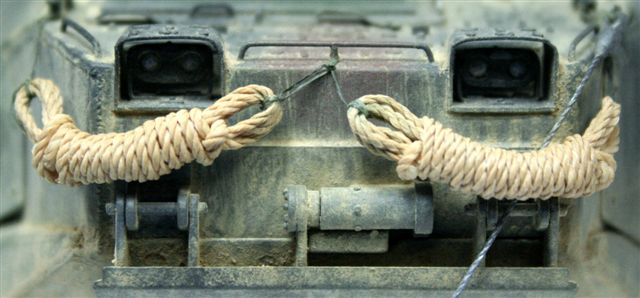
You have been busy. Please submit a feature on how you painted on the dust streaks. They are very convincing. One of the best examples of desert weathering I have ever seen. I can relate to how tricky home made decals can be. They take some trial and error but are worth it in the end. The MOLLE gear turned out great. I think my favorite detail would have to be the rope bumpers. They look perfect. I'm not really a fan of the AAV but this one is too good not to love.
-Matt
-Matt

seb43

Joined: August 30, 2005
KitMaker: 2,315 posts
Armorama: 2,158 posts

Posted: Saturday, June 28, 2008 - 07:28 AM UTC
Well Really great piece of Work
This should be on display
Cheers
Seb
This should be on display
Cheers
Seb

DeskJockey

Joined: July 17, 2006
KitMaker: 1,558 posts
Armorama: 1,159 posts

Posted: Sunday, June 29, 2008 - 06:19 AM UTC
Wow!!! Your AAVP is stunning! I really love the weathering--it's incredibly realistic. 


AngryDog

Joined: March 27, 2004
KitMaker: 1,114 posts
Armorama: 900 posts

Posted: Tuesday, July 01, 2008 - 04:16 PM UTC
Thank you guys, your comments are very nice and very inspiring.... 
I will submit and hope it is featured..
I have taken photos of the process of achieving the dust streaks as well...
The rope add on is something I usually do for the Israeli tanks I build..and the tie method is very simple as I tried to simulate as in photos in one of my books...However, I would like to tackle some different rope coils I've seen on photos from the net...those look like a challenge.
The stowage gear and MOLLE is something that I have to improve in my next builds, I should think I only have Real Model and Goffy Models to turn to... (Hobby Fan's MOLLE is great but the rolled sleeping mats just don't do it.
Looking forward to more decal designing and printing...
The AAV bug hit me .. I'm on a quest to find at least 3 more tamiya kits (of course more the better)
-AAVP7A1 w/UGWS or older LVTP-7A1 (Already found one locally and one from a member on this site via my post on "buy,sell or trade")
I plan to build these 5 kits with Hobbyfan's conversion of EAAK armor, Mounting blocks, Interior and Recovery version...and what seems to me as an "uparmored" version-required via scratch building..
So anyone willing to let go of their tamiya AAV kits...pm me please
 |


