_GOTOBOTTOM
Armor/AFV: AA/AT/Artillery
For discussions about artillery and anti-aircraft or anti-tank guns.
Hosted by Darren Baker
sFH18 Painted and ready for weathering
FAUST
#130
Visit this Community
Noord-Holland, Netherlands
Joined: June 07, 2002
KitMaker: 8,797 posts
Armorama: 4,190 posts
Posted: Tuesday, June 24, 2008 - 12:22 PM UTC
Ola Guys

This is a new topic coming out of the sFH18 built log that I did in the link below. Dial up people be warned... 143 pictures and probably an endless loadtime.
Trumpeter sFH18 built blog

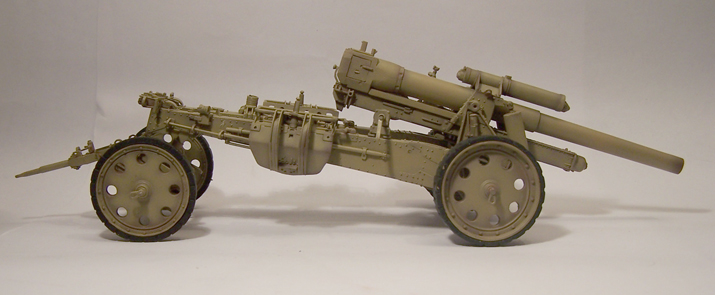
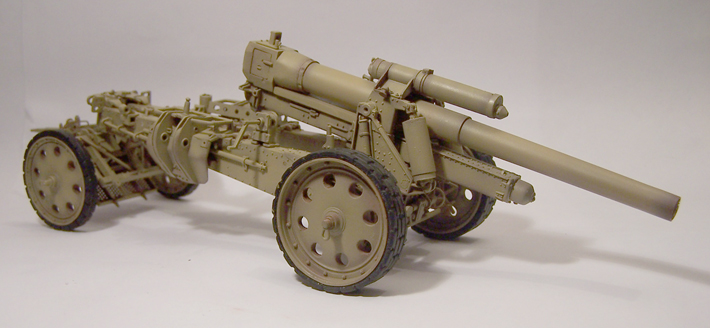
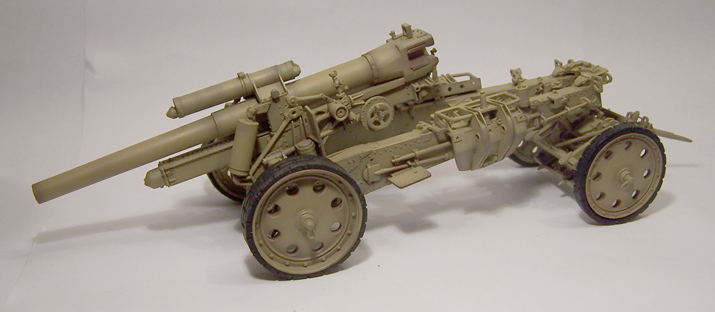
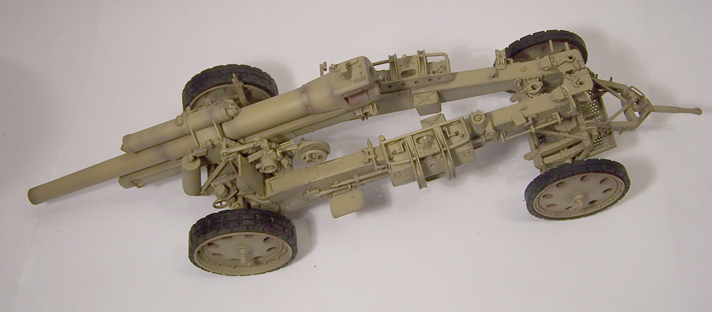
In this topic I have started the painting. and got pics to go with it. What I also explained in the built log was that in my excitement to get it finished I already had disassembled the gun to prep everything for painting just before I could make pics of it. So the next time I would have had a chance for that was after I painted the gun in it's basecolor. Look below. I used no primer at all... just started spraying.


I wanted my gun to have camo on it's sandcolored base. However I was not yet sure what I would choose. This was where my favorite toy came in handy... Photoshop. I took one picture of the gun and started to experiment with several patterns. In the link below you find the results of an hour spraying digital camo
sFH18 camotest

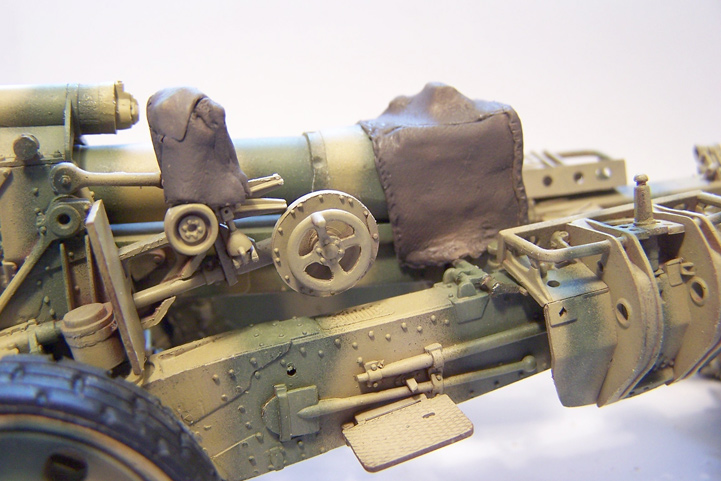
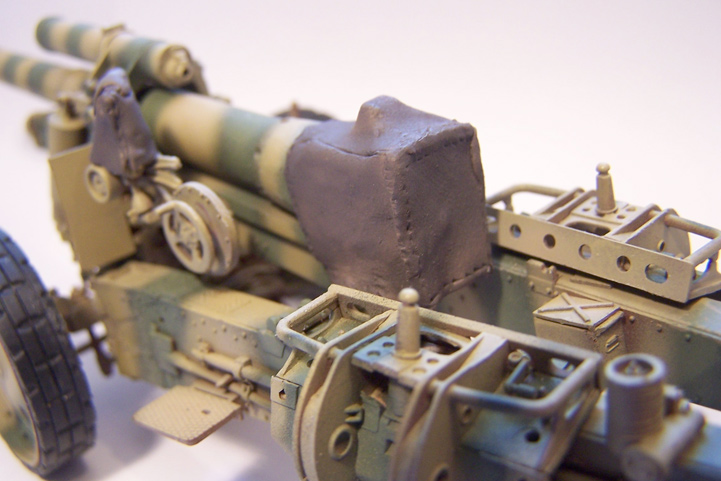
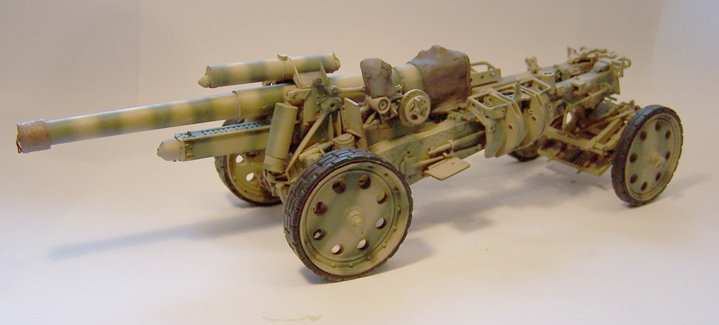
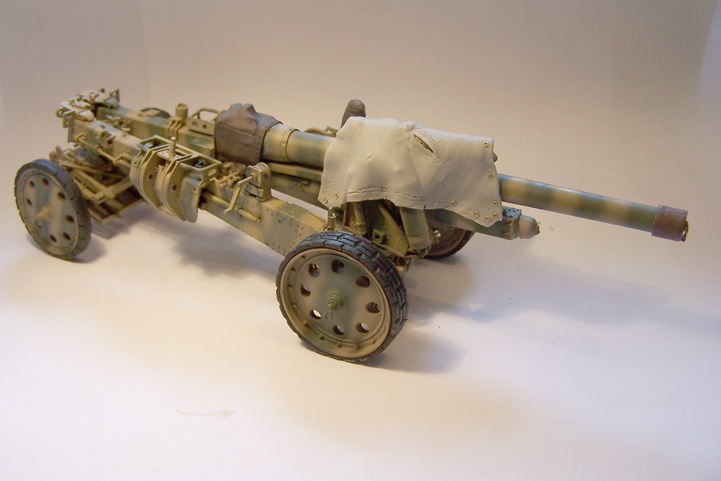
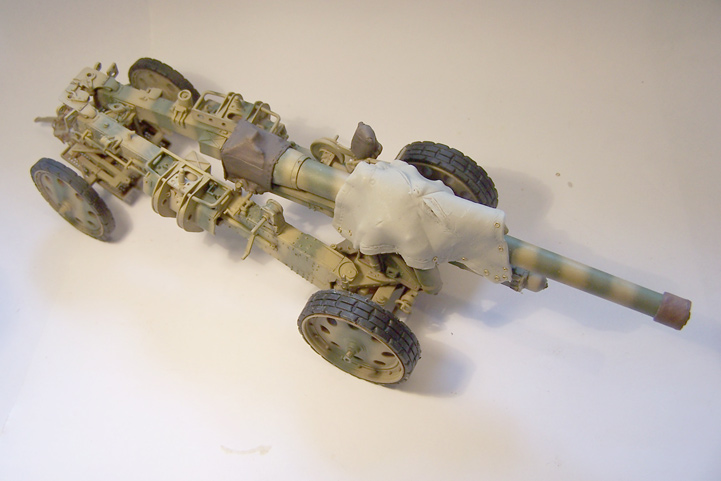
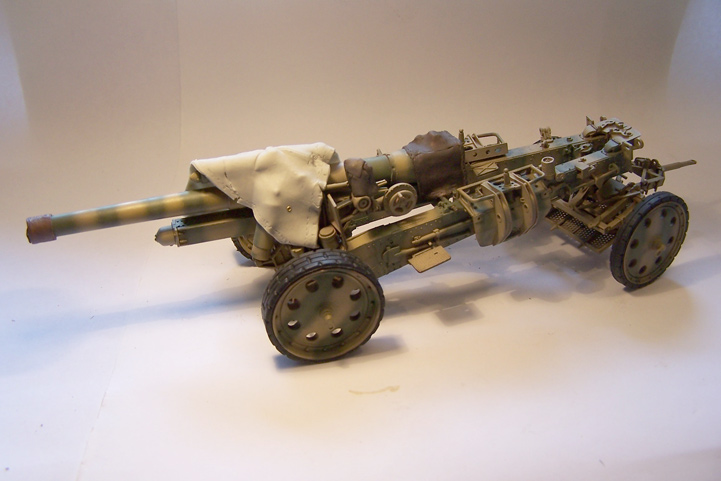
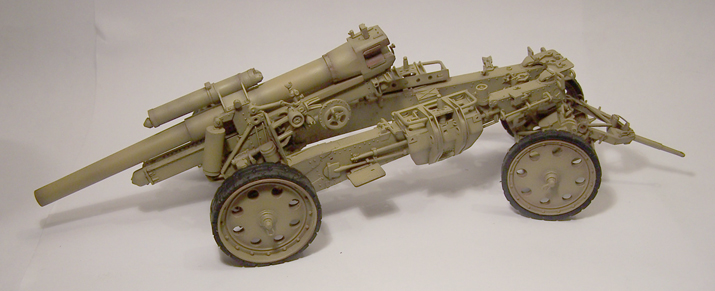
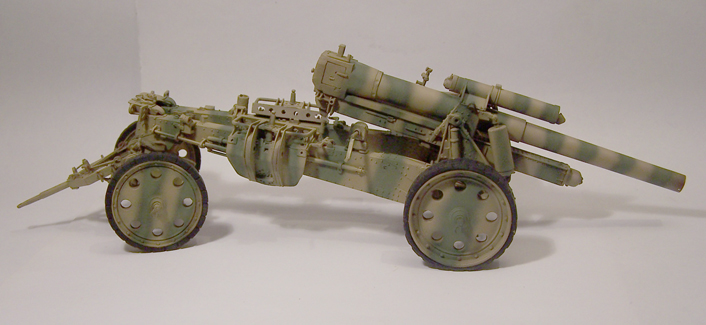
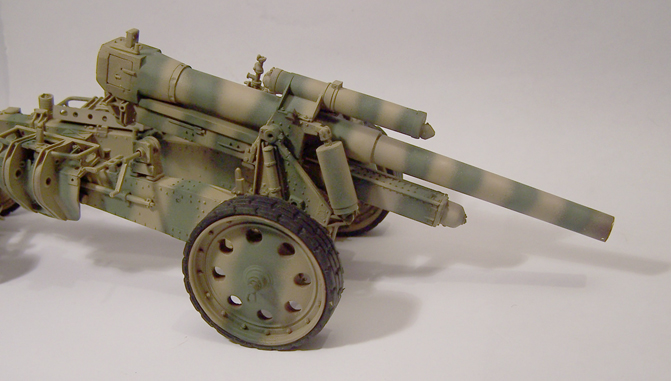
In the end I decided on the wide green stripes on the sandcolor basecoat because I liked the look of it. I started with a green and started spraying. Just after I finished it I really had the idea I messed it up big time. Initially I found the green too dark and I got a huge load of overspray. Ovencleaner was at the ready to strip the model completely and start over.
I eventually tried to repair the camo by using the darkgreen as a preshade for a lighter green and when that was sprayed I Airbrushed the overspray away with sandcolor which after that got highlighted again. The technique used was kinda following the modular painting of Adam Wilder. Eventually I started to like the camo and put the mr Muscle away. No stripping for this gun.
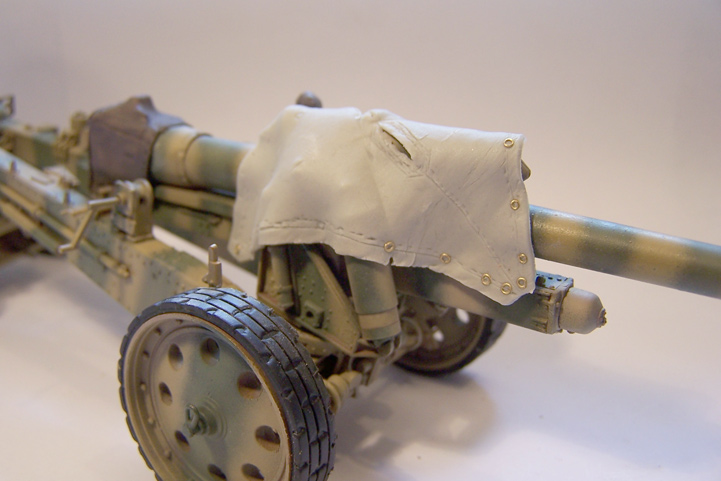
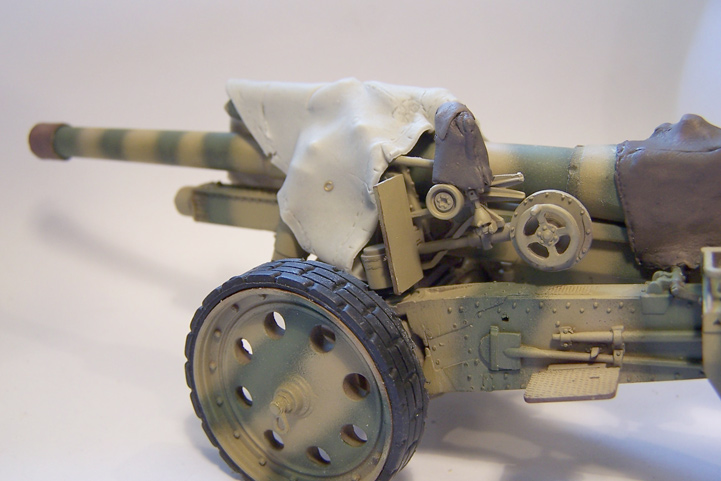
The result of the camo repair can be seen below


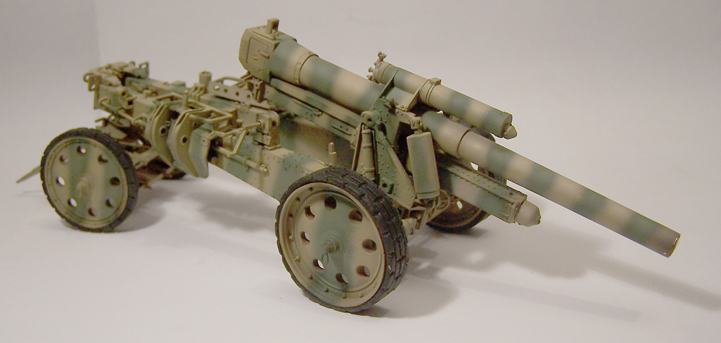
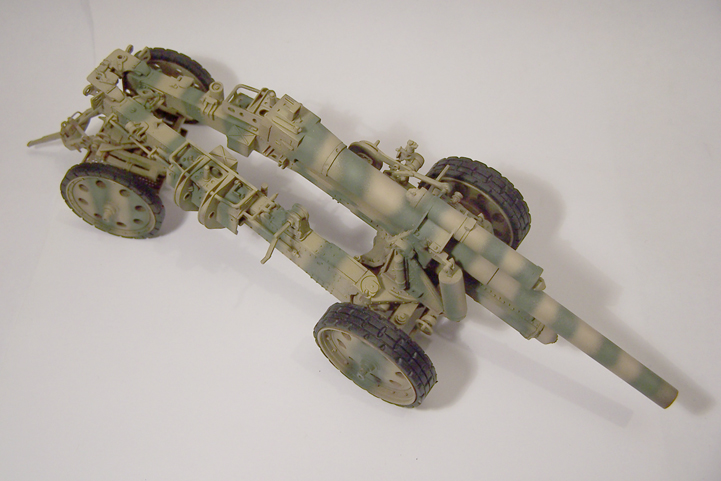
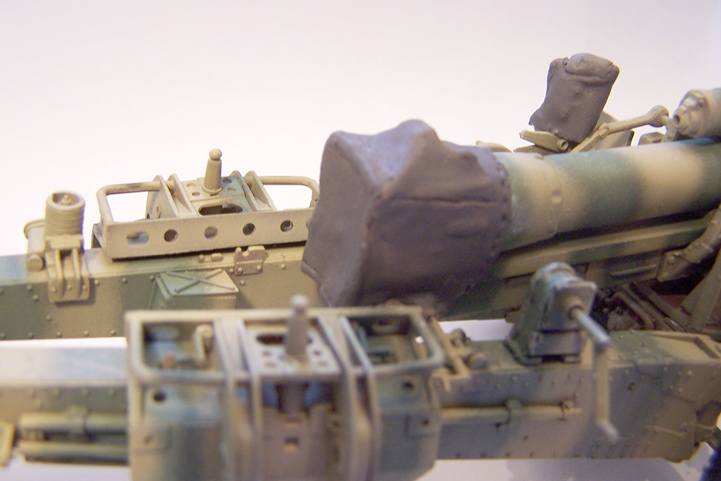
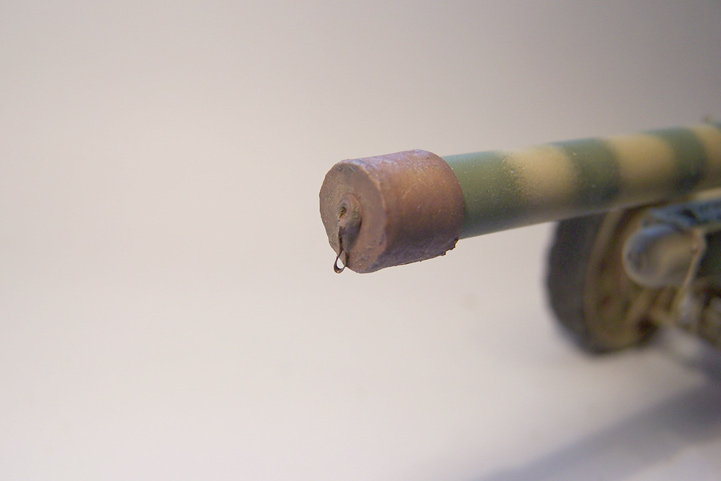
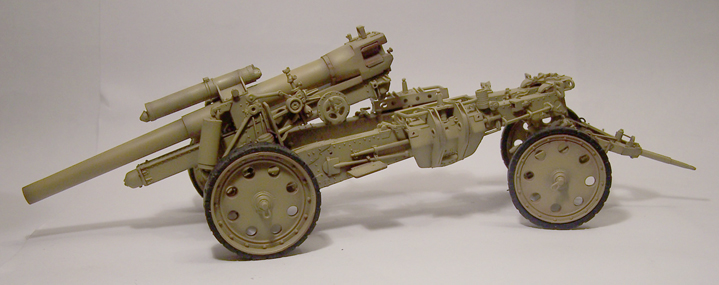
This is the status for now. This is where I ended this evening so the whole project is up to date and online now. Next steps are weathering and bringing out details.

With friendly greetz

Robert Blokker
xFOX_HOUNDx
Visit this Community
North Carolina, United States
Joined: May 03, 2007
KitMaker: 249 posts
Armorama: 230 posts
Posted: Tuesday, June 24, 2008 - 12:31 PM UTC
Excellent job on the painting! Love the camo scheme!!! VERY INSPIRATIONAL!! A+
Fledermaus
Visit this Community
New York, United States
Joined: January 05, 2007
KitMaker: 236 posts
Armorama: 174 posts
Posted: Tuesday, June 24, 2008 - 12:49 PM UTC
Robert,

Nice job! I really like the colors. Which paints did you use?

Thanks.

Matt
milvehfan
Visit this Community
North Carolina, United States
Joined: June 26, 2007
KitMaker: 2,116 posts
Armorama: 1,080 posts
Posted: Tuesday, June 24, 2008 - 01:00 PM UTC
Awesome Build, really like the paintjob, what colors/brand paints did you use. milvehfan
wbill76
Visit this Community
Texas, United States
Joined: May 02, 2006
KitMaker: 5,425 posts
Armorama: 4,659 posts
Posted: Tuesday, June 24, 2008 - 02:23 PM UTC
Very nice work on the paint scheme Robert.
PanzerMike
Visit this Community
Hamilton, New Zealand
Joined: May 09, 2007
KitMaker: 298 posts
Armorama: 162 posts
Posted: Tuesday, June 24, 2008 - 06:10 PM UTC
Very nice camo and build - almost makes me want to pull mine out of the stash and give it a go
FAUST
#130
Visit this Community
Noord-Holland, Netherlands
Joined: June 07, 2002
KitMaker: 8,797 posts
Armorama: 4,190 posts
Posted: Wednesday, June 25, 2008 - 12:06 AM UTC
Ola Guys

Thanks for your replies and comments they are appreciated. As for what colors I used I can't give more info then that they are Tamiya acrylics. This is not because I don't want to tell you which paintnumbers I used it is more that I don't remember it myself.
I never use the standard bottle color but I always mix it myself. Most of the colors from the bottles are too hard. So usually I start with adding some buffto the mix. And some drops of Tamiya Clear X22 for the satinsheen of painted metal. And it is prethinned too to my specifications so it is ready to use... Basically my own modelair.
First I sprayed the preshade which was a reddish brown mix sprayed on all seams and such. Then it was on with a color quite similar to panzergelb. Which in turn got a highlight with panzergelb with a lot of buff added to it.
Then the green which to my eyes looked like OD with a little buff added to it. Which was then highlighted with Russian green with some drops of panzer yellow and buff added to it.

This is as close an explanation as I can get. I hope this is of some use to you guys

With friendly greetz

Robert Blokker
FAUST
#130
Visit this Community
Noord-Holland, Netherlands
Joined: June 07, 2002
KitMaker: 8,797 posts
Armorama: 4,190 posts
Posted: Thursday, July 03, 2008 - 10:39 PM UTC
Okay Guys

Time for the next update. First thing I had to do was lock the slide into the transport position this was pointed out to me by Roy Chow. I had already added a little glue to the gun in this position so a little force and violence was needed to push the slide down to the point where the two cilinders on the back of the slide just under the breech lined up with the two pins on the trailarms. here I found out that Trumpeter did not keep in mind that for a vehicle on the move the gun should actually be locked and the pins do not reach the cilinders. So a little DIY with Evergreen and also that problem was fixed.
With the help of some magic sculpt I created the dust cover for the Breech and the sightmechanism. Not too happy with the Sightmechanism cover but I'm a bit too late now with getting it off. When I try to get it off now I will break it and that is not something I'm waiting for so as for now I keep it this way. The dustcap on the end of the barrel was made with paper, a piece of tamiya masking tape, a little bit of Evergreen tubing and some aluminum oventray and further a lot of CA glue. Pictures are not that good today as they were made during the day... and with changing light from outside the pics came out not the way I hoped.


fortune cookie
I like vehicles with some color. It always makes it look more interesting. The dustcovers and dustcap already bring in some extra color but I wanted more. So again Magic Sculp came to the rescue. And after some sculpting and making little brass rings Finally this piece of abstract art came out


I Still need to fix some pieces of the Zeltbahn as the piece of Magicsculpt became a bit thin on some parts and ruptures and near ruptures occured. And some of the little rings fell off when I bend the Zeltbahn on the recuperator barrel.


I sculpted it in such a way that the Zeltbahn is removable for the ease of painting and also with the fact that it needs to be tied down to the gun. Therefore I have also sculpted in the channels were the rope goes over. All the rings and such that fell off need to be glued on again, do some fixes with putty and on to painting.
exer
Visit this Community
Dublin, Ireland
Joined: November 27, 2004
KitMaker: 6,048 posts
Armorama: 4,619 posts
Posted: Thursday, July 03, 2008 - 10:53 PM UTC
Great idea to use a zeltbahn to add colour and nice sculpting too Robert.
neil22
Visit this Community
Cotes-d`Armor, France
Joined: August 12, 2007
KitMaker: 292 posts
Armorama: 281 posts
Posted: Friday, July 04, 2008 - 12:19 AM UTC
very nice! those covers look great!

neil
FAUST
#130
Visit this Community
Noord-Holland, Netherlands
Joined: June 07, 2002
KitMaker: 8,797 posts
Armorama: 4,190 posts
Posted: Saturday, July 05, 2008 - 02:16 AM UTC
Ola Guys

Thanks a lot for the compliments.
I started painting the zeltbahn and was pretty much finished when I found a good picture of an original zeltbahn... And I realised that what I painted was absolute rubbish so I stripped it again and Now I have to start over. Pics will follow
 _GOTOTOP