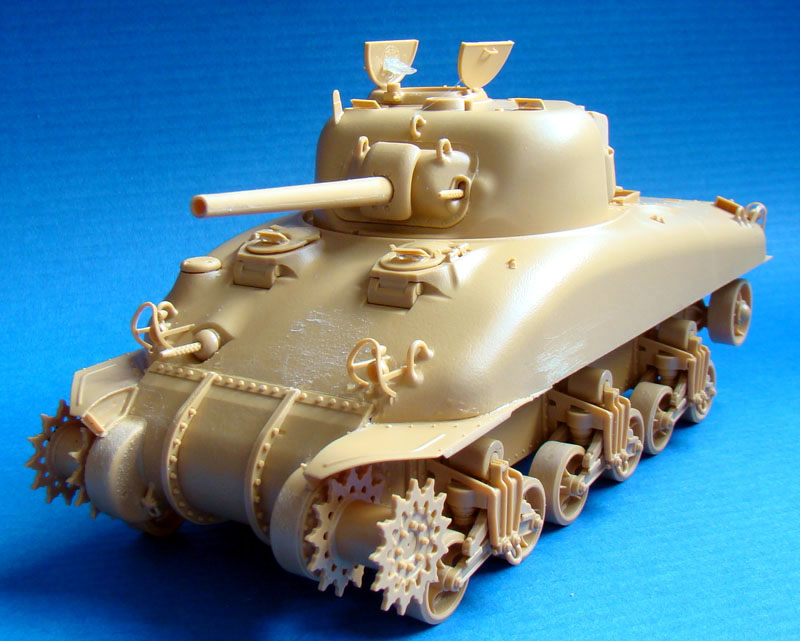
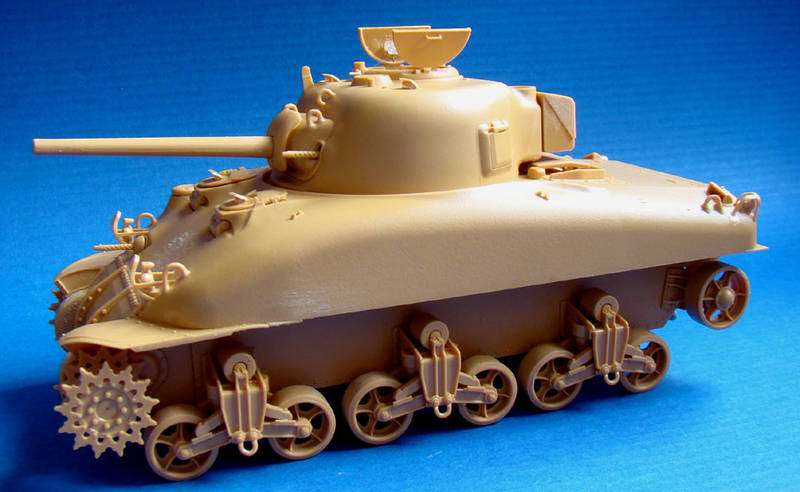
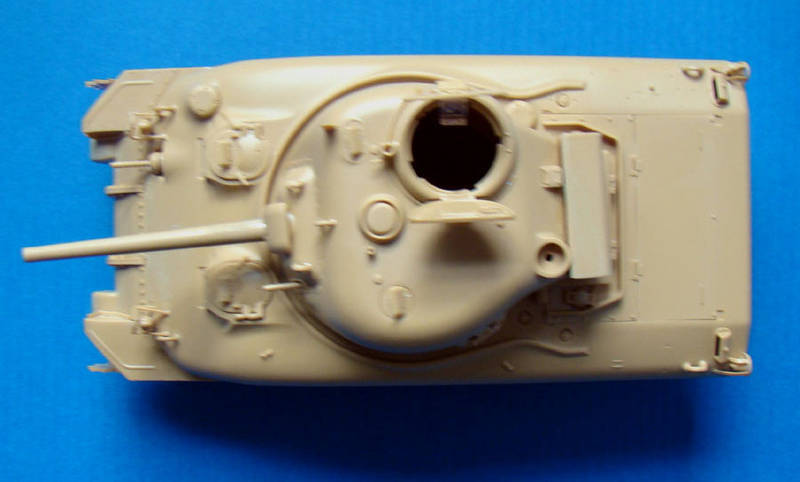
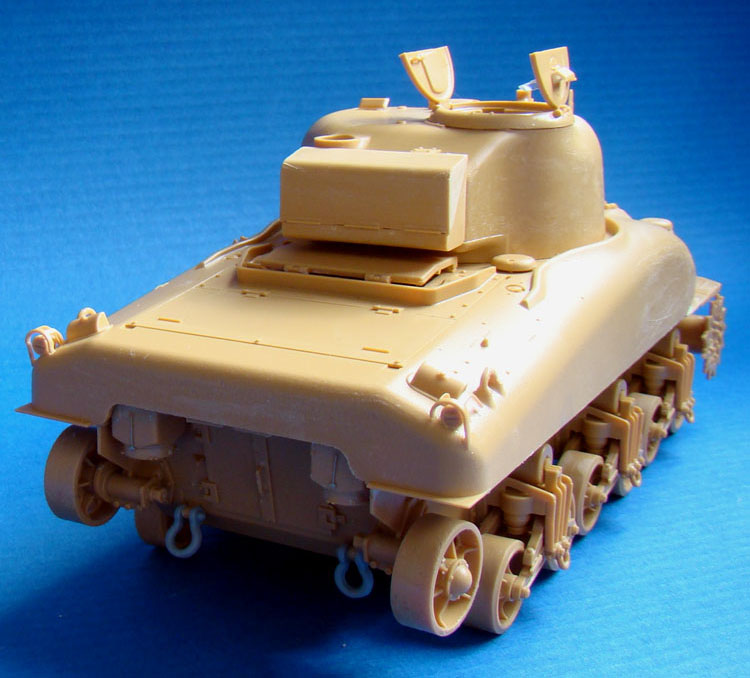
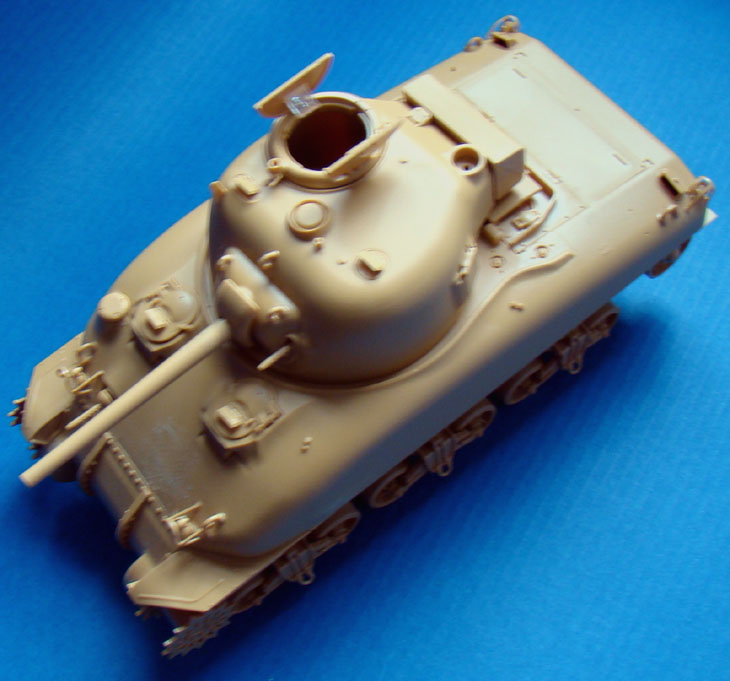
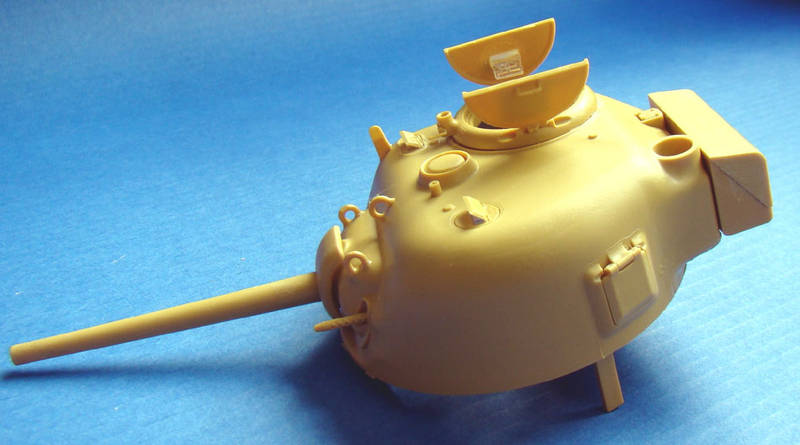
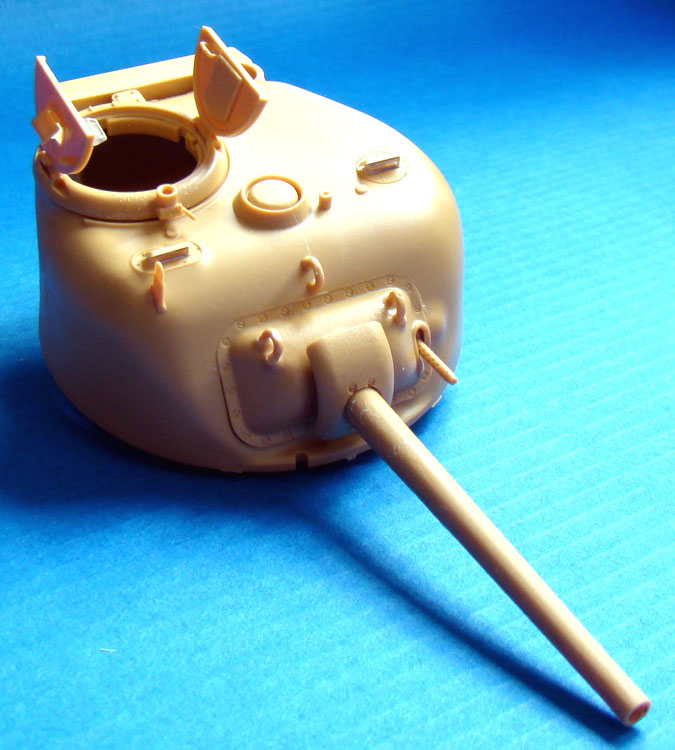
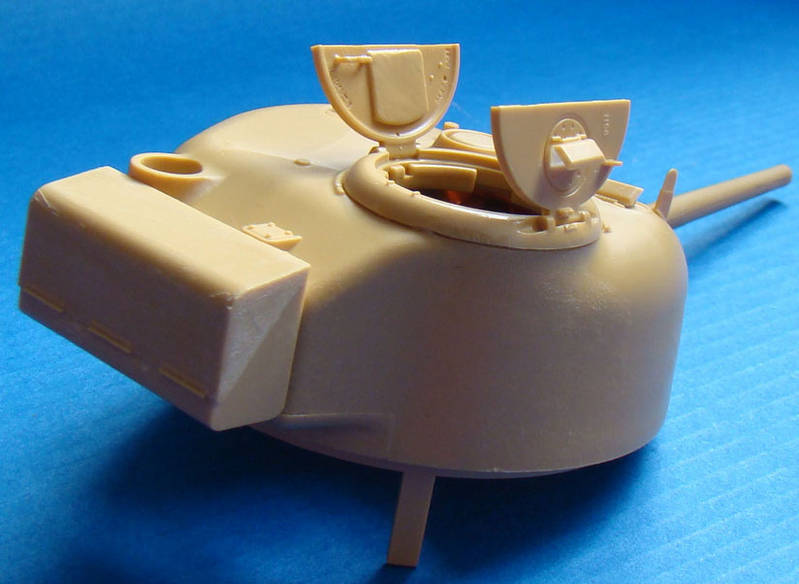
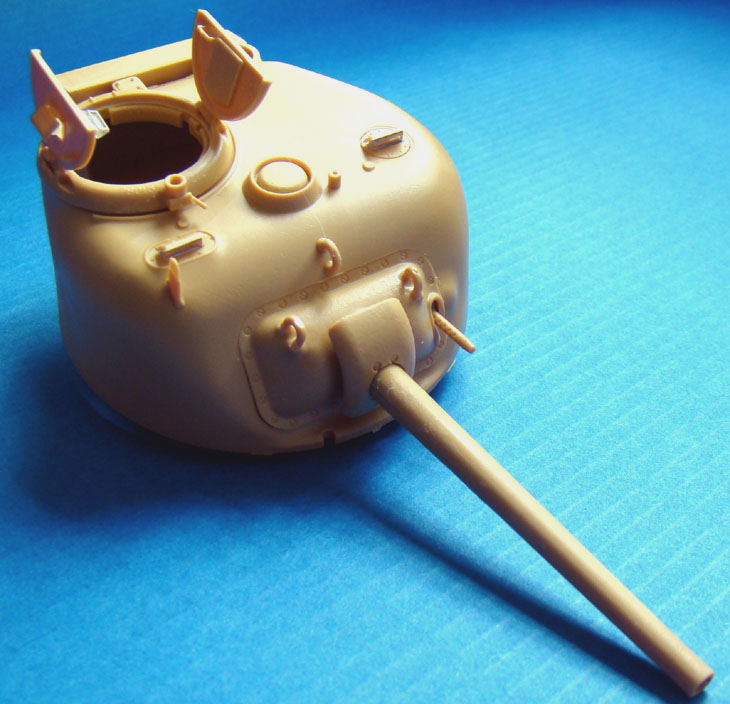
Turret started with a few more details to be added. It's now REALLY beginning to look like an M4a1...
Hosted by Darren Baker
Tasca's New Sherman II - First Steps
jimbrae
Provincia de Lugo, Spain / España
Joined: April 23, 2003
KitMaker: 12,927 posts
Armorama: 9,486 posts
Joined: April 23, 2003
KitMaker: 12,927 posts
Armorama: 9,486 posts
Posted: Saturday, October 25, 2008 - 11:58 PM UTC
panamadan
Minnesota, United States
Joined: July 20, 2004
KitMaker: 1,513 posts
Armorama: 1,449 posts
Joined: July 20, 2004
KitMaker: 1,513 posts
Armorama: 1,449 posts
Posted: Sunday, October 26, 2008 - 02:45 AM UTC
Looks great! Wish that mine was here! Dan
DT61
Ontario, Canada
Joined: September 18, 2005
KitMaker: 1,226 posts
Armorama: 819 posts
Joined: September 18, 2005
KitMaker: 1,226 posts
Armorama: 819 posts
Posted: Sunday, October 26, 2008 - 03:02 AM UTC
Looking good Jim.
Darryl
Darryl
mauserman
Maryland, United States
Joined: September 27, 2004
KitMaker: 1,183 posts
Armorama: 628 posts
Joined: September 27, 2004
KitMaker: 1,183 posts
Armorama: 628 posts
Posted: Sunday, October 26, 2008 - 03:36 AM UTC
Quoted Text
Best place to get this in the States would be?
Or better from Overseas?
Thanks
Jeff, I don't know if it's the 'best' place, but you can order directly off of their website. Go here: Tasca
I ordered the Firefly from them two weeks before Christmas last year and received it in three days!
Oh, and Jim, great blog. I usually do modern armor but after reading this I just ordered one of these from Tasca.
DT61
Ontario, Canada
Joined: September 18, 2005
KitMaker: 1,226 posts
Armorama: 819 posts
Joined: September 18, 2005
KitMaker: 1,226 posts
Armorama: 819 posts
Posted: Sunday, October 26, 2008 - 05:38 AM UTC
Looking good Jim.
Darryl
Darryl
Pedro
Wojewodztwo Pomorskie, Poland
Joined: May 26, 2003
KitMaker: 1,208 posts
Armorama: 1,023 posts
Joined: May 26, 2003
KitMaker: 1,208 posts
Armorama: 1,023 posts
Posted: Sunday, October 26, 2008 - 08:24 AM UTC
Hey Jim,
finally starts to have that "little hippo" look to it that we all love
Regarding the tracks painting, I always thought that PVA was the least adhesive medium , at least when it comes to painting plastics? Anyway, I've painted tracks for mine M4A1 starting with Humbrol enamel base (some three coats, relatively thick). This was rubbing off quite easily upon being touched, so I added a good coat of vallejo panzer gray. Such paint job is fairly rub-proof but it scratches off very easily. I managed not to ruin it while I was painting the end connectors gunmetal, but it got scratched upon being installed on the suspension. Nothing that couldn't be touched up afterwards, but no vroom vroom on the carpet for this one Anyway, I'll probably be tempted to try painting with pva based paint when I'll get this wonderful DV M4A1.
Cheers
Greg
jimbrae
Provincia de Lugo, Spain / España
Joined: April 23, 2003
KitMaker: 12,927 posts
Armorama: 9,486 posts
Joined: April 23, 2003
KitMaker: 12,927 posts
Armorama: 9,486 posts
Posted: Thursday, October 30, 2008 - 08:43 PM UTC
This week has been pretty hectic for me so I haven't got near the workbench at all. So, i'll take this opportunity to make some comments about the model itself - a 'Teeny-Review'
Ease of Build. You know, some people may get the idea that Tasca's models are complex and are some kind of injection-moulded equivalent of full-resin kits. NOTHING could be further from the truth. What I find complex are older models whch are full of sink-holes, moulding plugs and flash. This doesn't have any of these. Unusually, Tasca have moulded in a sand-colored plastic which smomehow feels 'cleaner' than the usual dark green. Hopefully, they'll continue with this. The plastic is very high quality and cleans up easily with scraping or light sanding. ONE thing that I mentioned before, and i'll repeat it again, is there's a hardly-noticed innovation - rather than great blobs of styrene attached to the part, Tasca have managed to put the merest sprue attachment point HORIZINTALLY on the part which means, to clean up a simple horizontal cut to clean up...
Instructions are clear although there really SHOULD have more in English on the instructions. I don't THINK i'm missing much but it'd be good to have completely translated instructions...
Accuracy I've checked with lots of different sources just to see if there WERE errors in the kit and, in my judgement, there simply isn't anything that is noticable without the most exhaustive use of the original blueprints. No kit is ever going to be 100% - this though goes well into the 90s..
On the Debit Side Like many others , the area I don't like are the shackles. I've NEVER managed to take one of these off the sprue without breaking it apart. Tasca should REALLY rethink this part - either make them less 'scale' or think of their sprue attachment. A small point but one which could be reasonably easily resolved...
The Competition When DML release THEIR M4a1 DV, it's going to be interesting to compare the two. I DON'T want to fall into the trap of making judgements on something which only seems to exist in CAD form. There are a couple of comments though. For ease of build, I prefer Tasca's approach with the sandshields - stryrene rather than PE and the same for the stowage box on the front. As to the 'Texture Issue', the texture IS there. If you want more, most of us can open and apply Mr. Surfacer if we want. I (personally) don't need, or believe that roughened-up surfaces are very accurate on the M4. As to this ridiculous 'Hybrid' campaign over the tracks, Tasca have produced VERY accurate T41s - END OF STORY.... Some will go for the DML kit and i'll probably pick up one later on as well. There again, having just got my copy of Factory Publishing's New Breed 1, i'll probably be returning to the DV hull at some point in the future and it'll almost certainly be Tasca again...
HONEYCUT
Victoria, Australia
Joined: May 07, 2003
KitMaker: 4,002 posts
Armorama: 2,947 posts
Joined: May 07, 2003
KitMaker: 4,002 posts
Armorama: 2,947 posts
Posted: Friday, October 31, 2008 - 12:39 AM UTC
She looks a beaut Jim.
One query and that is of the rear air cleaner boxes. Should the flat circle at the bottom be rotated a little to have the small clips lined up to receive the vertical locking pins? These pins also look a little on the short side. Seems where you have positioned them at the top end is where they should be attached, but they should reach the aforementioned clips, and then a wingnut would secure it in place...
Brad
One query and that is of the rear air cleaner boxes. Should the flat circle at the bottom be rotated a little to have the small clips lined up to receive the vertical locking pins? These pins also look a little on the short side. Seems where you have positioned them at the top end is where they should be attached, but they should reach the aforementioned clips, and then a wingnut would secure it in place...
Brad
jimbrae
Provincia de Lugo, Spain / España
Joined: April 23, 2003
KitMaker: 12,927 posts
Armorama: 9,486 posts
Joined: April 23, 2003
KitMaker: 12,927 posts
Armorama: 9,486 posts
Posted: Friday, October 31, 2008 - 12:51 AM UTC
Quoted Text
Should the flat circle at the bottom be rotated a little to have the small clips lined up to receive the vertical locking pins? These pins also look a little on the short side.
A good point - yep, it's a lot clearer with that pic thanks for that!
Posted: Friday, October 31, 2008 - 07:44 AM UTC
Hi Jim,
Just one point to look out for is the tool arrangement on the RHS, it was slightly different on the M4A1 SHerman Mk II. Part C26 is not required. If you have a copy of Ospreys Modelling Manual M4 Sherman, check there, although he shows the tool as a crowbar when it should be the wooden handle for the piick, the arrangement I believe is correct.
Al
panamadan
Minnesota, United States
Joined: July 20, 2004
KitMaker: 1,513 posts
Armorama: 1,449 posts
Joined: July 20, 2004
KitMaker: 1,513 posts
Armorama: 1,449 posts
Posted: Friday, October 31, 2008 - 12:28 PM UTC
Brad, Good photo! A helpful pic for this great build! Dan
Hollowpoint
Kansas, United States
Joined: January 24, 2002
KitMaker: 2,748 posts
Armorama: 1,797 posts
Joined: January 24, 2002
KitMaker: 2,748 posts
Armorama: 1,797 posts
Posted: Friday, October 31, 2008 - 03:50 PM UTC
This looks like a sweet kit.
One question: are there any foundry marks? It might be my monitor and/or my failing eyes, but I can't see any in the usual places.
EDIT: I spotted one on one piece of the three-piece final drive.
One question: are there any foundry marks? It might be my monitor and/or my failing eyes, but I can't see any in the usual places.
EDIT: I spotted one on one piece of the three-piece final drive.
ericadeane
Michigan, United States
Joined: October 28, 2002
KitMaker: 4,021 posts
Armorama: 3,947 posts
Joined: October 28, 2002
KitMaker: 4,021 posts
Armorama: 3,947 posts
Posted: Friday, October 31, 2008 - 11:57 PM UTC
Howdy all: I'll post some of my build up pics soon too. Like Jim: I find there is very little to fault with this kit. The only real issue I've had to confront (and it's a Shermanaholic nitpick) is I modified how the tail lights were mounted. Tasca has them sitted onto the hull with a slotted piece. In actuality, the lights were attached via a tube at the rear of the assembly. I just had to fill in most of the hull slot and carve back the plastic on the tail light. I've made some building mistakes (but that was due to my rushing with the hull assembly) but I can't fault Tasca for that. Some filler is needed on the = seams on the bogies, the lifting lug, the transmission cover, where the DV pieces meet the hull and I placed some weld beads on the turret bustle stowage box. Fabio Sacchi pointed out that the early M4A1 DVs' roadwheel hex bolts should have a hole in the center. I added these with a tiny drill bit.
As for foundry markings Bob, there are a few on the 3-piece trans cover and the inside of the commander's hatch. That's all.
jimbrae
Provincia de Lugo, Spain / España
Joined: April 23, 2003
KitMaker: 12,927 posts
Armorama: 9,486 posts
Joined: April 23, 2003
KitMaker: 12,927 posts
Armorama: 9,486 posts
Posted: Saturday, November 01, 2008 - 01:08 AM UTC
Quoted Text
As for foundry markings Bob, there are a few on the 3-piece trans cover and the inside of the commander's hatch. That's all.
I think i'll be buying some from Archer - really fancy tring out that new range they have:
Hollowpoint
Kansas, United States
Joined: January 24, 2002
KitMaker: 2,748 posts
Armorama: 1,797 posts
Joined: January 24, 2002
KitMaker: 2,748 posts
Armorama: 1,797 posts
Posted: Saturday, November 01, 2008 - 06:54 AM UTC
Quoted Text
Quoted TextAs for foundry markings Bob, there are a few on the 3-piece trans cover and the inside of the commander's hatch. That's all.
I think i'll be buying some from Archer - really fancy tring out that new range they have:
Glad to see this, Jim -- the Archer set was going to be my follow-up suggestion. I picked up a couple sets at the AMPS Nats in Indiana and they are sweet. Apply right to the bare plastic, a bit of setting solution (I use Mr. Mark Softer) and paint right over the top.
I have been resisting these Tasca kits, but my resolve is slowly breaking down ...
HONEYCUT
Victoria, Australia
Joined: May 07, 2003
KitMaker: 4,002 posts
Armorama: 2,947 posts
Joined: May 07, 2003
KitMaker: 4,002 posts
Armorama: 2,947 posts
Posted: Saturday, November 01, 2008 - 11:21 AM UTC
Quoted Text
The only real issue I've had to confront is I modified how the tail lights were mounted. Tasca has them sitted onto the hull with a slotted piece. In actuality, the lights were attached via a tube at the rear of the assembly .
Hey Roy, so they are the basic set up of all companies' previous attempts? IIRC the previous tasca offerings had the slot running underneath the light to connect to the hull, but had a small tube out of the rear of the light. I guess they figured the gap between the light and the hull was negligible and could be used to make a strong bond? The Formations set look spot on, and I think the CAD images of the DML release finally look to have fixed this? I'm only going by what I though I saw in the preview...
Brad
ericadeane
Michigan, United States
Joined: October 28, 2002
KitMaker: 4,021 posts
Armorama: 3,947 posts
Joined: October 28, 2002
KitMaker: 4,021 posts
Armorama: 3,947 posts
Posted: Saturday, November 01, 2008 - 01:00 PM UTC