_GOTOBOTTOM
Armor/AFV: Axis - WWII
Armor and ground forces of the Axis forces during World War II.
Hosted by Darren Baker
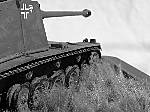
Bronco Marder I
wbill76
Visit this Community
Texas, United States
Joined: May 02, 2006
KitMaker: 5,425 posts
Armorama: 4,659 posts
Posted: Wednesday, November 26, 2008 - 02:28 AM UTC

Quoted Text

Another beauty, Bill, thanks for all the SBS. I definately like the weathering you've been doing lately. Even though I wouldn't think it's possible, each build gets better and better. Looking forward to the next one.


Thanks James, appreciate the comments. It's good to hear you're seeing a progression, I'm always trying to expand the horizons and test out new ideas/concepts...some of them work better than others but it's all an evolutionary process in the end. Thanks for the encouragement.
jimz66
Visit this Community
Connecticut, United States
Joined: December 15, 2006
KitMaker: 1,165 posts
Armorama: 1,105 posts
Posted: Wednesday, November 26, 2008 - 06:28 AM UTC
OOOOOOOOOOh no the MAD SCIENTIST has done it again. Just kidding .Nice work as always Bill. Great job on this one.
wbill76
Visit this Community
Texas, United States
Joined: May 02, 2006
KitMaker: 5,425 posts
Armorama: 4,659 posts
Posted: Wednesday, November 26, 2008 - 07:19 AM UTC
Thanks Jim, now excuse me while I go practice my maniacal laughter...
RSingleton
Visit this Community
Kentucky, United States
Joined: August 26, 2008
KitMaker: 286 posts
Armorama: 273 posts
Posted: Wednesday, November 26, 2008 - 08:20 AM UTC
Your model is amazing!(extreme understatement) What are you going to do next. Diorama? Vignette? Or just leave it the way it is, perfect!

A treat for the eyes

Richard

"Building is easy. Painting is hard. Weathering is harder. Not going crazy doing the above is hardest."
wbill76
Visit this Community
Texas, United States
Joined: May 02, 2006
KitMaker: 5,425 posts
Armorama: 4,659 posts
Posted: Wednesday, November 26, 2008 - 06:22 PM UTC

Quoted Text

Your model is amazing!(extreme understatement) What are you going to do next. Diorama? Vignette? Or just leave it the way it is, perfect!

A treat for the eyes

Richard

"Building is easy. Painting is hard. Weathering is harder. Not going crazy doing the above is hardest."


Hi Richard, thanks for the comments! I build vehicles as stand-alones vs. dios or vignettes, mostly because of space and display considerations, so this is one is done as a project.
Drader
Visit this Community
Wales, United Kingdom
Joined: July 20, 2004
KitMaker: 3,791 posts
Armorama: 2,798 posts
Posted: Sunday, November 30, 2008 - 11:15 PM UTC
Some more thoughts on the model from ML

http://www.network54.com/Forum/47207/thread/1227913482/New+Bronco+H39+w-7.5+cm+Pak+better+than+Trumpeter-

David
modelpanzer
Visit this Community
Portugal
Joined: October 20, 2008
KitMaker: 109 posts
Armorama: 106 posts
Posted: Monday, December 01, 2008 - 07:53 AM UTC
Congratulations,
fantastic work.

José César
exer
Visit this Community
Dublin, Ireland
Joined: November 27, 2004
KitMaker: 6,048 posts
Armorama: 4,619 posts
Posted: Monday, December 01, 2008 - 09:49 AM UTC
Great work bill. Most panzers leave me cold but the SPGs and Jagdpanzers interest me and I really like the shape of this one so I'll be bookmarking this thread.
wbill76
Visit this Community
Texas, United States
Joined: May 02, 2006
KitMaker: 5,425 posts
Armorama: 4,659 posts
Posted: Monday, December 01, 2008 - 10:02 AM UTC
Jose,

Appreciate the comments!


Quoted Text

Great work bill. Most panzers leave me cold but the SPGs and Jagdpanzers interest me and I really like the shape of this one so I'll be bookmarking this thread.


Pat, have to agree with you, they have a strange appeal. A friend of mine described this one as an "armed golfcart", it's so ugly it's beautiful in an odd sort of way.
scgatgbi
Visit this Community
Florida, United States
Joined: May 28, 2009
KitMaker: 285 posts
Armorama: 267 posts
Posted: Tuesday, June 09, 2009 - 03:08 AM UTC
Bill,
Great looking work, I've got a question for you. Is that the Testors Enamel colors you're using for the dot/fading on the camo? If so, how did you get it to blend so well? I just tried it on a Panther (basic Model Master Sandgelb finish) and it made a bit of a mess of the base paint job (darkened it, streaks of different colors). Thanks for any input or tips you can provide.

Sean
wbill76
Visit this Community
Texas, United States
Joined: May 02, 2006
KitMaker: 5,425 posts
Armorama: 4,659 posts
Posted: Tuesday, June 09, 2009 - 04:21 AM UTC

Quoted Text

Great looking work, I've got a question for you. Is that the Testors Enamel colors you're using for the dot/fading on the camo? If so, how did you get it to blend so well? I just tried it on a Panther (basic Model Master Sandgelb finish) and it made a bit of a mess of the base paint job (darkened it, streaks of different colors). Thanks for any input or tips you can provide.


Sean,

Yes, I used either Testors regular or Model Master enamel colors for the dot filters and fading. The key to getting it to blend is selection of colors and working in small sections at a time. If the dots are allowed to sit too long, they will start to "harden" and become very difficult to blend properly. To blend them, you have to use repeated strokes of a thinner dampened brush, continuing to work with them until they virtually disappear. The goal here is to produce a very subtle shade variation, so if you're seeing vivid streaks you've either used too much paint in your dots and/or didn't repeat the strokes enough. The dots need to be fairly small as well, some of the colors such as white, yellow, red, etc. are very powerful in small quantities so a little goes a very long way. Here's an example of what I mean by the strokes required:


As far as the issue of paint darkening goes, this may be driven by your choice of colors for the filters/washes and also whether or not you lightened your base coat to compensate. I will typically lighten the base coat for a Dunkelgelb or similar color by adding anywhere from 20% to 50% Light Gray (I prefer that vs. White) as a means to compensate for what I know will happen during the weathering process. HTH!
scgatgbi
Visit this Community
Florida, United States
Joined: May 28, 2009
KitMaker: 285 posts
Armorama: 267 posts
Posted: Tuesday, June 09, 2009 - 05:10 AM UTC

Quoted Text


Quoted Text

Great looking work, I've got a question for you. Is that the Testors Enamel colors you're using for the dot/fading on the camo? If so, how did you get it to blend so well? I just tried it on a Panther (basic Model Master Sandgelb finish) and it made a bit of a mess of the base paint job (darkened it, streaks of different colors). Thanks for any input or tips you can provide.


Sean,

Yes, I used either Testors regular or Model Master enamel colors for the dot filters and fading. The key to getting it to blend is selection of colors and working in small sections at a time. If the dots are allowed to sit too long, they will start to "harden" and become very difficult to blend properly. To blend them, you have to use repeated strokes of a thinner dampened brush, continuing to work with them until they virtually disappear. The goal here is to produce a very subtle shade variation, so if you're seeing vivid streaks you've either used too much paint in your dots and/or didn't repeat the strokes enough. The dots need to be fairly small as well, some of the colors such as white, yellow, red, etc. are very powerful in small quantities so a little goes a very long way. Here's an example of what I mean by the strokes required:


As far as the issue of paint darkening goes, this may be driven by your choice of colors for the filters/washes and also whether or not you lightened your base coat to compensate. I will typically lighten the base coat for a Dunkelgelb or similar color by adding anywhere from 20% to 50% Light Gray (I prefer that vs. White) as a means to compensate for what I know will happen during the weathering process. HTH!


Bill,
Thanks for the reply. It looks like maybe I used too much paint with the dots (I noticed the red REALLY over powered everything else). how much thinner should be on the brush. I dip it & give it a quick wipe, maybe there's too much thinner & it spreads it too much? Also, do you allow the brush strokes to encompass a large area or do you focus on a small area at a time to prevent to much cross color contamination ( I noticed all the light colors dissapeared & only the red & raw umber showed up). would you suggest doing the darker & lighter shades in seperate applications to prevent that? and.... I don't have an airbrush, so I use the rattlecans for the base coat and brush paint the rest. Would a wash using a lightened shade of the base coat help/work for lightening the whole thing done in anticipation of the weathering darkening it? while not having as much finesse as the color pre-lightened with the airbrush I'd imagine it would at least come reasonably close to accomplishing the same thing (what shade of light grey do you use by the way?) . Thanks again & sorry for all the questions, i'd just rather not have a repeat of last nights dibacle & ruin all the work done up till now. Thanks.

Sean
wbill76
Visit this Community
Texas, United States
Joined: May 02, 2006
KitMaker: 5,425 posts
Armorama: 4,659 posts
Posted: Tuesday, June 09, 2009 - 07:57 AM UTC

Quoted Text

Thanks for the reply. It looks like maybe I used too much paint with the dots (I noticed the red REALLY over powered everything else). how much thinner should be on the brush. I dip it & give it a quick wipe, maybe there's too much thinner & it spreads it too much? Also, do you allow the brush strokes to encompass a large area or do you focus on a small area at a time to prevent to much cross color contamination ( I noticed all the light colors dissapeared & only the red & raw umber showed up). would you suggest doing the darker & lighter shades in seperate applications to prevent that? and.... I don't have an airbrush, so I use the rattlecans for the base coat and brush paint the rest. Would a wash using a lightened shade of the base coat help/work for lightening the whole thing done in anticipation of the weathering darkening it? while not having as much finesse as the color pre-lightened with the airbrush I'd imagine it would at least come reasonably close to accomplishing the same thing (what shade of light grey do you use by the way?) . Thanks again & sorry for all the questions, i'd just rather not have a repeat of last nights dibacle & ruin all the work done up till now.


The brush needs to just be damp with thinner. I will dip the brush into a bottle of clean thinner and use the lip of the jar to get rid of most of the excess thinner. Then I will use a paper towel and touch the brush to that to make sure it won't flood the surface when it makes contact with the model. Depending on the area I'm working on and the effect I want, I will keep the strokes isolated to small areas at a time and allow the dots to blend together. There's some thought that goes into the placement of the dots and I will allow the colors to bleed together and influence each other to a certain degree. Using only a damp brush will allow you to play with the colors more as the paint pigment will stay more on the surface instead of get completely washed away if you're using too much thinner.

You can use darker and lighter colors together but darker colors are always going to have a heavier effect since it's much easier to darken than it is lighten a color. You can work the filters in separately by sealing if you want to "stack" their effect but it will take some experimentation to get it right so don't be afraid to explore that route if you like what it produces. Applying an overall light wash to change the base coat given that you don't have an airbrush might work but I've never tried that approach so can't say if it will actually work as intended. Definitely would have to seal it before applying additional weathering to preserve it or it will get lost in the follow-on steps. I use regular Testors Model Master Light Gray for lightening colors by mixing but that may not work in this particular case...you'll want something that as a wash will lighten the underlying coats but still keep the underlying color as the finish tone. That might be tough to pull off convincingly, especially with multi-colored camo schemes, consider using a lighter similar color to the base color perhaps instead of a Light Gray or Flat White?
scgatgbi
Visit this Community
Florida, United States
Joined: May 28, 2009
KitMaker: 285 posts
Armorama: 267 posts
Posted: Tuesday, June 09, 2009 - 08:53 AM UTC
Ollie,
Thanks, after asking around it seems that I may have had the dot method right, I just made the fatal mistake of using testors dullcote & the thinner & enamels just wrought havoc with it. That's the first & last time I make that mistake. Now to find a acrylic flat clear spray (don't have an airbrush, so the future isn't an option) to use instead of the Testors. Hopefully once I get that debacle sorted out & repaired I should be good. As to the wash, I figured if I lightened the equivelent base color & then used that for the wash it might work. You never know till ya try. God I hate sounding like such a bloody newbie!!! Thanks for all your help.

Sean
wbill76
Visit this Community
Texas, United States
Joined: May 02, 2006
KitMaker: 5,425 posts
Armorama: 4,659 posts
Posted: Tuesday, June 09, 2009 - 09:31 AM UTC
Testors Dullcote doesn't usually respond well to enamel thinner. It generally will cause the dulling agent (a fine talcum-like powder) to come out of suspension since it's lacquer based and the enamel thinner can eat through that. Compound that with the fact that a flat coat will have more "tooth" to grab onto the paint pigment and you'll get more pronounced streaking as a result. I prefer to do mine over a sealed coat of Future since it's 1) acrylic and provides a barrier between the enamel base coats and the enamel thinner and 2) it is very durable and can tolerate the repeated brush action necessary. Since it's also a gloss instead of a flat, it provides more flexibility IMHO. Don't be afraid to ask questions and good luck on your next attempt!
scgatgbi
Visit this Community
Florida, United States
Joined: May 28, 2009
KitMaker: 285 posts
Armorama: 267 posts
Posted: Wednesday, June 10, 2009 - 02:03 AM UTC

Quoted Text

Testors Dullcote doesn't usually respond well to enamel thinner. It generally will cause the dulling agent (a fine talcum-like powder) to come out of suspension since it's lacquer based and the enamel thinner can eat through that. Compound that with the fact that a flat coat will have more "tooth" to grab onto the paint pigment and you'll get more pronounced streaking as a result. I prefer to do mine over a sealed coat of Future since it's 1) acrylic and provides a barrier between the enamel base coats and the enamel thinner and 2) it is very durable and can tolerate the repeated brush action necessary. Since it's also a gloss instead of a flat, it provides more flexibility IMHO. Don't be afraid to ask questions and good luck on your next attempt!


Ollie,
Thankfully I was able to rescue the Panther with nail polish remover. The acetone just stripped off the afflicted areas & I was able to just re-paint those areas instead of starting from scratch. I picked up some Krylon Acrylic clear spray, so i should be good. Don't have an airbrush so the future isn't really an option (though I read on a post the the Future can yellow over time and requires a lot of dullcote to get rid of the gloss, ant thoughts there). Hopefully I'm good to go now & will have much better luck & success with the dot method. One last thing, more of a perception question, the Tam/Polly-S/Model Master Dark Yellow looks more "Greenish" to me than yellow. It even looks more "greenish" with the way you lightened it. DO you notice the same thing? I've asked a few people & I've gotten mixed answers, some swear it's yellow, while others thing it's a lighter shade of green. Your Thoughts? Thanks.

Sean
wbill76
Visit this Community
Texas, United States
Joined: May 02, 2006
KitMaker: 5,425 posts
Armorama: 4,659 posts
Posted: Wednesday, June 10, 2009 - 04:16 AM UTC

Quoted Text


Ollie,
Thankfully I was able to rescue the Panther with nail polish remover. The acetone just stripped off the afflicted areas & I was able to just re-paint those areas instead of starting from scratch.


Just out of curiosity, who's Ollie?


Quoted Text

One last thing, more of a perception question, the Tam/Polly-S/Model Master Dark Yellow looks more "Greenish" to me than yellow. It even looks more "greenish" with the way you lightened it. DO you notice the same thing? I've asked a few people & I've gotten mixed answers, some swear it's yellow, while others thing it's a lighter shade of green. Your Thoughts?


Straight out of the bottle the MM Panzer Dunkelgelb does have a more greenish tint to it. The name actually derives from the German RAL naming system and so even though it translates literally as "dark yellow" that doesn't necessarily mean much. The names are only partially descriptive of the acutal tone color and the RAL numbering ranges generally followed certain color "bands" in terms of the codes assigned. The RAL 7028 designation is actually in the intermediate bands between gray and green oddly enought, at least in the modern charts (not 100% applicable to the WW2 colors but close). http://www.ralcolor.com/

I lighten it pretty high these days, adding 50% Light Gray to it, to somewhat counteract that for scale effect and also of course lighten the color.
scgatgbi
Visit this Community
Florida, United States
Joined: May 28, 2009
KitMaker: 285 posts
Armorama: 267 posts
Posted: Wednesday, June 10, 2009 - 04:34 AM UTC

{quote}Just out of curiosity, who's Ollie? [quote]
Bill,
can you hear Homer yelling DOOOOHH!!!! sorry about that, switched posts and for some reason the name came with me, laugh. That'll teach me to post while at work, chuckle.

Glad to know my eyes aren't messing with me with the color. 1st time I went to use it it left me scratching my head, chuckle. Thanks for the tip with using grey to lighten the color. I deffinitely like the shade of "Dark Yellow" you get with it. I've been trying to find that particular shade of light yellow/greenish color & hadn't had any success for obvious reasons. Thanks a ton.

Sean
scgatgbi
Visit this Community
Florida, United States
Joined: May 28, 2009
KitMaker: 285 posts
Armorama: 267 posts
Posted: Friday, June 26, 2009 - 05:23 AM UTC
Bill,
Thanks for all the help you've given me. I was wondering if you get a sec if you could give me some feedback. I pretty much finished up the Panther (just need to seal it) and wanted to get some basic opinions. I don't want to polute your thread with pics, so if you go into my photos & it's the Panther G II. not the greatest pics, but they give a decent impression of what I did. I made the minor error of taking pics after I weathered it, so the dot method work I did is a little obscure in areas. Thanks in advance for taking the time to help!!! It's greatly appreciated!
wbill76
Visit this Community
Texas, United States
Joined: May 02, 2006
KitMaker: 5,425 posts
Armorama: 4,659 posts
Posted: Friday, June 26, 2009 - 10:10 AM UTC
Sean,

I took a look at your Panther G pics but they are too small for me to really be able to see much, so I can't offer much by way of advice one way or the other. What I can say is that the method does take some practice and getting used to and it looks like you're well on your way in that department.
 _GOTOTOP