![](../../modules/SquawkBox/images/smilies/hello.gif)
Happy New Year to all!
Right on with the pasting onslaught!
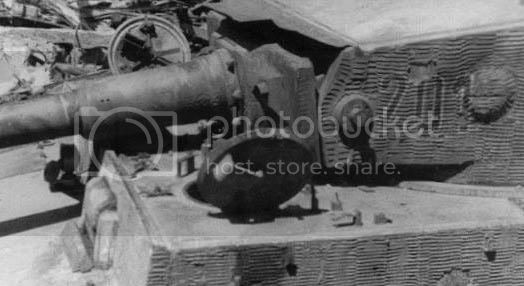
The next turret pattern up will be the universaly more common heavy broad pattern, that can be seen applied to the majority of mids and late Tiger 1's. This is a problematical type of zimmerit to reproduce due to the nature of it's texture. The pattern using a wider applicator, clashes with it's neighbouring column, as well as looking as though it has be 'over-rolled' at slight variations of a vertical angle and starting point. This gives it the look in places as being out of step in relation to the adjacent vertical row, and meshing into it's neighbour also. Here are a few images courtesy of the Bundesarchiv and IWM for comparitive purposes only.
![](../../../i39.photobucket.com/albums/e198/barkmann424/scan0001-2.jpg)
![](../../../i39.photobucket.com/albums/e198/barkmann424/scan0002-2.jpg)
![](../../../i39.photobucket.com/albums/e198/barkmann424/scan0003-1.jpg)
As can be seen whilst Dragons version being a good solution to this difficult pattern depiction, it falls somewhere in-between the two generally accepted pattern types seen on the Late version of the Tiger 1. I can fully understand how difficult this could be to replicate via injection moulding, even with Dragons benchmark setting standards in todays ever changing industry.
![](../../../i39.photobucket.com/albums/e198/barkmann424/scan0004-1.jpg)
![](../../../i39.photobucket.com/albums/e198/barkmann424/scan0005-1.jpg)
![](../../../i39.photobucket.com/albums/e198/barkmann424/231-1.jpg)
![](../../../i39.photobucket.com/albums/e198/barkmann424/101-304a.jpg)
So thats the reference bit out of the way for now, onto the pasting!
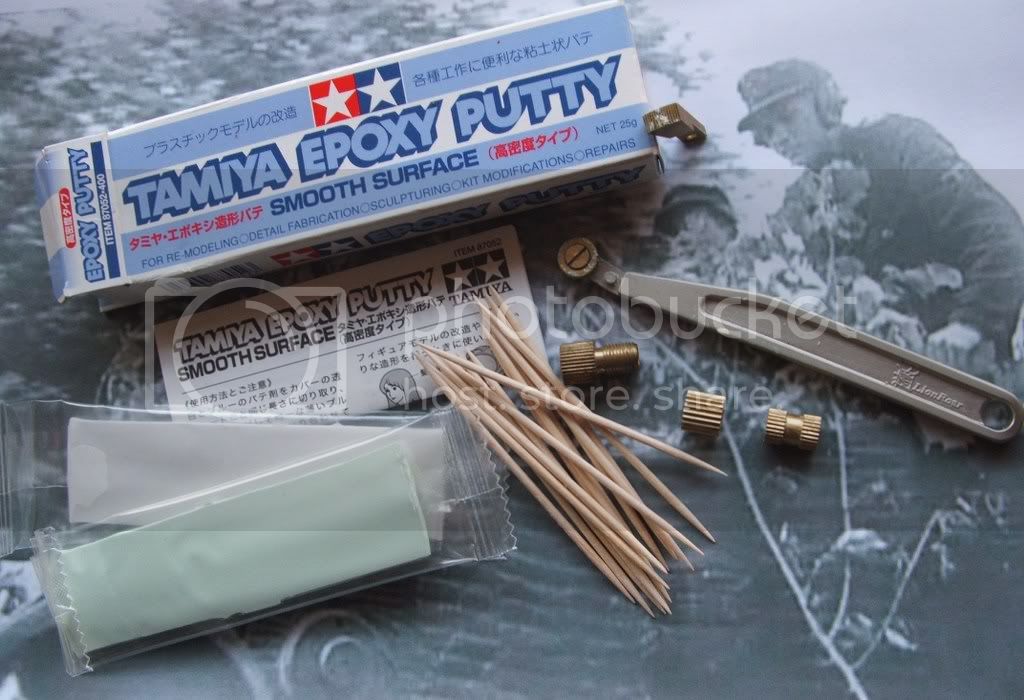
The first set of images once again relate to the application of the base medium 'Tamiya epoxy putty' to a desired thickness. Once again the thickness we are aiming for is 0.3 to 0.5ish millimeters. If the gauge of the putty is to deep it will give us a ridge that is far to large, as a flattened look is what we are aiming for with the recess of the gear being used not fully indenting the putties surface.
"This gear?" I hear you ask. "Where can such an item be found?" you say!.. Well this little marvel of modelling, can be found in the 'inertia mechanism' of most venetian blinds. You can see them just sat there waiting for a better purpose in life. It is now up to you 'the modeller' to liberate it from it's tedious existance encased within mere home furnishings, and convince the 'other half' whether real or bi-polar to adopt a more modern form of winow obliterating device, and let you 'dispose' of the dated blinds. Now you have the 'tool' we can get to rolling. On a side note this is an easier option than breaking apart your offsprings 'pull-back' cars I can assure you.
![](../../../i39.photobucket.com/albums/e198/barkmann424/TZPlfs004.jpg)
![](../../../i39.photobucket.com/albums/e198/barkmann424/TZPlfs007.jpg)
![](../../../i39.photobucket.com/albums/e198/barkmann424/TZPlfs016.jpg)
Now that you have achieved the application of the putty, we will start indenting the pattern, in overlapping columns that almost cover half of the previous row, a third of area overlap is best, I find.
![](../../../i39.photobucket.com/albums/e198/barkmann424/TZPlfs018.jpg)
![](../../../i39.photobucket.com/albums/e198/barkmann424/TZPlfs040.jpg)
![](../../../i39.photobucket.com/albums/e198/barkmann424/TZPlfs025.jpg)
Now that the portion of the turret between the gun trunnion pintles and vision slits is rolled, we can move on to the curved area of the turret sides and rear. The pattern has to be be brought slightly closer together here, as the radial aspect of the turrets rear will not allow full engagement of the 'tool' here. Once again overlapping and over-rolling being the way to achieve this texture.
![](../../../i39.photobucket.com/albums/e198/barkmann424/TZPlfs026.jpg)
![](../../../i39.photobucket.com/albums/e198/barkmann424/TZPlfs042.jpg)
![](../../../i39.photobucket.com/albums/e198/barkmann424/TZPlfs032.jpg)
![](../../../i39.photobucket.com/albums/e198/barkmann424/TZPlfs047.jpg)
Now if you are happy with the results so far, we can pay some attention to the finer points related to this pattern. The area forward of the gun trunnion pintles need to have the smaller finer pattern applied to it now, following the angle of the turret sides leading edge. Again with the heavier of the Lion Roar applicator die's
![](../../../i39.photobucket.com/albums/e198/barkmann424/TZPlfs059.jpg)
![](../../../i39.photobucket.com/albums/e198/barkmann424/TZPlfs066.jpg)
![](../../../i39.photobucket.com/albums/e198/barkmann424/TZPlfs068.jpg)
All that is needed now is to 'flatten' some of the pattern to it's distinctive squashed look with the aid of a moistened smooth blunt impliment of choice. I tend to use the end of the Lion Roar tool itself!
![](../../../i39.photobucket.com/albums/e198/barkmann424/TZPlfs078.jpg)
![](../../../i39.photobucket.com/albums/e198/barkmann424/TZPlfs073.jpg)
![](../../../i39.photobucket.com/albums/e198/barkmann424/TZPlfs083.jpg)
![](../../../i39.photobucket.com/albums/e198/barkmann424/TZPlfs091.jpg)
All that is needed now before waiting for the putty to 'cure' in order for clean up and finnishing which with the Tamiya epoxy can be up to eight hours depending up abient room temperature... Is to flatten the pattern a little around the turrets escape hatch. As can be seen on the real vehicles often.
![](../../../i39.photobucket.com/albums/e198/barkmann424/scan0004-1.jpg)
This can be done via the use of a blunt smooth impliment/tool also.
![](../../../i39.photobucket.com/albums/e198/barkmann424/TZPlfs098.jpg)
Okay that is all for now, the next logical step is to try and match Dragons excellent moulded zimmerit mantlet, with a few choice tweaks of course. Thanks again for putting up with my whettering.
![](../../modules/SquawkBox/images/smilies/tank.gif)
Phil