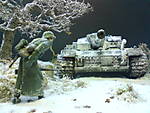
Managed to get some better photos today
The first shows the depth at which the water is at, one more layer should be enough.
2nd photo is from a similar angle as the original I'm trying to depict.
The only thing left to do after the water is - a palm tree and 3 figures and a pile of gear that has been removed from the tank.
Dioramas
Do you love dioramas & vignettes? We sure do.
Hosted by Darren Baker, Mario Matijasic
Iraq Dio
newdriftking
England - North West, United Kingdom
Joined: September 20, 2008
KitMaker: 365 posts
Armorama: 283 posts
Joined: September 20, 2008
KitMaker: 365 posts
Armorama: 283 posts
Posted: Monday, April 18, 2011 - 09:02 AM UTC
edoardo
Milano, Italy
Joined: November 30, 2007
KitMaker: 642 posts
Armorama: 234 posts
Joined: November 30, 2007
KitMaker: 642 posts
Armorama: 234 posts
Posted: Monday, April 18, 2011 - 09:43 AM UTC
just can't wait to se how it turns out....
keep on modellin'!
ciao
edo
keep on modellin'!
ciao
edo
TREEMENDUS
England - North West, United Kingdom
Joined: April 10, 2009
KitMaker: 86 posts
Armorama: 82 posts
Joined: April 10, 2009
KitMaker: 86 posts
Armorama: 82 posts
Posted: Monday, April 18, 2011 - 09:44 PM UTC
That looks great Paul, you must be chuffed with the result so far.
Ant
Ant
newdriftking
England - North West, United Kingdom
Joined: September 20, 2008
KitMaker: 365 posts
Armorama: 283 posts
Joined: September 20, 2008
KitMaker: 365 posts
Armorama: 283 posts
Posted: Tuesday, April 19, 2011 - 10:11 AM UTC
edoardo , Ant.
Thanks for the comments guys, I'm totally chuffed upto now with the dio, the only thing next is the figures! Not really a big figure modeller so we'll see how I get on!
The only thing that's disappointing is that I've noticed that the picture I'm trying to replicate the turret is further towards the right of the main body!
Too late now !!
retiredyank
Arkansas, United States
Joined: June 29, 2009
KitMaker: 11,610 posts
Armorama: 7,843 posts
Joined: June 29, 2009
KitMaker: 11,610 posts
Armorama: 7,843 posts
Posted: Tuesday, April 19, 2011 - 10:40 AM UTC
Remember, little hold in front big hole in rear. Take it from me, took a bullet to the head execution style. It sticks with you.
newdriftking
England - North West, United Kingdom
Joined: September 20, 2008
KitMaker: 365 posts
Armorama: 283 posts
Joined: September 20, 2008
KitMaker: 365 posts
Armorama: 283 posts
Posted: Thursday, April 21, 2011 - 10:34 PM UTC
Hi guys - quick update
final layer of resin has been poured - I must say I'm happy with the overall look, I've now started adding small details to the dio, in the middle of the water is a box of bottled water that's "floating" away.
Also I realise that the bank of the canal was a little low that's why the white part is there. I'll make this higher once it's dry. (also covers up where the resin has left a gap when drying)
Just getting bits together now for a pile of equipment to place next the tank that has been removed..
more pictures to follow......
newdriftking
England - North West, United Kingdom
Joined: September 20, 2008
KitMaker: 365 posts
Armorama: 283 posts
Joined: September 20, 2008
KitMaker: 365 posts
Armorama: 283 posts
Posted: Wednesday, April 27, 2011 - 07:06 AM UTC
Covered the plaster from the previous post - now has a layer of sand on it.
I've ordered my figures now just gotta wait for them to arrive then it's a whole new ball game for me (never done figures before)!
newdriftking
England - North West, United Kingdom
Joined: September 20, 2008
KitMaker: 365 posts
Armorama: 283 posts
Joined: September 20, 2008
KitMaker: 365 posts
Armorama: 283 posts
Posted: Wednesday, May 04, 2011 - 09:33 AM UTC
Well my figures have arrived, just gotta clean em up and put em together. Any suggestions on the best paint to use? I normally use Tamiya but would like to try something different.
grimmo
Queensland, Australia
Joined: January 17, 2006
KitMaker: 752 posts
Armorama: 569 posts
Joined: January 17, 2006
KitMaker: 752 posts
Armorama: 569 posts
Posted: Saturday, May 07, 2011 - 09:37 PM UTC
Awesome work paul. I use humbrol enamels for most of my figures. Depending on what camo you are going to do, i'll put up a list of what paints for what camo i use.
newdriftking
England - North West, United Kingdom
Joined: September 20, 2008
KitMaker: 365 posts
Armorama: 283 posts
Joined: September 20, 2008
KitMaker: 365 posts
Armorama: 283 posts
Posted: Sunday, May 08, 2011 - 08:37 AM UTC
Matt, I plan on doing the standard woodland camo that the US had in OIF...
If you check back on this page the picture I'm trying to represent is posted by Francisco... The guys to the left of the tank are what I want to do..
Cheers
Paul.
If you check back on this page the picture I'm trying to represent is posted by Francisco... The guys to the left of the tank are what I want to do..
Cheers
Paul.