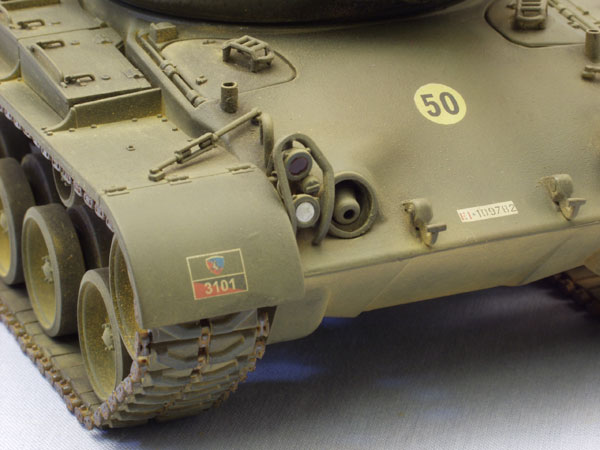
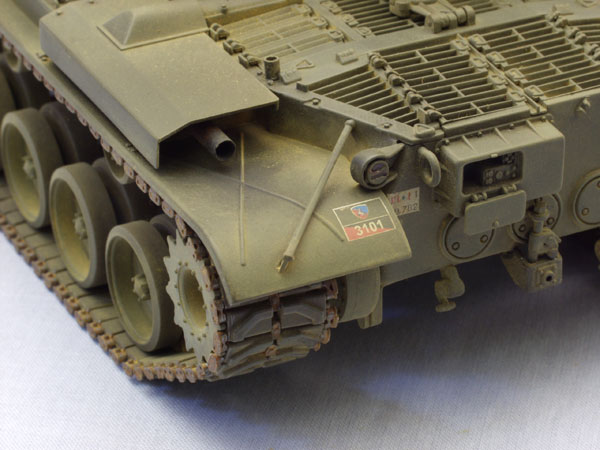
How to paint tank treads?
Limburg, Netherlands
Joined: November 18, 2003
KitMaker: 894 posts
Armorama: 643 posts
Posted: Tuesday, April 23, 2013 - 04:04 AM UTC
Quoted Text
Mat,
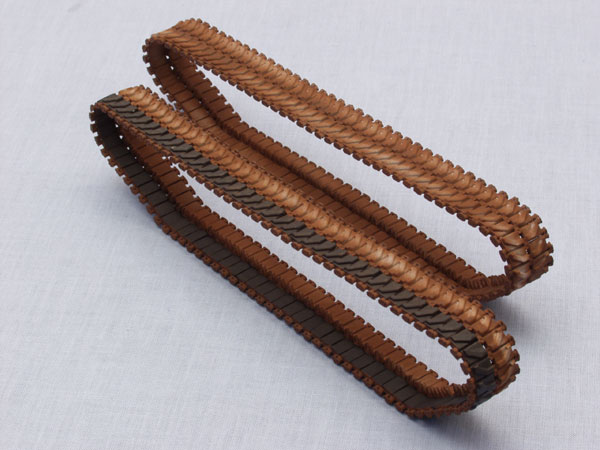
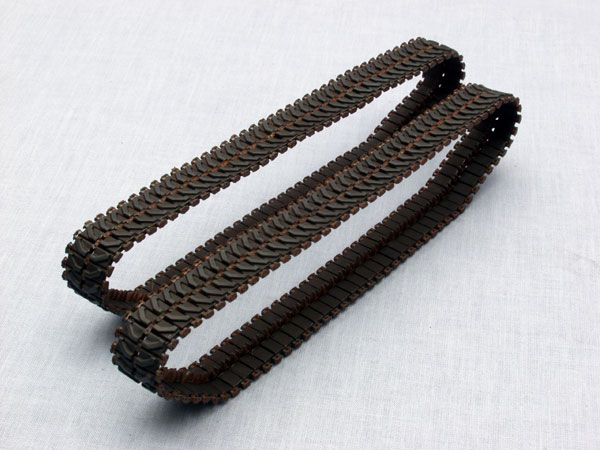
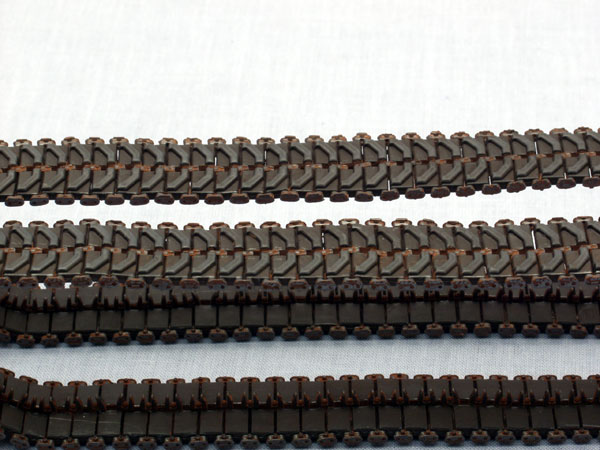
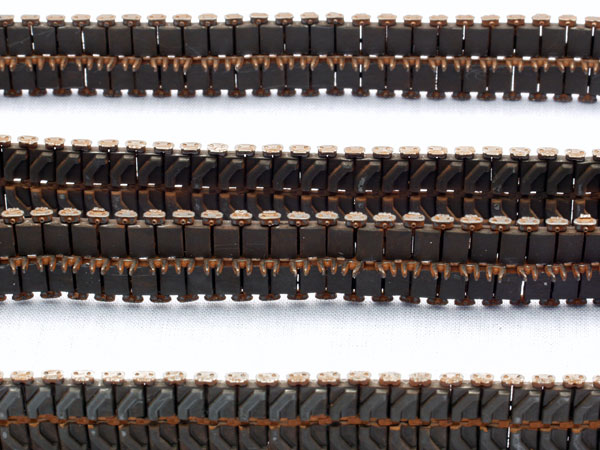
Even when glued they are still somewhat flexible, here is a pic of the tracks for my King Tiger. 
Cheers Rob.
Hi Rob,
I forgot to tell these were resin tracks which are glued with CA

"We don't know anything about their race, history, or culture, but one thing's for sure. They stand for everything we stand against."
Zapp Brannigan from the cartoon series "Futurama"
California, United States
Joined: December 01, 2001
KitMaker: 5,885 posts
Armorama: 3,799 posts
Posted: Tuesday, April 23, 2013 - 04:29 AM UTC
Quoted Text
Amazing how a thread nearly nine years old has popped-up and is still current and useful.
I have to agree with you too.
Gunnie
Museum Associate Curator, Military Vehicle Technology Foundation (MVTF), Portola Valley, California
GunTruck Studios
AMPS #1044
IPMS/USA #24551

#226
British Columbia, Canada
Joined: February 20, 2012
KitMaker: 1,909 posts
Armorama: 1,066 posts
Posted: Tuesday, April 23, 2013 - 10:08 AM UTC
[/quote]
Hi Rob,
I forgot to tell these were resin tracks which are glued with CA

[/quote]
Mat,
In that case I would make the opening at the sprocket so you have a little curve in the top and bottom with the last joint in the center of the sprocket.
Cheers Rob.
Anything without guns is a target!
27 completed campaigns and counting :)
Arkansas, United States
Joined: June 29, 2009
KitMaker: 11,610 posts
Armorama: 7,843 posts
Posted: Tuesday, April 23, 2013 - 10:22 AM UTC
Mat: I start with indi links by glueing them together, around the top of the sprocket. As Rob pointed out, you should have the last link at the mid point of the sprocket. I recommend you use plastic glue, not ca glue. Plastic glue lets you bend the links, after it is applied.
Ideals are peaceful. History is violent.
Limburg, Netherlands
Joined: November 18, 2003
KitMaker: 894 posts
Armorama: 643 posts
Posted: Wednesday, April 24, 2013 - 03:53 AM UTC
Quoted Text
Mat: I start with indi links by glueing them together, around the top of the sprocket. As Rob pointed out, you should have the last link at the mid point of the sprocket. I recommend you use plastic glue, not ca glue. Plastic glue lets you bend the links, after it is applied.
I will give it a try, although I am forced to use CA since the tracks are resin..
"We don't know anything about their race, history, or culture, but one thing's for sure. They stand for everything we stand against."
Zapp Brannigan from the cartoon series "Futurama"
Nevada, United States
Joined: August 27, 2008
KitMaker: 16 posts
Armorama: 15 posts
Posted: Wednesday, June 19, 2013 - 08:38 PM UTC
I have yet another method for tracks.
1. Prime with Citadel Kaos black.
2. Spray with Tamiya mix of 90% Hull Red and 10% Flat Black.
3. Apply light coat of AK Interactive Track Wash.
4. Apply spotting wash of Mig Standard Rust Wash.
5. Apply vary light washes of Mig Light Rust.
6. Let dry !!!!
7. Dry Brush with Tamiya Gun Metal and then very light brush on teeth with Tamiya Chrome Silver.
If the track has rubber pads paint them with Vallejo Rubber black and dry brush them with dark grey.
This will give you a dirty slightly rusted used track look that is more dirty and rusted then a very rusted look. But id you want more rust dust with the Mig Pigments Standard and fresh rust colors too!
Here is a picture of a real track to use as guide if you like.
Idaho, United States
Joined: March 09, 2010
KitMaker: 557 posts
Armorama: 217 posts
Posted: Thursday, October 10, 2013 - 03:43 PM UTC
GunTruck,I use your method exclusively with good results and the paint fumes are much easier to live with when painting indoors, I have a small paint booth, thanks so much.Here is my first effort...not too bad?
http://i604.photobucket.com/albums/tt127/davechavez7/armor/DSCN1587.jpgWar is cruelty.There is no use trying to reform it.The crueler it is, the sooner it will be over.
England - North West, United Kingdom
Joined: April 20, 2004
KitMaker: 2,439 posts
Armorama: 1,980 posts
Posted: Friday, October 11, 2013 - 02:17 AM UTC
Don't know why people use rusty colours on their tracks,tank tracks when in use hardly get rusty unless there sitting there for months on end.Just use earth tones and mud colours.


Never in the field of scale modelling was so much owed by so many to so few.
Idaho, United States
Joined: March 09, 2010
KitMaker: 557 posts
Armorama: 217 posts
Posted: Friday, October 11, 2013 - 05:21 PM UTC
what color would be under the earth tone and mud colors? shiny steel, burnt iron, black?
War is cruelty.There is no use trying to reform it.The crueler it is, the sooner it will be over.
Idaho, United States
Joined: March 09, 2010
KitMaker: 557 posts
Armorama: 217 posts
Posted: Friday, October 11, 2013 - 06:39 PM UTC
tigeriv, I think I see your logic

and your tracks do look great.could you share your method in regards to track painting technique?
War is cruelty.There is no use trying to reform it.The crueler it is, the sooner it will be over.
Virginia, United States
Joined: December 27, 2009
KitMaker: 29 posts
Armorama: 27 posts
Posted: Saturday, October 12, 2013 - 01:45 AM UTC
Quoted Text
what color would be under the earth tone and mud colors? shiny steel, burnt iron, black?
Correct. A rolling stone gathers no moss, and a rolling tread gathers no rust. Only in places where there is no metal to metal or metal to earth/rock/sand/gravel contract could rust possibly accumulate...unless it's a museum piece or stationary for some time. Think of a bicycle chain. It won't rust if used, except where there is no rubbing.
The point here is apply common sense.
"If we lose the war in the air, we lose the war, and we lose it quickly."
--Field Marshal Bernard Montgomery
England - North West, United Kingdom
Joined: April 20, 2004
KitMaker: 2,439 posts
Armorama: 1,980 posts
Posted: Saturday, October 12, 2013 - 02:58 AM UTC
Quoted Text
Quoted Text
what color would be under the earth tone and mud colors? shiny steel, burnt iron, black?
Correct. A rolling stone gathers no moss, and a rolling tread gathers no rust. Only in places where there is no metal to metal or metal to earth/rock/sand/gravel contract could rust possibly accumulate...unless it's a museum piece or stationary for some time. Think of a bicycle chain. It won't rust if used, except where there is no rubbing.
The point here is apply common sense.
Glad someone agrees.

Never in the field of scale modelling was so much owed by so many to so few.
Virginia, United States
Joined: December 27, 2009
KitMaker: 29 posts
Armorama: 27 posts
Posted: Saturday, October 12, 2013 - 03:52 AM UTC
The only possible exception I can think of is in a dusty environment like Afghanistan. There the "PigPen" (from Charlie Brown) dust cloud follow the heavy vehicles, and can settle when the vehicle stops. Even then, though, it is bright shiny metal under the dust, or mud.
"If we lose the war in the air, we lose the war, and we lose it quickly."
--Field Marshal Bernard Montgomery
Idaho, United States
Joined: March 09, 2010
KitMaker: 557 posts
Armorama: 217 posts
Posted: Saturday, October 12, 2013 - 10:18 AM UTC
I will go with a steel color...no rust and some light weathering on the Emil Sturer I have started,thanks for the advice

War is cruelty.There is no use trying to reform it.The crueler it is, the sooner it will be over.
Idaho, United States
Joined: September 03, 2003
KitMaker: 448 posts
Armorama: 245 posts
Posted: Saturday, October 12, 2013 - 04:29 PM UTC

[/url][/img]
Here is an example from Toadman's Tank Pictures of a JGSDF Type 74 with bare tracks and no dirt to confuse the situation.
The latest survey shows that
three out of four people make
up 75% of the population.
"Entitlement kicks gratitude right out the back door."
Idaho, United States
Joined: March 09, 2010
KitMaker: 557 posts
Armorama: 217 posts
Posted: Saturday, November 30, 2013 - 10:38 AM UTC
I am using the famous GunTruck method on my emil tracks

I gave up on the trumpeter workable tracks.Nice to make use of the band tracks that came stock.
War is cruelty.There is no use trying to reform it.The crueler it is, the sooner it will be over.
Ontario, Canada
Joined: March 25, 2010
KitMaker: 514 posts
Armorama: 261 posts
Posted: Thursday, February 06, 2014 - 01:51 PM UTC
I have just stumbled upon this thread. I was having success painting tracks though was wondering if there were different colour procedures. Thanks for reassuring me upon my procedure and how to improve it.

United States
Joined: May 10, 2014
KitMaker: 1 posts
Armorama: 1 posts
Posted: Friday, May 09, 2014 - 11:49 PM UTC
Fabio,
Your painted tracks look amazing. I'm new to modeling and I can't understand how you were able to get such a prefect line between the rusty metal portions and the rubberized pads when you painted the black.
I'm trying to paint what looks like the very same tracks (M1 Abrams) from an old Tamiya kit and having a terrible time getting them to look like yours.
Please advise.
United States
Joined: June 18, 2012
KitMaker: 459 posts
Armorama: 195 posts
Posted: Tuesday, November 18, 2014 - 05:45 AM UTC
Quoted Text
Fabio,
Your painted tracks look amazing. I'm new to modeling and I can't understand how you were able to get such a prefect line between the rusty metal portions and the rubberized pads when you painted the black.
I'm trying to paint what looks like the very same tracks (M1 Abrams) from an old Tamiya kit and having a terrible time getting them to look like yours.
Please advise.
I would like to know this as well
United States
Joined: November 28, 2012
KitMaker: 319 posts
Armorama: 285 posts
Posted: Tuesday, November 18, 2014 - 06:23 AM UTC
One thing to remember sometimes the location of where your tank is operating can determine what type of paint that goes on the tracks. i.e. Desert enviornment vs. Northern Europe. I live in the Southwestern Desert of the USA and that will make the tracks perhaps have less rust, more metal wearing etc. Something to think about.
New Zealand
Joined: May 13, 2013
KitMaker: 165 posts
Armorama: 135 posts
Posted: Wednesday, January 21, 2015 - 03:28 PM UTC
For people who use acrylics to paint tracks, don't you find the paint cracking and flaking off when you bend the track?
Tennessee, United States
Joined: April 04, 2002
KitMaker: 1,290 posts
Armorama: 658 posts
Posted: Friday, February 06, 2015 - 06:48 AM UTC
Quoted Text
One thing to remember sometimes the location of where your tank is operating can determine what type of paint that goes on the tracks. i.e. Desert enviornment vs. Northern Europe. I live in the Southwestern Desert of the USA and that will make the tracks perhaps have less rust, more metal wearing etc. Something to think about.
Yes and No, the only difference is how quickly rust starts to set in after return to motor park or assembly area. I operated tracked fighting vehicles in Kentucky, Louisiana, Mojave Desert, New Mexico/Texas and Germany and had daily access to the 4th ID motor pools on Baghdad. After a day off roads in any of these areas all the rust is scrubbed off metal components of the track. In Louisiana and Germany, the rust would start returning as soon as we washed the vehicles. In drier climes, the tracks would slowly turn a dark rusty brown, skipping the orange stage you see in wetter areas.
I paint the metal parts with steel colored paint, and polish the center guides and end connectors with graphite. Sometimes I may have dark brown "rust" settled in recesses on surfaces that do not have direct ground contact.
After all that then I may add dust, dirt and mud.
All that being said, the basics of painting different types of track material listed above are valid and excellent information.


Ontario, Canada
Joined: March 06, 2010
KitMaker: 14 posts
Armorama: 12 posts
Posted: Wednesday, June 24, 2015 - 02:31 AM UTC
Lots of great info. I recently bought a set of AFV Club M113 tracks. I decided to try something different so I washed the tracks, dried them, sprayed(can) Tamiya surface primer, let them dry for a couple days, then airbrushed Alclad Steel, let it dry for a couple days, then proceeded to apply Tamiya rubber to the tracks. Well let the flaking begin. It was a mess. Anyone out there have an idea what went wrong? I suppose it was the primer that the Alclad was incompatible with. The tracks has been scrubbed clean and now it is where to begin. Anyone have some helpful hints. It is the first time using these tracks. By the way, the Academy tracks are pitiful and not long enough which is why I bought the replacements in the first place. Thanks in advance for any helpful hints Jim
British Columbia, Canada
Joined: October 16, 2006
KitMaker: 480 posts
Armorama: 399 posts
Posted: Wednesday, June 24, 2015 - 04:35 AM UTC
Jim are the tracks vinyl or palstic indie? I would try painting your base coat with a solvent based thinner like tamiya laquer to bite the track a bit and skip the primer, just one more step that could go sideways. That said Ive never used AFV Vinyl tracks, just a thought.
Eric.
Ontario, Canada
Joined: March 06, 2010
KitMaker: 14 posts
Armorama: 12 posts
Posted: Wednesday, June 24, 2015 - 06:53 AM UTC
I would suspect the same type material the Tamiya tracks are now made from. Still drying out from the brushing

but the Tamiya lacquer should work. I generally use a combination of enamel and acrylic paints, Vallejo, Tamiya, Model Master, and Humbrol and sometimes weather with white spirits and oils. Thanks for the info Happy Kit Bashing !!





 [/url][/img]

