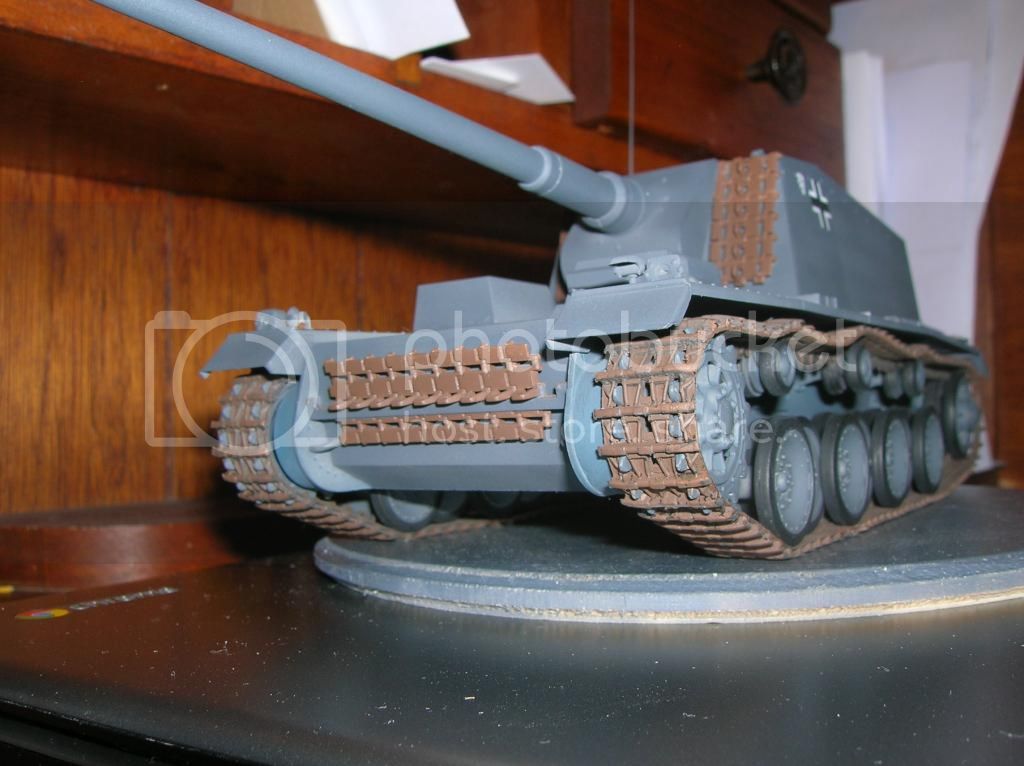
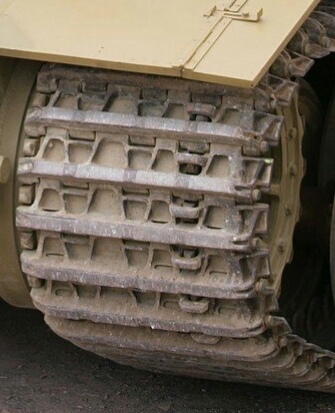
My approach is somewhat different. I mostly build armour in scale 1:76, 1:72 or 1:48
I paint the tracks a flat dark bluish gray. (Similar to dull steel, but with no metallic pigments.) I give this a black wash to bring out details and then while the wash is still wet a sprinkle of reddish and earthen chalk-pigments. Once the wash is dry i give the trachs hard brushing. Lastly I finish it of with a light drybrushing with a mix of steel and gunmetal metallics.
If the track has rubber parts, the last session is done with black cut with a grey colour in stead.
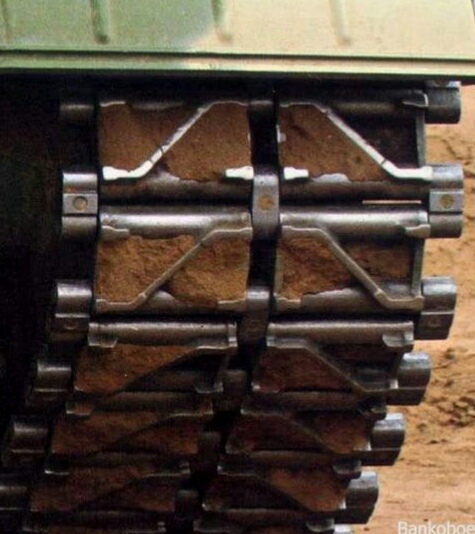
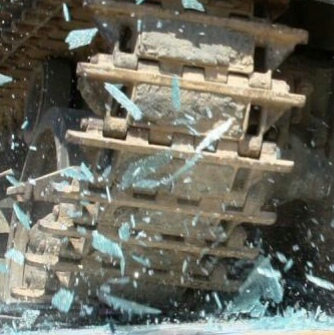
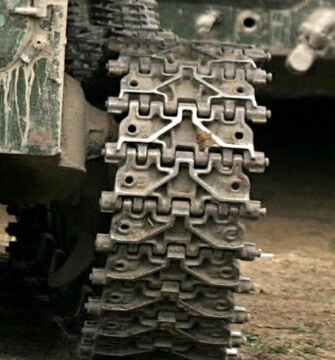
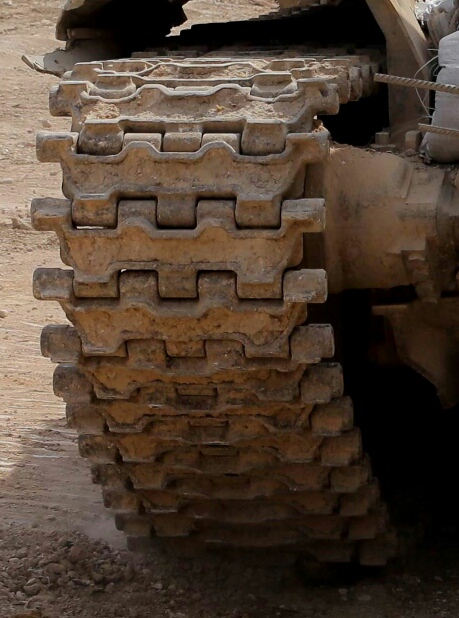
If you don't have readily access to armour, heavy tracked engineering equipment are a good substitute to study. (Just looking at pictures isn't quite the same.)
I include two pictures.
The fist is a Köningstiger in scale 1:76
Second a KV-1 in 1:48 scale
AFV Painting & Weathering
Answers to questions about the right paint scheme or tips for the right effect.
Hosted by Darren Baker, Matthew Toms
How to paint tank treads?
SuperSandaas
Sør-Trøndelag, Norway
Joined: October 23, 2012
KitMaker: 189 posts
Armorama: 37 posts
Joined: October 23, 2012
KitMaker: 189 posts
Armorama: 37 posts
Posted: Saturday, October 03, 2015 - 07:08 PM UTC
OatmealSavage
Ontario, Canada
Joined: March 06, 2010
KitMaker: 14 posts
Armorama: 12 posts
Joined: March 06, 2010
KitMaker: 14 posts
Armorama: 12 posts
Posted: Sunday, October 25, 2015 - 06:12 AM UTC
Well, the tracks were washed, scrubbed, and dried for the summer. Used Tamiya lacquer thinner with the Tamiya paint, cured for a week, and then some Gunze rubber/tire black on the track pads, and when I attempted to fit the damn things, flake city. Then when I tried to glue them using superglue, guess what did not stick!! Since this is simply a shelf sitter I am almost finished with the damn things and have a NATO one in the stash to gnash my teeth over, What are these made from? I get really frustrated with the plastic individual AM tracks though I seem to have a bunch of them too
Posted: Wednesday, February 17, 2016 - 11:31 PM UTC
Jim,
If these are single piece "rubber band" track then they are generally made of a vinyl elastomeric plastic. And no glue or paint on the planet will actually stick to it. The underlying flex of the material means that when stretched or twisted, the paint is very likely to flake off.
The Dragon glue-able track is a variant of polystyrene and lacquer based paints will stick much better; but traditional track? No.
Cleaning and doing what you did gets the best results, but nothing gets perfect results, the material simply doesn't permit it.
Rigid indie or length and link track will hold paint best simply because the track links are rigid and don't flex under the paint.
Paul
doppelganger
Idaho, United States
Joined: March 09, 2010
KitMaker: 557 posts
Armorama: 217 posts
Joined: March 09, 2010
KitMaker: 557 posts
Armorama: 217 posts
Posted: Sunday, May 01, 2016 - 12:32 AM UTC
Quoted Text
You had no trouble at all with the paint chipping off when handling the track for installation? what type of paint do you use? I am as frustrated as many in regards too rubber band tracks. I am considering using individual tracks however they are a pain to assemble. I have two models with painted rubber tracks, they look acceptable however it was impossible to prevent some chipping even with the most careful handling. Thanks. My approach is somewhat different. I mostly build armour in scale 1:76, 1:72 or 1:48
I paint the tracks a flat dark bluish gray. (Similar to dull steel, but with no metallic pigments.) I give this a black wash to bring out details and then while the wash is still wet a sprinkle of reddish and earthen chalk-pigments. Once the wash is dry i give the trachs hard brushing. Lastly I finish it of with a light drybrushing with a mix of steel and gunmetal metallics.
If the track has rubber parts, the last session is done with black cut with a grey colour in stead.
If you don't have readily access to armour, heavy tracked engineering equipment are a good substitute to study. (Just looking at pictures isn't quite the same.)
I include two pictures.
The fist is a Köningstiger in scale 1:76
Second a KV-1 in 1:48 scale
varanusk
Managing Editor
Santa Cruz de Tenerife, Spain / España
Joined: July 04, 2013
KitMaker: 1,288 posts
Armorama: 942 posts
Joined: July 04, 2013
KitMaker: 1,288 posts
Armorama: 942 posts
Posted: Sunday, May 01, 2016 - 01:18 AM UTC
David, (plastic) indy tracks are not that hard once you get used to them.
Use a slow curing glue (I like Revell Contacta), glue all links for a track run, wait five minutes or so and put it in place.
You may need to play a bit with the time, the trick is it has to be dry enough to stay together but still flexible to take the shape you need.
Give it a try!
Use a slow curing glue (I like Revell Contacta), glue all links for a track run, wait five minutes or so and put it in place.
You may need to play a bit with the time, the trick is it has to be dry enough to stay together but still flexible to take the shape you need.
Give it a try!
doppelganger
Idaho, United States
Joined: March 09, 2010
KitMaker: 557 posts
Armorama: 217 posts
Joined: March 09, 2010
KitMaker: 557 posts
Armorama: 217 posts
Posted: Sunday, May 01, 2016 - 03:48 AM UTC
Good information, I guess part of my problem is I am not familiar with proper technique. Thanks so much.
long_tom
Illinois, United States
Joined: March 18, 2006
KitMaker: 2,362 posts
Armorama: 2,005 posts
Joined: March 18, 2006
KitMaker: 2,362 posts
Armorama: 2,005 posts
Posted: Wednesday, October 25, 2017 - 12:04 AM UTC
Question: how do you manage to keep the paint on the rubber part of the tracks when you paint them? o you mask, or paint by hand?
retiredyank
Arkansas, United States
Joined: June 29, 2009
KitMaker: 11,610 posts
Armorama: 7,843 posts
Joined: June 29, 2009
KitMaker: 11,610 posts
Armorama: 7,843 posts
Posted: Tuesday, October 31, 2017 - 01:02 PM UTC
Quoted Text
Question: how do you manage to keep the paint on the rubber part of the tracks when you paint them? o you mask, or paint by hand?
I ,too, would like to know this.
Bravo1102
New Jersey, United States
Joined: December 08, 2003
KitMaker: 2,864 posts
Armorama: 2,497 posts
Joined: December 08, 2003
KitMaker: 2,864 posts
Armorama: 2,497 posts
Posted: Tuesday, October 31, 2017 - 03:19 PM UTC
Quoted Text
Quoted TextQuestion: how do you manage to keep the paint on the rubber part of the tracks when you paint them? o you mask, or paint by hand?
I ,too, would like to know this.
I do it by hand but then I am old fashioned and not very bright. I used to do metal track by airbrush, but since I don't airbrush at all anymore,I am sort of stuck with the paint brush.
I used to do vinyl track with Floquil Railway Lacquer and they did not chip. But some vinyl reacted badly like the Tamiya glueable and I know DS track would melt. Another good way is to use grey or black auto primer and enamel paints. Then Testors Dullcote. Since I also do soft plastic figures it's not impossible.
Tojo72
North Carolina, United States
Joined: June 06, 2006
KitMaker: 4,691 posts
Armorama: 3,509 posts
Joined: June 06, 2006
KitMaker: 4,691 posts
Armorama: 3,509 posts
Posted: Tuesday, October 31, 2017 - 03:39 PM UTC
For all metal tracks,I now use Tamiya XF-84 Dark Iron,AK-Track Wash,and some Mig pigments Track Brown,also whatever pigments I may br using on the lower hull and running gear.
long_tom
Illinois, United States
Joined: March 18, 2006
KitMaker: 2,362 posts
Armorama: 2,005 posts
Joined: March 18, 2006
KitMaker: 2,362 posts
Armorama: 2,005 posts
Posted: Friday, November 10, 2017 - 08:39 PM UTC
Ironically the kit tracks for the M41 look better in proportion than the aftermarket version! The latter had too thick track pads.
So hand painting for the rubber areas?
Posted: Friday, November 10, 2017 - 11:08 PM UTC
Thanks guys, I usually do wingy things, but I do have a couple of tanks in the stash that I'd like to get built.
Now if I can just figure out how to book mark this thread...
Posted: Saturday, November 11, 2017 - 02:51 AM UTC
At the top, follow it.
Cheers Rob.
Cheers Rob.
Das_Abteilung
United Kingdom
Joined: August 31, 2010
KitMaker: 365 posts
Armorama: 351 posts
Joined: August 31, 2010
KitMaker: 365 posts
Armorama: 351 posts
Posted: Tuesday, September 11, 2018 - 10:22 AM UTC
Guys, guys guys......
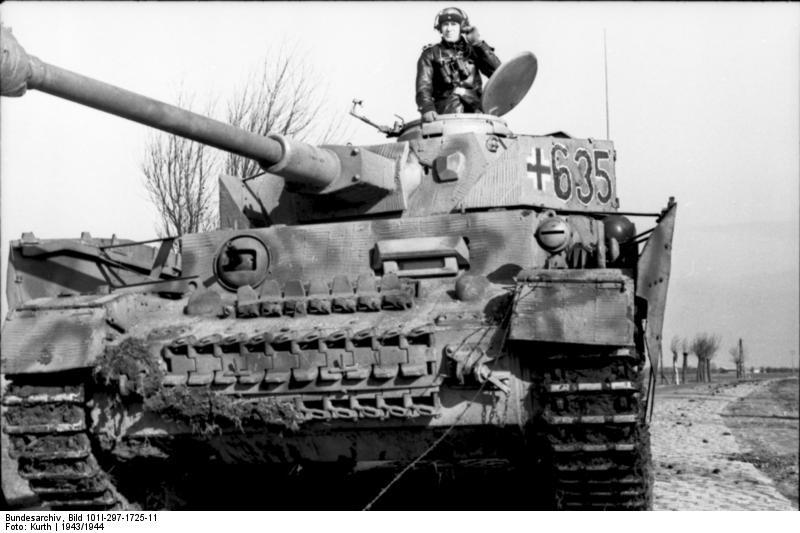
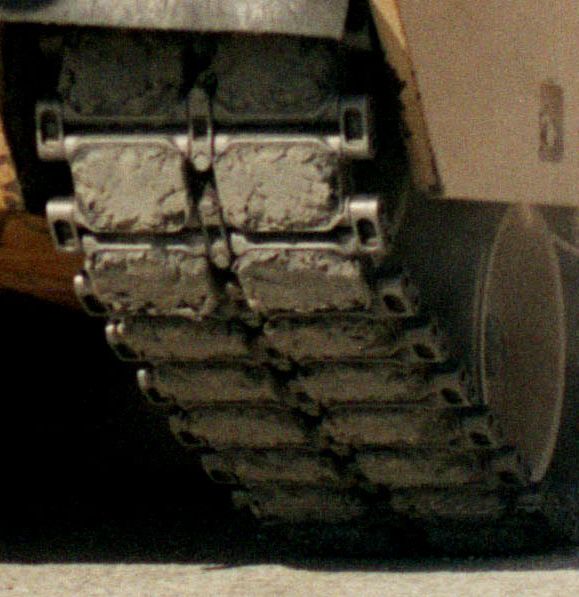
All-metal tracks of all nations from the late 1930's to the present day were and are made of high manganese steel. This DOES NOT RUST!!!! At least not in the conventional orange/brown/red sense. Its oxide is a mid grey-brown colour, leaning towards the brown. Ordinary steel tracks wore out in a few hundred miles, whereas adding manganese extended their lives tenfold.
And IT ISN'T SILVER OR GRAPHITE COLOUR and doesn't polish to shiny silver or graphite. Everyone has just historically assumed that worn steel is shiny silver. Manganese steel is a goldy-brown colour and that's the colour it polishes to. The German alloy was a darker brown colour than UK or US, perhaps indicating a lower manganese content (Germany was still getting manganese from Sweden via Denmark until 1945). Some pressed-plate types were face-hardened, which turned them a darkish brown. Again, neither silver nor graphite.
We've come to realise that worn paint areas on armour plate aren't silver, gunmetal or graphite because the metal is a dark metallic brown colour - darker for face-hardened than for RHA. At least the paint companies have got Chipping Colours right..... BTW - it doesn't readily or quickly rust either because of the high carbon content. Another bugbear of mine - in service tanks weathered like range wrecks.
Now we need to come to the same realisation about tracks.
Where the sheen catches the light in photos it can look silvery - but it isn't. So can we please stop putting steel/silver paint and graphite on our tracks. It isn't right. And as for white metal tracks, chemical blackening then sanding back the contact points - no, no, no. Did I say no?
Having said that, rubber-padded tracks post-WW2 seem to have reverted to using low or non-manganese steel. With the rubber pads taking the wear, the expensive manganese content isn't necessary. And they usually seem to be painted. So you do see orange-brown rust on the metal parts of M48 and M60 tracks, for example. But you don't see it on T-series or Merkavas, which still use high-manganese all-metal tracks. Those tracks which had rubber pads only for peacetime and which would be removed in wartime (T-64??), would still be high manganese.
All the Track Primers and Track Colours on the market are shades of dark brown, also very wrong. No-one does a decent manganese natural state or oxide match out of the pot.
I have contacted all of the major paint manufacturers to suggest that they do some proper research on track colours and come up with some appropriate paints, but none who replied expressed any interest.
Of course the predominant colour on most tracks will be whatever dust or dirt they're operating in. A mid grey-brown is as good a base color as any for all-metal tracks to represent the oxide. So far, the best colour I've found for highlighting the contact points, outside and inside faces, is a Vandyke Brown Metallic oil pastel. But I'm still looking
baldwin8
Quebec, Canada
Joined: January 23, 2009
KitMaker: 89 posts
Armorama: 74 posts
Joined: January 23, 2009
KitMaker: 89 posts
Armorama: 74 posts
Posted: Tuesday, September 11, 2018 - 11:40 AM UTC
Quoted Text
I have contacted all of the major paint manufacturers to suggest that they do some proper research on track colours and come up with some appropriate paints, but none who replied expressed any interest.
That would imply they made a mistake and modelers demanding refunds and business owners demanding free exchanges on stock. I doubt they will bother with your request, but you never know.
varanusk
Managing Editor
Santa Cruz de Tenerife, Spain / España
Joined: July 04, 2013
KitMaker: 1,288 posts
Armorama: 942 posts
Joined: July 04, 2013
KitMaker: 1,288 posts
Armorama: 942 posts
Posted: Wednesday, September 12, 2018 - 10:19 AM UTC
Quoted Text
And IT ISN'T SILVER OR GRAPHITE COLOUR and doesn't polish to shiny silver or graphite. Everyone has just historically assumed that worn steel is shiny silver. Manganese steel is a goldy-brown colour and that's the colour it polishes to. The German alloy was a darker brown colour than UK or US, perhaps indicating a lower manganese content
Sorry but I can not agree. Not based on my knowledge, which is scarce and surely inferior to yours, but on photos and videos:
For me it is hard to believe this is a shade of brown reflecting light:
Or this:
Clearer on wartime colour photos:
On a cloudy day:
And even on shadows:
And finally, assuming that The Tiger Ausf. B from Saumur has original tracks (which I would say so), they look bright polished steel even after a little use:
firstcircle
England - South East, United Kingdom
Joined: November 19, 2008
KitMaker: 2,249 posts
Armorama: 2,007 posts
Joined: November 19, 2008
KitMaker: 2,249 posts
Armorama: 2,007 posts
Posted: Wednesday, December 05, 2018 - 11:43 AM UTC
Agree that those contact points look quite shiny, but not too clear to me whether it is a steely / silvery shiny, or something a bit grey-brownier.
I thought it might be interesting to look at more photos of various tracks, however to really see the colours clearly, you need favourable lighting, high resolution and colour (obviously), and I also only picked photos of tracks on vehicles that were clearly in use (not static exhibits) and that weren't covered in too much mud etc.
This is what I found so far:
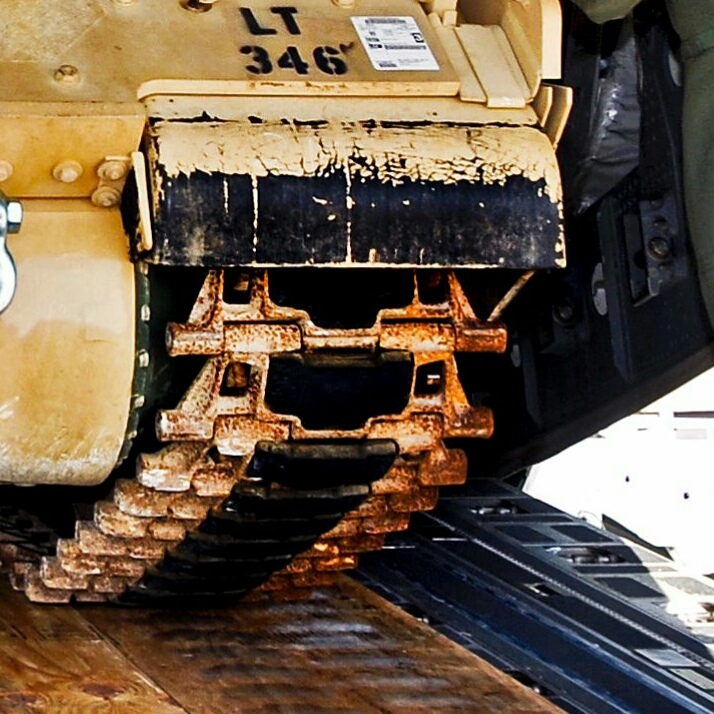
M1A1 - shiny grey highlights?
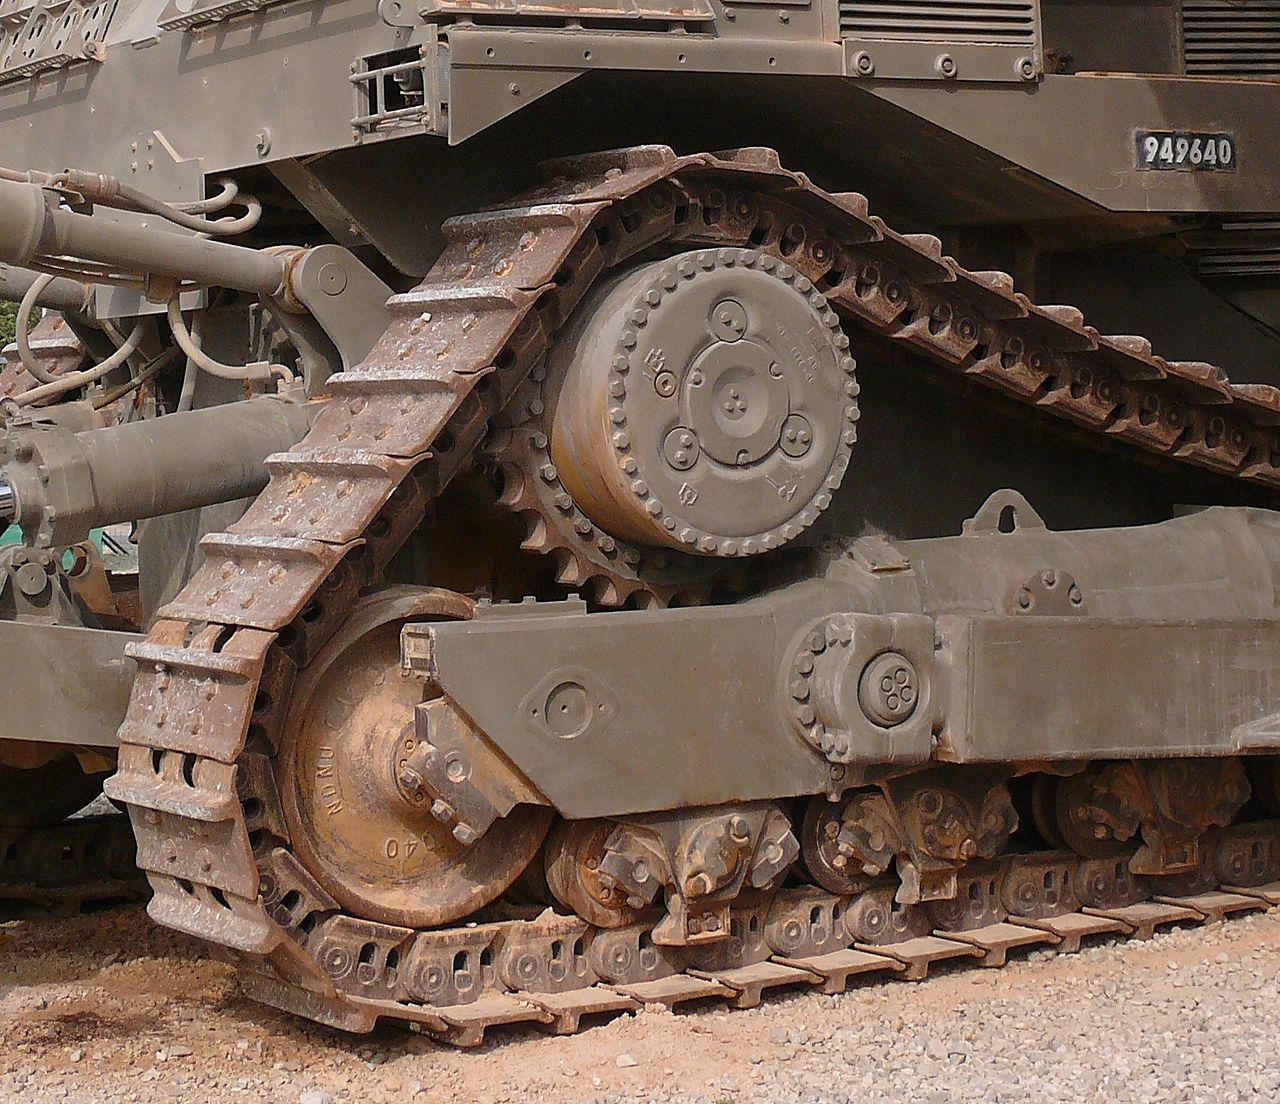
D9 - quite rusty looking, maybe not that in use
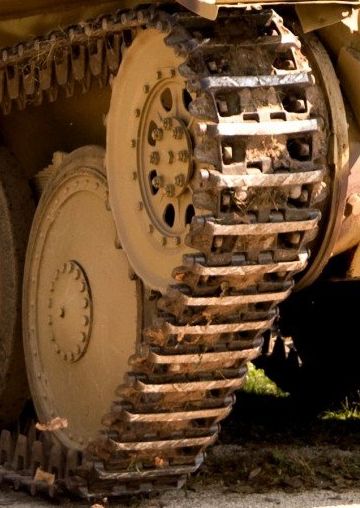
Hetzer
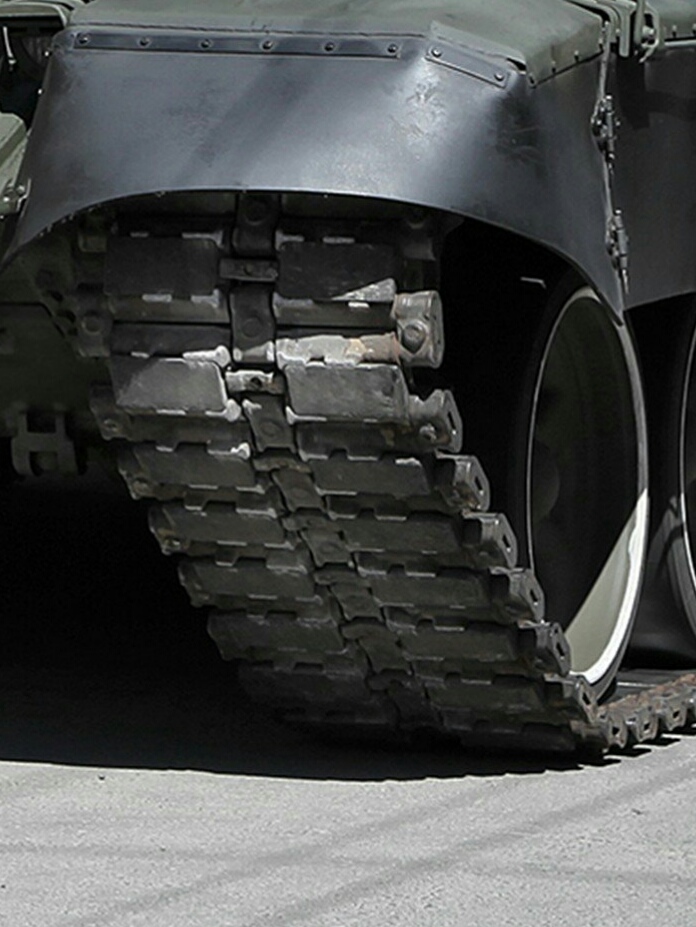
T-72 with track pads, parade condition:
Bradley:
ZTZ-99A:
Chieftain:
BMP (or something):
T-72 in Syria:
Tiger (Bovington's)
JastrebJ21
Namur, Belgium
Joined: March 19, 2019
KitMaker: 6 posts
Armorama: 3 posts
Joined: March 19, 2019
KitMaker: 6 posts
Armorama: 3 posts
Posted: Tuesday, March 26, 2019 - 03:36 AM UTC
In other words, we're once again back to the first step of model making: finding inspiration pics and following them that's when I feel fortunate to do models of recent real life subjects: can you imagine the suffering of those who do ancient ships or mecha?
woltersk
Utah, United States
Joined: May 27, 2003
KitMaker: 1,026 posts
Armorama: 654 posts
Joined: May 27, 2003
KitMaker: 1,026 posts
Armorama: 654 posts
Posted: Sunday, May 05, 2019 - 02:32 AM UTC
Hello Everyone,
I haven’t posted anything in while, mostly due to my not having worked on a proper kit of any subject in a few years. What I have been doing, scale model-wise, is working on Friulmodel tracks to replace the kit originals on a few previously completed AFVs.
I’m posting in this thread since this entry covers a few topics already mentioned here: Rust vs dirt, and bare metal contact points.
I’ve developed a somewhat simple technique, that I call the ‘Calico Method’, for painting metal tracks. After trying and failing with homebrewed chemical oxidizers (I’m too cheap and lazy to try to get the profession stuff available on the market) and traditional weathering techniques, I reverted back to my trusty artist’s oils and chalks to obtain the same effects.
Prep each track run in the usual way:
1. Remove the flash and/or mold lines from each track link.
2. Drill out the connecting pin holes on each track link.
3. Clean all the track links by gently scrubbing them in a bath of liquid soap and water.
4. Allow all the track links to thoroughly dry.
5. Cut the wire to ‘pin’ length.
6. Assemble the track links into track runs by connecting the proper number of links together with the wire ‘pins.’ Assemble any remaining tread links into a number of spare track runs.
7. Gluing the pins: Optional. On my first set I used a drop of CA glue at the end of each pin to hold it in place. By the second set of tracks I built I realized that the tension and friction between the tracks and the wire lengths is enough to hold the wire ‘pins’ in place, without having that annoying blob of glue at the end of each pin that may require cleanup and may also resist paint.
Use oils to mimic the steel color obtained by the oxidizing chemicals:
1. Place a puddle of black oil paint on a palette and add a few dollops of titanium white oil paint, and mix until a desired dark gray hue is obtained. NOTE: It needn’t be a metallic color since the bare metal will show through at the completion of Step 3.
2. Liberally apply the gray color as a sludge wash across both the tops and bottoms of the track length.
3. Remove the excess wash by dabbing it with paper towels and cotton swabs. Be sure to also articulate each pivot point and wipe in-between to ensure there is not a thick buildup of the wash that may be visible when spooled around a sprocket or idler wheel.
4. Leave the resultant ‘steel’ tracks to dry for the better part of a week.
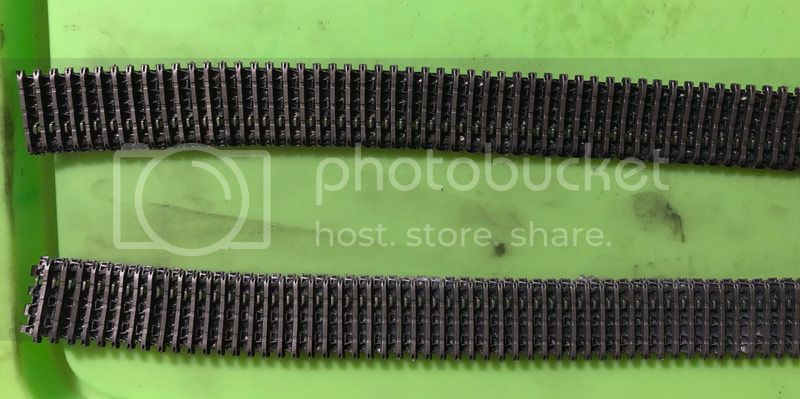
Use oil chalks to recreate the slight rust and dirt/dust/dried mud of either a well-maintained vehicle or one operating in an arid/desert zone:
1. Using a sharp blade, shave a range of colors of oil chalk stick colors into mounds of loose chalk on a palette. These are the colors I’ve been using:
a. Off-White
b. Desert or Dingy Yellow
c. Light Brown
d. Dark Brown
e. Black
2. Apply a coat of the appropriate mixing agent/thinner for the chalk brand and type onto each length of track. With the brand I have, tap water works just fine.
3. Apply the colors by dabbing the loose chalk onto the treads with a bristle brush in a loose checkerboard pattern across the top and bottom of each track run, hence the ‘Calico Method’. This is similar to Georg Eyerman’s technique:
https://armorama.kitmaker.net/features/7385
NOTE: Dabbing loose chalk onto the liquid on the track run applies a thinner layer of pigment than mixing each chalk color into a liquid and then dabbing it onto the treads. Doing it this way allows more of the ‘steel’ color to show through.
4. Blend the checkerboard dabs together loosely, to resemble the colors on the pelt of a calico cat.
5. Once dry, remove the excess chalk using a large, bristle brush.
6. Rub the pigment off the track guide horns and contact points with a dry cotton swab. (The cotton swabs thath have a combination pointy end and paddle shaped end found in the makeup section of large department stores work well.) This leaves the metal semi-bare, with a hint of dirt and grime, and not bright & shiny as sandpaper or a file does.
7. Finally, seal the paint by applying a coat of clear matte to each side of each tread run.
This method isn’t for everyone, and is probably not appropriate nor accurate for depicting vehicles that operate in muddy terrain. However, if you believe it may suite your needs and you wish to try it, please first attempt it on a short, spare run of AM indy-link metal tracks.
Keith
I haven’t posted anything in while, mostly due to my not having worked on a proper kit of any subject in a few years. What I have been doing, scale model-wise, is working on Friulmodel tracks to replace the kit originals on a few previously completed AFVs.
I’m posting in this thread since this entry covers a few topics already mentioned here: Rust vs dirt, and bare metal contact points.
I’ve developed a somewhat simple technique, that I call the ‘Calico Method’, for painting metal tracks. After trying and failing with homebrewed chemical oxidizers (I’m too cheap and lazy to try to get the profession stuff available on the market) and traditional weathering techniques, I reverted back to my trusty artist’s oils and chalks to obtain the same effects.
Prep each track run in the usual way:
1. Remove the flash and/or mold lines from each track link.
2. Drill out the connecting pin holes on each track link.
3. Clean all the track links by gently scrubbing them in a bath of liquid soap and water.
4. Allow all the track links to thoroughly dry.
5. Cut the wire to ‘pin’ length.
6. Assemble the track links into track runs by connecting the proper number of links together with the wire ‘pins.’ Assemble any remaining tread links into a number of spare track runs.
7. Gluing the pins: Optional. On my first set I used a drop of CA glue at the end of each pin to hold it in place. By the second set of tracks I built I realized that the tension and friction between the tracks and the wire lengths is enough to hold the wire ‘pins’ in place, without having that annoying blob of glue at the end of each pin that may require cleanup and may also resist paint.
Use oils to mimic the steel color obtained by the oxidizing chemicals:
1. Place a puddle of black oil paint on a palette and add a few dollops of titanium white oil paint, and mix until a desired dark gray hue is obtained. NOTE: It needn’t be a metallic color since the bare metal will show through at the completion of Step 3.
2. Liberally apply the gray color as a sludge wash across both the tops and bottoms of the track length.
3. Remove the excess wash by dabbing it with paper towels and cotton swabs. Be sure to also articulate each pivot point and wipe in-between to ensure there is not a thick buildup of the wash that may be visible when spooled around a sprocket or idler wheel.
4. Leave the resultant ‘steel’ tracks to dry for the better part of a week.
Use oil chalks to recreate the slight rust and dirt/dust/dried mud of either a well-maintained vehicle or one operating in an arid/desert zone:
1. Using a sharp blade, shave a range of colors of oil chalk stick colors into mounds of loose chalk on a palette. These are the colors I’ve been using:
a. Off-White
b. Desert or Dingy Yellow
c. Light Brown
d. Dark Brown
e. Black
2. Apply a coat of the appropriate mixing agent/thinner for the chalk brand and type onto each length of track. With the brand I have, tap water works just fine.
3. Apply the colors by dabbing the loose chalk onto the treads with a bristle brush in a loose checkerboard pattern across the top and bottom of each track run, hence the ‘Calico Method’. This is similar to Georg Eyerman’s technique:
https://armorama.kitmaker.net/features/7385
NOTE: Dabbing loose chalk onto the liquid on the track run applies a thinner layer of pigment than mixing each chalk color into a liquid and then dabbing it onto the treads. Doing it this way allows more of the ‘steel’ color to show through.
4. Blend the checkerboard dabs together loosely, to resemble the colors on the pelt of a calico cat.
5. Once dry, remove the excess chalk using a large, bristle brush.
6. Rub the pigment off the track guide horns and contact points with a dry cotton swab. (The cotton swabs thath have a combination pointy end and paddle shaped end found in the makeup section of large department stores work well.) This leaves the metal semi-bare, with a hint of dirt and grime, and not bright & shiny as sandpaper or a file does.
7. Finally, seal the paint by applying a coat of clear matte to each side of each tread run.
This method isn’t for everyone, and is probably not appropriate nor accurate for depicting vehicles that operate in muddy terrain. However, if you believe it may suite your needs and you wish to try it, please first attempt it on a short, spare run of AM indy-link metal tracks.
Keith