

Excellent pics there Tomapaul!!
Please tell me, what are you using there for that yellow, putty (I think)?
Rob
Figures
Military figures of all shapes and sizes.
Military figures of all shapes and sizes.
Hosted by Darren Baker, Mario Matijasic
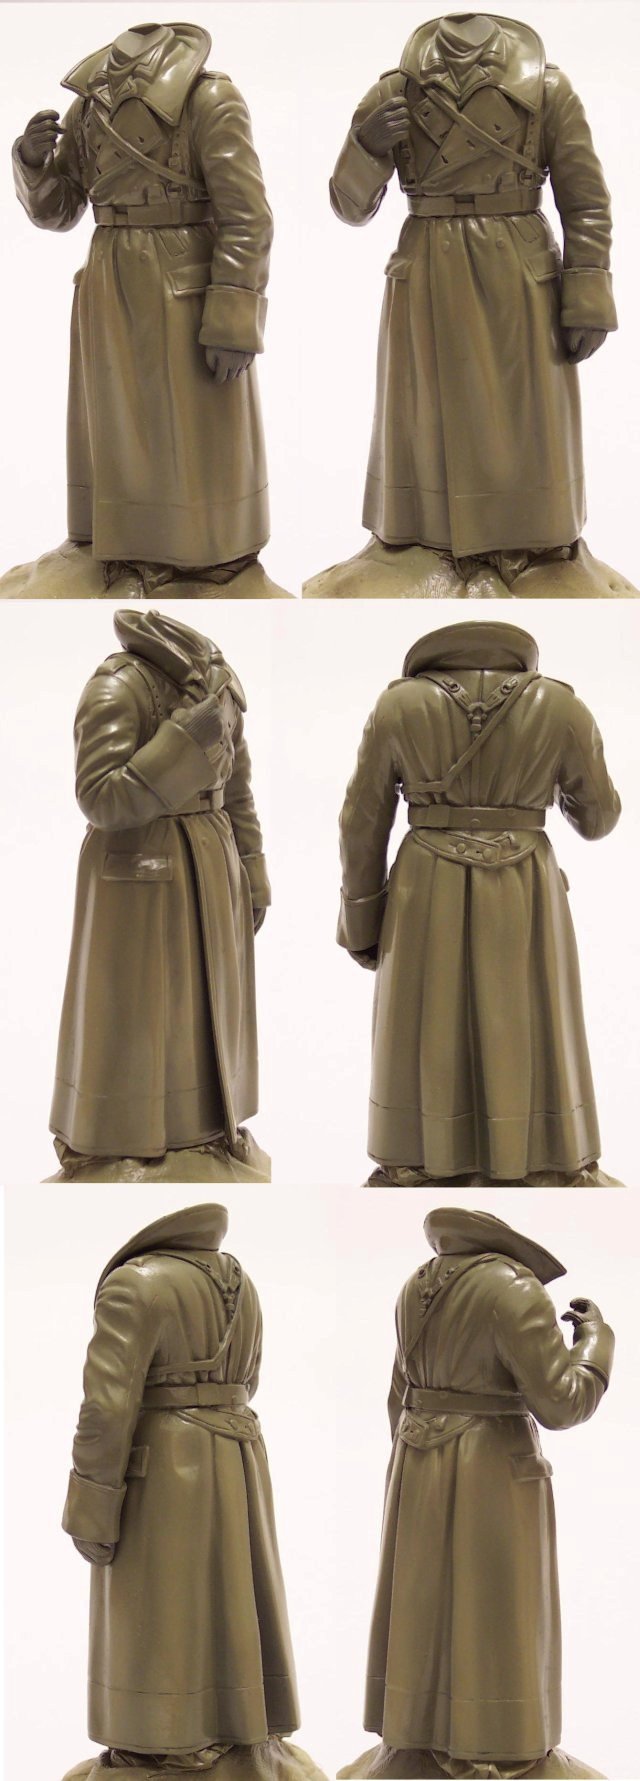
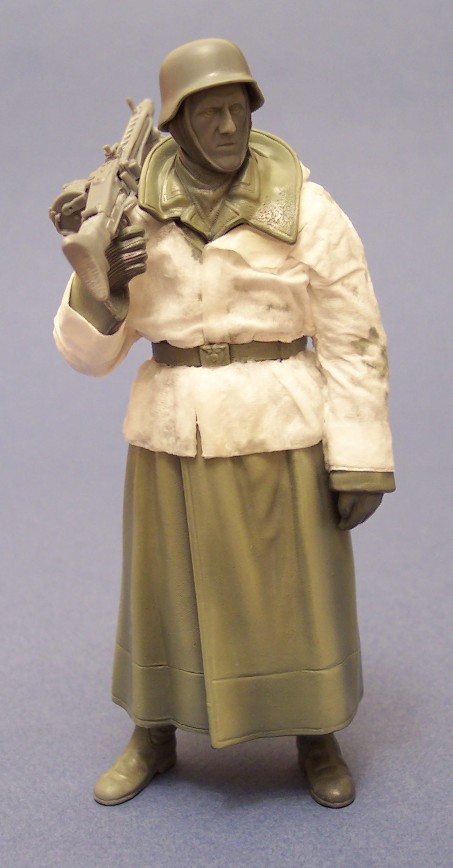
German Machine Gunner (tamiya 1/16)
GALILEO1

Joined: April 18, 2006
KitMaker: 1,794 posts
Armorama: 1,431 posts
Posted: Thursday, January 29, 2009 - 06:49 AM UTC
tomapaul

Joined: September 17, 2007
KitMaker: 425 posts
Armorama: 304 posts
Posted: Thursday, January 29, 2009 - 07:02 AM UTC
Quoted Text
Excellent pics there Tomapaul!!
Please tell me, what are you using there for that yellow, putty (I think)?
Rob

Thanks!
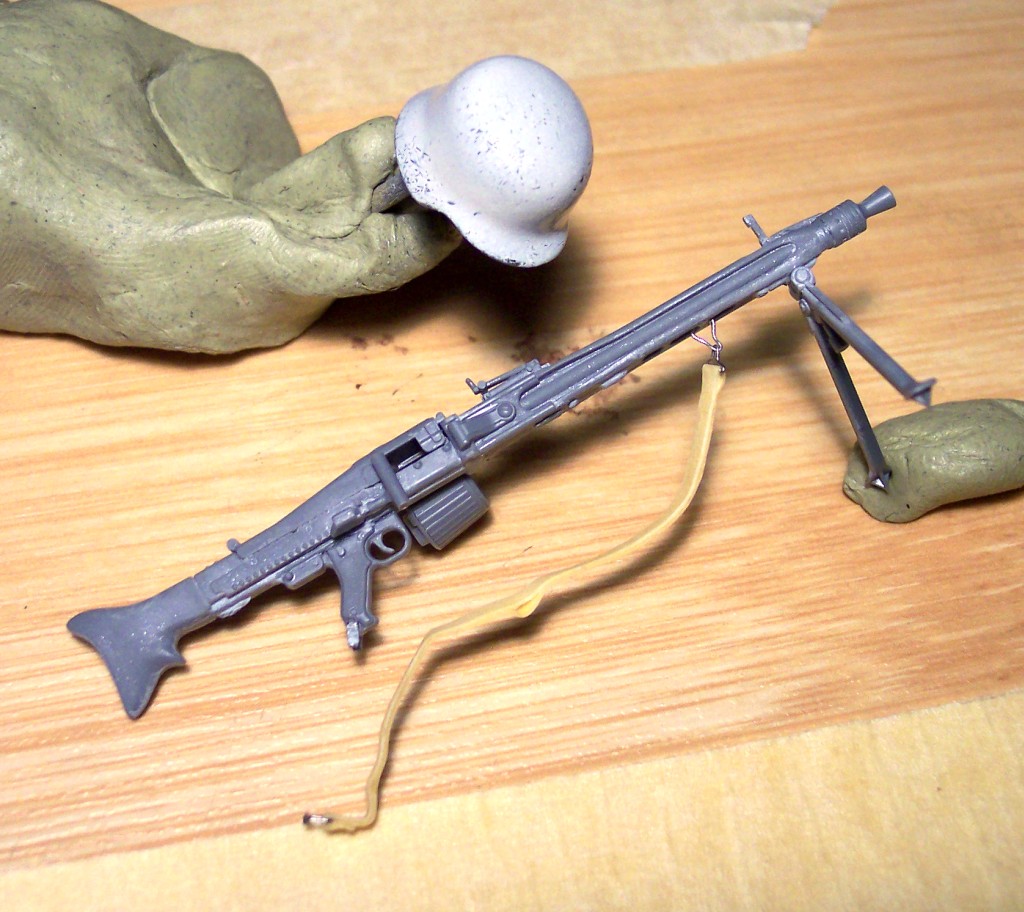
The yellow thing is patafix.I use it for painting (when I need camo paint scheme) and for sticking temporary pieces together.I think it is called bluetech in the model world...I might be wrog.
For putty I use diluted tamiya putty basic(the white stuff on boots and MG).

alanmac

Joined: February 25, 2007
KitMaker: 3,033 posts
Armorama: 2,953 posts
Posted: Thursday, January 29, 2009 - 07:57 AM UTC
Tarok

Joined: July 28, 2004
KitMaker: 10,889 posts
Armorama: 3,245 posts
Posted: Thursday, January 29, 2009 - 09:48 AM UTC
Hi Tomapaul,
About the MG's shoulder placement -the other reason I suggested trying to fit it closer to the collar is just because it sits better. It's just a observation from my own experiences of the kit
About the MG sling - I'm not suggesting you change the way the MG is carried. I think that would be a lengthy arm conversion. I'm just saying don't forget to add it to the MG (for completeness), just as I'm sure you'll drill out the end of the barrel
Rob,
We do appreciate Lamont's pics - just a bit of friendly debate
Rudi

CDK
Joined: September 24, 2006
KitMaker: 358 posts
Armorama: 339 posts
Posted: Thursday, January 29, 2009 - 10:46 AM UTC
Quoted Text
You know I just have to say that I don't understand why some of you sort of downplayed, and right down criticized, those great photos Lamont shared with us.
Geez, can we just all be thankful to have people who are actually willing to privide not circumstantial but factual evidence that certain things did indeed occurred?
Rob
Thank you Rob.

For the record, a couple of simple google image searches turned up about 15 other wartime photos as well. It doesn't appear to be that uncommon at all, especially in winter gear.
I would assume the thick clothing would probably act as padding between the MG and the shoulder making comfort (which I'm not sure was ever a priority in war) a moot point and unless I'm mistaken, that figure has a few layers of clothing on.
tomapaul
Joined: September 17, 2007
KitMaker: 425 posts
Armorama: 304 posts
Posted: Friday, January 30, 2009 - 04:35 AM UTC
Quoted Text
Hi Tomapaul,
About the MG's shoulder placement -the other reason I suggested trying to fit it closer to the collar is just because it sits better. It's just a observation from my own experiences of the kit
The MG sits very close to the collar(touches it).It could sit closer but the top part of the collar is in the way.There is not much I can do at this stage.
Quoted Text
About the MG sling - I'm not suggesting you change the way the MG is carried. I think that would be a lengthy arm conversion. I'm just saying don't forget to add it to the MG (for completeness), just as I'm sure you'll drill out the end of the barrel
I think I can do that...
The MG's hole muzzle is a MUST!!!
I painted it.

I'm trying to aim for the missing-lynx Robert Doepp's color.So sprayed a coat of tamiya geman grey.Then airbrushed some highlights (revell yellow+white+green).I used the last combination for a filter (but diluted it with thinner).So here it is:

It doesn't look so green when I look at it.
tomapaul
Joined: September 17, 2007
KitMaker: 425 posts
Armorama: 304 posts
Posted: Saturday, February 07, 2009 - 12:08 AM UTC
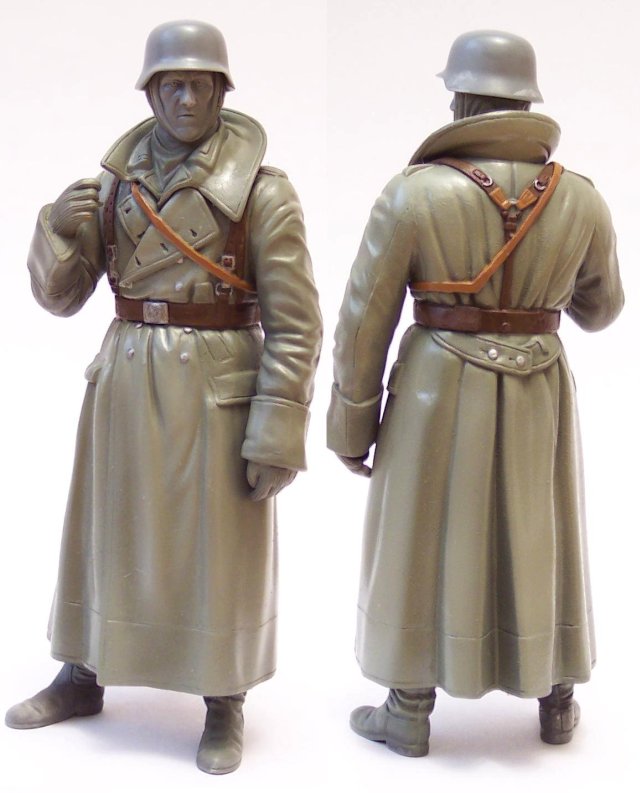
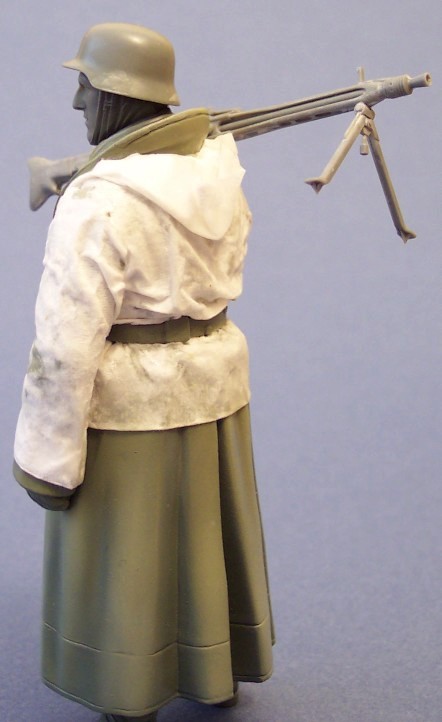
Something went bad  and I had to remove the paint and repaint it.I also changed the texture of the greatcoat to give it a rough look rather than the smoother original one.
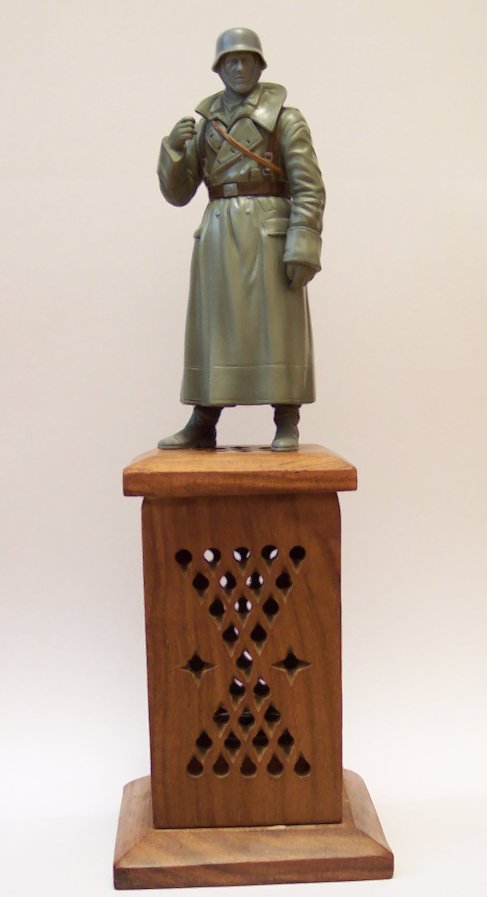
Also found a nice wood base to put it on.
After a little more work I'll go for the shadows and highlights.
and I had to remove the paint and repaint it.I also changed the texture of the greatcoat to give it a rough look rather than the smoother original one.Also found a nice wood base to put it on.
After a little more work I'll go for the shadows and highlights.
davsam28
Joined: July 19, 2006
KitMaker: 95 posts
Armorama: 92 posts
Posted: Sunday, February 08, 2009 - 01:12 PM UTC
i will be following this one close i got one from my LHS yesterday to do my first figure ....looks good so far thanks for sharing
tomapaul
Joined: September 17, 2007
KitMaker: 425 posts
Armorama: 304 posts
Posted: Sunday, February 08, 2009 - 10:57 PM UTC
Quoted Text
i will be following this one close i got one from my LHS yesterday to do my first figure ....looks good so far thanks for sharing
Thanks!
This is my first 1/16 figure too.
For the base color I used Tamiya XF-15.
tomapaul
Joined: September 17, 2007
KitMaker: 425 posts
Armorama: 304 posts
Posted: Friday, February 13, 2009 - 06:46 AM UTC
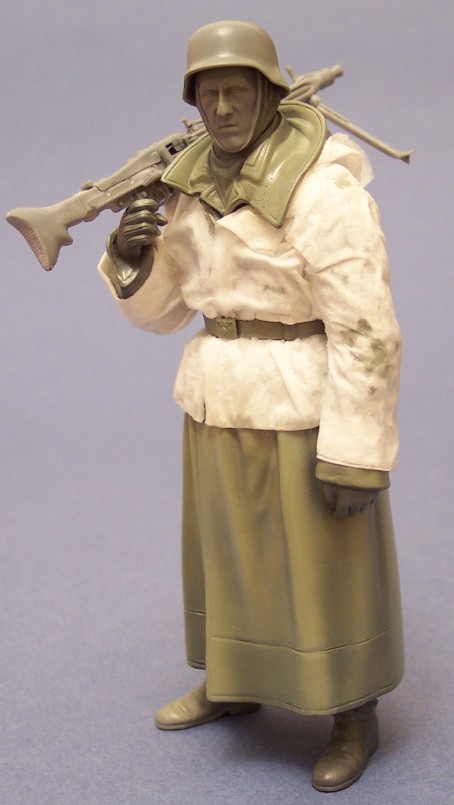
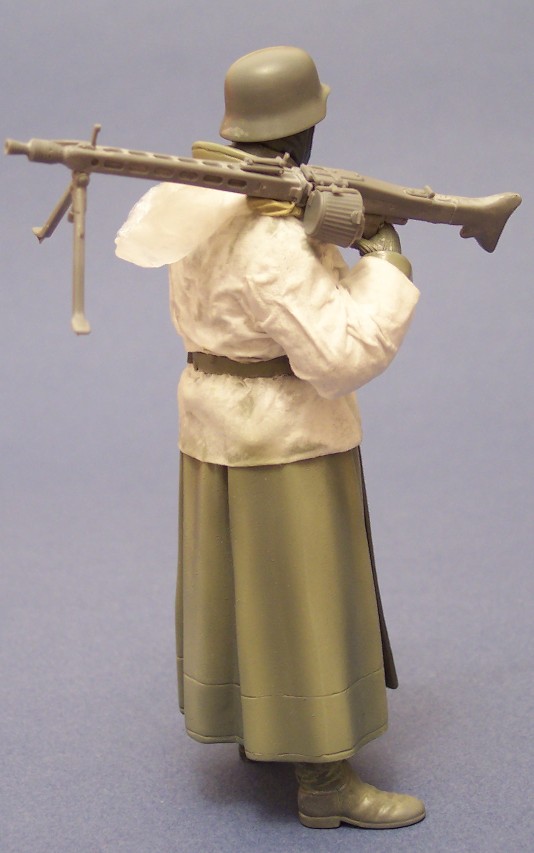
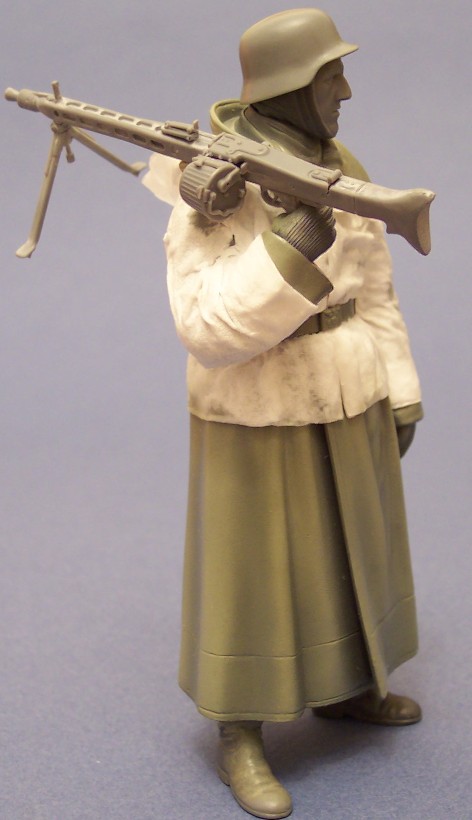
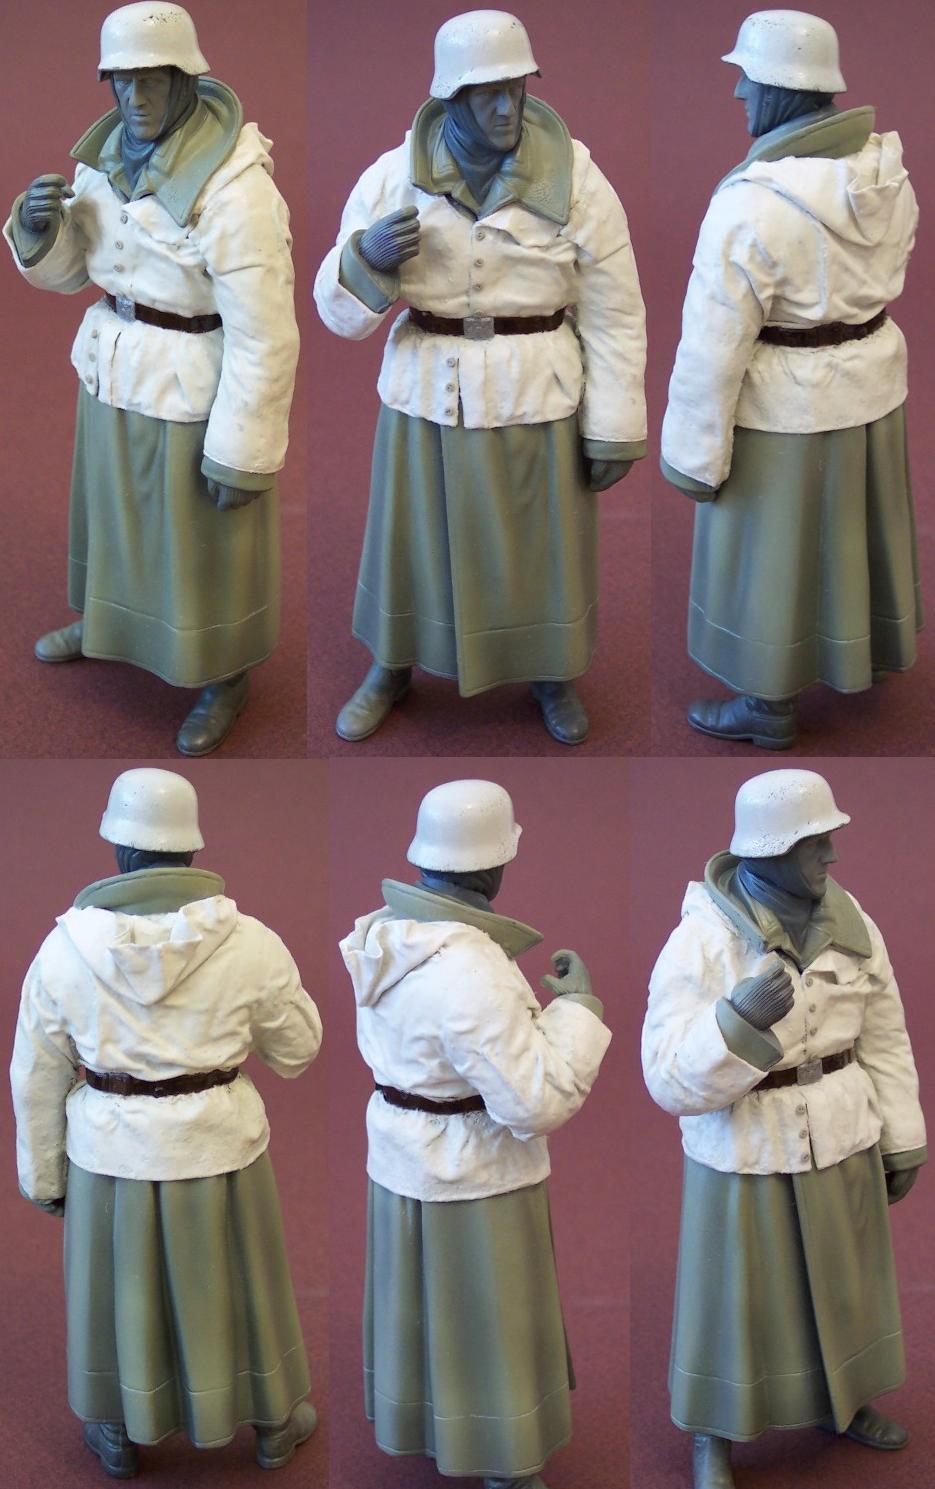
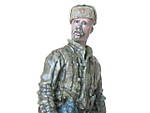
OK...So I didn't like the result for this paint job(the one you can see above) and decided to paint it again.This time I also decided to do a little more to make my tamiya figure pop out.So I scratched the white camouflage anorak.Now I have to paint it.And the MG42 sits closer to the neck now.I drilled the nozzle.

trackpads

Joined: December 17, 2008
KitMaker: 330 posts
Armorama: 284 posts

Posted: Friday, February 13, 2009 - 07:01 AM UTC
very nice looks great ,now it stands ot a right eye catcher i think.

tomapaul
Joined: September 17, 2007
KitMaker: 425 posts
Armorama: 304 posts
Posted: Friday, February 13, 2009 - 09:07 PM UTC
Quoted Text
very nice looks great ,now it stands ot a right eye catcher i think.
Thanks!
The anorak's hood was to big and unnatural so I made another one.

TuomasH

Joined: September 10, 2008
KitMaker: 470 posts
Armorama: 175 posts
Posted: Friday, February 13, 2009 - 10:17 PM UTC
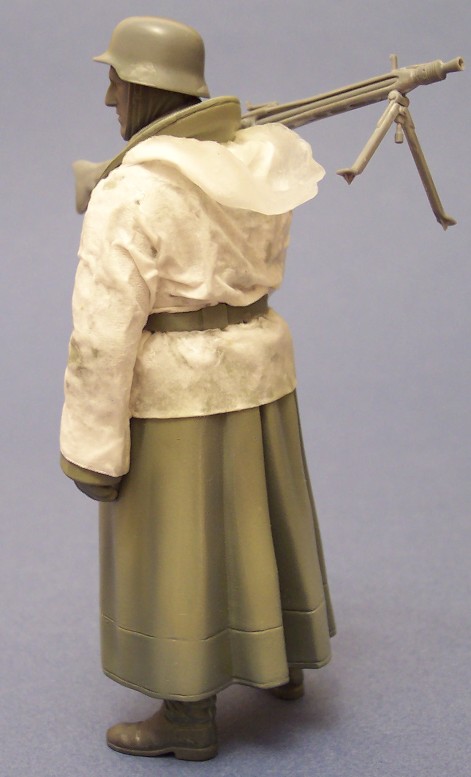
Whoa! How and from what material did you sculp that white anorak? Impressive looking one!
Tuomas
Tuomas
tomapaul
Joined: September 17, 2007
KitMaker: 425 posts
Armorama: 304 posts
Posted: Saturday, February 14, 2009 - 03:03 AM UTC
Quoted Text
Whoa! How and from what material did you sculp that white anorak? Impressive looking one!
Tuomas
 Much appreciated!
It's made out of tissue paper.
Made 7 pieces:
1xback
2xarms
2xfront side
1xbottom-side(the piece under the belt)
1xhood
-After this I soften them with water and carefully added them to my model.
-I used a nail scissor to adjust the size of the pieces(a really good and sharp one too).
-With a tooth pick I moved them as I liked.
-After all the moving part I used a hair dryer to .... dry them(1 or 2 minutes).
-Then I carefully applied superglue.The tissue paper hardens in 5-10 seconds to a very hard plastic like material...much harder than the models plastic.
My technique worked better for me than the tissue paper + water+ white glue or sculpt putty as my anorak has to be very thin.
tomapaul
Joined: September 17, 2007
KitMaker: 425 posts
Armorama: 304 posts
Posted: Tuesday, February 17, 2009 - 12:05 AM UTC
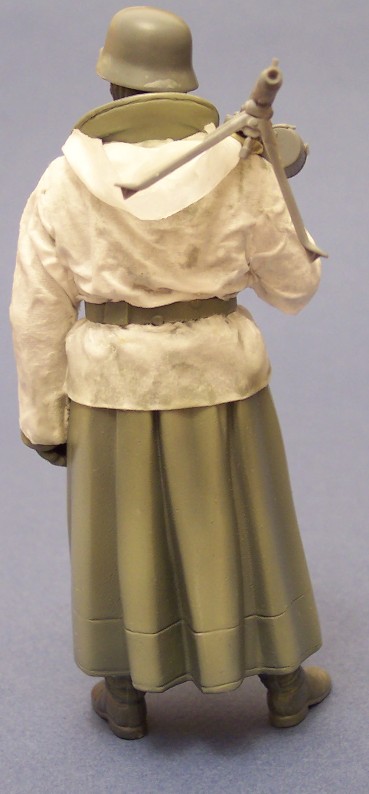
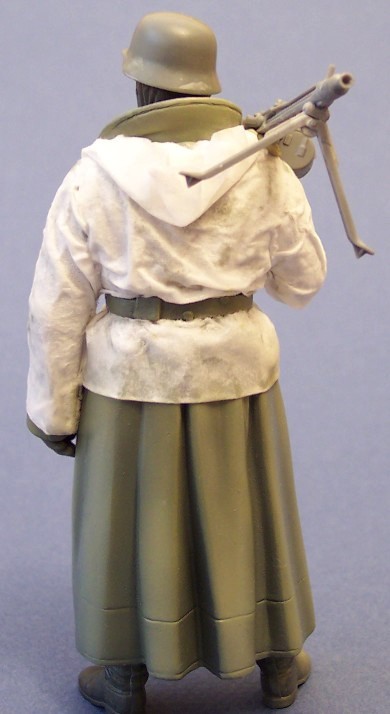
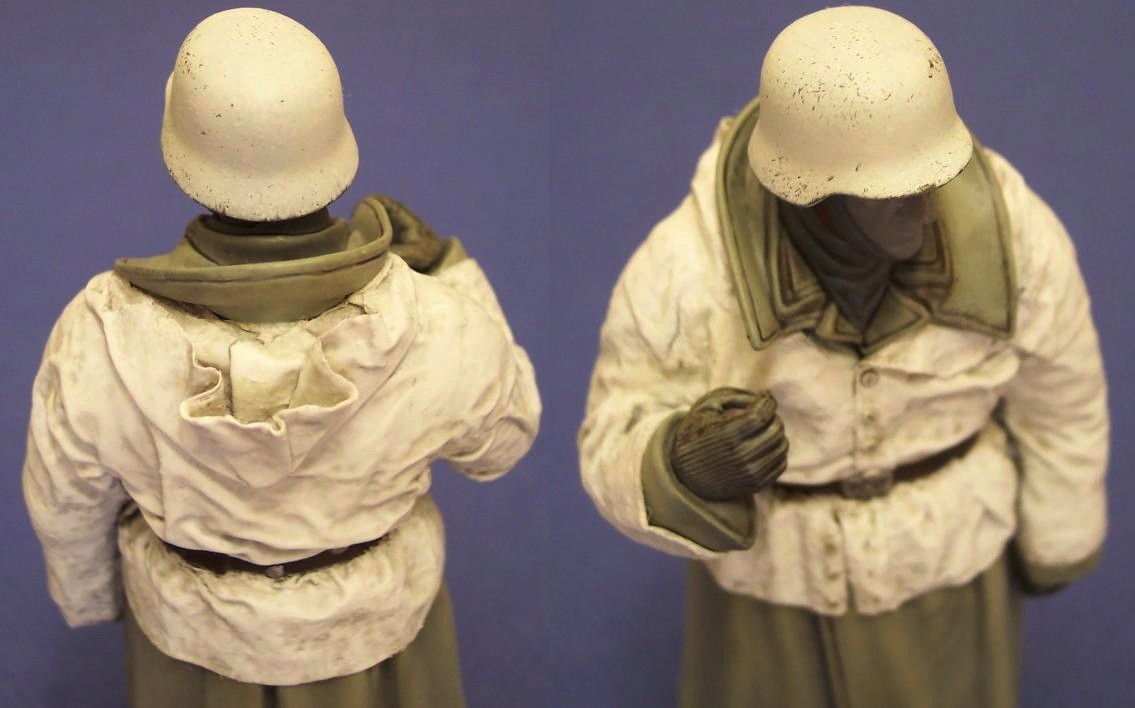
Mg 42 belt and helmet.
and the buttons:
and the buttons:
tomapaul
Joined: September 17, 2007
KitMaker: 425 posts
Armorama: 304 posts
Posted: Wednesday, February 18, 2009 - 10:07 AM UTC
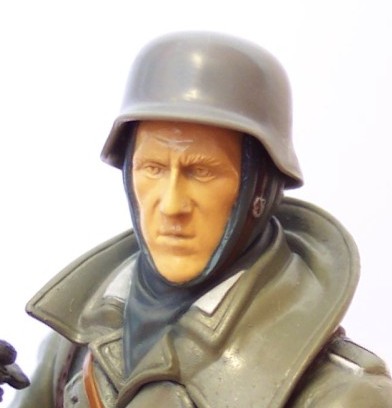
Compleated the shadows.The figure is almost done, I just have to do the face...

jdgator
Joined: October 08, 2008
KitMaker: 10 posts
Armorama: 6 posts
Posted: Wednesday, February 18, 2009 - 02:34 PM UTC
Looks very good!
Would you recommend this figure to someone who is just getting started in modeling? Or was it a bit too complicated? I see how you modified parts of the figure to improve accuracy of details... Also - could it made to look OK without any airbrushing?
Would you recommend this figure to someone who is just getting started in modeling? Or was it a bit too complicated? I see how you modified parts of the figure to improve accuracy of details... Also - could it made to look OK without any airbrushing?
Tarok
Joined: July 28, 2004
KitMaker: 10,889 posts
Armorama: 3,245 posts
Posted: Wednesday, February 18, 2009 - 03:08 PM UTC
Quoted Text
Would you recommend this figure to someone who is just getting started in modeling?
Absolutely! This figure, in fact, marked my own return to modelling about 5 years ago (the pics can be seen under my gallery). Most people who paint this figure do so without an airbrush.
Rudi
tomapaul
Joined: September 17, 2007
KitMaker: 425 posts
Armorama: 304 posts
Posted: Wednesday, February 18, 2009 - 10:33 PM UTC
I agreed with everything that Rudi said above.There is no point in ruining resin kit for a first attempt.This kit is very easy to put together and it needs one color, so no hard to do camo pattern.After this you can try something more difficult .
The model is accurate..I just added the MG42 belt so far.The anorak is just to make my figure different.It's not like AFV modelling where you can make the vehicles in different ways.Here you don't have much to chose from, all the photos that I found with this model looked the same (some had better paint job than the others but ... ), so I did this.
You don't need an airbrush.I use it because it is a time saver.
The model is accurate..I just added the MG42 belt so far.The anorak is just to make my figure different.It's not like AFV modelling where you can make the vehicles in different ways.Here you don't have much to chose from, all the photos that I found with this model looked the same
(some had better paint job than the others but ... ), so I did this.You don't need an airbrush.I use it because it is a time saver.
Pavlovsdog

Joined: June 05, 2006
KitMaker: 438 posts
Armorama: 352 posts

Posted: Wednesday, February 18, 2009 - 10:51 PM UTC
Fantastic work on the smock , I've had this figure in my stash for ages now you have in sipred me to do somthing with it, I am such a copy cat it is terrible
Thanks for your post,
Jerry
Thanks for your post,
Jerry

ryally
Joined: July 29, 2005
KitMaker: 879 posts
Armorama: 330 posts
Posted: Wednesday, February 18, 2009 - 11:17 PM UTC
Hi
You are doing an outsatnding job on this figure. I love the changes you have made.
Well done
Ryally
tomapaul
Joined: September 17, 2007
KitMaker: 425 posts
Armorama: 304 posts
Posted: Thursday, February 19, 2009 - 03:28 AM UTC
Thanks guys!Really glad you like it.
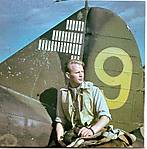
Finnished the MG.Here is the real thing...
and here is my MG 42:

gbyrnsie

Joined: July 12, 2006
KitMaker: 770 posts
Armorama: 38 posts
Posted: Thursday, February 19, 2009 - 06:57 AM UTC
Great idea with the anorak - your figure is looking great.
GB
GB
tomapaul
Joined: September 17, 2007
KitMaker: 425 posts
Armorama: 304 posts
Posted: Thursday, February 19, 2009 - 09:39 AM UTC
Thanks!I hope the face turns as good.
GALILEO1
Joined: April 18, 2006
KitMaker: 1,794 posts
Armorama: 1,431 posts
Posted: Friday, February 20, 2009 - 07:25 AM UTC
Excellet work so far, tomapaul!!!
Question, where did you get the hardware for the sling? Was it aftermarket or home made?
Thanks!
Rob
Question, where did you get the hardware for the sling? Was it aftermarket or home made?
Thanks!
Rob
 |

WEB HOSTING BY


Copyright ©2021 Armorama and Kitmaker Network, a subsidiary of Silver Star Enterprises
All Rights Reserved. Please read our Conditions of Use and Privacy Policy.
All Rights Reserved. Please read our Conditions of Use and Privacy Policy.