_GOTOBOTTOM
Dioramas: Buildings & Ruins
Ruined buildings and city scenes.
Hosted by Darren Baker
'Liberte' Normandy '44
Barbarossa
Visit this Community
United Kingdom
Joined: August 25, 2005
KitMaker: 216 posts
Armorama: 215 posts
Posted: Wednesday, March 04, 2009 - 09:32 PM UTC
Hi Everyone,

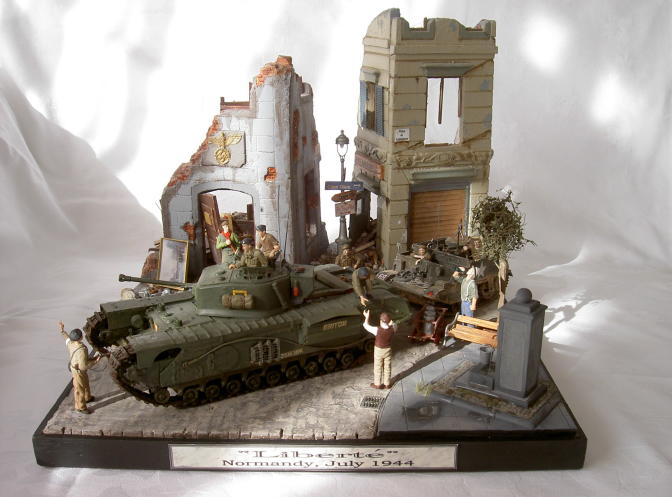
Just thought I'd share with you my new recent diorama. It's abit of a change this one, I've re-built an old diorama I made in the 'early years' of my model making. Obviously a lot of dead space and too simple a story, but one of those ones you're happy with at the time.


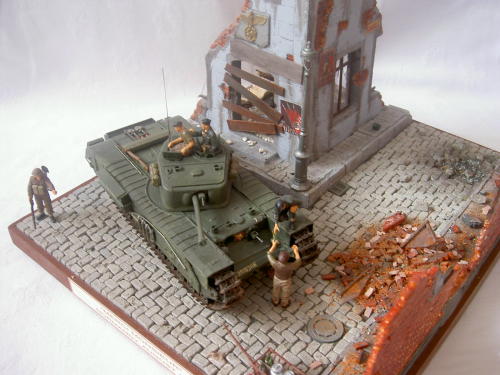
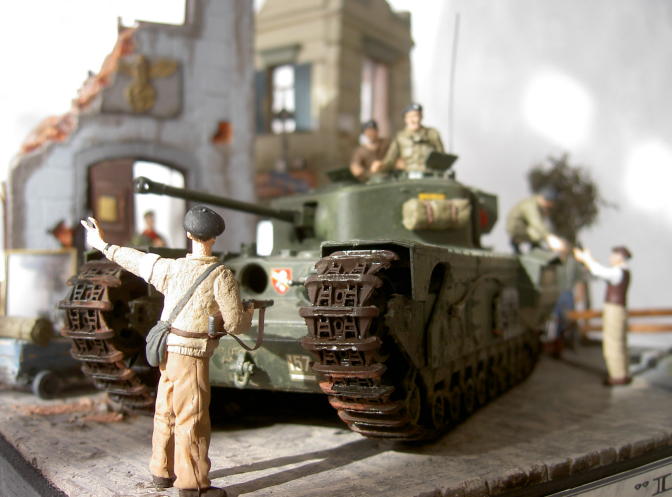
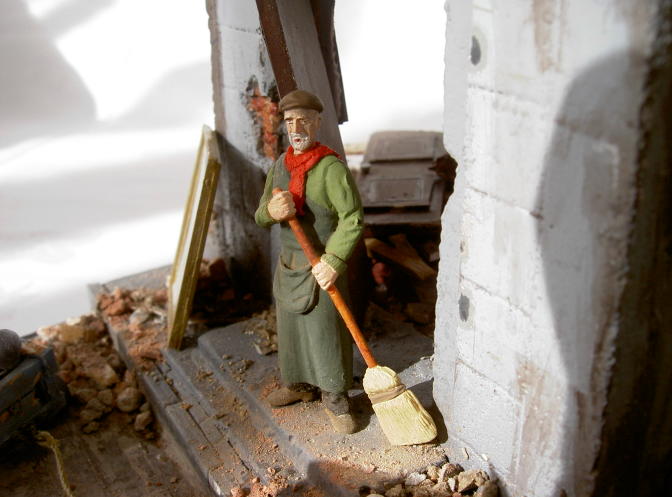
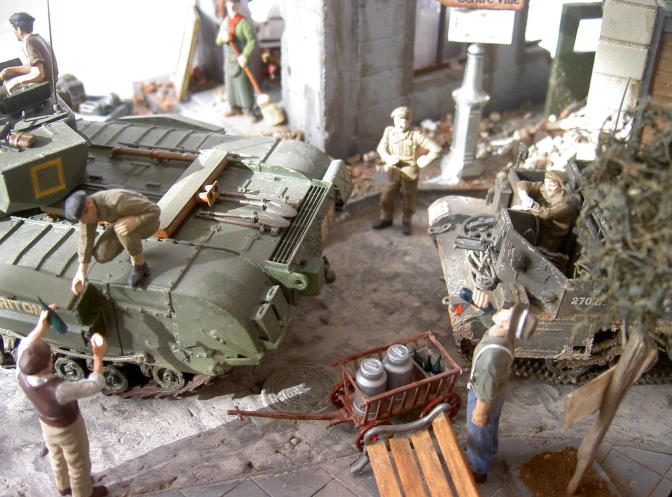
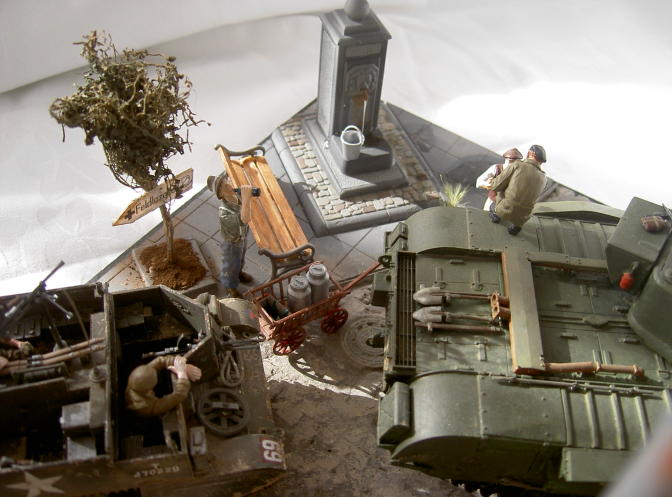
So the idea was to add another building, improve the bomb damage in both, add some more interacting figures, including civilians, add another smaller vehicle and some character to the town, i.e. the water pump. The story would be British forces having just liberated a Normandy French town in July 1944. Firstly I repositioned the original building, giving it more an angle. The inside was totally gutted, I didn't really want to touch the exterior. Some of the road was taken up to allow for the new building, and the pavement was to be redone.
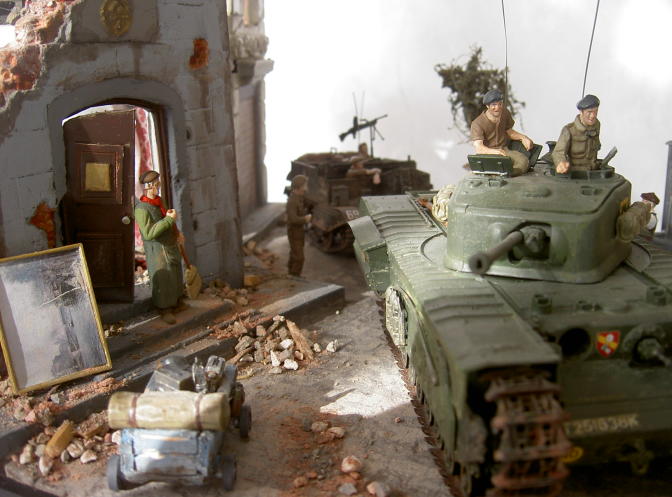
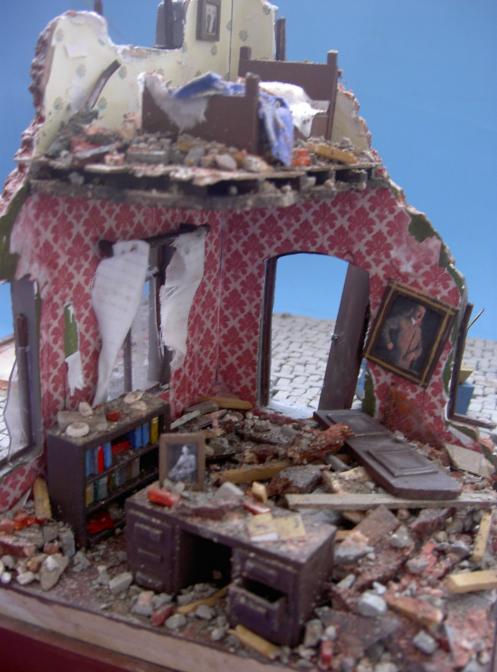
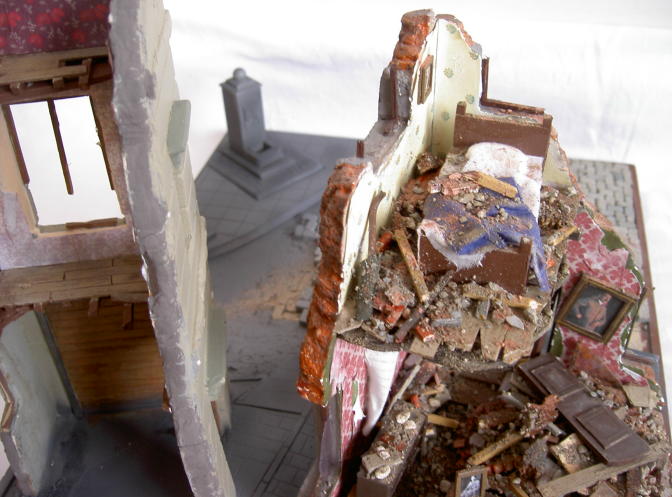
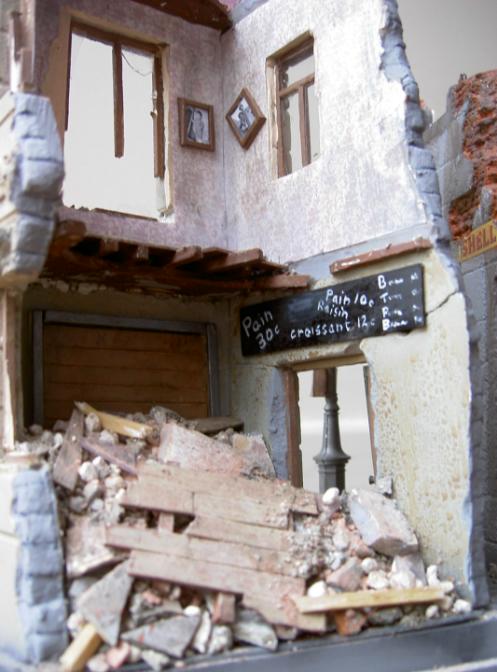
The bed, flooring, front doors, picture frames,bookcase & desk were all built from plastic. the wallpaper made on computer, and rubble made from cat litter, bits of wood, crumbled plaster, brick dust & pigments.


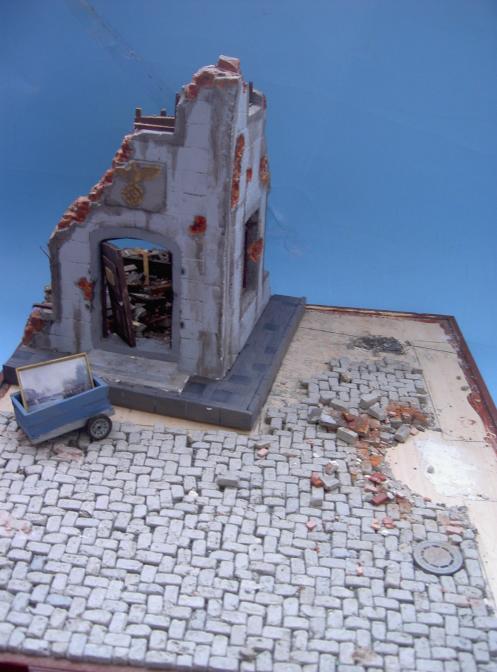
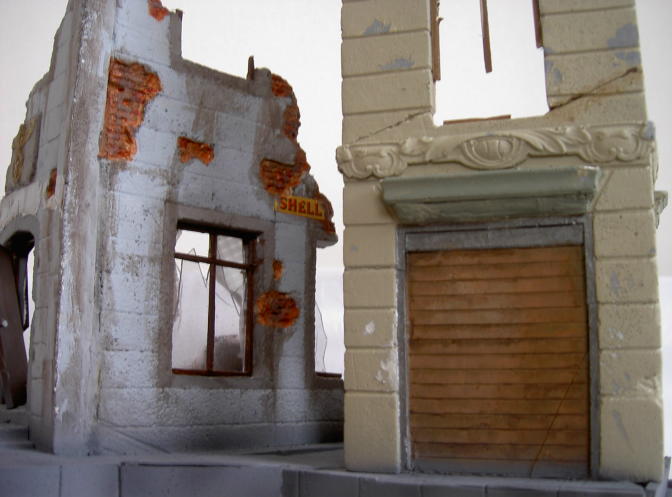
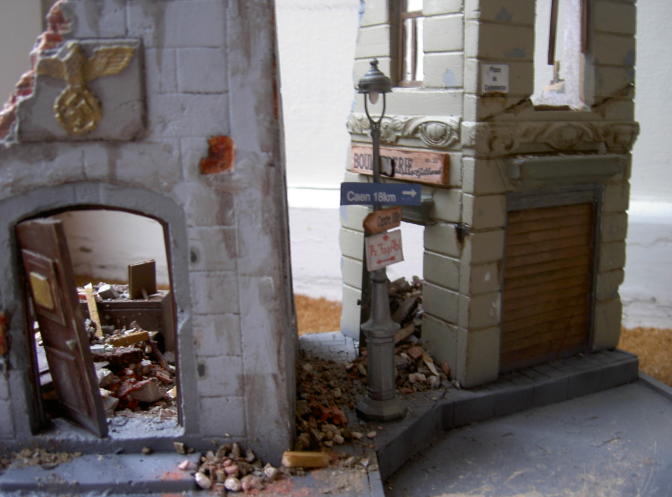
The additional building is the VLS Italian Shop Ruin. Different country I know, but the locals won't mind.... 
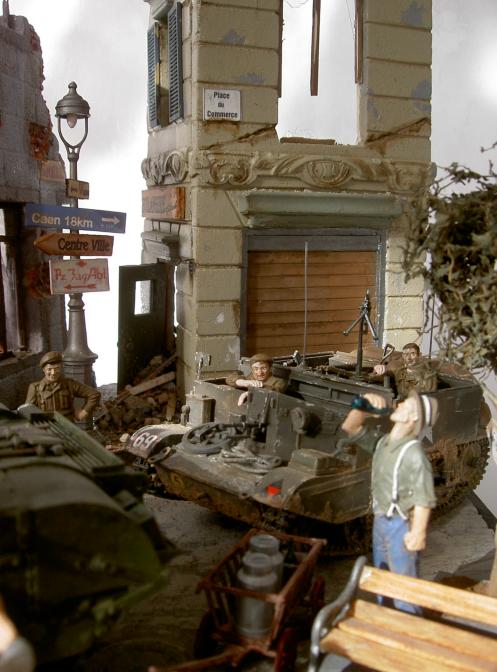
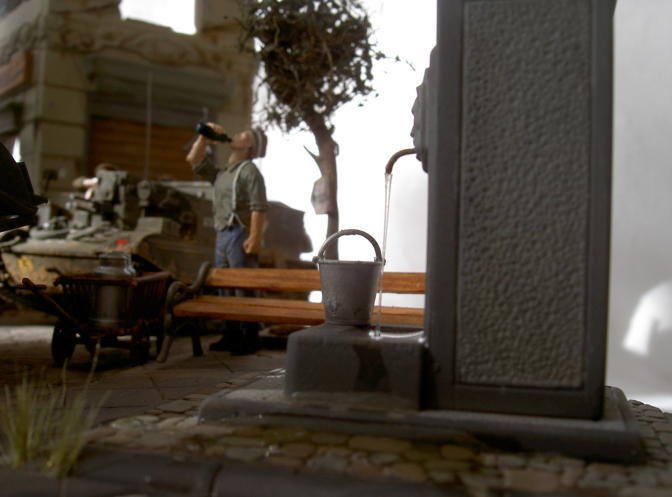
I had earlier ordered Italeri's Village Fountain, which is simple but does the job. But then VLS's shop came with it's own fountain...typical, so one for future builds. The bench is Plus Models park bench, the pavement is all from plastic card.


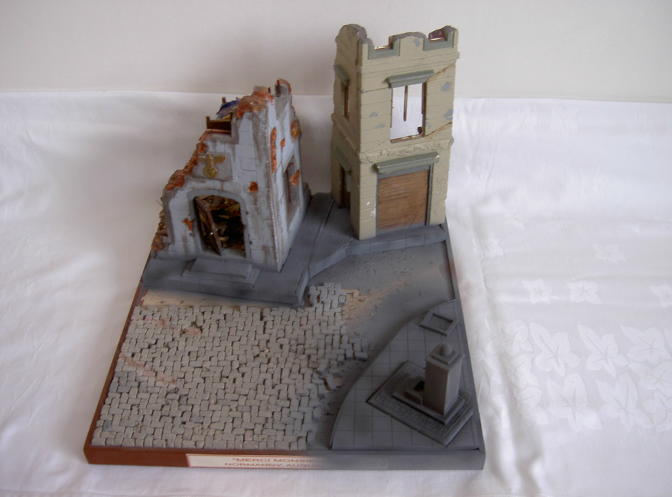
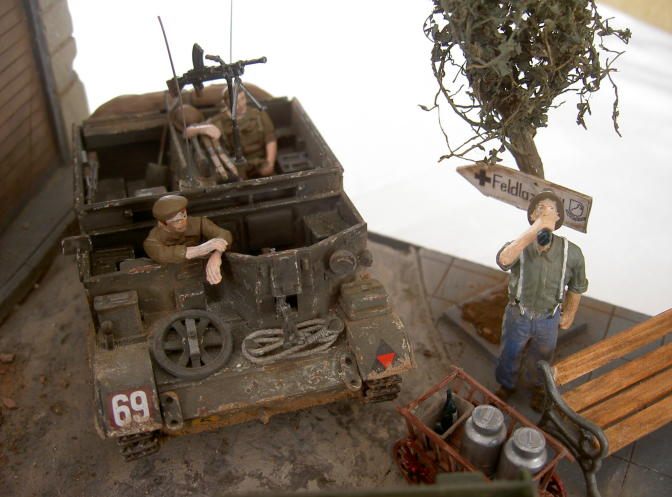
The water in the fountain was made from 'Deluxe' Solid water, a stretched clear plastic sprue then made to immitate the water pouring out of the tap, unfortunately hidden in the photo below. The tree was just a root, with the addition of dried thyme to simmulate leaves, then spray painted. The bench was easy to make and with the additions of oil paints came up well.


The Shop Ruin from VLS was a joy to make. Simple to constuct, although the top left hand story wall feature didn't align unlike the rest of the building. The inside was fashioned in the same way as the first building, I wanted a collapsed interior with most of the rubble almost reaching the first floor. Clear plastic was put into the window frames for the glass, and the notices and signs were again made form plastic card.


So that's it for now....I've got the last few bits n' pieces to add, and then I'll add them to the rest of this post. Any comments and critiques most welcome, thanks for looking and I'll get them pics up soon....
Cheers for now,
SIMON
psilocyber
Visit this Community
Nordland, Norway
Joined: January 25, 2006
KitMaker: 78 posts
Armorama: 49 posts
Posted: Wednesday, March 04, 2009 - 10:36 PM UTC
Awesome stuff Simon.Looking forward to the rest
exer
Visit this Community
Dublin, Ireland
Joined: November 27, 2004
KitMaker: 6,048 posts
Armorama: 4,619 posts
Posted: Wednesday, March 04, 2009 - 11:06 PM UTC
Nice work Simon and good idea to recycle an old dio. I like the placement of the new shop making the narrow alleyway between the two buildings
Plasticbattle
#003
Visit this Community
Donegal, Ireland
Joined: May 14, 2002
KitMaker: 9,763 posts
Armorama: 7,444 posts
Posted: Thursday, March 05, 2009 - 05:08 AM UTC

Quoted Text

Nice work Simon and good idea to recycle an old dio. I like the placement of the new shop making the narrow alleyway between the two buildings


Hi Simon. As Pat says ... the second building and alleyway adds so much to the initial base .... was really worth updating. It will a great background for whatever you choose to add. Will you be keeping the churchill in the new new dio?
martyncrowther
Visit this Community
England - West Midlands, United Kingdom
Joined: September 12, 2007
KitMaker: 1,548 posts
Armorama: 1,407 posts
Posted: Thursday, March 05, 2009 - 05:16 AM UTC
Great dio so far mate! I am looking forward ot more.
bizzychicken
Visit this Community
Wales, United Kingdom
Joined: September 06, 2008
KitMaker: 967 posts
Armorama: 842 posts
Posted: Thursday, March 05, 2009 - 06:17 AM UTC
Only one question, If its Liberated France. Why the picture of Adolf? I would of thought he would be the last person some French house hold would have up, pride of place in the living room Grate rebuild X-lant work
motorbreath23
Visit this Community
Wisconsin, United States
Joined: December 29, 2008
KitMaker: 159 posts
Armorama: 138 posts
Posted: Thursday, March 05, 2009 - 06:20 AM UTC
I love the "walkaround" effect, that a viewer needs to look at it from all angles to appreciate its entirety. Great work.
Eaglewatch
Visit this Community
United Kingdom
Joined: December 19, 2008
KitMaker: 560 posts
Armorama: 352 posts
Posted: Thursday, March 05, 2009 - 01:19 PM UTC
Awesome dio Simon great attention to detail
fanai
Visit this Community
Queensland, Australia
Joined: April 10, 2005
KitMaker: 2,654 posts
Armorama: 208 posts
Posted: Thursday, March 05, 2009 - 01:38 PM UTC
Simon love the detail and the book cases - a lovely piece that just 'works'

Ian
bizzychicken
Visit this Community
Wales, United Kingdom
Joined: September 06, 2008
KitMaker: 967 posts
Armorama: 842 posts
Posted: Friday, March 06, 2009 - 12:31 AM UTC
LIKE I said Brill Dio, stunning work! Get rid of Adolf or a bit of graffiti on him (Devils horns or something would be quite funny) LOL Geraint
Barbarossa
Visit this Community
United Kingdom
Joined: August 25, 2005
KitMaker: 216 posts
Armorama: 215 posts
Posted: Friday, March 06, 2009 - 06:09 AM UTC
Hi guys,
well here are the final photo's from 'Liberte'. Firstly though, can I just say a huge "Thank You" to everyone who left a comment, they were all much appreciated.
As I mentioned before, the story is set around the allies having just liberated a Normandy town in July 1944. The locals have come out to greet them, with some making the most of their new found freedom.....
Both Churchill & Bren Gun Carrier are Tamiya, with the crews & old man with the brown waistcoat coming with them. The other 3 are MK35 figures from France. I've seen afew posts on here with people not being too sure about these figures, but I've used almost a dozen now and really like the enormous amount of potential they give to a dio, especially the civilian characters. The guy infront of the Churchill is a resistance member, informing the crew to recent events. The Bren Gun crew however have their eyes on another local whose just helped himself to some of the local 'plonk' from the farmers trolley. Apart from repainting the tanks crew, I didn't touch the tank & left it as it originally was. I know there was a chance to even just add a little weathering, scratches or pigments, but I just left it as it was....


I see what you mean Geraint about the pictures of Hitler in the building. The reason behind that was the building was used as some sort of HQ / Offices for the occupying Wehrmacht, hence the golden eagle on the wall outside. Although the idea of having the picture on the wall scribbeled on and slashed is a good one!! Might work on that one..... The old guy on the steps is clearing some of the debris, whilst at the same time collecting some booty in the blue cart parked at the front. Maybe he can trash the Hitler portrait....


The only major disaster I made was the road. The original road was I think form Plus Models, and was the simple rectangular brick type. So I carefully relaid the road, and then using tile filler as a means to make it look more aged...??? Anyway, that looked fine, but I should've made the filler alot darker to give it a contrast with the stone. But after countless washes, sanding, painting with oils, it looked great whilst the oils were wet. But once they'd dried, all the individual stone pieces were lost, and it just looked like an almost smooth surface. So instead of more stress, I just got used to it, and once all the vehicles and rubble are on, it looks ok.......just about...


Well cheers again for looking, and thanks in advance for any futher comments....
and now off to the next project, somewhere in Eastern Europe (it never ends), or so my wife keeps telling me!!
Cheers,
SIMON.
tjkelly
Visit this Community
Maryland, United States
Joined: May 04, 2007
KitMaker: 1,132 posts
Armorama: 1,123 posts
Posted: Sunday, March 08, 2009 - 08:35 PM UTC
Nicely done Simon! Like your placement of the buildings, as well as the fountain. Adds a nice touch, breaks up the pavement / street. Thanks for sharing your work, your figures are great!

Cheers -
Tim
Tanker9
Visit this Community
California, United States
Joined: January 31, 2009
KitMaker: 165 posts
Armorama: 141 posts
Posted: Saturday, March 14, 2009 - 08:36 AM UTC
Wow, very, very nice!

I like the alleyway and the view from that upstairs window is superb!
AlanL
Visit this Community
England - East Anglia, United Kingdom
Joined: August 12, 2005
KitMaker: 14,499 posts
Armorama: 11,675 posts
Posted: Saturday, March 14, 2009 - 09:22 PM UTC
Hi Simon,

Great stuff I love to see re-cycled kits. The addition of the extra building looks great, I like the odd angle placement.

On the Hitler picture it seems fine to me as the building you're depicting was obviously German occupied.

Keep up the good work, look forward to seeing more, looking great so far.

Al
bobman331
Visit this Community
Massachusetts, United States
Joined: April 13, 2009
KitMaker: 177 posts
Armorama: 142 posts
Posted: Tuesday, May 05, 2009 - 12:30 PM UTC
love the window pic.

no offense, but work on ur figure painting. maybe its just the photos idk.


montythefirst
Visit this Community
England - South West, United Kingdom
Joined: August 04, 2007
KitMaker: 1,055 posts
Armorama: 199 posts
Posted: Tuesday, May 05, 2009 - 12:36 PM UTC
great looking diorama
 _GOTOTOP