_GOTOBOTTOM
Armor/AFV: Allied - WWII
Armor and ground forces of the Allied forces during World War II.
Hosted by Darren Baker
M4 composite review/build
russamotto
Visit this Community
Utah, United States
Joined: December 14, 2007
KitMaker: 3,389 posts
Armorama: 2,054 posts
Posted: Thursday, May 07, 2009 - 08:47 AM UTC
Here is the start of the review. I'm not an expert on the M4 or at building. This review/build will mainly focus on how the kit goes together for the "average" builder. Any tips, advice, direction will be appreciated.

First, photos of what you get. The box.


The instructions are very brief and crowded, but I should be able to make sense of them.


The photo etch sheet is very nice. Too bad I don't have a form for molding the light guards.


I don't know if the kit decals are accurate. They are nicely printed but don't include any serial numbers or other data.


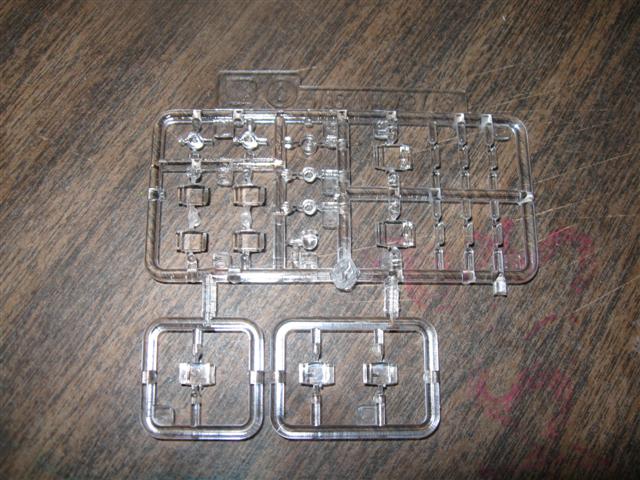
One clear sprue from the M4 A2/A3 set.


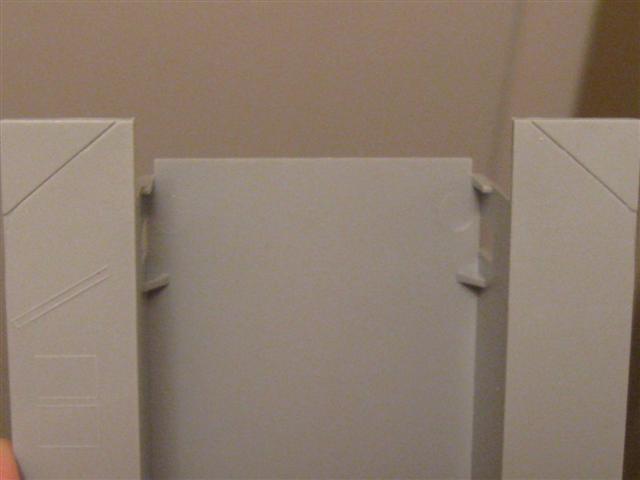
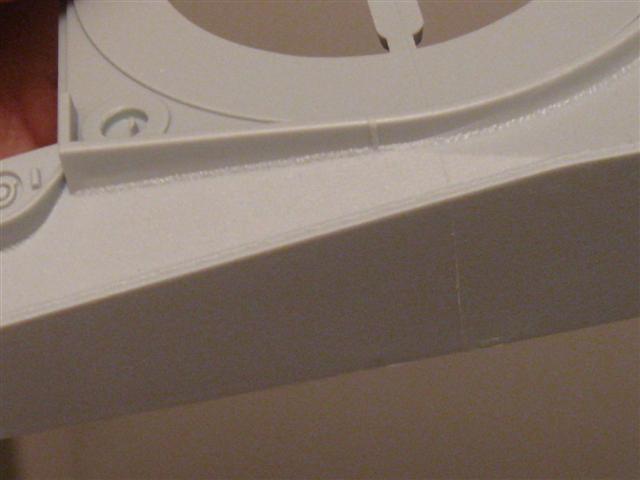
The hull from the M4. It has tabs marked on the upper front corners to trim for the fit of the composite upper hull.


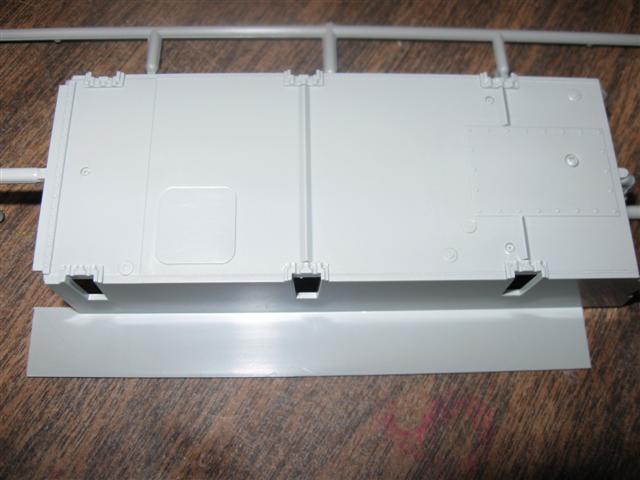
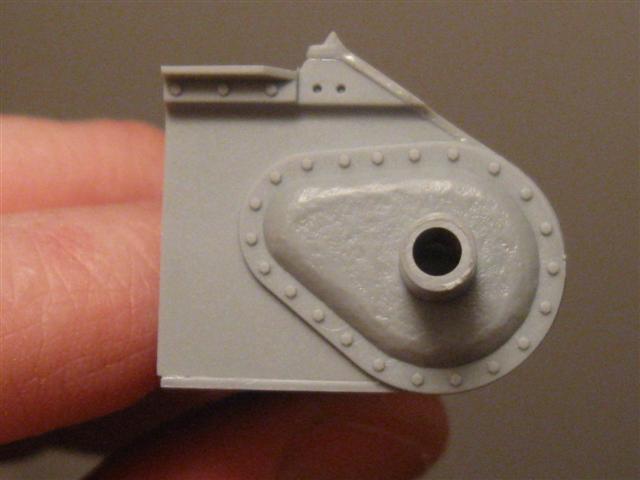
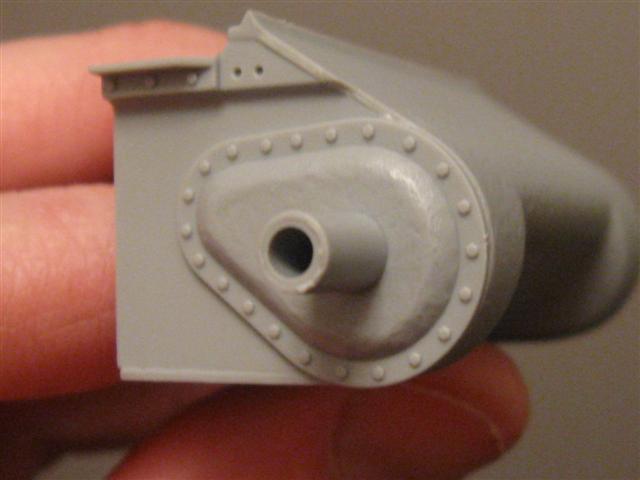
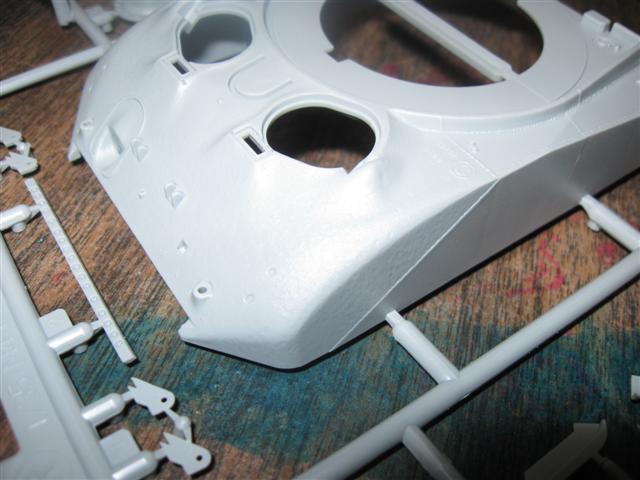
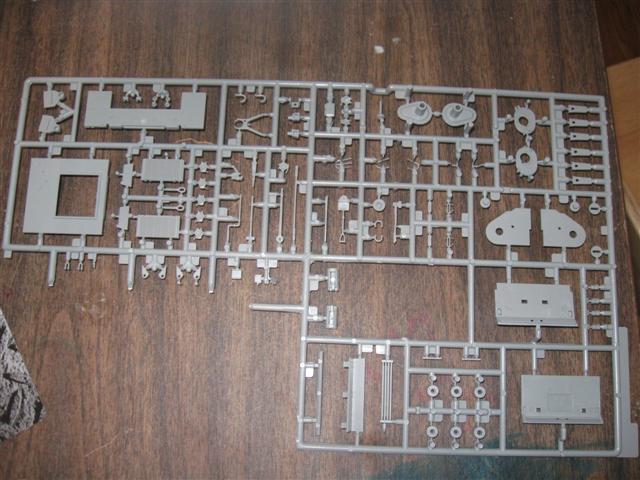
A new "R" sprue marked M4 PTO. The hull appears to be nicely textured. Plastic fenders are included. Applique armor for this hull is also included. The front hatches appear to be a new molding, as well as the drive assembly being molded to the forward hull piece. There is casting texture added to this part as well. The fit issues with the drive assembly and transmission cover seem to have been fixed for this kit.


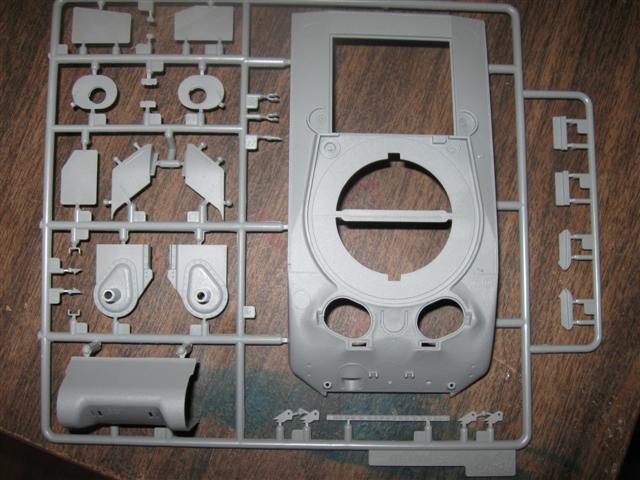
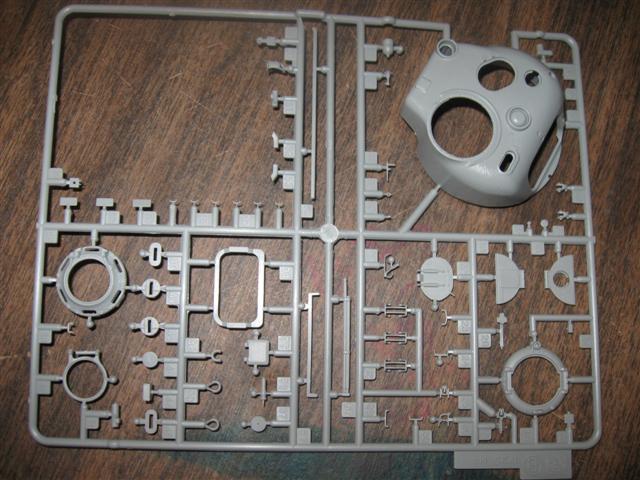
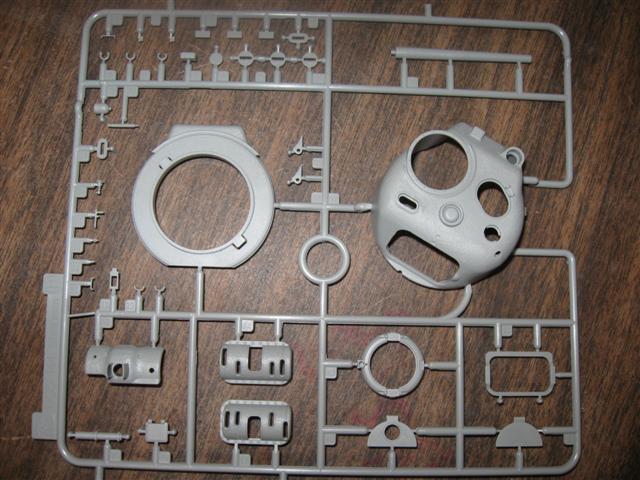
Next, one "B" sprue for the M4, with the high bustle turret, with no lower ring (Dragon Care is sending mine in the mail).


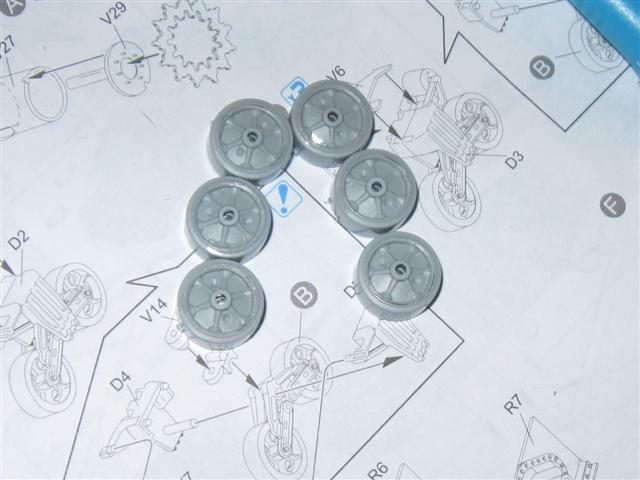
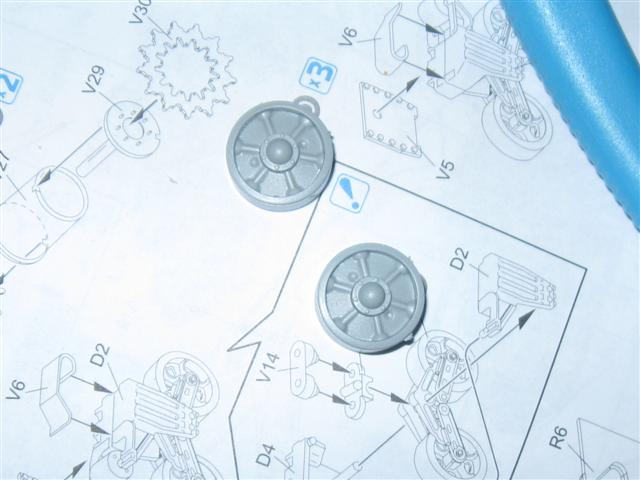
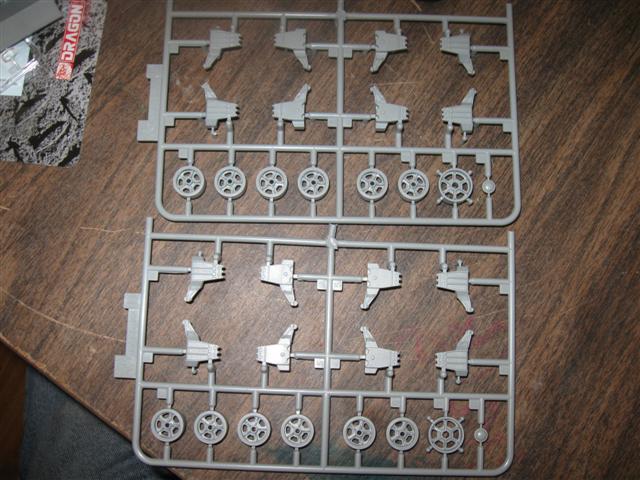
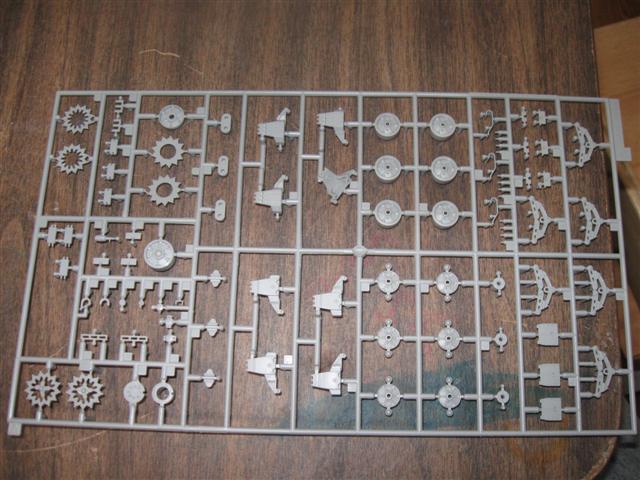
Two "D" sprues for the M4, with the open spoke wheels and raised return rollers with casting numbers molded on.


Another "B" sprue M4 with the low bustle turret and ring, mantlet and mantlet cover, and main gun.


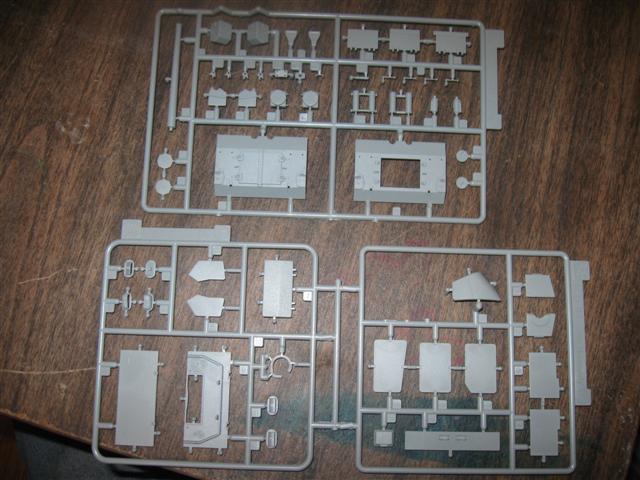
"C" sprue for the M4A1 DV, with rear hull piece, air cleaners and another main gun, "E" sprue M4 75mm Normandy, with applique armor and "F" sprue M4A1 DV with the upper rear deck details.


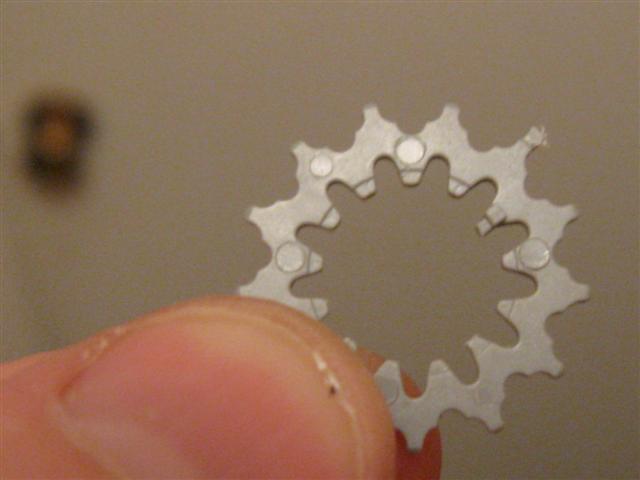
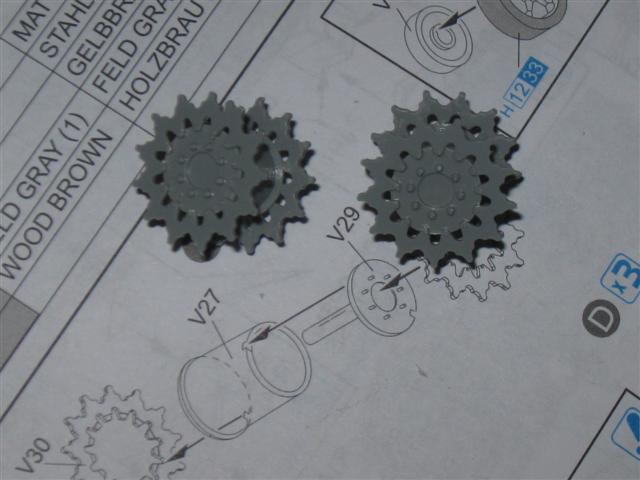
Two VVSS bogie sprues with the six spoke wheels, lower bogie assembly, drive sprockets, spare track links, and straight return arms. There are four small bolt heads for each of the return blocks, but they are not indicated on the instructions. There are also twelve small bolts molded to the side of the sprue.


One "A" sprue M4 A2/A3, with tools, hull MG, fuel caps, drive housings, rear hull plate and rear deck plate for the A2/A3 variants.


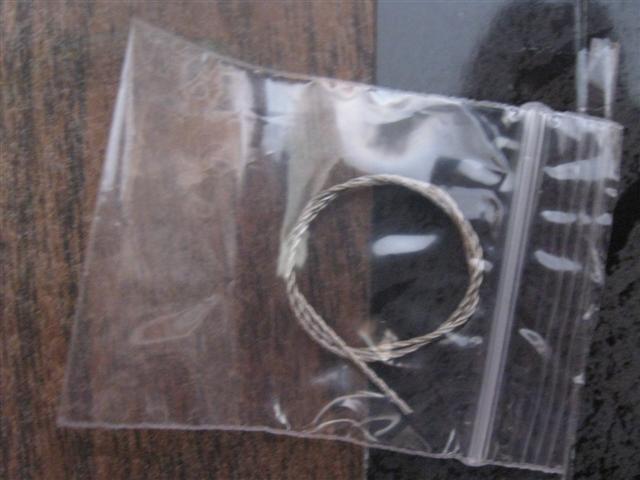
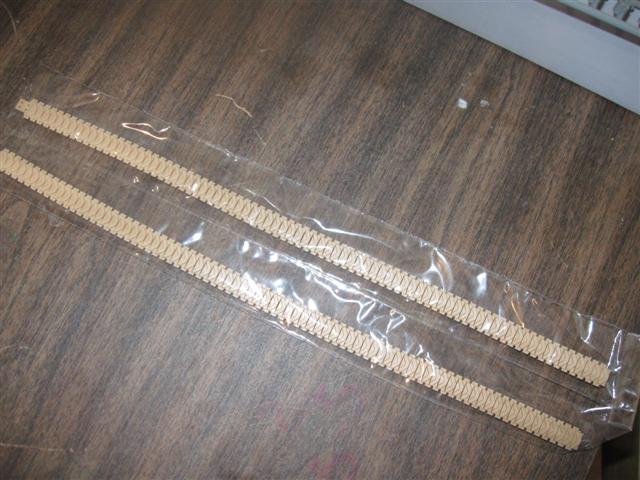
Rubber chevron track lengths without EEC in DS. They are nicely molded.


The molding looks very clean on all parts, even on the VVSS sprues, which are in better condition than on my M4A2 PTO. The new drive assembly on the "R" sprue is really nice. I am happy so far with what was included in the box.

I do with Dragon had included the turret ring for the high bustle turret. Also, either a .50 cal or .30 cal MG to mount on top would have been nice, as there are lots of photos showing them in place. Considering all the extra parts included in the box that won't be used, I don't know why they didn't include something that I would have used. It still bothers me that no gun breech is included, or a working ball mount for the hull MG, as these are standard on the German tanks. Finally, is it greedy to ask for two sets of tracks like I have in the M4A2 PTO? (I did get two turrets after all). I have reference photos showing composite hull tanks with the EEC T48track, T51,also with EEC and T49 track.. Maybe Cyberhobby will come out with a special kit for the earlier single hatch w/o the pistol port, or an Okinawa flame tank.

I will start the build on this as soon as possible. The wife has me working on a 1/1 scale woodpile right now, with a fence and a chicken coop to follow. She mocked my apparently sagging physique and indicated that I need to spend a little more time outdoors working, and less time indoors hunched over a table (in my defence, at least I'm not eating junk food. There is probably less plastic in this kit box then in a Twinkie box, and my mind is still getting exercise.)

Updates will follow.
russamotto
Visit this Community
Utah, United States
Joined: December 14, 2007
KitMaker: 3,389 posts
Armorama: 2,054 posts
Posted: Friday, May 08, 2009 - 03:01 AM UTC
Managed to get a little bit of work done. The drive sprocket assembly has a lot of cleanup from sprue attachment points. There are raised ejector pin marks on the back of the sprockets that are easy to clean up.


Road wheels and idlers.


Here is the transmission housing showing texturing. Much better than the parts in my M4A2.


Here is the lower hull showing the cutoff points for the upper hull.


Two shots of the upper hull. There is a fine mold seam where the new mold attached to the old to make the new hull.


That's all for now. I have a few projects around the house before I go to work so I don't know if I'll get more done today or not.
russamotto
Visit this Community
Utah, United States
Joined: December 14, 2007
KitMaker: 3,389 posts
Armorama: 2,054 posts
Posted: Tuesday, May 12, 2009 - 11:05 AM UTC
Not a whole lot done this week. Mainly because of outside chores. Here's a sample-the woodpile.


I assembled the lower bogie halves. I primed the interior faces with Krylon ultra flat OD camo, straight from the rattle can, as I can't reach those surfaces from the outside to paint them but they are always visible. Also to make sure I got the right side of the road wheels facing out.


A shot of the air cleaner.


Both attached to the rear hull plate.


I'm using this book for reference sources. I found a photo of an M4 composite on Okinawa that I would like to try to build this kit after.


I have been distracted all week by the activity from Hill AFB. Non stop F-15 and F22 fighters on top of the regular F-16 flights. The visiting flights always always fly right over my house, and low enough that as they bank and turn I can see the pilots in the cockpit. It seems that if the F16s are loaded with extra ordinance their flight path is over my house as well. I've tried repeatedly to photograph the jets as they fly over but I don't know when to expect them and the only times I've had the camera with me they were going too fast. Falcons, Eagles and Raptors, and the only bird photo I got was this one.


Yup. The little guy is the rooster. I will try to finish the bogie assemblies tonight, and start on the upper hull. Still waiting for the correct part to arrive from Dragon Care. Any input is welcome.
panamadan
Visit this Community
Minnesota, United States
Joined: July 20, 2004
KitMaker: 1,513 posts
Armorama: 1,449 posts
Posted: Tuesday, May 12, 2009 - 02:14 PM UTC
Russ, Great start!
Dan
HONEYCUT
Visit this Community
Victoria, Australia
Joined: May 07, 2003
KitMaker: 4,002 posts
Armorama: 2,947 posts
Posted: Thursday, May 14, 2009 - 03:31 AM UTC
Thanks for the peruse of the kit Russ... That is some gaping hole left in the sprue where the lower turret half should be...
I'd love to build a ETO version. Funny, when building the DML M4 I noticed the the mould lines in the forward half and thought a hybrid was in the offings...
Brad
panamadan
Visit this Community
Minnesota, United States
Joined: July 20, 2004
KitMaker: 1,513 posts
Armorama: 1,449 posts
Posted: Thursday, May 14, 2009 - 09:12 AM UTC
Russ, Have you ordered the lower turret from Dragon care?
Dan
russamotto
Visit this Community
Utah, United States
Joined: December 14, 2007
KitMaker: 3,389 posts
Armorama: 2,054 posts
Posted: Thursday, May 14, 2009 - 02:45 PM UTC
Dan, I did order the lower turret ring from Dragoncare. They sent me another low bustle turret ring. I notified them and am awaiting a reply. Had quite a bit of trouble with the transmission cover mating to the lower hull. Huge gaps on the sides and it didn't mate snugly at the bottom. I had to do some trimming and filling. On the back end everything went together without a hitch.

russamotto
Visit this Community
Utah, United States
Joined: December 14, 2007
KitMaker: 3,389 posts
Armorama: 2,054 posts
Posted: Thursday, May 14, 2009 - 04:27 PM UTC
Here's the hull front. I have already tried to fill the gap. It was uneven and varied, up to 1mm wide.


A dry fit of the hull top to bottom.


The small gap should be covered by the fenders, but I don't like it. Topside shot.


Hull rear. Everything fit very well. The air cleaners were a bit fiddly to set.


The completed bogie assemblies, partially primed. The instructions don't call out the bolts for the return skid, but they are included. I tried to eyeball the four bolt holes on the front of the bogie assembly.


The instructions show lots of arrows pointing to the general location of the parts with no specific placement. Reference photos or someone else's instructions come in handy just to see what it is supposed to look like. I'm moving to the hull top next.
russamotto
Visit this Community
Utah, United States
Joined: December 14, 2007
KitMaker: 3,389 posts
Armorama: 2,054 posts
Posted: Thursday, May 21, 2009 - 12:40 PM UTC
With all the warm weather I have been mostly outside catching up on yardwork. I finally did manage to get some work on the kit done, mostly photoetch. I purchased a bigulator at Lowe's for $25 to help me see what I was doing. Bonus, when you drop something on the floor (repeatedly) you can use it to search.


I have not used the photoetch light guards before so this was a new experience. Not having any official tools to use, I bent the frame around a small file handle. To get rid of the "sprue" tabs, I held the piece carefully in a pair of smooth pliers and filed off the nub very carefully. The horn guard took about 20 tries to get into place. It is still crooked so I will have to go back and try to fix it.


I painted the backside of the lights aluminum. I painted the periscopes white and took the risk of placing them in the hatches before the OD top coat. The instructions just sort of show the latch handles dropped on with no specific location. I used an old Italeri hatch as a guide. I'll place the brush guards when I am ready to paint.


I did manage to get a nice glue print on one of the hatches. On to the rear. Etch mesh over the rear intakes and the engine deck.


The two fuel caps next to the rear intake were more trouble than almost anything else in the kit. They are a bit smaller and therefore tighter than the others and I could not get them to seat very well. Also notice that there is a large gap along one side of the rear deck. It is a kit fit issue as I did not trim the engine cover plates at all. Here it is from another angle. I will have to fill that opening.


I assembled the rear exhaust and placed it. Then I put the lower hull in place to check the fit.


The fit of the two hull halves was fair. The front left corner (looking from the bottom) was off, probably from my trimming of the parts. The right corner was a perfect fit.


I glued the two halves together and now have a complete hull, minus a few parts. I will get them placed and then begin priming and painting as I am still waiting for the lower turret ring for the high bustle turret. There is only one set of tools, but the photo etch fret does include tie down straps for the shovel, pick head, axe and pick handle. Overall, I have been mostly happy with the kit. It has gone together well so far. The instructions are cluttered so you have to go over them several times to make sure everything is in place. The instructions also call out for the fenders to be placed before the hull halves are mated but I wanted to wait until I was closer to the end to prevent me from bending them or knocking them off.


I still wonder why Dragon rushed this kit out the door, especially with the obvious goofs. Does someone else have this same project under development? Are they just trying to put out as many models as possible? I would like to see someone like Academy do this kit, just for comparison, and because I could still afford it. As I said above, it is still a nice build. There is just a little taint to it knowing what is missing.
m4sherman
Visit this Community
Arizona, United States
Joined: January 18, 2006
KitMaker: 1,866 posts
Armorama: 1,808 posts
Posted: Thursday, May 21, 2009 - 02:52 PM UTC
It's looking good, I have been watching this one as I was curious to see how Dragon did on this new attempt. The troubles with fit here and there is what I usually expect to find with a Dragon M4. I do like the welds on this one though. I finally got one of the kits, and the low bustle is not an issue for me. I checked a few picture books and the low bustle was common enough to be normal. The tank on display (Toadmans tank pics) out in CA is a low bustle with no pistol port. I have found several low bustle with pistol ports as well. Just like with most Shermans, plenty of variety.
russamotto
Visit this Community
Utah, United States
Joined: December 14, 2007
KitMaker: 3,389 posts
Armorama: 2,054 posts
Posted: Thursday, May 28, 2009 - 10:55 AM UTC
Shame on me for making assumptions and not doing any fitting of parts. I finally got around to looking at the turrets today. The turret ring fits both turrets just fine. I would take pictures but my camera left town for a couple of days. It will need some sanding and texturing, but this is nothing new. This is good for me as all of the reference photos I am working off of show the high bustle turret. All are from the rear. Bob Card also showed me some photos. No headlights or horn. What does the plug look like for the sockets? I'm also not too sure on the placement of the add on armor plates. I may have buggered those. That is where a locator pin on the part would have come in handy, or a paint dot. I should have lots more progress to show when my camera gets back.
BobCard
Visit this Community
Florida, United States
Joined: August 09, 2006
KitMaker: 1,008 posts
Armorama: 847 posts
Posted: Friday, May 29, 2009 - 03:26 AM UTC

Quoted Text

What does the plug look like for the sockets?


This is the best actual I could find. This is Caribou at Iwo a couple of close ups. All that will be visable will be the heads and chain if you want to add them. I cut off some bolt heads from some spare parts I had and the chains from extra PE I had from the fuel covers.


And Dance to this on Okinawa

Hard to make out the bolt and chain

Someone might have a photo of an actual item but the sherman in my yard doesn't have them.

Bob


I just received mine so I'm counting on you to find all the problems before I attack mine.
mmcalc
Visit this Community
Virginia, United States
Joined: February 19, 2008
KitMaker: 55 posts
Armorama: 49 posts
Posted: Saturday, May 30, 2009 - 03:24 AM UTC

Quoted Text

I have found several low bustle with pistol ports as well. Just like with most Shermans, plenty of variety.


Randall,
Are the photos of the composites with the low bustle turrets and the pistol ports you mentioned on the web? Could you point me to them? I would really appreciate it, I have been looking for pictures of that variant.
Thanks,
Mike Canaday
ALBOWIE
Visit this Community
New South Wales, Australia
Joined: February 28, 2006
KitMaker: 1,605 posts
Armorama: 1,565 posts
Posted: Saturday, May 30, 2009 - 09:53 PM UTC

Quoted Text

It's looking good, I have been watching this one as I was curious to see how Dragon did on this new attempt. The troubles with fit here and there is what I usually expect to find with a Dragon M4. I do like the welds on this one though. I finally got one of the kits, and the low bustle is not an issue for me. I checked a few picture books and the low bustle was common enough to be normal. The tank on display (Toadmans tank pics) out in CA is a low bustle with no pistol port. I have found several low bustle with pistol ports as well. Just like with most Shermans, plenty of variety.


Hi Randall, can you share the source of the pictures of LB with pistol port and Loaders hatch on Composites with us please. Haven't been able to find any yet and would really appreciate seeing some.

Al
captkf
Visit this Community
Pennsylvania, United States
Joined: May 18, 2008
KitMaker: 71 posts
Armorama: 70 posts
Posted: Sunday, May 31, 2009 - 04:38 AM UTC
Hi Russ,

I'm building Dragon's M4A4 75mm Sherman and came across the same problems you are, with the instructions not being very clear on some points, not showing exact locations of certain items, etc... etc.
If you can get your hands on SQUADRON's M4 Walk Around No.1, there are some great reference photos in it that are a great help.
With that said, I believe that you put your "latch handles" in the wrong spot. Looking through my SQUADRON book, I found no such evidence of there being that type of latch on the outside of hatches. Besides, if hatches were latched on the outside, how would the tankers get out?
Hope this helps out!

There's also some great photos of the light socket plugs and the plug holders.

Happy Modeling
Kirk
russamotto
Visit this Community
Utah, United States
Joined: December 14, 2007
KitMaker: 3,389 posts
Armorama: 2,054 posts
Posted: Sunday, May 31, 2009 - 09:57 AM UTC
Thanks for the info on the latch handles for the hatches and the reference source. The LHS doesn't have it so I will have to look elsewhere. I was feeling rather dumb after the turret ring issue, but I compared the turret ring from this kit with that from my M4A2 and they are obviously very different. Even though it fits, it ain't right. The mising part should be B-31 from the high bustle turret sprue. It is very hard getting it. Either I go with a messed up turret or try Dragon Care one more time.
russamotto
Visit this Community
Utah, United States
Joined: December 14, 2007
KitMaker: 3,389 posts
Armorama: 2,054 posts
Posted: Monday, June 01, 2009 - 09:45 AM UTC
Thanks to Armando at Dragon Care, I have the correct turret ring. It is assembled now and looks like it should. I'll post photos tomorrow.
russamotto
Visit this Community
Utah, United States
Joined: December 14, 2007
KitMaker: 3,389 posts
Armorama: 2,054 posts
Posted: Thursday, June 04, 2009 - 03:40 PM UTC
Finally had some time to do some more work. Kirk was right about the latches on the two hull hatches. I removed them as nothing like them appears in any photo I have seen. There is an M4 composite on display at the Fort Douglas museum, high bustle, no loaders hatch. Front hatches are clean. There is also a gap around the rear engine deck. Not as big as on mine, but still noticeable. I ended up guesstimating with the etch parts for the sand shield attachments, and I moved the left side applique armor piece to the (more) correct location. Here's what I accomplished.


I managed to get all the small parts on without gluing anything to myself, and I only dropped a few pieces several times. Maybe the carpet monster has accepted my previous offerings and had mercy on me this time. I need to build a modeling box, totally enclosed, with a nice white floor so I can find everything I drop.

Here are the turret shots. I was able to put it together when the correct ring arrived. Thanks again to Dragon Care and Armando. It is a nice fit and looks a lot better than the low bustle ring which per the instructions was supposed to be used. The instructions also indicate to add all the accessory attachments. Most of the parts called out aren't included on the tanks in the photos I looked at. A couple I have seen appear to have a turret box mounted on the bustle.


The antenna is off of the A sprue. It is not mentioned in the instructions. The details were negligible so I attempted to fix it. I don't know how I've done, but it does have more detail now.


The instructions leave out part of the gun/mantlet assembly. I can't remember what it is called right now. It is the inner mantlet ring assembly shown in place here but never identified by part.. There are two in the kit, both are the same, one on each B sprue.


The completed gun assembly.


Here is how it sits on the hull.


The photo etch comes with straps for the tools. I cleaned up the tools and placed the first. I'm not used to parts this small. CA glue ads to the fun. The starter rod, tension adjusting tool and sledge hammer all appear to have been placed in different locations on the composite hull. I am already thinking ahead to stowage, which also appears to have varied quite a bit. More in the Philippines, less on Okinawa. If I go with an Okinawa tank I will need tracks with EEC and new decals. Of course, unless I do Bushmaster, I will need new decals anyway. Here is where I started with the shove.


I am almost ready to start painting. If I have missed anything let me know. I found a good photo at Toadman's of the plug on the light socket. It looks like a small metal plate was used to mount the horn. I think I can make something out of the extra etch, or out of paper.
Halaci
Visit this Community
Budapest, Hungary
Joined: October 05, 2005
KitMaker: 223 posts
Armorama: 215 posts
Posted: Thursday, June 04, 2009 - 08:44 PM UTC
It's a nice build, good to see!

In case if you need info about the light plug, here is a better shot from the Squadron Walk Around for reference. On the left lightguard it was positioned on the other side, simmetrically:

russamotto
Visit this Community
Utah, United States
Joined: December 14, 2007
KitMaker: 3,389 posts
Armorama: 2,054 posts
Posted: Saturday, June 06, 2009 - 12:56 PM UTC
I had some time today and did some more work. I added hatch handles made out of 28 gauge wire, started on the light socket plugs and formed a piece of the etch sheet as a base for the horn. Thank you Laszlo for the photo. I primed the model and added the first coat of paint. Nothing finds errors like a coat of paint, and they're all mine. Here's what she looks like now.


Here is what the plugs and horn base look like.


I added the periscope guards after priming to try to protect the periscopes.


The handles look a lot finer than the periscope guards but I can't form the wire to make the guards. If I've missed anything, let me know. Significant errors aside, this is the nicest of the three M4 kits I have built from Dragon.

It's nearly time to choose markings for the tank. I still don't know what I'm going to do. I may just go with Bushmaster, and then later I'll pick another one up and do a flamethrower tank.
mmcalc
Visit this Community
Virginia, United States
Joined: February 19, 2008
KitMaker: 55 posts
Armorama: 49 posts
Posted: Sunday, June 07, 2009 - 05:43 PM UTC
Russ,

Nice work. The photoetch light guards are really well done., Those kill me, I can never get them glued on well. The sand shield mounting strips look better installed than they do in the box. In the box they look too wide, but they look pretty good on your model. Bushmaster is a good choice for markings.

Mike Canaday
russamotto
Visit this Community
Utah, United States
Joined: December 14, 2007
KitMaker: 3,389 posts
Armorama: 2,054 posts
Posted: Friday, June 12, 2009 - 03:22 PM UTC
Can anyone help with a good photo of the base for the second antenna? It looks like it extends off the rear of the turret. I'll be posting photos hopefully tomorrow. All painted and getting the tracks on, almost ready for the decals. I'll have to find the link posted here about how to assemble the three piece antenna.
russamotto
Visit this Community
Utah, United States
Joined: December 14, 2007
KitMaker: 3,389 posts
Armorama: 2,054 posts
Posted: Monday, June 15, 2009 - 11:43 AM UTC
I finished the basic hull painting and put the tracks on. They were both too long by 1 link so I had to trim them. I painted them with Pollyscale oily black. Guide horns are Tamiya nato brown, with a graphite stick (6B) used for highlights. I am ready for decals I think. Let me know if there is anything I missed or need to fix.


I need to touch up the tracks where they are joined, and around the light guard, which I knocked off while placing the tracks. My tools placement is probably off. I think the straps are all supposed to line up. I'll do a coat of future for the decals, and then start weathering. It's hard to see, but based on other tanks it looks like there should also be a blacked out star on the hull sides as well as the turret. I have a spare from the "Thunderbolt VII" kit. Is there anything I'm leaving out? I also need to do the antenna base for the second antenna.
shneezbert
Visit this Community
Arizona, United States
Joined: October 31, 2005
KitMaker: 134 posts
Armorama: 99 posts
Posted: Monday, June 15, 2009 - 11:57 AM UTC
Nice job. I believe the M4A1 DV has a styrene tool for bending the light guards, so if you have the kit you could use that to bend the light guards.
russamotto
Visit this Community
Utah, United States
Joined: December 14, 2007
KitMaker: 3,389 posts
Armorama: 2,054 posts
Posted: Friday, June 19, 2009 - 07:15 AM UTC
Well, I started with the decals and weathering. The star decals went on fine initially, although they were very bright green. I added two star decals for the hull sides from the M4A3E8 kit. Three of the four decals started to peel badly on the edges, and one of the kit decals bubbled badly as well. The big star on the rear engine deck also bubbled. I put some solvaset on the decals to help them settle down, and the rear star seemed to go down better. This kit's decals need more care in handling than others I have used, so be careful. The "U.S. ARMY" decal for the hull rear is very tricky. It is neatly printed with the film following the lettering and periods very closely. Mine separated and fell apart at the U, S, and Y when I put the solvaset on. I ended up with what looked more like a booger on the side of the hull than a decal, so I only have stars on right now. I sanded the turret and hull side stars down and painted over them as they are blacked out in the photos I have seen. I used Pollyscale scale black. I did some color modulation and I started the weathering with a wash of burnt umber and yellow ochre. Here is what it looks like right now.


The photos were taken in outside in the sunlight. I need to figure out what to do about hull markings before I go much farther. I'll probably make an order from Archer. I am not sure how heavily I want this to be weathered. I don't want to mess it up. I ground pastels last night, mixing colors for the final dusting. Suggestions, tips, corrections and redirections are welcome. Thanks for looking.
 _GOTOTOP