Dioramas: Buildings & Ruins
Ruined buildings and city scenes.
Hosted by Darren Baker
Miniart Farmhouse Dio with Base
silentsteel
Visit this Community
Kansas, United States
Joined: August 20, 2005
KitMaker: 153 posts
Armorama: 143 posts
Posted: Saturday, August 01, 2009 - 06:09 AM UTC

Quoted Text

Hey there Mike,

nice work so far...i could sense this gonna be a busy dio...

personally i like all of the setup..... any of them will sure gives a wonderful dio.. but if u still ask which of them is the best, i would vote for the number 2.. the uneven alignment of the two building maybe attracted me to vote for the setup..

good luck for the whole build....


I would have to agree with you I will just extent the wall on the other side.

Thanks
Mike
silentsteel
Visit this Community
Kansas, United States
Joined: August 20, 2005
KitMaker: 153 posts
Armorama: 143 posts
Posted: Saturday, August 01, 2009 - 06:14 AM UTC

Quoted Text

hi mike, i like your dio so far, especially the mold for the base, but if you want a accurate sherman your going to have to modify or replace it im afraid. the photo your basing your dio on is after the normandy landings, the tank is part of the 2nd armored division most likely. the sherman in dragons kit has some glaring errors, i had to do a **** load of work to get it to be okay. heres a link to base your sherman on ,the one in the photo is a late production one. http://www.tasca-modellismo.com/seihin/m4a175/m4a175lp.html if you can, get yourself a tasca sherman, its the bet on the market, but if you decide to stick with the dragon one heres a list of improvements and corrects if you want a late sherman

http://www.usarmymodels.com/MANUFACTURERS/DML/dml6048.html


Yes you are right the Sherman is part of 2nd AD outside of Countence France in July 1945. and thanks for getting me on the right track with the Sherman I will be picking up a Tasca Sherman and build that one since its a match to the one in the picture.

Thanks of the help
Mike
silentsteel
Visit this Community
Kansas, United States
Joined: August 20, 2005
KitMaker: 153 posts
Armorama: 143 posts
Posted: Saturday, August 01, 2009 - 06:17 AM UTC

Quoted Text

Hi

Great Build. Certainly getting to grips with building Miniart sets.

One point. I don't think your timber roof structure is quite correct. The large timbers you show would run vertically not across. Then much thinner timbers positioned horizontally to fix roof tiles to.

Alan


Hey Alan,

Is there a site or anything that can guide me in building the roof, I can honestly say this is not my strong suit.

Thanks again
Mike
c_benshoof
Visit this Community
Oregon, United States
Joined: April 05, 2008
KitMaker: 122 posts
Armorama: 98 posts
Posted: Saturday, August 01, 2009 - 06:31 AM UTC
Mike,

Here is an example on how the roof should be framed up. Hope it helps!

silentsteel
Visit this Community
Kansas, United States
Joined: August 20, 2005
KitMaker: 153 posts
Armorama: 143 posts
Posted: Saturday, August 01, 2009 - 06:39 AM UTC
Thanks Chris,

This is exactly what I was looking for.............Thanks again.

Mike
c_benshoof
Visit this Community
Oregon, United States
Joined: April 05, 2008
KitMaker: 122 posts
Armorama: 98 posts
Posted: Saturday, August 01, 2009 - 06:42 AM UTC
If the roof will be tiled then you will need to add some horizontal wood strapping for the tiles to sit on. See picture below for reference.

silentsteel
Visit this Community
Kansas, United States
Joined: August 20, 2005
KitMaker: 153 posts
Armorama: 143 posts
Posted: Saturday, August 01, 2009 - 01:11 PM UTC
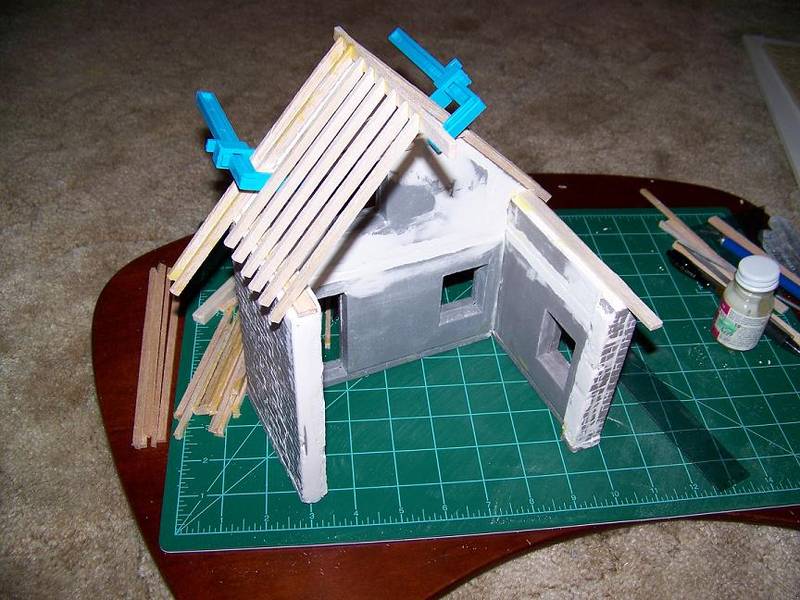
OK with a little help from some friends I've decided to rebuild the roof of the main building, with some some help from Chris and his pictures.


I will even have a crawl space at the peek of the roof, with the way the building is designed.....I think.

Thanks
Mike


c_benshoof
Visit this Community
Oregon, United States
Joined: April 05, 2008
KitMaker: 122 posts
Armorama: 98 posts
Posted: Saturday, August 01, 2009 - 01:48 PM UTC
Much better Mike! Good work. looks to be a good dio, I will keep watching!
Plasticbattle
#003
Visit this Community
Donegal, Ireland
Joined: May 14, 2002
KitMaker: 9,763 posts
Armorama: 7,444 posts
Posted: Saturday, August 01, 2009 - 02:40 PM UTC
Great work Mike. It was only a matter of time before somebody starting kit-bashing MiniArt´s building to create originals. Enjoying this so far.
silentsteel
Visit this Community
Kansas, United States
Joined: August 20, 2005
KitMaker: 153 posts
Armorama: 143 posts
Posted: Sunday, August 02, 2009 - 06:54 AM UTC
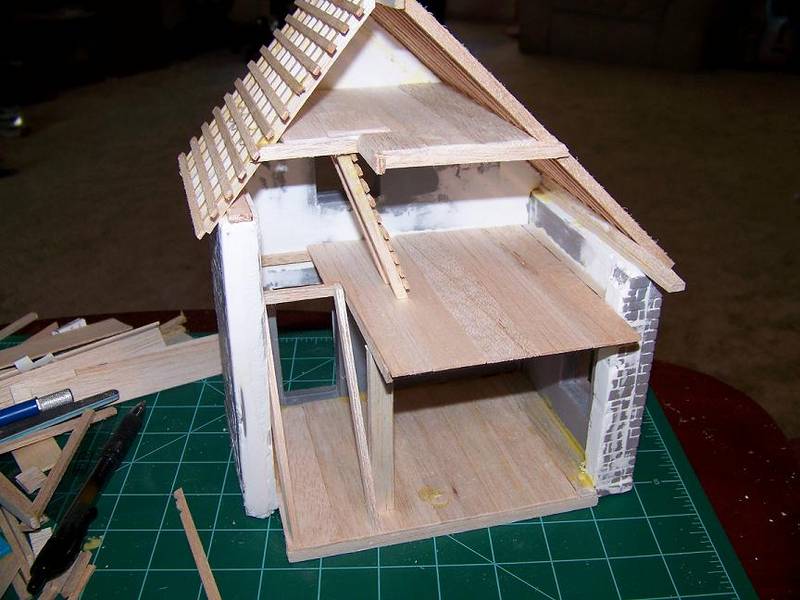
Just want to post some in progress picture of the main building

Shot of the inside.


Thanks
Mike
c_benshoof
Visit this Community
Oregon, United States
Joined: April 05, 2008
KitMaker: 122 posts
Armorama: 98 posts
Posted: Sunday, August 02, 2009 - 07:23 AM UTC
Nice work. I like the attic area. Keep it coming!
silentsteel
Visit this Community
Kansas, United States
Joined: August 20, 2005
KitMaker: 153 posts
Armorama: 143 posts
Posted: Sunday, August 02, 2009 - 07:39 AM UTC

Quoted Text

Nice work. I like the attic area. Keep it coming!


Thanks Couldn't do it without your help!!!!!!!!!!!!!

Mike
silentsteel
Visit this Community
Kansas, United States
Joined: August 20, 2005
KitMaker: 153 posts
Armorama: 143 posts
Posted: Sunday, August 02, 2009 - 01:55 PM UTC
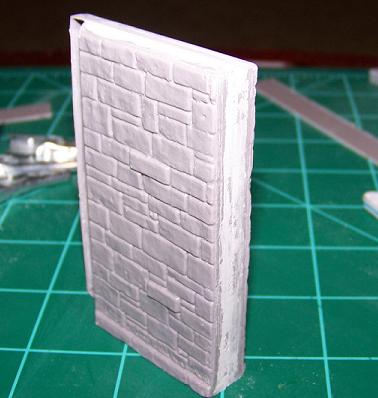
OK guys I just want to post a technique I use to help make sure, that the building is solid and square.

Please feel free to ask any questions or have any concerns with this technique.

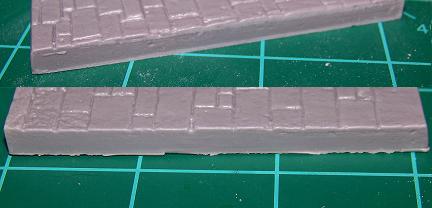
Here are some basic Items I use to start out with:


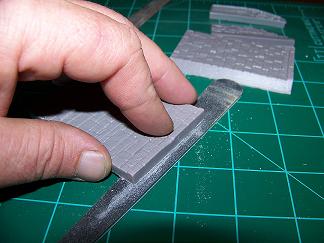
After I scribe all the parts of the sheets I start sanding everything:


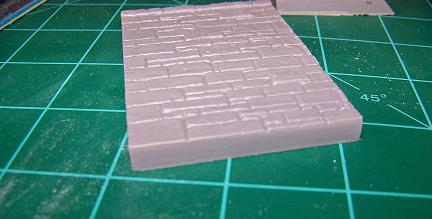
Once done sanding it should look like this:


Here is a before and after shot.


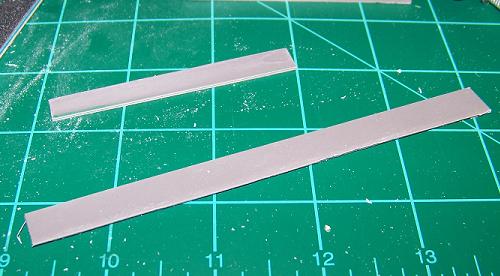
OK next move to the excess strips that you have after you scribe the parts of the sheets and yes they do come in handy.


Once you clean them up a little, cut them to size and use plastic cement to clue the pieces to the parts along the straight part of the wall.


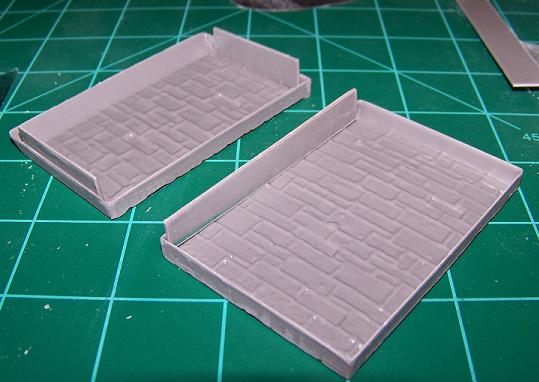
Here is what both part look like when everything is clued.


Go ahead and dry fit the parts to together to check for any major areas that will need to be worked. (Extra cluing or filling)


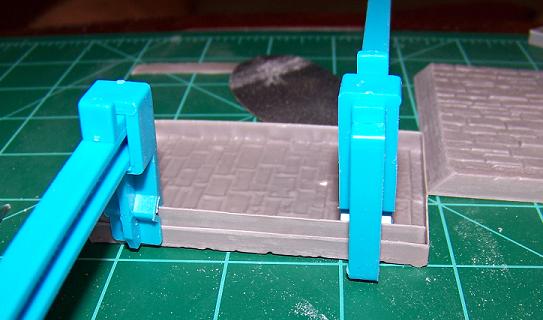
Now go ahead and still using the plastic cement, clue the parts together and hold them in some sort if a vise. I use clamps but you can use anything you have to keep the part tight together.


Once the cement is dried it should look like this: This piece had a slight gap on one corner which can be filled with filler.


Now go ahead and fill in with putty, I use Squadron white putty cause it helps with the bonding of the parts:


Once the putty is dry, sand as need and then the parts are ready to be assembled.


Now this is the way I like to do it cause it makes everything more stable and square the parts up better.

I hope you enjoy and will post more techniques I've found that works for me.

Thanks
Mike
Gorizont
Visit this Community
Sachsen, Germany
Joined: November 28, 2007
KitMaker: 1,462 posts
Armorama: 1,289 posts
Posted: Tuesday, August 04, 2009 - 01:49 AM UTC
It´s an interesting thing, to see a Miniart-building get built up!
Also on their webpage I´ve seen the videos.
But I do not trust me, to build one.

The wooden parts makes it more unique! Looks good so far!

greetings...
Soeren
Removed by original poster on 08/14/09 - 02:26:07 (GMT).
silentsteel
Visit this Community
Kansas, United States
Joined: August 20, 2005
KitMaker: 153 posts
Armorama: 143 posts
Posted: Thursday, August 06, 2009 - 04:03 AM UTC
Hi Troops,

Just want to post more pictures of the build.

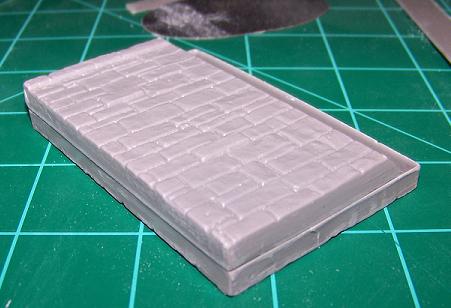
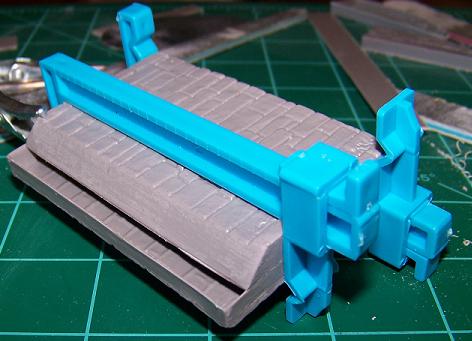
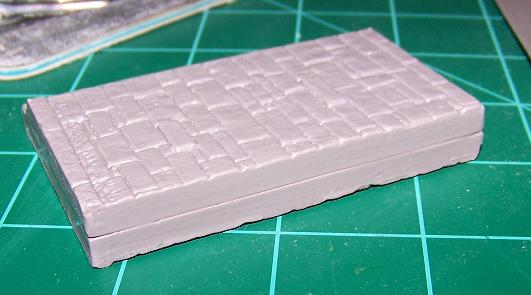
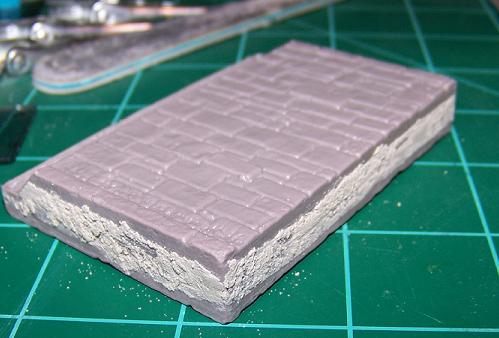
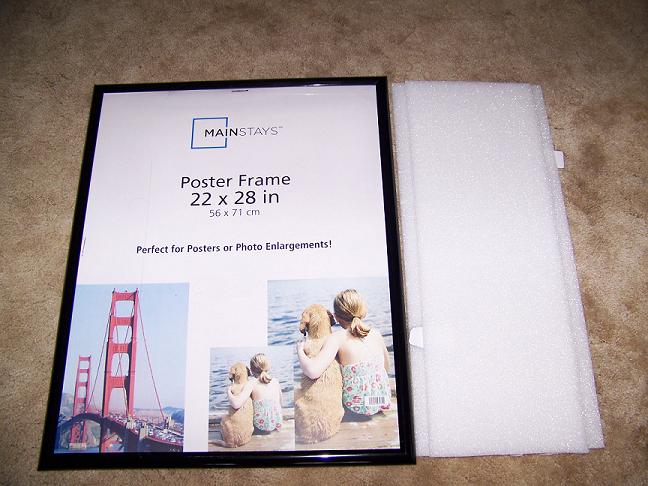
Here is what I will be using for the base,
big a** frame and styrofoam board:


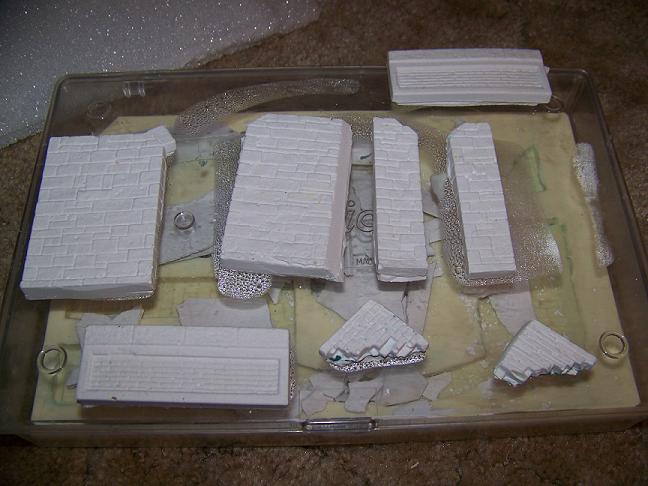
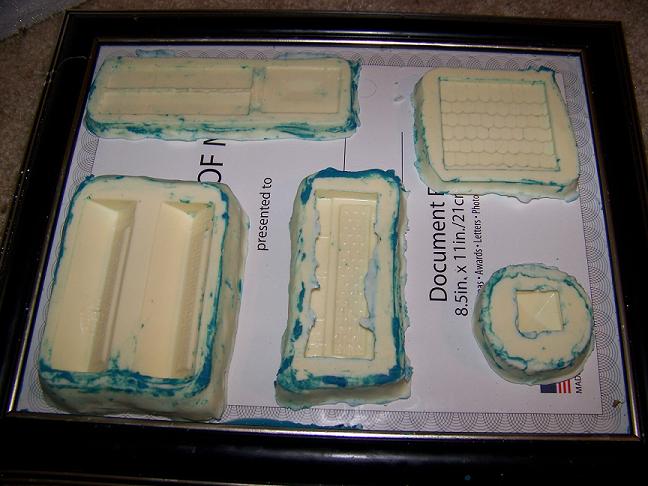
And some Plaster of Paris mold and and new molds for things I will incorporate in the Diorama


I hope you like, will start putting everything together soon.

Mike
silentsteel
Visit this Community
Kansas, United States
Joined: August 20, 2005
KitMaker: 153 posts
Armorama: 143 posts
Posted: Thursday, August 06, 2009 - 06:16 AM UTC
Hi everyone, I recently started going though my girlfriend's Mother's rifle collection and I found these two rifles.

Now if I'm not wrong these are German WW2 Rifle they have, one even has the German Eagle over a swastika on it all over it. (Bolt, stock, Barrel) and allot of factory markings.

Can some one help me ID these rifles, please let me know I have other pictures of the rifles on Photebucket, here's the link......... hope it works,

http://s299.photobucket.com/albums/mm314/steelbee_1/German%20Rifles/

If I can post on other forums please also let me know.

Thanks
Mike
exer
Visit this Community
Dublin, Ireland
Joined: November 27, 2004
KitMaker: 6,048 posts
Armorama: 4,619 posts
Posted: Thursday, August 06, 2009 - 06:29 AM UTC

Quoted Text

Hi everyone, I recently started going though my girlfriend's Mother's rifle collection and I found these two rifles.


Your girlfriend's Mother's rifle collection? You better do right by that girl

You'd get more response in the militaria forum or even the figures forum with a good post title.
silentsteel
Visit this Community
Kansas, United States
Joined: August 20, 2005
KitMaker: 153 posts
Armorama: 143 posts
Posted: Thursday, August 06, 2009 - 06:46 AM UTC
I do agree with you Pat.........Both are avid collectors

and thanks, I've already posted in the militaria forum, and I will post in the figure forum for more information.

Thanks
Mike
smitsan
Visit this Community
Latvia
Joined: September 05, 2008
KitMaker: 51 posts
Armorama: 50 posts
Posted: Thursday, August 06, 2009 - 08:39 AM UTC
Mike Banicky:rifle witch is second on photo is a german rifle kar 98k and first(witch is up on photo,how i think) is rifle from England: Lee-Enfield .410
silentsteel
Visit this Community
Kansas, United States
Joined: August 20, 2005
KitMaker: 153 posts
Armorama: 143 posts
Posted: Thursday, August 06, 2009 - 09:45 AM UTC
OK enough about the rifles

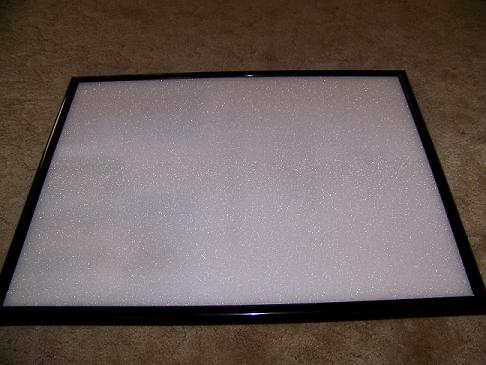
This is a photo of my base,


What I have done was cut the Styrofoam board same size as the fame, and inserted into the opening, then I placed the clear plastic sheet and backing board back on the fame and taped it all down with masking tape.

I will post other a little later.

P.S. I'm starting to run out of room for my pictures (disk Space) on KitMaker Galllery and will soon have to delate some. Sorry. Will have all the pictures in Photobucket account.

Thanks
Mike
dioman13
Visit this Community
Indiana, United States
Joined: August 19, 2007
KitMaker: 2,184 posts
Armorama: 1,468 posts
Posted: Friday, August 07, 2009 - 02:22 AM UTC
Mike, It looks good so far. If you are going to show a bit of expossed roof without shingles, you might want to reduce the thickness of your wood on the cross peices. They are looking like 2x4s which are too thick. Try to get thinner wood, and if you are showing open roof don't forget the dam nails that are always stuck , ( my pants will testify about the nails on a slate roof) looking forward to seeng this one, I have one of these that I'm redoing.
diverdown724
Visit this Community
Ontario, Canada
Joined: January 21, 2007
KitMaker: 15 posts
Armorama: 12 posts
Posted: Saturday, August 08, 2009 - 08:22 AM UTC
Mike. I am glad I have been following this thread. I found MiniArt stuff to be a bit tricky to get together right, but this is certainly helping piece things together (alright, bad pun there). It's looking good so far, the addition of the interior is great.

silentsteel
Visit this Community
Kansas, United States
Joined: August 20, 2005
KitMaker: 153 posts
Armorama: 143 posts
Posted: Monday, August 10, 2009 - 05:41 PM UTC
I have some bad news for the guys who have been keeping up with the build.

There has been a major sat back.......I have to put a hold on everything until I can get some personnel issues taken care. This doesn't mean I have stop modeling, Which is the only thing I really enjoy.

As soon as I start up again I will find this post and start it again.

Thanks for all the good advise and words from you all

Mike
silentsteel
Visit this Community
Kansas, United States
Joined: August 20, 2005
KitMaker: 153 posts
Armorama: 143 posts
Posted: Thursday, August 13, 2009 - 12:24 PM UTC
OK everyone, I'm back and everything is good......Sorry some health issues just getting OLD.

I have some pictures of the build and will post very soon need to make some room for them.

Mike