_GOTOBOTTOM
Dioramas: Techniques
Diorama techniques and related subjects.
Hosted by Darren Baker
Technique for Building a Miniart Model
silentsteel
Visit this Community
Kansas, United States
Joined: August 20, 2005
KitMaker: 153 posts
Armorama: 143 posts
Posted: Sunday, August 02, 2009 - 01:59 PM UTC
OK guys I just want to post a technique I use to help make sure, that the building is solid and square. when I build a Miniart model

Please feel free to ask any questions or have any concerns with this technique.

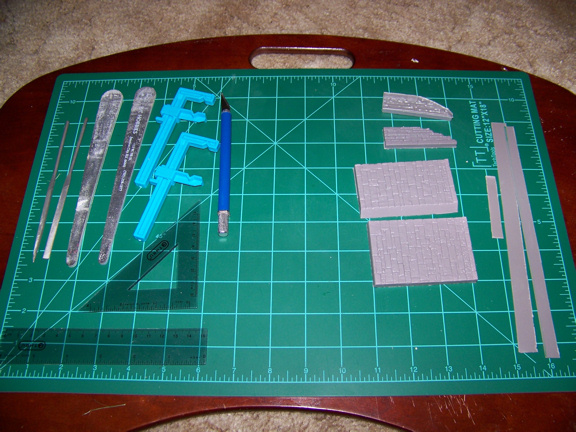
Here are some basic Items I use to start out with:


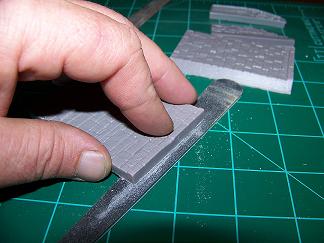
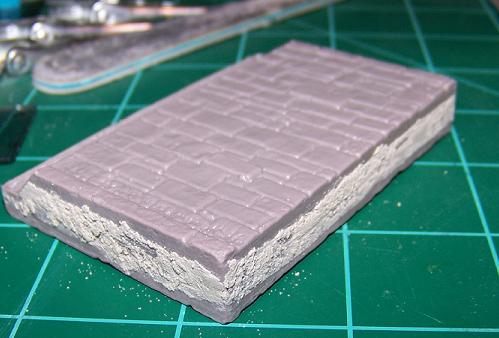
After I scribe all the parts of the sheets I start sanding everything:


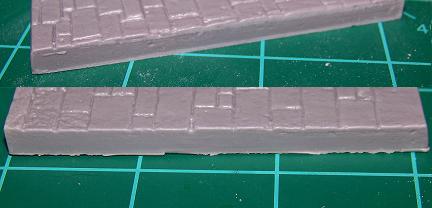
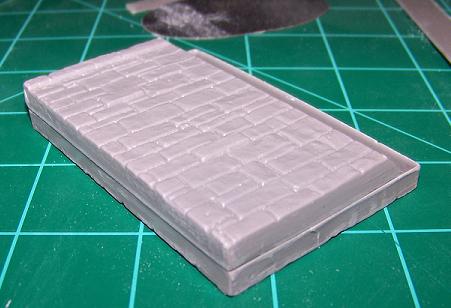
Once done sanding it should look like this:


Here is a before and after shot.


OK next move to the excess strips that you have after you scribe the parts of the sheets and yes they do come in handy.


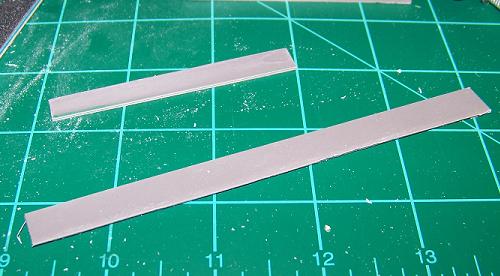
Once you clean them up a little, cut them to size and use plastic cement to clue the pieces to the parts along the straight part of the wall.


Here is what both part look like when everything is clued.


Go ahead and dry fit the parts to together to check for any major areas that will need to be worked. (Extra cluing or filling)


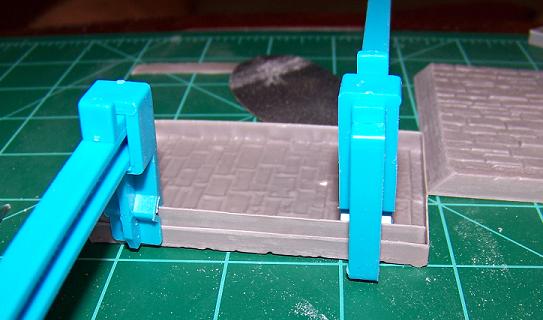
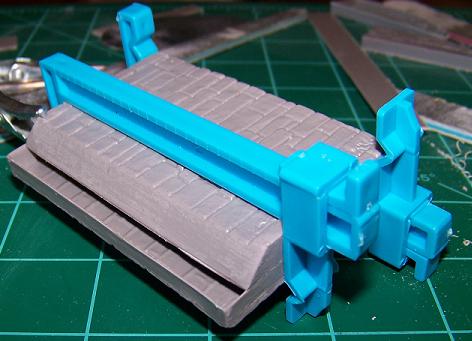
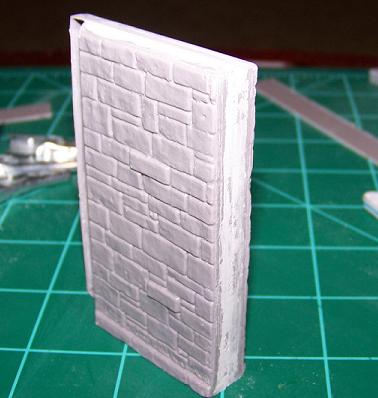
Now go ahead and still using the plastic cement, clue the parts together and hold them in some sort if a vise. I use clamps but you can use anything you have to keep the part tight together.


Once the cement is dried it should look like this: This piece had a slight gap on one corner which can be filled with filler.


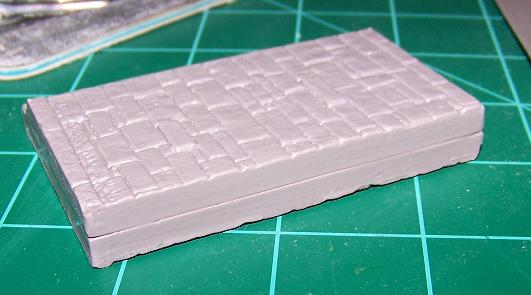
Now go ahead and fill in with putty, I use Squadron white putty cause it helps with the bonding of the parts:


Once the putty is dry, sand as need and then the parts are ready to be assembled.


Now this is the way I like to do it cause it makes everything more stable and square the parts up better.

I hope you enjoy and will post more techniques I've found that works for me.

Thanks
Mike
yeahwiggie
Visit this Community
Dalarnas, Sweden
Joined: March 24, 2006
KitMaker: 2,093 posts
Armorama: 1,359 posts
Posted: Sunday, August 02, 2009 - 08:42 PM UTC
Mike, there is a campaignproposal for just this kind of thing!
Building Miniart-buldings is the main theme, so it think it would be great if you could post this there too.

thanks for the info anyway!
Dangeroo
#023
Visit this Community
Zurich, Switzerland
Joined: March 13, 2009
KitMaker: 2,058 posts
Armorama: 1,656 posts
Posted: Sunday, August 02, 2009 - 10:24 PM UTC
Mike, thanks for the tip, I'll surely be using this as soon as I get to building the miniart kit in my stash. Which could be a while...

Cheers
Stef
silentsteel
Visit this Community
Kansas, United States
Joined: August 20, 2005
KitMaker: 153 posts
Armorama: 143 posts
Posted: Monday, August 03, 2009 - 02:07 AM UTC

Quoted Text

Mike, there is a campaignproposal for just this kind of thing!
Building Miniart-buldings is the main theme, so it think it would be great if you could post this there too.

thanks for the info anyway!


Hi Ron,

I've already posted on that post, it sounds like a good idea to start a campaign like this.

Mike
Biggles2
Visit this Community
Quebec, Canada
Joined: January 01, 2004
KitMaker: 7,600 posts
Armorama: 6,110 posts
Posted: Tuesday, August 03, 2010 - 04:51 AM UTC
Has anyone noticed that the standard sized doors on MiniArt kits scale out to about 8 ft? The buildings generally look quite nice when properly built and detailed, but I find the door heights a real pain to adjust. Are they really supposed to be this high?
alanmac
Visit this Community
United Kingdom
Joined: February 25, 2007
KitMaker: 3,033 posts
Armorama: 2,953 posts
Posted: Tuesday, August 03, 2010 - 05:28 AM UTC

Quoted Text

Has anyone noticed that the standard sized doors on MiniArt kits scale out to about 8 ft? The buildings generally look quite nice when properly built and detailed, but I find the door heights a real pain to adjust. Are they really supposed to be this high?


Hi

I seem to remember reading somewhere that the Miniart buildings are designed to fit 1/32 as well as 1/35. In other words what you are seeing is the oversize in doors etc to make a true 1./35 scale item but probably right for 1/32.

Alan

ltb073
Visit this Community
New York, United States
Joined: March 08, 2010
KitMaker: 3,662 posts
Armorama: 3,078 posts
Posted: Tuesday, August 03, 2010 - 06:20 AM UTC
Mike,
Thanks for starting this tread. I just finished my 4th mini art kit but never thought to use the scrap plastic as bracing looking forward to seeing what you do to the rest as I still have 2 other Mini-art kits in the stash
Gorizont
Visit this Community
Sachsen, Germany
Joined: November 28, 2007
KitMaker: 1,462 posts
Armorama: 1,289 posts
Posted: Tuesday, August 03, 2010 - 06:34 AM UTC
Hi, i also had the idea to build one of these nice kits. But my skills are very limited.
But also I found on Miniart-modelsī webpage the videos, which show the instructions or help /guide to build and paint them.
http://www.miniart-models.com/index.htm?/Assembly/page_01.php

Also in the -paint-section- one can find the "salt-method" for the "chipped-off colors" effect.

Perhaps this could be one of my next plans.

greetings...
Soeren
slodder
Visit this Community
North Carolina, United States
Joined: February 22, 2002
KitMaker: 11,718 posts
Armorama: 7,138 posts
Posted: Tuesday, August 03, 2010 - 06:51 AM UTC
great thread.
One thing I just thought of as a tool for this is a magnetic jig. I have seen magnetic jig where magnet is placed on a metal sheet and acts like a clamp to hold pieces in place and at right angles.
I think I may have to try this in conjunction with the tips in this thread to build some miniart buildings.
Plasticbattle
#003
Visit this Community
Donegal, Ireland
Joined: May 14, 2002
KitMaker: 9,763 posts
Armorama: 7,444 posts
Posted: Tuesday, August 03, 2010 - 06:55 AM UTC
Hi Mike. I use the exact same method for joining the halves. Works great.
One extra thing I do, is to add cement several times and wait a few minutes before joining the halves. Humbrol liquid polly is particularily good for this job. This makes the ends rather soft. Then when you join the two halves, they fix better, and also squeeze out some soft plastic. Small gaps will also be filled in this process, meaning much less filling with putty afterwards. Let this cure until the next day, then trim first with a blade and sand. You will have very little to fill.
I also find it better to use a large sheet of sand paper and sand all four sideas at the same time. Sanding each side individually could mean variances in the sanding level, which could mean puttying.
The result is a really strong bond.
meaty_hellhound
Visit this Community
Alberta, Canada
Joined: July 23, 2010
KitMaker: 786 posts
Armorama: 753 posts
Posted: Tuesday, August 03, 2010 - 06:57 AM UTC
good post and great explanation. i just put together my Miniart building over the weekend and it was not as straight forward as i thought it might be. the bigger walls do need reinforcement or they flex during gluing, making a good fit tough.

one thing i found with the Miniart engineering is the "angled inner wall piece" that i suppose is designed to give a large gluing surface for wall to wall joints. they are not designed for easy joints so i cut right angle sections out of the inside walls, removing this angled "flange" and glued them much better.

Miniart buildings are sweet but they are in need of great "how-to's" like yours so that people can make their first one a nice piece. i scoped out some old posts to get mine started. cheers, mh.
sfctur1
Visit this Community
California, United States
Joined: December 12, 2007
KitMaker: 643 posts
Armorama: 497 posts
Posted: Tuesday, August 03, 2010 - 09:01 AM UTC
Thanks for the extra tips. Using them along with MiniArts online instructions should make building a lot easier. I still need to tackle mine for the MiniArt campaign.
Tom
 _GOTOTOP