_GOTOBOTTOM
Dioramas
Do you love dioramas & vignettes? We sure do.
"The Iron Curtain" - Soviet T55A Diorama
Gundam-Mecha
Visit this Community
England - South East, United Kingdom
Joined: August 05, 2009
KitMaker: 1,019 posts
Armorama: 933 posts
Posted: Wednesday, August 05, 2009 - 11:59 PM UTC
After feeling inspired looking at IS-2's and T-10's in Minsk on a recent visit to a war memorial there, I decided to branch out and start a project on modern Soviet armour. Working on a cold war project was a really nice change and allowed me to try modelling totally new styles of armour and wargear. I also decided to scale up and try 1:35 scale.


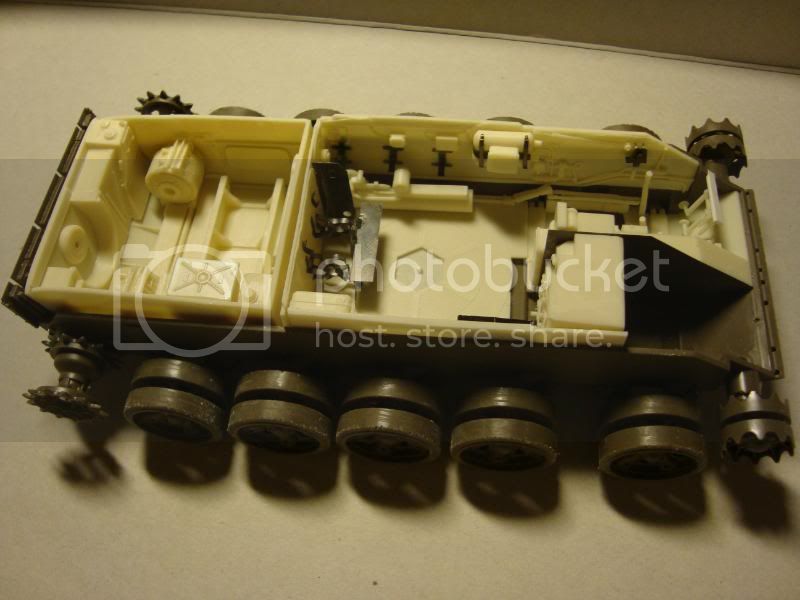
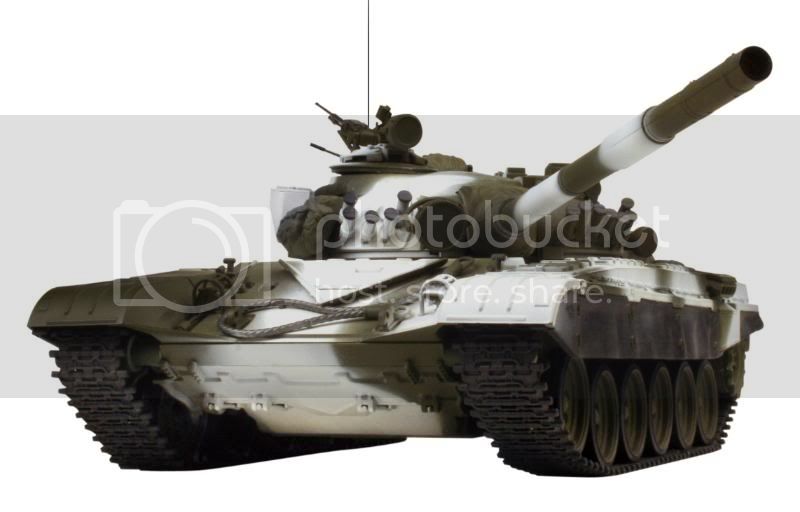
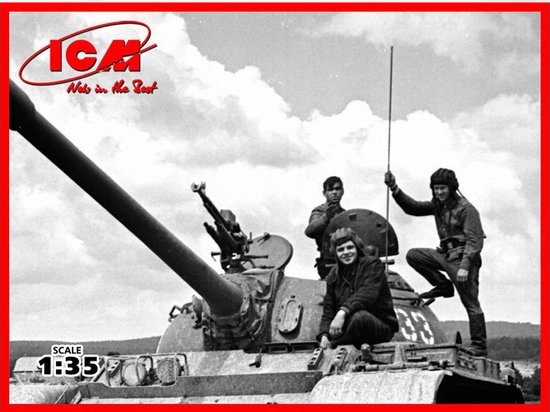
The scene will show a T-55A and Soviet Motor Rifle Troops on patrol, the main part of the scene will be the excellent Tamiya 1:35 scale T-55A:


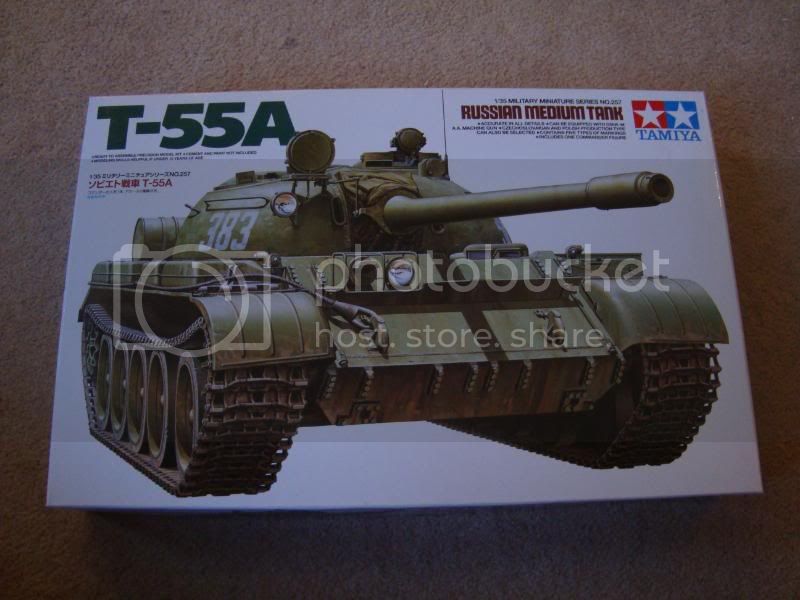
This really is a fantastic kit and a real joy to put together. It's reputation as a great kit is well deserved and Tamiya out did themselves, the level of detail is fantastic and the build goes together like a dream.

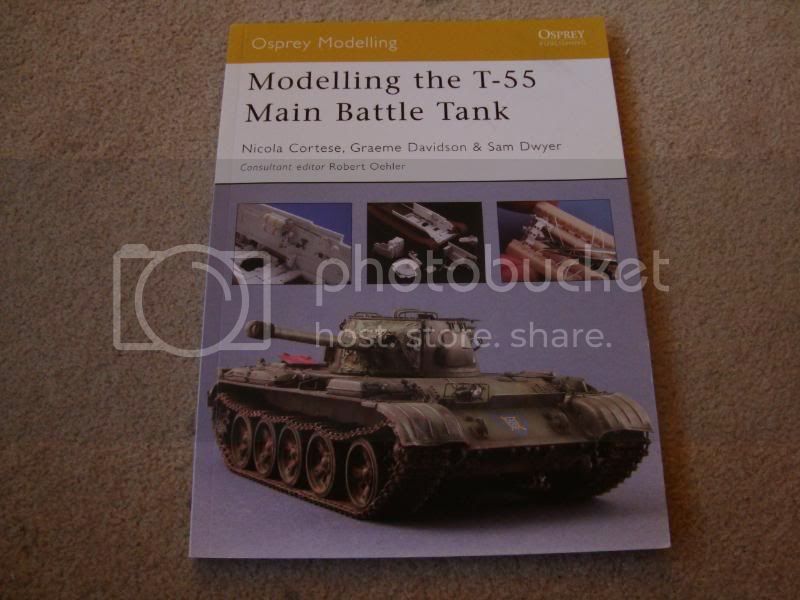
Once again I'll be using Osprey's excellent modelling guides, as reference as well as Osprey reference books on the T55:


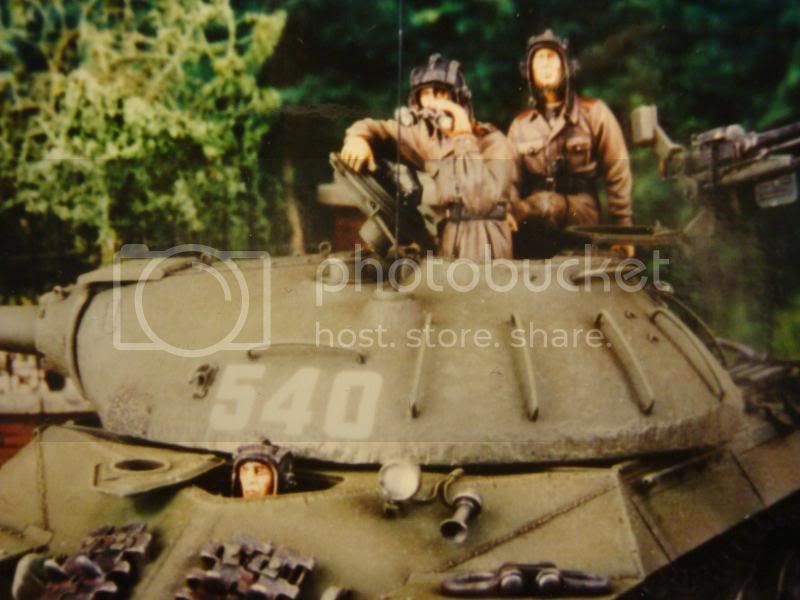
I'll also be using numerous magazine articles and web sources.

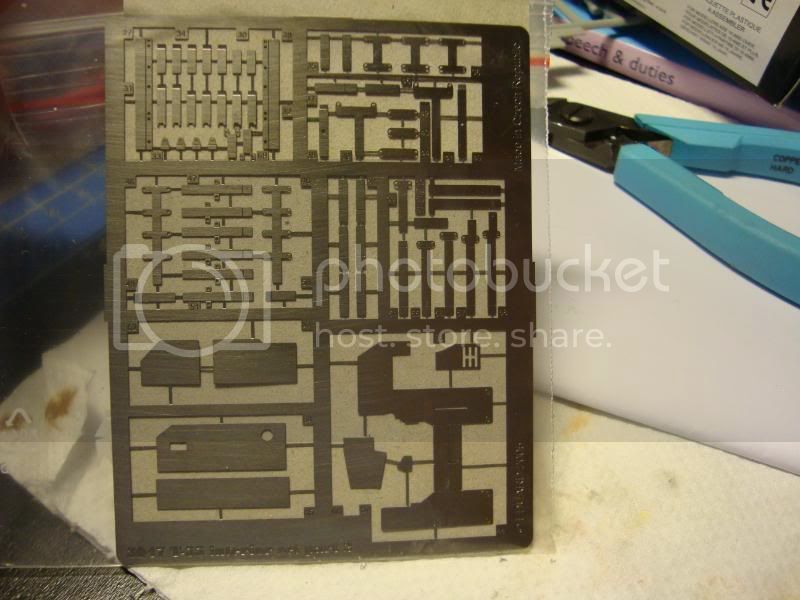
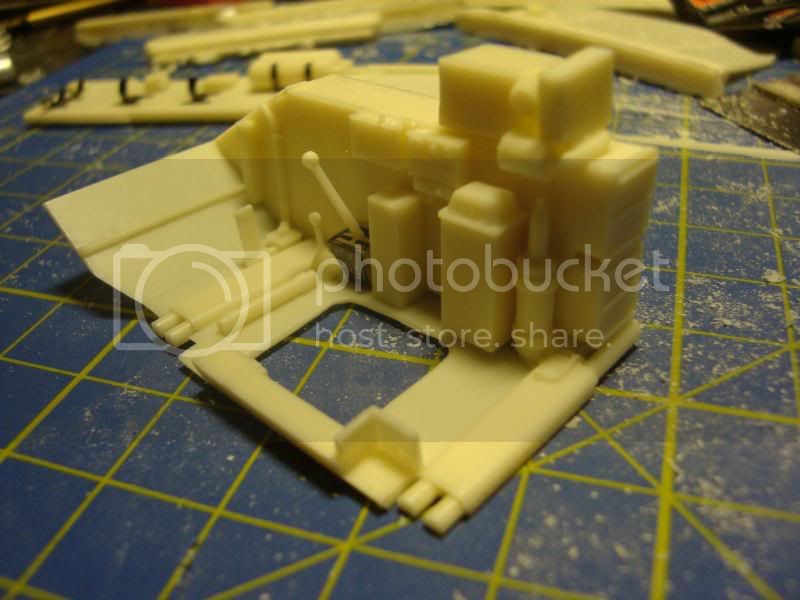
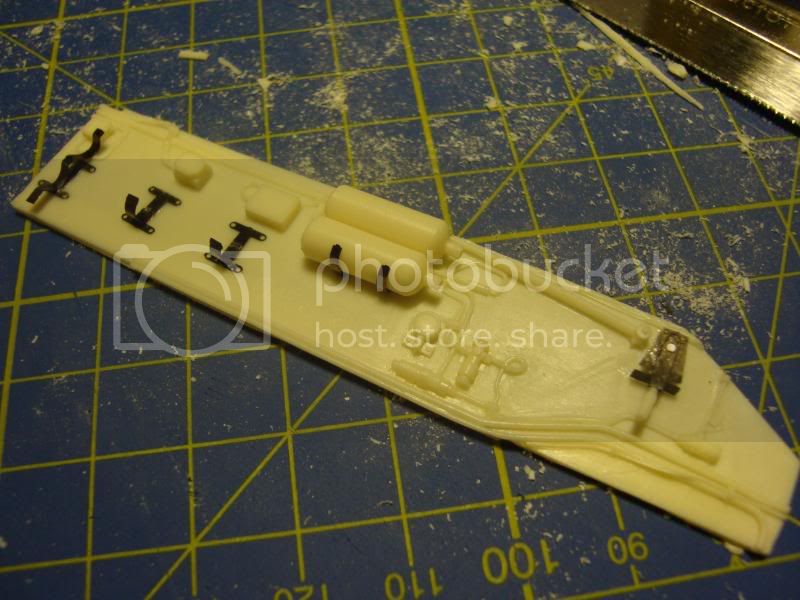
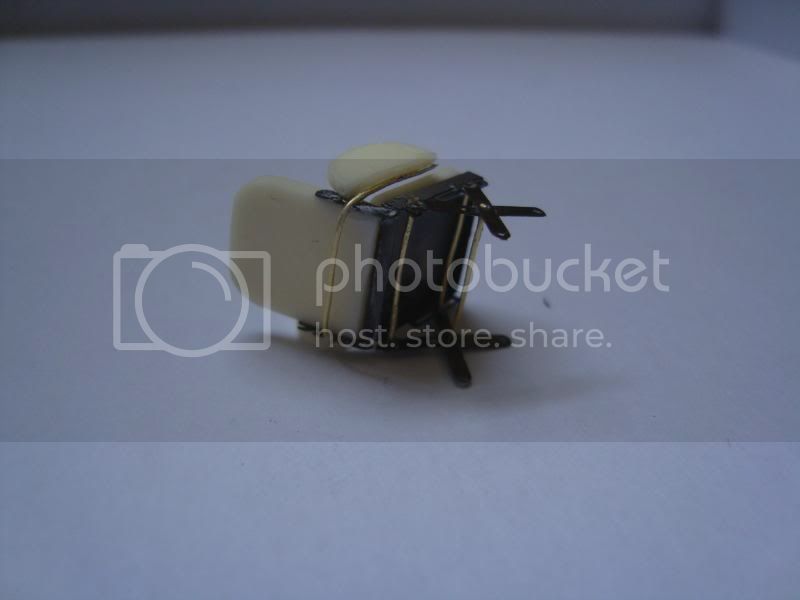
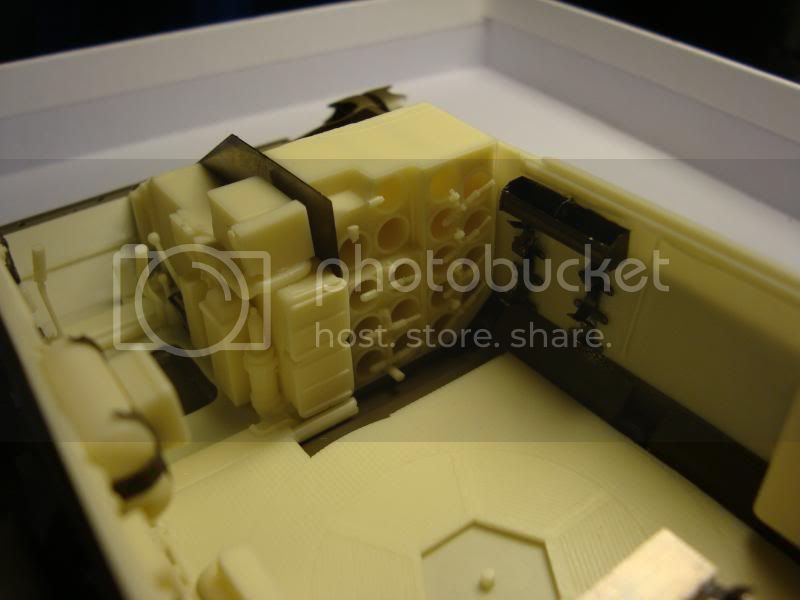
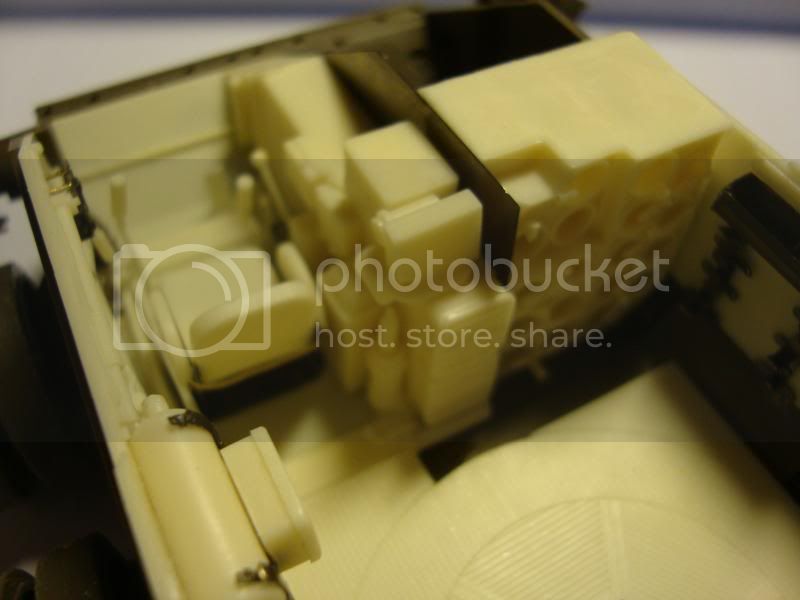
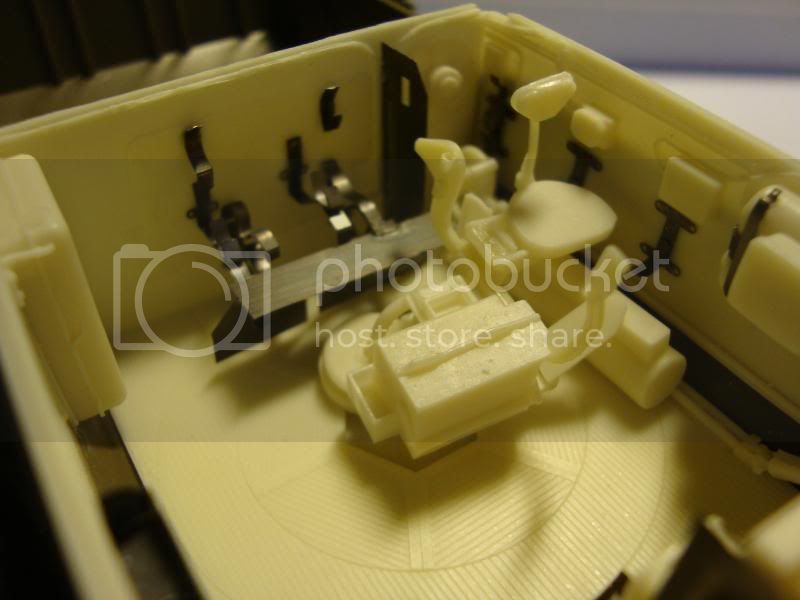
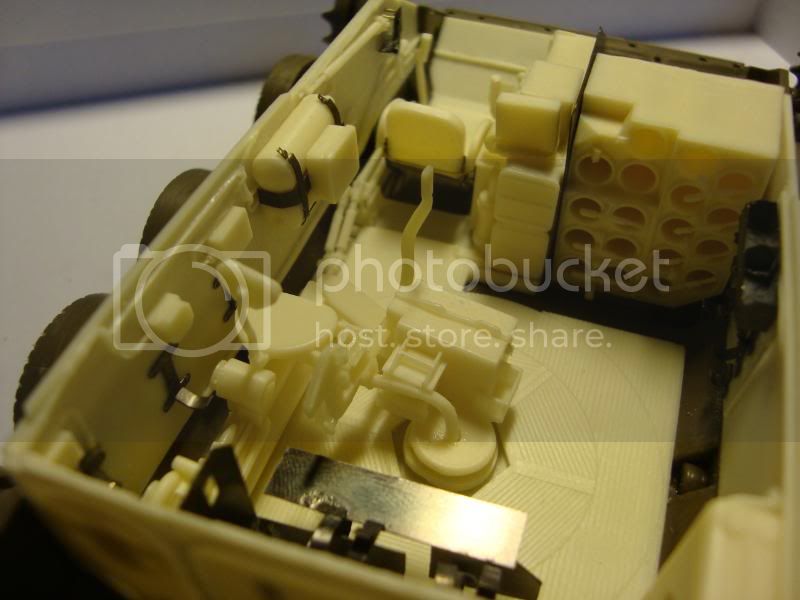
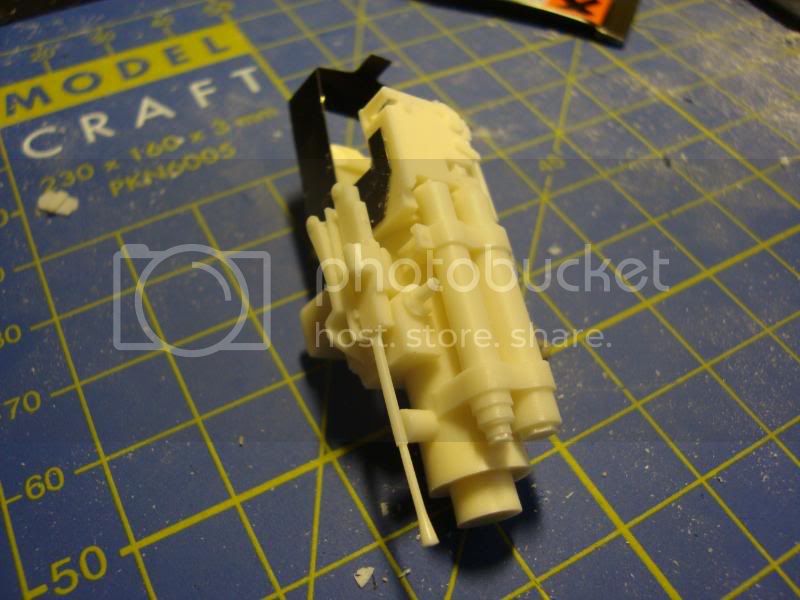
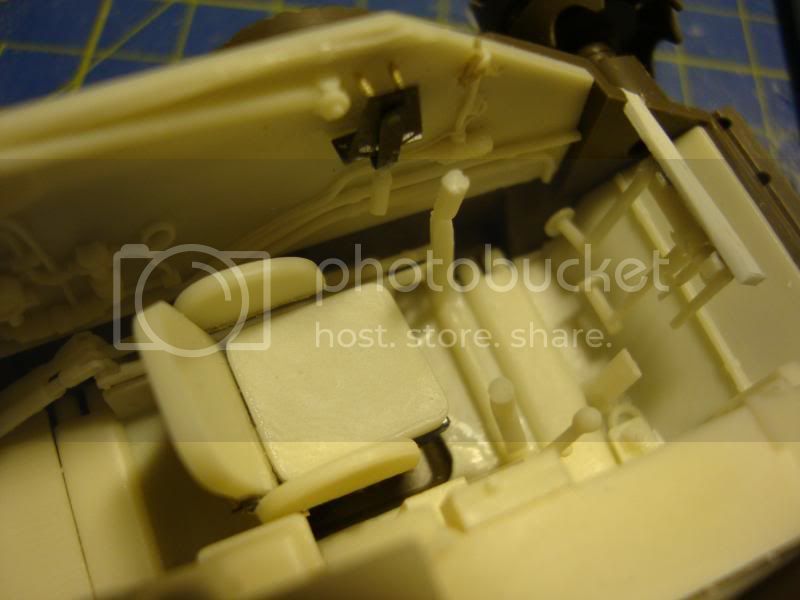
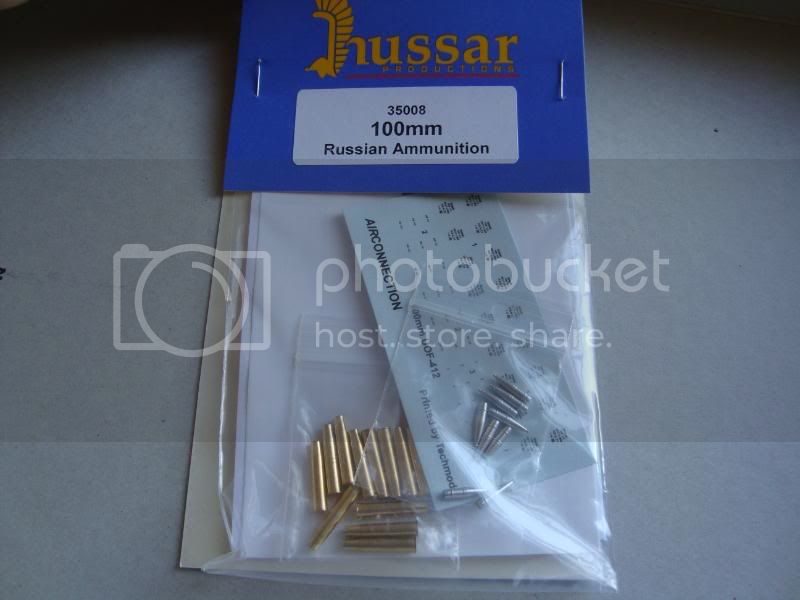
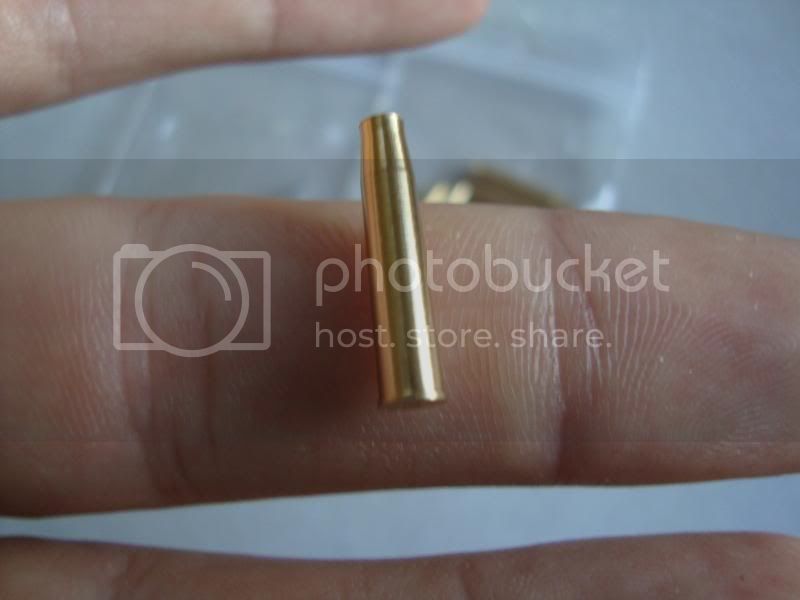
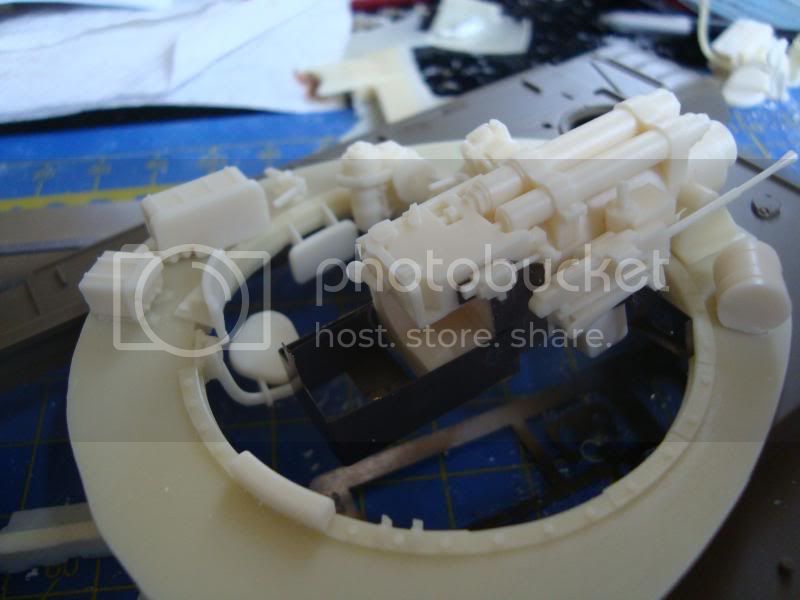
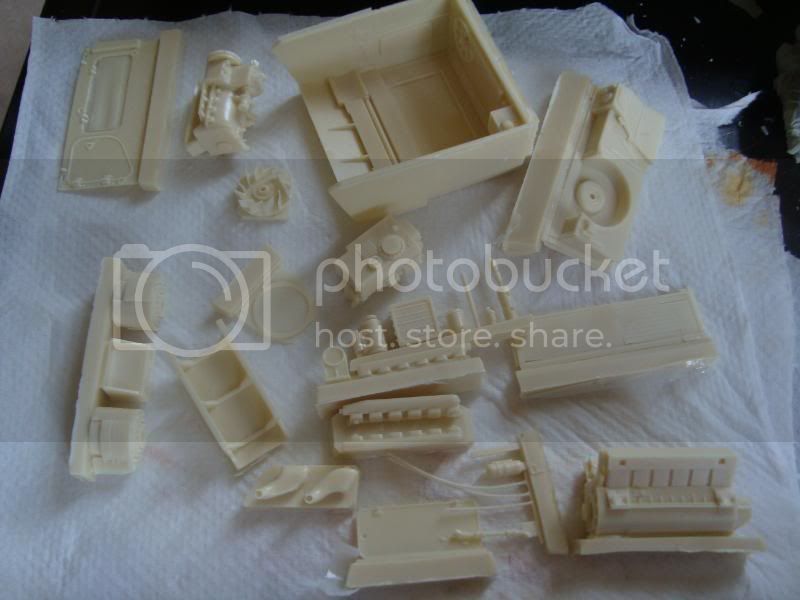
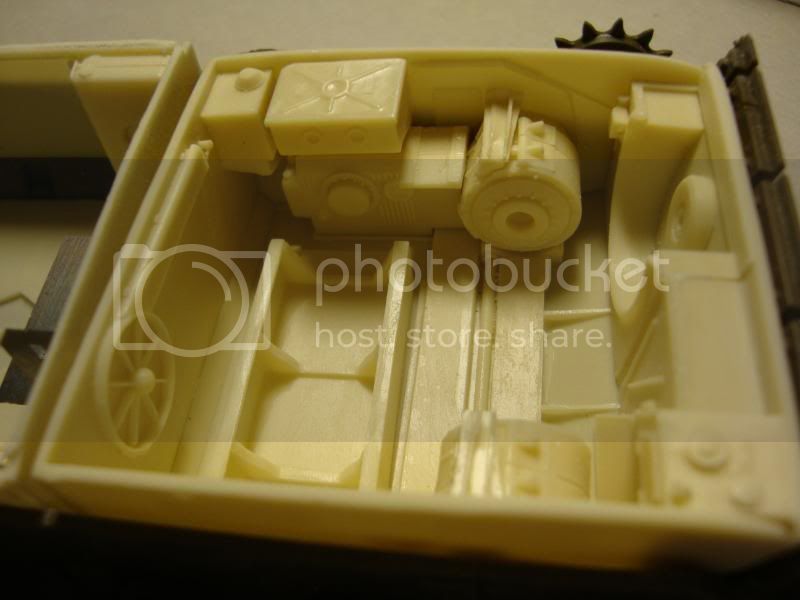
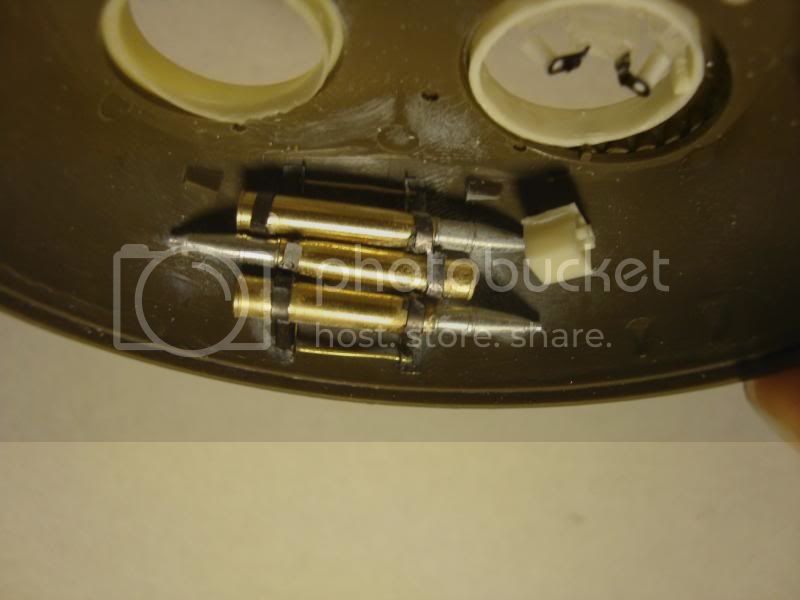
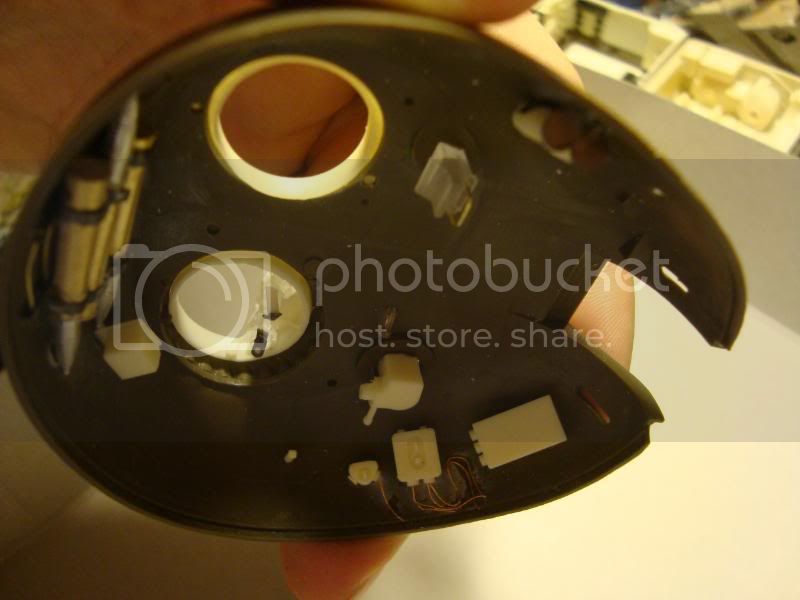
In terms of aftermarket itesm I decided to really go crazy and will be using photo etch from Aber, Lions Roar, Eduard, some resin crew figures from nemrod, workable tracks from Japanese firm Modelkasten, turned shells from Hussar Productions, and some resin full interior detail kits from CMK (Czech Masters Kits). Since these CMK kits are all on mail order from Sprue Brothers in the USA I'll be starting what parts of the build I can without them for now. Luckily CMK provide full instructions for their kits online so I have been able to read these and see what areas of the Tamiya kit that don't require surgery or modification.

Starting the build:

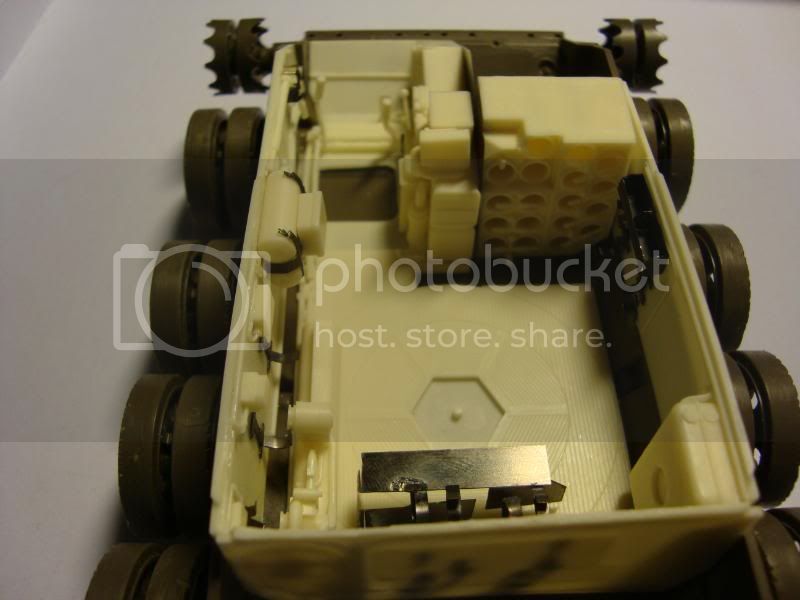
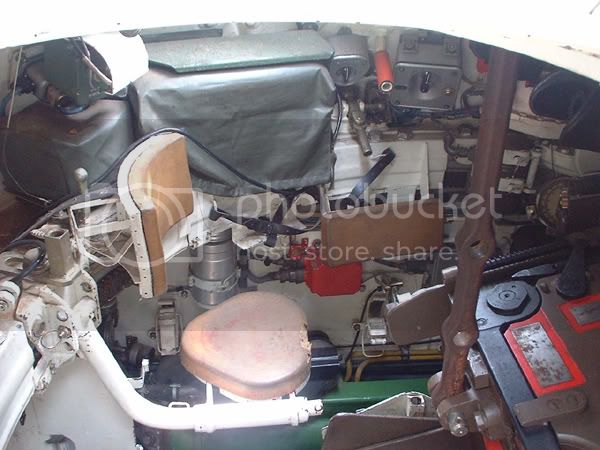
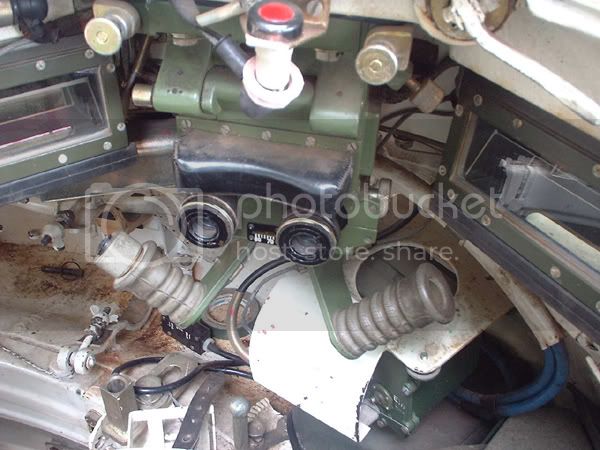
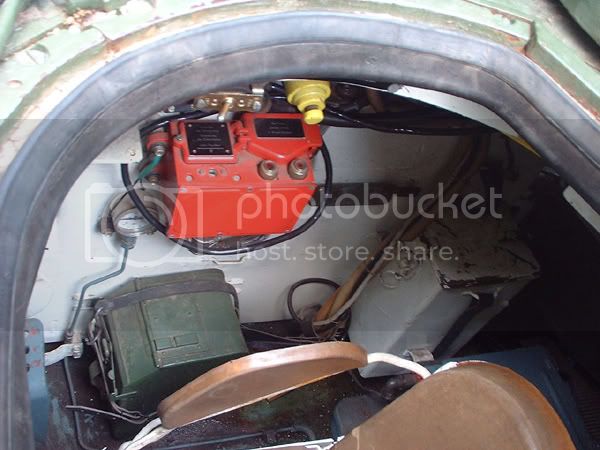
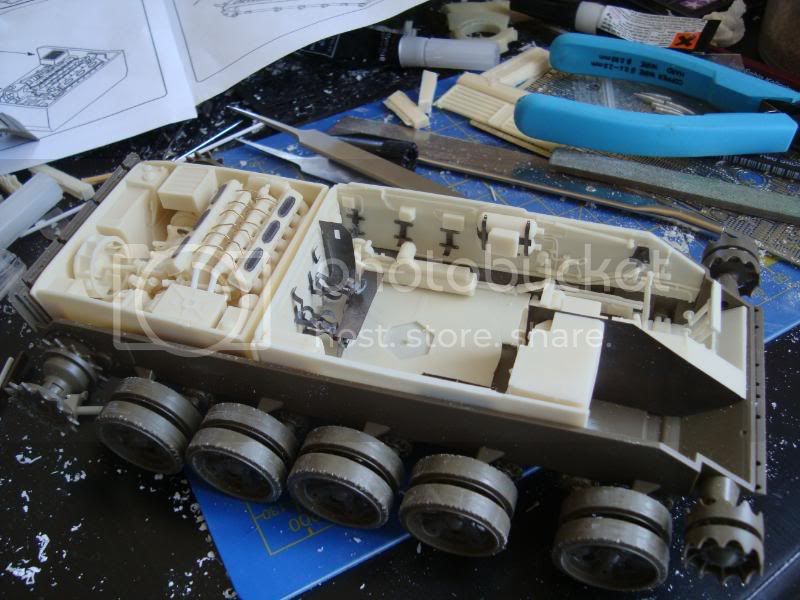
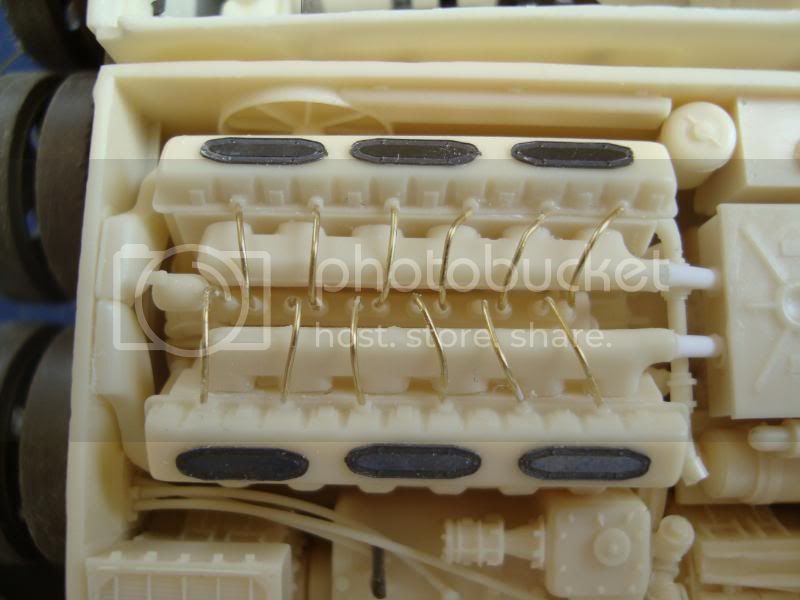
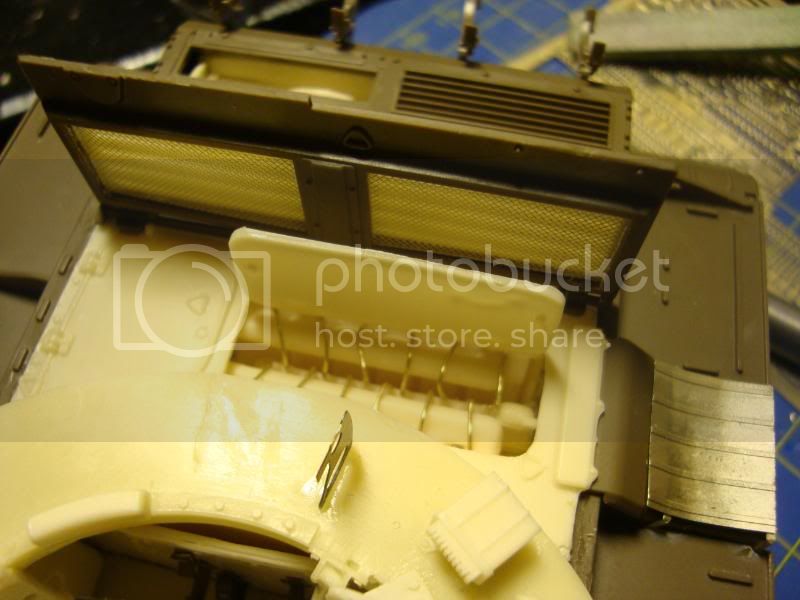
The CMK instructions told me that it was safe to start work on the lower hull and wheels without the resin upgrade parts, so I cracked into the basics and time consuming parts of building road wheels and suspension. The only work I did to improve this area was to add chipping to the rubber road wheels:


I must say the lower Hull has great detail! It's a shame that the underside won't be visible!

Since this dio will be made up of the tank, three tankers, and four motor rifle infantrymen, set in a winter scene. I'm thinking to do a winter camo for the armour. My last winter Diorama I gave away as a gift so I'm keen to do one for myself now.

The scene will include quite a few figures, and I'm trying brands I havent used before such as Nemrod.

Heres the Nemrod box art, it certainly grabbed my attention in the model store and was the best looking modern Soviet Tank crew I could find there:


This set comes with a driver, gunner, and commander. One is in a seated position inside the tank (upper body only), one is seated on the turret (full body), and one standing (full body). I plan to convert the driver with the spares from the plastic Tamiya crew figure that comes with the T-55 to convert him into a fully seated figure to go into the CMK drivers chair.


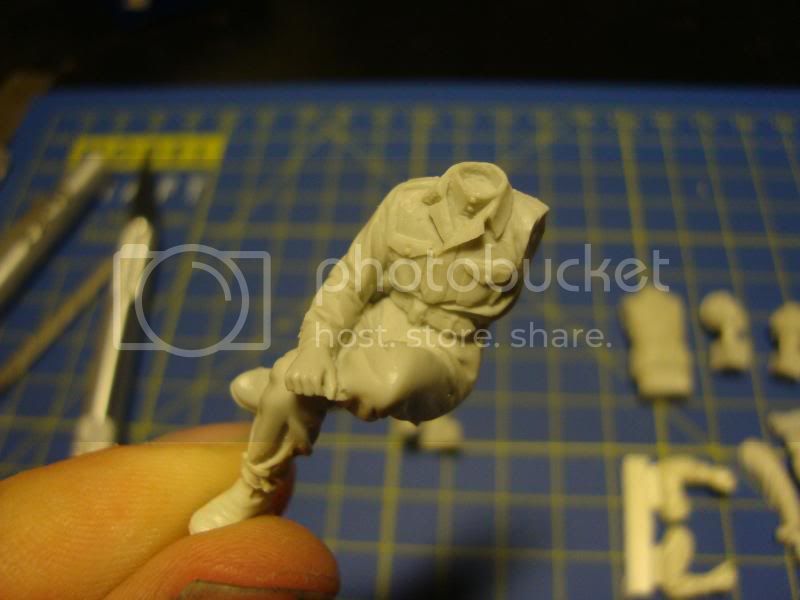
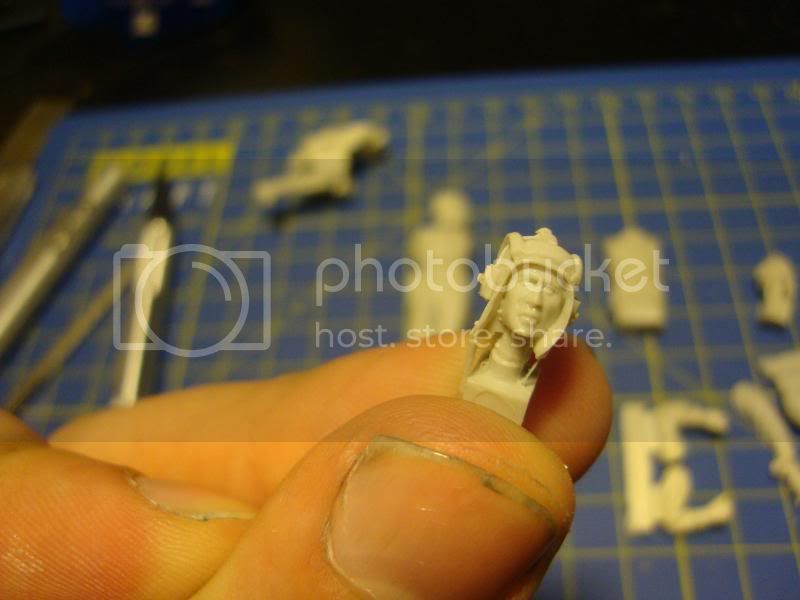
They need some cleaning up but overall the quality of the resin casts are very good with some nice surface details. Also the faces are very nicely done. The detail doesn't show to well in these images, but theres plenty there. I've recently gotten myself some modellers oil paints from Mig's Achtelung range for skin tones, so I'm really looking forward to working on the skin tones in that medium instead of using acrylic colours.

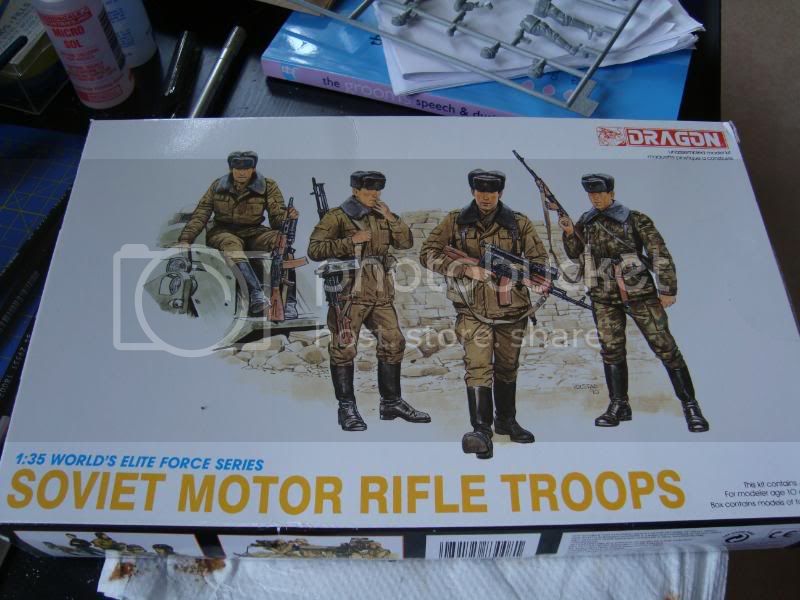
Next up is the Infantry, a great 1:35 plastic kit from Dragon:


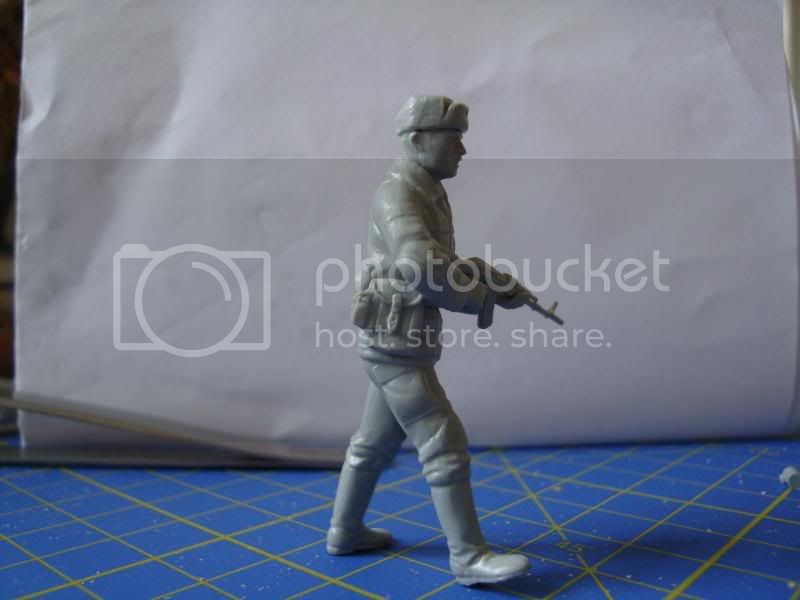
This figure is very early stages of build, the gaps need to be filled with filler and extra details added such as a rifle strap on the AK-74 for example. However this gives an idea of the figure straight from the box. I really love the Russian winter hats in this kit! These sculpts really have character. Although shortly after putting this figure together I decided to try some Hornet Resin upgrade heads that I saw online, so I may replace the plastic head in the kit or mix and match them depending on size and scale creep.


Gundam-Mecha
Visit this Community
England - South East, United Kingdom
Joined: August 05, 2009
KitMaker: 1,019 posts
Armorama: 933 posts
Posted: Thursday, August 06, 2009 - 12:07 AM UTC
I've been doing some research into the Motor Rifle Troops and found this great site

http://www.wargearweb.org/impressions/smr/soviet_motor_rifles.htm

Motor Rifle Troops riding a T-55


As you can see from my Avatar I actually have one of these hats myself!


Gundam-Mecha
Visit this Community
England - South East, United Kingdom
Joined: August 05, 2009
KitMaker: 1,019 posts
Armorama: 933 posts
Posted: Thursday, August 06, 2009 - 12:10 AM UTC
Shipping time and service from Sprue Brothers was great, the parts came within a few days and I started work on the CMK interior quickly.

After washing the resin components I quickly came to realise how complex and time consuming putting it together would be. Even more so than the Verlinden internal detail set I used in my 1:48 T34/76!

Heres the CMK kit, its a fantastic mix of resin, clear resin, painted etch, and photo etch components from Eduard:


The start of the Drivers cabin:


Position in the hull:


A wall section:


Gundam-Mecha
Visit this Community
England - South East, United Kingdom
Joined: August 05, 2009
KitMaker: 1,019 posts
Armorama: 933 posts
Posted: Thursday, August 06, 2009 - 12:15 AM UTC
Some more goodies arrived in the post yesterday and today before I went to work... sadly I had to leave the parcel on my coffee table... urgh!

Yesterday I got my Hornet resin heads and also the Aber photo etch upgrade set for the T-55A. I also got a great back issue of Tamiya modelling magazine in the post that has a really indepth article on the Tamiya T-55 kit. Plenty of construction shots and step by step painting guides.

Heres the CMK Resin engine set. This set is fantastic and reviews say it fits into the Tamiya Hull like a dream. It also fits together flawlessly with the CMK Interior set and gives a very comprehensive model, or so I'm assured!


It comes with plenty of resin parts, some photo etch, and just needs some Brass wire and plastic rod to finish (not supplied).

I also managed to get some more of the interior set built.

First up the Drivers chair, a nightmare of photo etch, brass wire, and resin. This was extremely fiddly to make and required building up the chair in stages from photo etch, and threading the brass wire through the holes in the chair legs and base. The end result though is a pretty detailed and nice looking drivers chair and I think was well worth the effort. Much more detailed than the drivers chair in my 1:48 Verlinden interior set for the T34.


The interior set requires a lot of sub assembly and building of parts before they fit together. It's quite complex and often components make little sense till you see them put together. I've often been building something and thinking "what on earth is this supposed to be?" however when it fits into another part of the kit you start to realise and think "ahhh so thats what it is." You also find that the instructions in these kits whilst generally good can be rather vague and a little confusing so it's been essential to follow my reference photos as well to double check where parts go. Sometimes the exploding diagrams can be tricky to follow.

Heres the gunners station (or at least part of it)... The chair and foot rest are very detailed with nice surface texture (not really clear in these photos).


Suspended


Gundam-Mecha
Visit this Community
England - South East, United Kingdom
Joined: August 05, 2009
KitMaker: 1,019 posts
Armorama: 933 posts
Posted: Thursday, August 06, 2009 - 12:18 AM UTC
Heres some more work on the Interior, I found that once I sat down at got at it it progressed quite smoothly.


Gun breach detail with coaxial machine gun:


Turret ring detail:


Drivers station with foot pedals


The little blob of superglue on the etch panel near the rear firewall that splashed out was tidied up and scrapped off when dry. Sadly I don't have a soldering iron.
Gundam-Mecha
Visit this Community
England - South East, United Kingdom
Joined: August 05, 2009
KitMaker: 1,019 posts
Armorama: 933 posts
Posted: Thursday, August 06, 2009 - 12:23 AM UTC
I also got a chance to do some more work on the Soviet Motor Rifle Troops using the Resin Hornet heads:

Motor Rifle Troopers comparison with the plastic figure head and the Hornet resin upgrade head


Upgraded trooper with scratch built etch strap made up from left overs:


These guys still need finishing off with filler etc. I found the Hornet heads to be a huge improvement in terms of detail compared to the Dragon plastic ones.
Gundam-Mecha
Visit this Community
England - South East, United Kingdom
Joined: August 05, 2009
KitMaker: 1,019 posts
Armorama: 933 posts
Posted: Thursday, August 06, 2009 - 12:31 AM UTC
Finally got my shells for the interior:


These really are great items and the mini transfers for the shells are amazing, also all in authentic Russian!

The service from Airconnections was also excellent.

Attaching the ammo rack and shell to the turret interior, this is just the first shell, there will be four layered on this rack.


Turret ring detail and gun breach:


Parts for the next stage of the project, the fully detailed engine and engine bay. Most of the main interior of the Crew cabin and the Turret is nearly done now, so I will be cracking into this part soon.


Gundam-Mecha
Visit this Community
England - South East, United Kingdom
Joined: August 05, 2009
KitMaker: 1,019 posts
Armorama: 933 posts
Posted: Thursday, August 06, 2009 - 12:34 AM UTC
The Modelkasten tracks arrived from the USA. I've read great things about Modelkasten and they seem to give a fantastic natural sag on the road wheels.


Interior with the start of the Engine bay, still missing the engine at the moment. While the reviews I've read say that the CMK deck fits well into the Tamiya Hull but actually I found on mine that it needed some work to get a right fit and for the upper hull to fit correctly. I had to shave down the walls a little and sand down the underside but it was worth it in the end.


Turret interior detail (the dusty reside from the superglue was cleaned off after the parts dried fully)


Gundam-Mecha
Visit this Community
England - South East, United Kingdom
Joined: August 05, 2009
KitMaker: 1,019 posts
Armorama: 933 posts
Posted: Thursday, August 06, 2009 - 12:38 AM UTC
As you can see from these reference photos the interior of the T55 was a maze of instruments, wires, and cabling! I don't know how the crew made sense of it all!


With so many various different parts in different colours painting the interior is certainly going to keep me busy!

I've also been doing some research into possible schemes for the Tank Camo and have decided to go for something like this example (in this case a T-72) but with weathering etc.

martyncrowther
Visit this Community
England - West Midlands, United Kingdom
Joined: September 12, 2007
KitMaker: 1,548 posts
Armorama: 1,407 posts
Posted: Thursday, August 06, 2009 - 01:29 AM UTC
Really nice work Jon, this looks great!
Gundam-Mecha
Visit this Community
England - South East, United Kingdom
Joined: August 05, 2009
KitMaker: 1,019 posts
Armorama: 933 posts
Posted: Thursday, August 06, 2009 - 02:21 AM UTC
Thanks Martyn! I'm glad you like it, the build is certainly taking alot of time and I can't wait to get some paint onto it.

afv_rob
Visit this Community
England - East Anglia, United Kingdom
Joined: October 09, 2005
KitMaker: 2,556 posts
Armorama: 2,199 posts
Posted: Thursday, August 06, 2009 - 02:42 AM UTC
Wow looking good! Your T-55 is coming along nicely.

The Nemrod tank crew figures however are a little off for the time frame, I think you can probably get away with their bodies, but the heads will need changing, they wear the WW2 model tank crew helmet with 3 ribs, the later helmets have 4 ribs.
smitsan
Visit this Community
Latvia
Joined: September 05, 2008
KitMaker: 51 posts
Armorama: 50 posts
Posted: Thursday, August 06, 2009 - 02:46 AM UTC
Jon Fitzgerald exellent work!hope to see this when it finish
Gundam-Mecha
Visit this Community
England - South East, United Kingdom
Joined: August 05, 2009
KitMaker: 1,019 posts
Armorama: 933 posts
Posted: Thursday, August 06, 2009 - 03:00 AM UTC
Hi Rob thanks for the advice, the Nemrod crew were the closest I could find to modern tankers.

In the Nemrod picture they are with an IS-3 which was in service till the 70's. I had guessed that the tankers uniforms hadn't changed much from then till the 80's to early 90's?

With regard to the hats where abouts was the position of the fourth ribbed section? Perhaps I can just sculpt it on to make them more accurate?
Gundam-Mecha
Visit this Community
England - South East, United Kingdom
Joined: August 05, 2009
KitMaker: 1,019 posts
Armorama: 933 posts
Posted: Thursday, August 06, 2009 - 03:04 AM UTC
Thanks Smitsan much appreciated!
Gundam-Mecha
Visit this Community
England - South East, United Kingdom
Joined: August 05, 2009
KitMaker: 1,019 posts
Armorama: 933 posts
Posted: Thursday, August 06, 2009 - 03:15 AM UTC
You're totally right Rob, just as well you pointed that out! I just found this reference photo from an ICM box of tankers by a T55


They definately seem to have four ribs. Nethermind! It won't be too much work to adjust that and sculpt some new ribs in

Gundam-Mecha
Visit this Community
England - South East, United Kingdom
Joined: August 05, 2009
KitMaker: 1,019 posts
Armorama: 933 posts
Posted: Monday, August 10, 2009 - 11:18 PM UTC
So after some more thorough research I've managed to work out the correct style of tank helmets, and also that Soviet Tankers in the 80's during winter used the Afhganka winter dress (padded jacket with four pockets and fur colar). This is the same as the jacket worn by the Dragon Motor Rifles.

Bearing that in mind I've ordered the modern tank crew from Tank models and decided to upgrade the Tankers in these Winter Afghanka to match the Motor Rifle Troops better. Changing the Tankers really helps tie the scene in a bit better I think and make it more obviously set in an 80's period.

I've also decided to upgrade the T-55 with some of the Soviet Modernisation packages that were issued in the 80's to make the tank more period identifiable too. I will be scratchbuilding a KTD series Laser range finder and am considering scratch building a Drozd system for fun.
Kuno-Von-Dodenburg
Visit this Community
England - North, United Kingdom
Joined: February 20, 2007
KitMaker: 1,453 posts
Armorama: 1,319 posts
Posted: Monday, August 10, 2009 - 11:43 PM UTC
Hi John,

You're really pushing the boat out on this and going seriously to town. Very interesting project that I'm enjoying following.

Are the Hornet heads a dedicated set for Soviet Motor rifle troops?

Given the amount of time, work and money you're investing in the all that interior detail, I hope some of it will still be visible at the end.

Great work.

- Steve
Gundam-Mecha
Visit this Community
England - South East, United Kingdom
Joined: August 05, 2009
KitMaker: 1,019 posts
Armorama: 933 posts
Posted: Monday, August 10, 2009 - 11:57 PM UTC
Thanks Steve

The Hornet heads are just a generic Soviet Ushanka winter hat set. I just made use of them for the Motor Rifle troops as I prefered their detail to the plastic ones provided by Dragon. I found the faces to be too flat and a bit boring.

Hornet do a Post War Tankers head set though with post WW2 modern style tank helmets.

I'm looking forward to working some more on this project tonight after work
Gorizont
Visit this Community
Sachsen, Germany
Joined: November 28, 2007
KitMaker: 1,462 posts
Armorama: 1,289 posts
Posted: Tuesday, August 11, 2009 - 12:55 AM UTC
Thats a lot of nice work!
I like the detail- and interior-sets.

For my 1/35 2S1 Gvozdika-howitzer only a few sets and parts are available. (no engine, no turret- and driving-compartment)

I look forward to see, what you build!

greetings...
Soeren
Plasticbattle
#003
Visit this Community
Donegal, Ireland
Joined: May 14, 2002
KitMaker: 9,763 posts
Armorama: 7,444 posts
Posted: Tuesday, August 11, 2009 - 02:14 AM UTC
Great build and thread so far Jon. Ive never built a T55, but you can´t help but like it. Will be following this. Thanks for sharing.
RSingleton
Visit this Community
Kentucky, United States
Joined: August 26, 2008
KitMaker: 286 posts
Armorama: 273 posts
Posted: Tuesday, August 11, 2009 - 03:11 AM UTC
This looks like it's gonna be awesome. I know you probably posted already but are you seriously going to put all that turret interior into that thing?

This is going to look good when done...
Rich
Gundam-Mecha
Visit this Community
England - South East, United Kingdom
Joined: August 05, 2009
KitMaker: 1,019 posts
Armorama: 933 posts
Posted: Tuesday, August 11, 2009 - 11:55 PM UTC
Thanks for all the great feedback and comments guys! Much appreciated.

Yes all the turret detail is going in. I'm thinking of different ways at the moment to best place the turret. I want to be able to take it apart to show the interior work once painted. Maybe by leaving that part unglued, or by adding a few small sneaky rare earth magnets?

I've been doing alot of research at the moment on my T-55 to try to make it into a T55M or T-55AM model. Updating the tank will help it fit in better with the figures and the period and also allows for some great modelling prospects. Alot of people model the T55AM2 "Klavido" model but I was keen to keep this as Russian Soviet as possible and avoid a Polish or Czech Tank. After a gruelling search I finally found some decent images and technical diagrams of both the Drodz system and the KTD-2 laser range finder. I put links to a great site over on a post at the Soviet Russo forum.

Here are some of the reference images, copyright of the original photographers of course and displayed here just for info.

Heres some details of the Drodz anti missle / RPG system


Its a very interesting system that used two tubes of rockets and a radar system that would fire and engage incoming missles. Due to the high cost it was eventually dropped by the Soviets when Kontakt ERA armour panels were introduced.

My main interest though was adding a KTD-2 laser range finder. There are some kits on the market but as others have pointed out the quality can be hit and miss so I decided to just scratch build my own from plasticard and use the Modelpoint Thermal barrel.


I'm really looking forward to scratch building this part and incorperating it into the modelpoint barrel.
Gundam-Mecha
Visit this Community
England - South East, United Kingdom
Joined: August 05, 2009
KitMaker: 1,019 posts
Armorama: 933 posts
Posted: Wednesday, August 12, 2009 - 12:05 AM UTC
I've also been doing alot of further research on the uniforms used by troops and Tankers in the 80's to early 90's.

I found some great reference images of the Afghanka and also various Tankers helmets used in the 1980's in Afghanistan. I now feel confident to use the modern Russian Tank Crew from Checnya 1992 in my diorama, as the Afghanka matches their uniforms very closely.

padded winter Afghanka


Summer Afghanka


Gundam-Mecha
Visit this Community
England - South East, United Kingdom
Joined: August 05, 2009
KitMaker: 1,019 posts
Armorama: 933 posts
Posted: Wednesday, August 12, 2009 - 12:15 AM UTC
Build updates:

Finally finished the Engine bay although it wasn't without problems. I found once built many of the CMK parts just simply didn't fit together at all correctly. It took some work to jiggle it around but I'm happy with the end result.

While I really like CMK I'm finding that consistency in their kits seems to be a problem... some are wonderful, some not so.


With the upper hull:


 _GOTOTOP