

Hosted by Darren Baker
Australian M577

Cartyb

Joined: May 02, 2007
KitMaker: 39 posts
Armorama: 39 posts
Posted: Monday, September 07, 2009 - 01:07 PM UTC
This is my first go at a build blog. Please be patient with me as I figure this out. Ever since doing some multinational operations in Australia, I have become interested in modern Australian Armour. I though I would give an M577 a go as it is one of my favorite tracks. Finding details for Aussie M577's was tough and without the help of WayneB who posts here frequently with Australian subjects I would have been sunk. Thanks again Wayne. Please know that I am an eyeball builder. It may not be dead on accurate as I translate as best I can what I see in pictures. Otherwise, comments are welcome. This project is almost finished but I will post over time.
Cartyb
Joined: May 02, 2007
KitMaker: 39 posts
Armorama: 39 posts
Posted: Monday, September 07, 2009 - 01:34 PM UTC
Used the Tamiya M577 kit as the base. Did do an interior of the drivers section using the drivers station from the M106 mortar kit. I gooned this up some as I did not go far enough back into hull so there is some dead space visible. Noted for next time. Australian M113's have an air filter on the troop hatch. This is fitted on the roof on the M577 just behind the roof hatch and midline as far as I could tell from the pictures. I also added the roof rack for the gear boxes that are often seen on the M577.

I decided to use build a relativly updated M577 so I have used the most current indicator light on the front and rear of the kit. These are from Mouse House. I have also added the armour plate that is seen between the first and third road wheel and some other odds and ends.


I decided to use build a relativly updated M577 so I have used the most current indicator light on the front and rear of the kit. These are from Mouse House. I have also added the armour plate that is seen between the first and third road wheel and some other odds and ends.

ptruhe

Joined: March 05, 2003
KitMaker: 2,092 posts
Armorama: 1,607 posts

Posted: Tuesday, September 08, 2009 - 04:08 AM UTC
Fantastic eye for the details. Looking good. Don't forget to correct the top of the radiator filler cap.
I'm guessing that there a modified lock for the TC hatch because of the rack and the air filter.
Paul
I'm guessing that there a modified lock for the TC hatch because of the rack and the air filter.
Paul
WayneB

Joined: July 22, 2008
KitMaker: 141 posts
Armorama: 130 posts
Posted: Tuesday, September 08, 2009 - 04:52 AM UTC
Looks good mate!
Youve got the air filter system on the roof in there nice and I like the stowage rack on top of it. This style of rack seems to be quite common on 1 Armd Reg vehicles from what I have seen. I also like the clamps you have on the rear of the vehicle for the annex - I did not build those on mine for some reason ..
A few comments below, feel free to take them or leave them whatever, they are offered as friendly encouragement rather than rivet counting craziness:
One comment. You will not normally see the tow cable stowed on an Aust M113 FOV vehicle on the rack on the rear ramp photo 2 above. The story is that they can become jammed in place on the mount and can be difficult to get off. Cant say I ever tried to test the theory. Its basically an SOP that the tow cable is mounted to either the left or right front tow hood and its normally laid behind the light clusters across the glacis plate near the spade for easy use in an emergency. The practice seems to be almost universally used in Aust.
Your indicators seem to be a little low down on the glacis plate. The indicators are mounted on the glacis plate almost at the level of the seam on the right front of the vehicle between the glacis plate and removable radiator and engine air filter panel.
I tried to upload some photos to demonstrate the above but photo bucket is not working for me at the mo .. Go here http://www.armouredacorn.com/photosaus.html there are some nice shots which show what I am talking about.
I like the sponson armour you mounted. Its a mod fitted to all Aust M113 FOV vehicles in response to mine damage in Vietnam.
If youre going to mount the driver hatch open and you feel inclined to do the scratch building you might want to think about fitting a spider lock such as this. Note the pick is Al Bowies and was posted recently to help me with my ARVL project.

I know mouse house do a decent version of the spider lock and drivers hatch in their M113 T50 turret kit. If you email them they might just send you the drivers hatch as a separate item. They have done that for me in the past on other components for a reasonable fee.
Good work mate!
W
Youve got the air filter system on the roof in there nice and I like the stowage rack on top of it. This style of rack seems to be quite common on 1 Armd Reg vehicles from what I have seen. I also like the clamps you have on the rear of the vehicle for the annex - I did not build those on mine for some reason ..
A few comments below, feel free to take them or leave them whatever, they are offered as friendly encouragement rather than rivet counting craziness:
One comment. You will not normally see the tow cable stowed on an Aust M113 FOV vehicle on the rack on the rear ramp photo 2 above. The story is that they can become jammed in place on the mount and can be difficult to get off. Cant say I ever tried to test the theory. Its basically an SOP that the tow cable is mounted to either the left or right front tow hood and its normally laid behind the light clusters across the glacis plate near the spade for easy use in an emergency. The practice seems to be almost universally used in Aust.
Your indicators seem to be a little low down on the glacis plate. The indicators are mounted on the glacis plate almost at the level of the seam on the right front of the vehicle between the glacis plate and removable radiator and engine air filter panel.
I tried to upload some photos to demonstrate the above but photo bucket is not working for me at the mo .. Go here http://www.armouredacorn.com/photosaus.html there are some nice shots which show what I am talking about.
I like the sponson armour you mounted. Its a mod fitted to all Aust M113 FOV vehicles in response to mine damage in Vietnam.
If youre going to mount the driver hatch open and you feel inclined to do the scratch building you might want to think about fitting a spider lock such as this. Note the pick is Al Bowies and was posted recently to help me with my ARVL project.
I know mouse house do a decent version of the spider lock and drivers hatch in their M113 T50 turret kit. If you email them they might just send you the drivers hatch as a separate item. They have done that for me in the past on other components for a reasonable fee.
Good work mate!
W
WayneB
Joined: July 22, 2008
KitMaker: 141 posts
Armorama: 130 posts
Posted: Tuesday, September 08, 2009 - 09:24 AM UTC
Hey paul,
Are you talking about that dome shaped armoured cover over the radiator fillerpoint which comes in the academy M113 kit? If so I think this might be an A2 detail.
Regardless Aust M113A1 family of vehicles have a flat style radiator filler cap like the below. The photo is a of a M113 FSV but its the best I could come up on short notice.

The detail is normally hidden by the canvas air intake cover which is a part of the vehicle CES and rarely is removed from the vehicle even when the vehicle is stored with all its CES in the Q store, the cover is normally left on the vehicle to stop rainwater getting into the engine bay, hence my difficulty in coming up with a photo. You can see the cover rolled up in the below picture. Frankly whenever I build an aust M113 I grind the radiator down to the level of the surrounding plastic and put some rolled up putty on top to represent the rolled up canvas cover.

Happy to be corrected if Im telling porkie pies.
Cheers mate
W
Quoted Text
Don't forget to correct the top of the radiator filler cap.Paul
Are you talking about that dome shaped armoured cover over the radiator fillerpoint which comes in the academy M113 kit? If so I think this might be an A2 detail.
Regardless Aust M113A1 family of vehicles have a flat style radiator filler cap like the below. The photo is a of a M113 FSV but its the best I could come up on short notice.
The detail is normally hidden by the canvas air intake cover which is a part of the vehicle CES and rarely is removed from the vehicle even when the vehicle is stored with all its CES in the Q store, the cover is normally left on the vehicle to stop rainwater getting into the engine bay, hence my difficulty in coming up with a photo. You can see the cover rolled up in the below picture. Frankly whenever I build an aust M113 I grind the radiator down to the level of the surrounding plastic and put some rolled up putty on top to represent the rolled up canvas cover.
Happy to be corrected if Im telling porkie pies.
Cheers mate
W
ptruhe
Joined: March 05, 2003
KitMaker: 2,092 posts
Armorama: 1,607 posts
Posted: Tuesday, September 08, 2009 - 03:23 PM UTC
Quoted Text
Regardless Aust M113A1 family of vehicles have a flat style radiator filler cap like the below. The photo is a of a M113 FSV but its the best I could come up on short notice.
That's what I was referring to but sounds like you're on top of it. Not sure why Tamiya had to make their attempt so thick.
Paul
Cartyb
Joined: May 02, 2007
KitMaker: 39 posts
Armorama: 39 posts
Posted: Wednesday, September 09, 2009 - 02:16 PM UTC
Late day at work so no real update today but I can tell you that I left it the way Tamiya made the kit. Didn't know about the canvas cover, I may be able to add that at the stage Im at.

lighthorseman
Joined: April 26, 2008
KitMaker: 84 posts
Armorama: 48 posts

Posted: Thursday, September 10, 2009 - 01:41 PM UTC
looking good on the build carty. one small thing i have noticed. we never used to stow the 10 ft tow cable in its proper spot due to it being a pain in the ass to remove and restow after use. on the command vehicles we used to run it from the from right towing bollard, up the right side of the hull, behind the right hand headlight guard and secured with a strap to the shovel stowage point much easier to use as one end is already connected for recovery operations. on the m113 we use to stow it in the same spot as the ACV or aroung the outside of the turret on the top of the hull
lighthorseman
Joined: April 26, 2008
KitMaker: 84 posts
Armorama: 48 posts
Posted: Thursday, September 10, 2009 - 03:00 PM UTC
Quoted Text
Hey paul,Quoted TextDon't forget to correct the top of the radiator filler cap.Paul
Are you talking about that dome shaped armoured cover over the radiator fillerpoint which comes in the academy M113 kit? If so I think this might be an A2 detail.
Regardless Aust M113A1 family of vehicles have a flat style radiator filler cap like the below. The photo is a of a M113 FSV but its the best I could come up on short notice.
The detail is normally hidden by the canvas air intake cover which is a part of the vehicle CES and rarely is removed from the vehicle even when the vehicle is stored with all its CES in the Q store, the cover is normally left on the vehicle to stop rainwater getting into the engine bay, hence my difficulty in coming up with a photo. You can see the cover rolled up in the below picture. Frankly whenever I build an aust M113 I grind the radiator down to the level of the surrounding plastic and put some rolled up putty on top to represent the rolled up canvas cover.
Happy to be corrected if Im telling porkie pies.
Cheers mate
W
wayne you are right about the engine grill cover staying on the vehicle at all times. the only time it would come off was when we got back from bush and were cleaning the vehicle then it would go straight back on. but the engine grille cover was moveable so we coud get access to the armoured coolant cover and radiator cap
Cartyb
Joined: May 02, 2007
KitMaker: 39 posts
Armorama: 39 posts
Posted: Friday, September 11, 2009 - 02:43 PM UTC
Here is the next go around for pics. At this point I have added most of the Eduard M577 PE that I am going to use on the kit. Wayne, I think you are right about my front indicators being a little low. I only had one reference and the angle may have been off to make it look a little lower than it actually is. Since I was almost complete with the kit before I started this string, I am kind of stuct with the position. Also, used the Academy trim planes as the basis of the work on the Tamiya one. After I put on the PE for the lights, the notch on the trim plane did not match up with the light guard. Another lesson learned. Check out Wayne's M806A1 build where he discusses the problems with M113 lights in detail. I like the way he went with the lights on his kit and on my next M113, I will be following his advice on this point.

Note that the Aussie M577 has a different position for the hoist arm than is usually seen on the US or some European M577's. The antenna bases are from Mouse House again. I like their stuff and most has nice, sharp molding.


I used this pick as my guide for the rear of the vehicle. On this track, the tow cable is on the rack, so mine is as well. Like I said in a previous post, I kind of go by eye and may end up kind of bashing things I liked from several different vehicles. I likes the spare Jerry Can rack in this picture so used it on my kit.

I used a Water Jerry in holder from Mouse House both directly on the kit and as a starting point for the Jerry Can. To make the Jerry Can in the holder, I copied the Mouse House Jerry in resin, cut off the water can to get just the holder, put a Tamiya Jerry on the holder and then made a copy of that one to use on other kits as well. I just eyeballed what looked right to get the cans on the track.


As always, comments welcome.
Note that the Aussie M577 has a different position for the hoist arm than is usually seen on the US or some European M577's. The antenna bases are from Mouse House again. I like their stuff and most has nice, sharp molding.
I used this pick as my guide for the rear of the vehicle. On this track, the tow cable is on the rack, so mine is as well. Like I said in a previous post, I kind of go by eye and may end up kind of bashing things I liked from several different vehicles. I likes the spare Jerry Can rack in this picture so used it on my kit.
I used a Water Jerry in holder from Mouse House both directly on the kit and as a starting point for the Jerry Can. To make the Jerry Can in the holder, I copied the Mouse House Jerry in resin, cut off the water can to get just the holder, put a Tamiya Jerry on the holder and then made a copy of that one to use on other kits as well. I just eyeballed what looked right to get the cans on the track.
As always, comments welcome.
Cartyb
Joined: May 02, 2007
KitMaker: 39 posts
Armorama: 39 posts
Posted: Friday, September 11, 2009 - 02:48 PM UTC
Sorry about the size of the pics. Will try to get some bigger for detail in the next go around.
Cartyb
Joined: May 02, 2007
KitMaker: 39 posts
Armorama: 39 posts
Posted: Wednesday, September 16, 2009 - 03:37 AM UTC
Have some pics now of painted and somewhat weathered kit. This was my first time using my airbrush. Up until now I had been using cans to paint only single color subjects. Gota love the Canadians and anything Desert Sand. Anyway, I am using an Testors Astec airbrush and can see that I dont get as fine a line as I would like even with their fine line nozzel. I may have to pick up a different brush for the detail work. This left me hardening up the camoflage with a brush in some places. I did the best I could with the colors and matching with the photos I have of Aussie equipment. The green can very widly from vehicle to vehicle and photos dont help that either. Anyway, here is what I ended up with.

I have added the Jerry Can rack to the top of the kit as well as the drivers hatch and have placed the genny. This was a little kit all on its own and I did a few things to dress this up a bit including some homemade brass parts and some bolts. I also placed the fuel tank cap on the correct end of the tank and added some more of the cage that surrounds the genny.

On the back I have added the lights but have not yet placed the ir lights. I was thinking about not putting them in at all but it just does not look right without them. Also added the tent poles to the rear of the vehicle.

I have done some weathering of the track area using a technique I saw on you-tube. It worked out pretty well to add mud to the underside and rear of the kit. The markings are from a track that I have a picture of. Could not come close to telling you what unit it is from. I just liked the layout. The hull# (?) is correct for an Aussie M577 athough I doubt it is accurate to the unit depiction I have applied. Markings are all either hand painted, dry transfers or homemade decals.


At this point I am up to my current place in the consruction process. Comments and suggestions are welcome.
I have added the Jerry Can rack to the top of the kit as well as the drivers hatch and have placed the genny. This was a little kit all on its own and I did a few things to dress this up a bit including some homemade brass parts and some bolts. I also placed the fuel tank cap on the correct end of the tank and added some more of the cage that surrounds the genny.
On the back I have added the lights but have not yet placed the ir lights. I was thinking about not putting them in at all but it just does not look right without them. Also added the tent poles to the rear of the vehicle.
I have done some weathering of the track area using a technique I saw on you-tube. It worked out pretty well to add mud to the underside and rear of the kit. The markings are from a track that I have a picture of. Could not come close to telling you what unit it is from. I just liked the layout. The hull# (?) is correct for an Aussie M577 athough I doubt it is accurate to the unit depiction I have applied. Markings are all either hand painted, dry transfers or homemade decals.
At this point I am up to my current place in the consruction process. Comments and suggestions are welcome.
grimmo
Joined: January 17, 2006
KitMaker: 752 posts
Armorama: 569 posts
Posted: Wednesday, September 16, 2009 - 11:06 PM UTC
looking good so far! what colors did you use?
ptruhe
Joined: March 05, 2003
KitMaker: 2,092 posts
Armorama: 1,607 posts
Posted: Thursday, September 17, 2009 - 04:47 AM UTC
Looking good.
Where did you get the spider lock hatch? What does the top of a spider lock hatch look like? I'm assuming that the IR periscope guard is removed.
Paul
Where did you get the spider lock hatch? What does the top of a spider lock hatch look like? I'm assuming that the IR periscope guard is removed.
Paul
Cartyb
Joined: May 02, 2007
KitMaker: 39 posts
Armorama: 39 posts
Posted: Thursday, September 17, 2009 - 10:55 AM UTC
As for the colors, I used Tamiya. For the green; 4 parts XF-67 Nato Green:1 part XF-15 Flat Earth. For the brown; 1 part XF-52 flat earth:2 part XF-15 Flat Earth. The black is just Flat Black. As for the spider lock hatch, I scratched it courtesy of the photos Wayne provided me a while back. Also see above pics in this string. It looks to me that in place of the IR scope, the Aussies have placed the locking mechanism. I just used some scrap evergreen strip and my punch set to make the round mechanism. Not sure what the top looks like. It must be under the scope cover.
WayneB
Joined: July 22, 2008
KitMaker: 141 posts
Armorama: 130 posts
Posted: Tuesday, September 22, 2009 - 05:07 AM UTC
Carty,
Looking good buddy. The camouflage edges look pretty nice.
Did you want to put a caution left hand drive warning sign on the back ramp? I think I have a spare somewhere. PM me your address. The colours are close, put a little dust on top of it and no one will know the difference - Everything gets dusty in aust!
The jerry can racks look nice.
Paul,
Mouse House do a nice dvrs hatch replacement with spider lock details in their T50 turret with interior kit however as carty has done its just as easy to scratch build. The IR scope in an aust M113 can be mounted by removing the front drivers periscope and is not mounted in the hatch. Many M113s still retain the IR scope guard on the hatch and there is a hole for the key for the spider lock located under the guard.
Itll be nice to see this one completed. Now if I can only get some more pictures of my ARVL up am currently stuck in the weeds trying to figure out where all the hydraulic lines go!!!!
W
ptruhe
Joined: March 05, 2003
KitMaker: 2,092 posts
Armorama: 1,607 posts
Posted: Tuesday, September 22, 2009 - 05:18 AM UTC
That's good to know about the IR periscope and the spider lock. Thanks guys.
Paul
Paul
lighthorseman
Joined: April 26, 2008
KitMaker: 84 posts
Armorama: 48 posts
Posted: Tuesday, September 22, 2009 - 06:47 PM UTC
looking good on the build carty
the ARN (hull number) you are using is definately correct for an aussie vehicle
is the callsign on you reference pics the same as you have depicted on your model?
as for the callsign it is depicting a headquarters unit not of RAAC origins possibly 5/7 RAR battalion headquarters. RAAC units would put the callsign on the middle of the hull and generally in black

BSHEVLIN
Joined: August 20, 2009
KitMaker: 47 posts
Armorama: 34 posts

Posted: Wednesday, September 23, 2009 - 11:53 AM UTC
Quoted Text
looking good on the build carty
the ARN (hull number) you are using is definately correct for an aussie vehicle
is the callsign on you reference pics the same as you have depicted on your model?
as for the callsign it is depicting a headquarters unit not of RAAC origins possibly 5/7 RAR battalion headquarters. RAAC units would put the callsign on the middle of the hull and generally in black
not exactly true mate about the callsign their is a ACV in my unit with exactly the same markings.

lighthorseman
Joined: April 26, 2008
KitMaker: 84 posts
Armorama: 48 posts
Posted: Wednesday, September 23, 2009 - 09:19 PM UTC
i stand corrected
which unit??
which unit??

jasmils
Joined: December 23, 2003
KitMaker: 1,016 posts
Armorama: 745 posts

Posted: Thursday, September 24, 2009 - 01:19 AM UTC
1 Armoured Reg Alex.
Cartyb
Joined: May 02, 2007
KitMaker: 39 posts
Armorama: 39 posts
Posted: Thursday, September 24, 2009 - 01:40 PM UTC
Quoted Text
looking good on the build carty
the ARN (hull number) you are using is definately correct for an aussie vehicle
is the callsign on you reference pics the same as you have depicted on your model?
as for the callsign it is depicting a headquarters unit not of RAAC origins possibly 5/7 RAR battalion headquarters. RAAC units would put the callsign on the middle of the hull and generally in black
Honestly all, was not shooting for a specific unit or even a specific track. I took the ARN number from one photo I had of an ACP.
I used this photo as the basis for the call sign. Again, I just liked the look of it. Couldn't tell you why.
From several of the more recent photos that I have it looks like there may have been a change in the way vehicle markings are now depicted. I have another pic of an M577 mounting a 30 cal. The setting makes it appear that it is in the not too distant past but I cannot see any vehicle markings on the track. Wayne tells me that the 30 cal. was phased out in 05. Based on the markings on my track, does anyone know if I could use the 30 cal on mine or am I depicting a track as it appears post 2005?
Cartyb
Joined: May 02, 2007
KitMaker: 39 posts
Armorama: 39 posts
Posted: Thursday, September 24, 2009 - 01:42 PM UTC
Should have some more pics for you all soon.

aussiemodeler
Joined: May 23, 2007
KitMaker: 266 posts
Armorama: 212 posts

Posted: Thursday, September 24, 2009 - 02:00 PM UTC
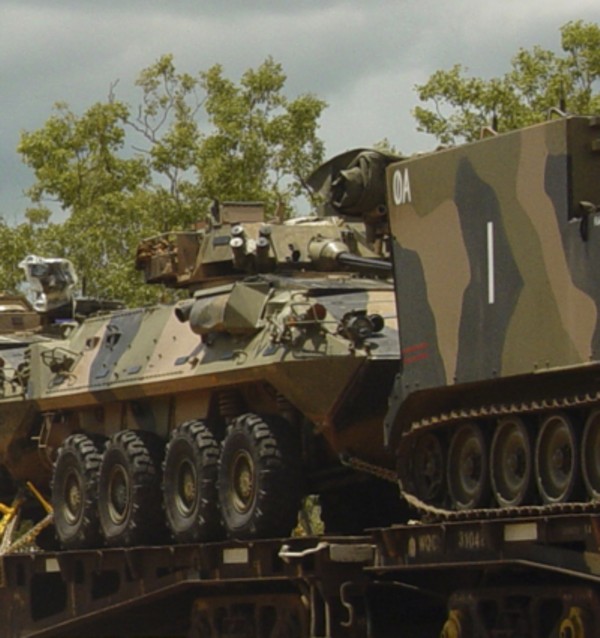
i may just beable to tell you the date it was taken as this picture was taken by a member of the NT news as it was the first time the army loaded anythingonto the ''new railway'' from darwin to adelaide. if it takes me a bit too long i'll let you know so your not waiting. cheers
lighthorseman
Joined: April 26, 2008
KitMaker: 84 posts
Armorama: 48 posts
Posted: Thursday, September 24, 2009 - 02:34 PM UTC
Quoted Text
1 Armoured Reg Alex.
tankies always gotta be different

 |

WEB HOSTING BY


Copyright ©2021 Armorama and Kitmaker Network, a subsidiary of Silver Star Enterprises
All Rights Reserved. Please read our Conditions of Use and Privacy Policy.
All Rights Reserved. Please read our Conditions of Use and Privacy Policy.