Back with some progress....
Added the welding on the hull - grill

Starting the side skirts I usually glue the first L- profile flush with the hull.

Next step is to adjust and fit the side skirt to the first L- profile using PVA glue on the profile itself and careful amount, just little "dots" of super glue on the attachment points on the skirt. I always use PVA glue for any type of side skirts including PE ones, it gives me time to align things and is quite strong when dried. Most of the accessories attached to my models (gear, ID panels, figures etc.) are fixed with PVA glue, and U can easily remove it again without damaging the paint.
When this process is set I then add another, second L- profile with superglue to strengthen things some more.

I have to mention that the last, back side skirt was about 5mm to long, shortening it to size is a 5 min. affair, the funny thing is, when I first use the same skirts from Pro Art Models a couple of year ago I had similar problem. Only that this time the front section was about 5mm to short, again just another 5 min. extending with some plastic rod and relocating the attachment screw.
Side skirts are wicked things!
Otherwise no big deal, this Kit has a real good fit.
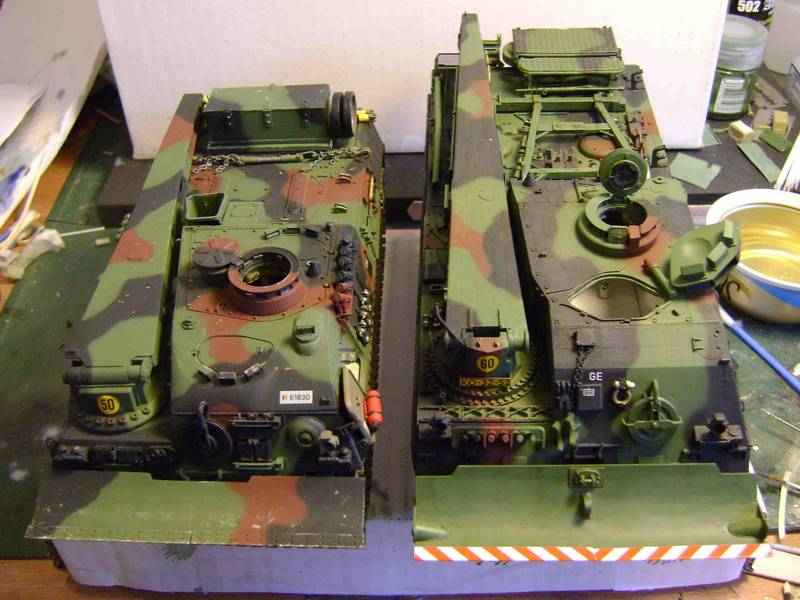
After seeing a Dutch Büffel on one of the most recent manoeuver DVD from M&N pictures called "Orange Amiger 2009", two of the ARVs had cut out their rear side skirts, so this is what I had to do as well.
Generally speaking, the problem with the German Army is they just stick to regulations, no individual touch what so ever (VERBOTEN!). I remember adding all kinds of useful things to our tracks and many field fabrication later became standard items and upgrades. And this is why I enjoy doing Dutch vehicles so much, as a modeler U have so many options beyond just doing "standard" and they are still Leopards. We got one guy in our model club who used to work in the Tank-Factory in Mainz/Germany, this is where mostly US and other Nato armies did upgrades, refurbishing, repairs etc. to their tanks. With the US military U would give away Ure track and then draw a "new" one from the depot, but with other nations the crew kept their "own" vehicle.
According to my friend the Canadians were the worst of all, not one tank was the same and after the job was finished all individual attachments had to go back to exactly same spot as they were before being stripped.
And as we all know, this is not the proper German way to conduct business, is it?


For the Dutch version U would need to utilize their type of smoke dischargers, taking these from a AFV YPR kit, I had to shorten the rail guard in length, extend it in width and then add the self fashioned supports.
Jason, thankx again for the links U sent me on this issue!
With part # 47 I had to make a new "slimmer" - baseplate in dimension, added a big screw and relocated it more to the right and up, as seen in this pic, something Dutch specific I believe.
Right now I am working to get the container, storing the spare smoke munitions in to proper shape and size, its located just below the driver on the front slope of the tank. I only have two good pics on this item so it wont be 100% correct.
With the rail guard and the container I will probable make some resin casts and thin down things a little add more details etc ... always good to have some spares.

Time up 4 now!
See U next week !
Cheers
Christopher