_GOTOBOTTOM
Armor/AFV
For discussions on tanks, artillery, jeeps, etc.
Sd.Kfz.7 8t Late Production Build
keenan
Visit this Community
Indiana, United States
Joined: October 16, 2002
KitMaker: 5,272 posts
Armorama: 2,844 posts
Posted: Sunday, September 20, 2009 - 12:17 PM UTC
The following is a build log of Dragon's "Sd.Kfz.7 8t Late Production kit, kit no. 6562."

You may or may not have read the review of this kit but it is a gem. This is my first build log so bear with me.
Step .75
Some minor clean up is needed in the first half of this step but be careful. There are a lot of sprue attachment points through out this kit and you will be better off cutting things long and cleaning up.

Pictured is how I cut both C17 parts off the sprue.


The flat on top of the leaf springs (C17) should not be removed. It mates up with parts B54 and 55.


The gap around parts B52 and B51 will not be seen after assembly but I am going to fill them anyway with some Mr Surfacer...
Stay tuned.

Shaun

c5flies
Visit this Community
California, United States
Joined: October 21, 2007
KitMaker: 3,684 posts
Armorama: 2,938 posts
Posted: Sunday, September 20, 2009 - 01:04 PM UTC
Hey, hey.....you actually do build models

I'm looking forward to this one Shaun, I'd like to tackle one of these some day.
GALILEO1
Visit this Community
Maryland, United States
Joined: April 18, 2006
KitMaker: 1,794 posts
Armorama: 1,431 posts
Posted: Sunday, September 20, 2009 - 04:16 PM UTC
Thanks for doing this one, Shaun. I've got it in the stash wating it's turn (if I can only finish up that sFH 18) and so I will be following along on this one with great interest. Will you be using any AM parts for it (if there are any out, that is)?

Nice work so far!

Rob
keenan
Visit this Community
Indiana, United States
Joined: October 16, 2002
KitMaker: 5,272 posts
Armorama: 2,844 posts
Posted: Tuesday, September 22, 2009 - 10:58 AM UTC
No Rob, strictly OOB and it is a big box.
Finished up step 1. No major issues but a couple of hints:

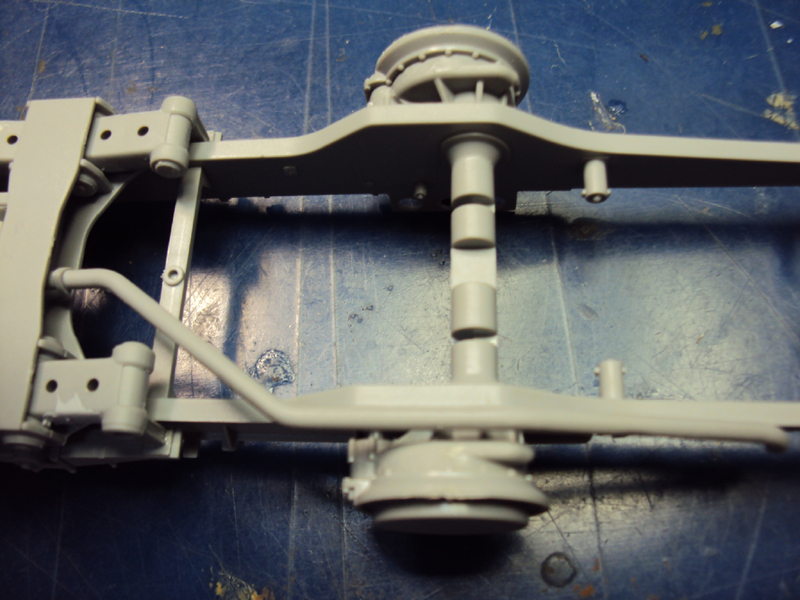
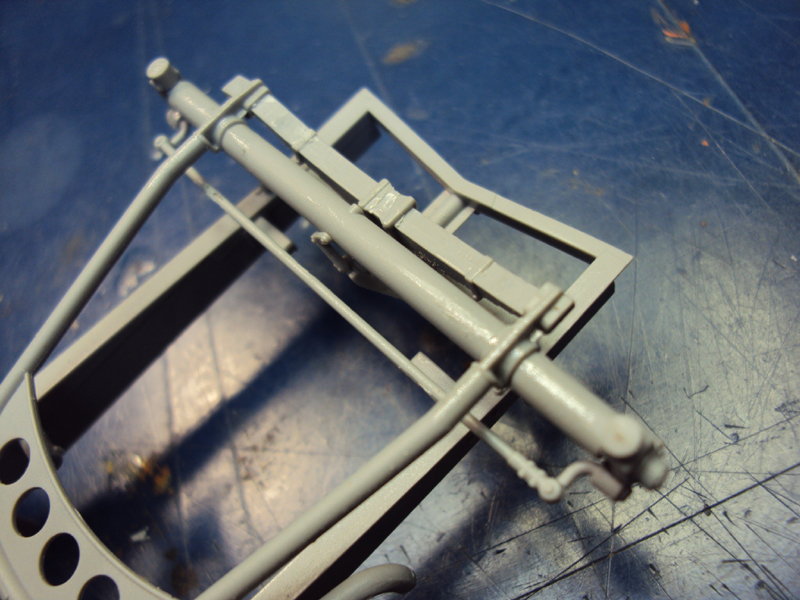
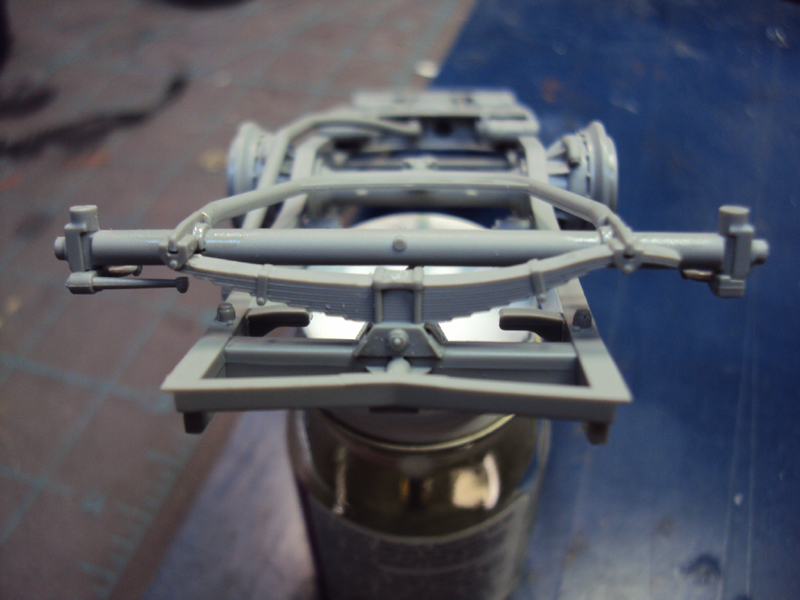
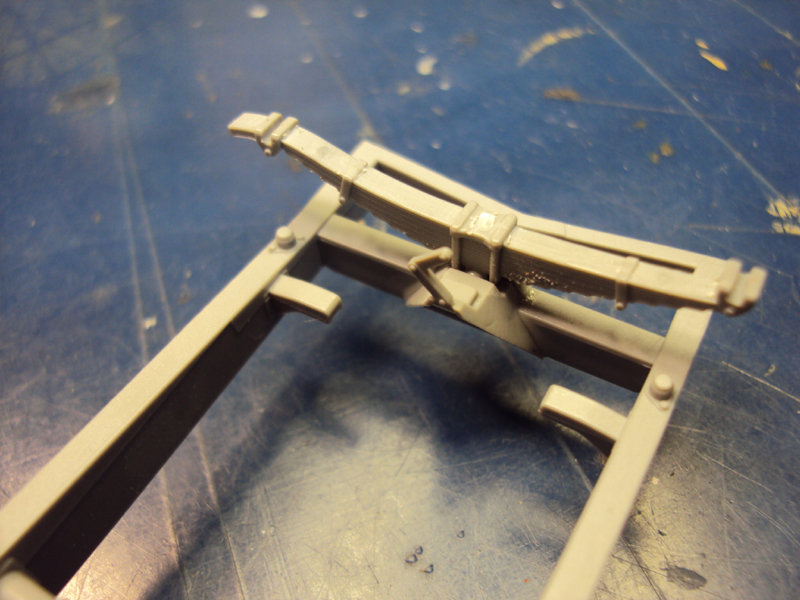
Install both parts C7 before parts C18. It is of course not mentioned in the instructions but there is no good way to locate the leaf springs (C18) unless the C7 suspension parts are already glued to the frame.


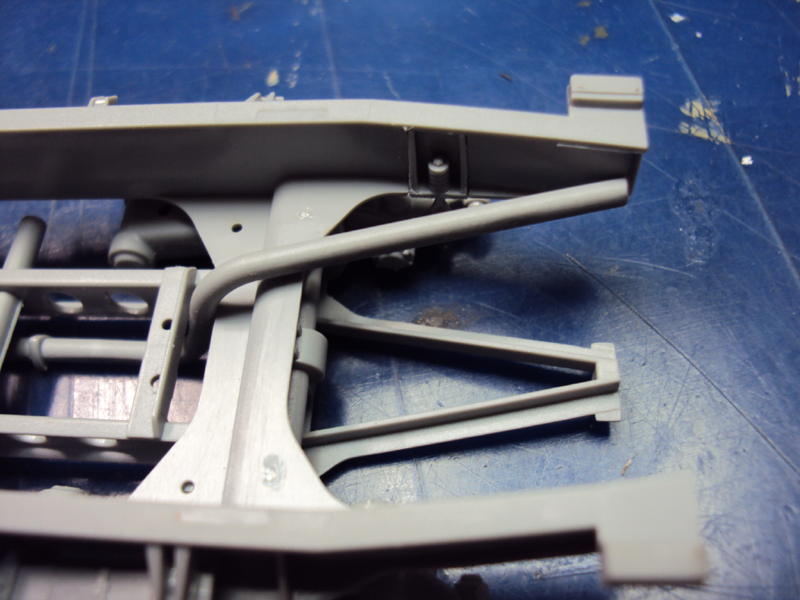
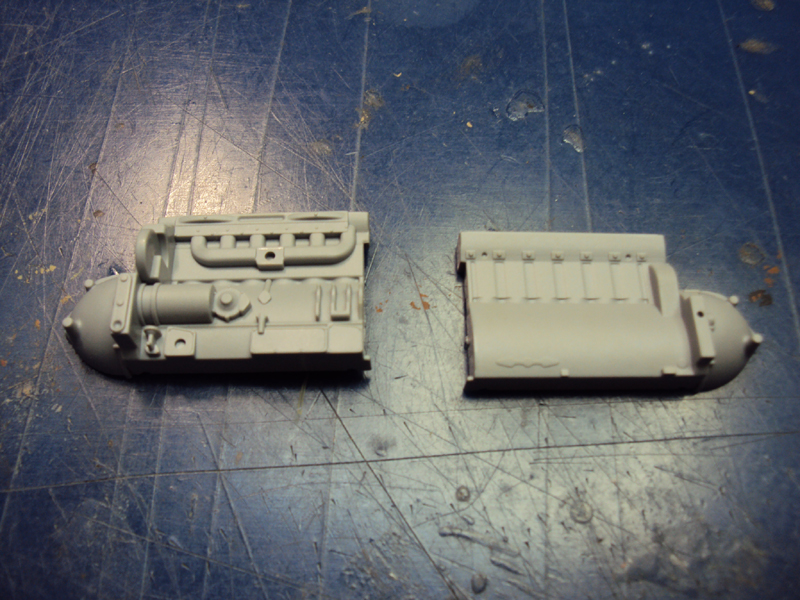
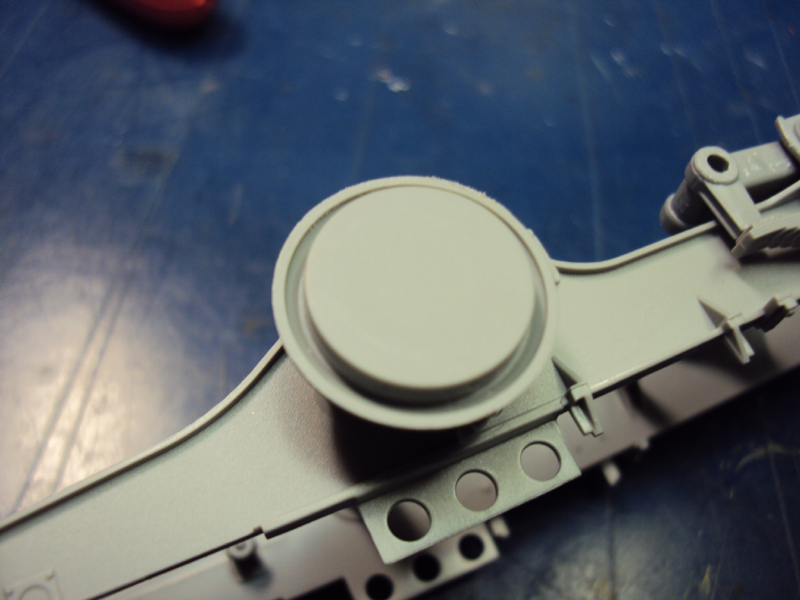
No issues whatsoever with the B21/B22 & B27/B28 assembly. No clean up worth mentioning and everything fit like a glove.


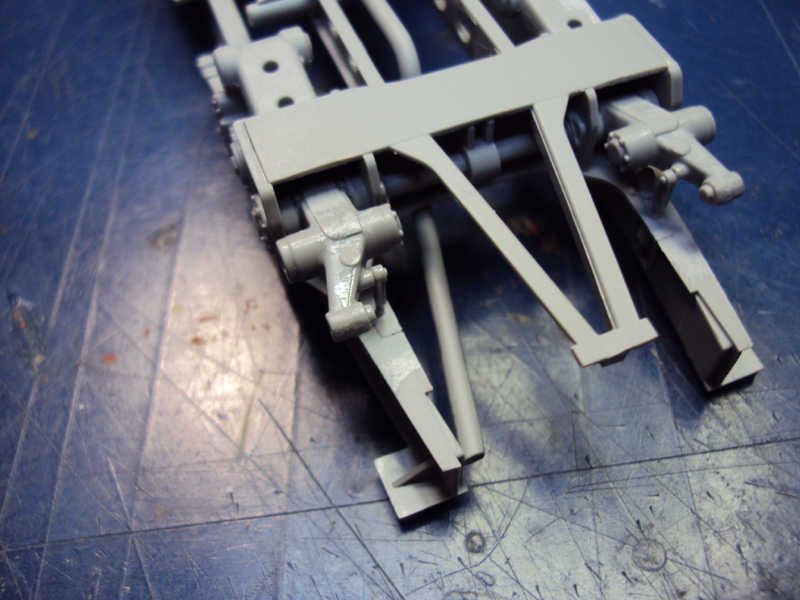
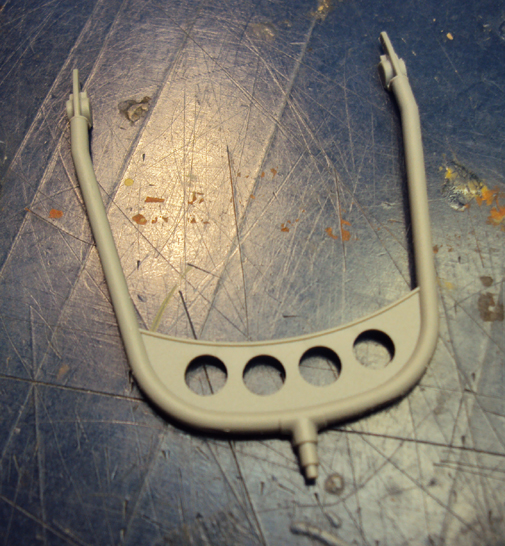
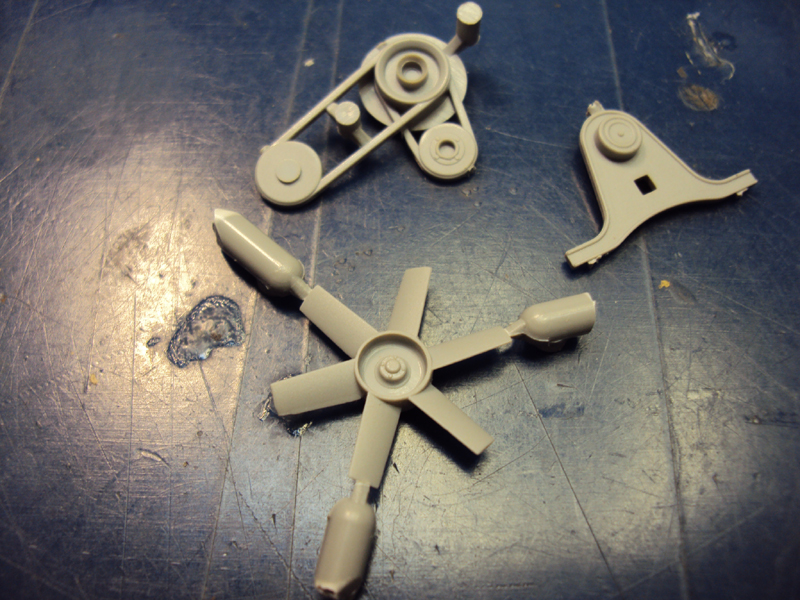
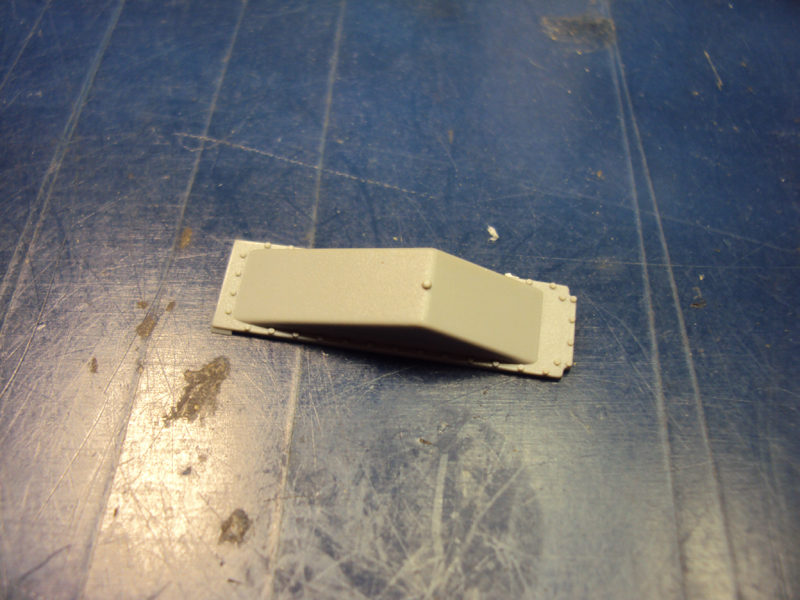
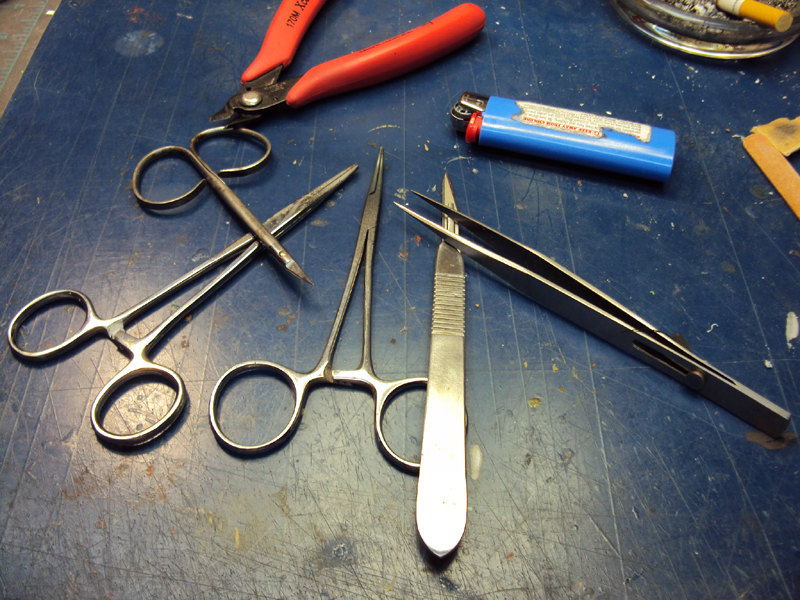
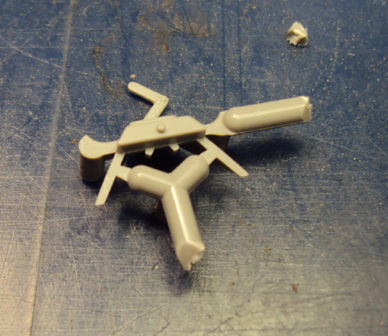
Part B31 is another one of those "dicey" pieces I cut off the sprue leaving a lot to clean up. Better safe than sorry. As you can see it would have been one of those parts I surely would have broken into at least three pieces if I tried to cut it off the sprue with the X-Acto.


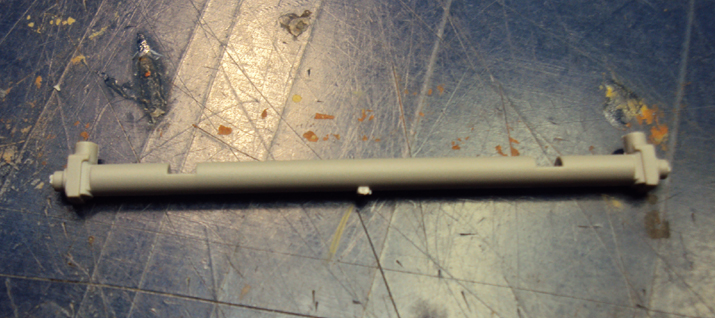
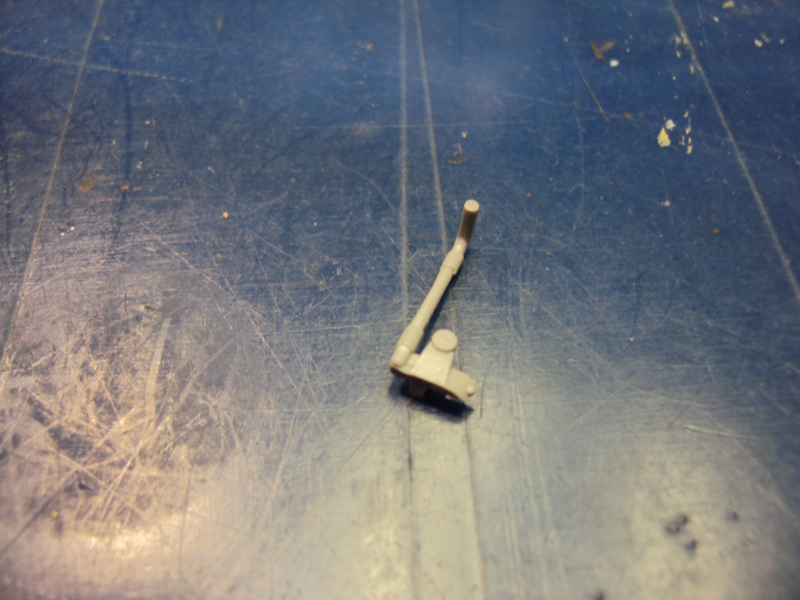
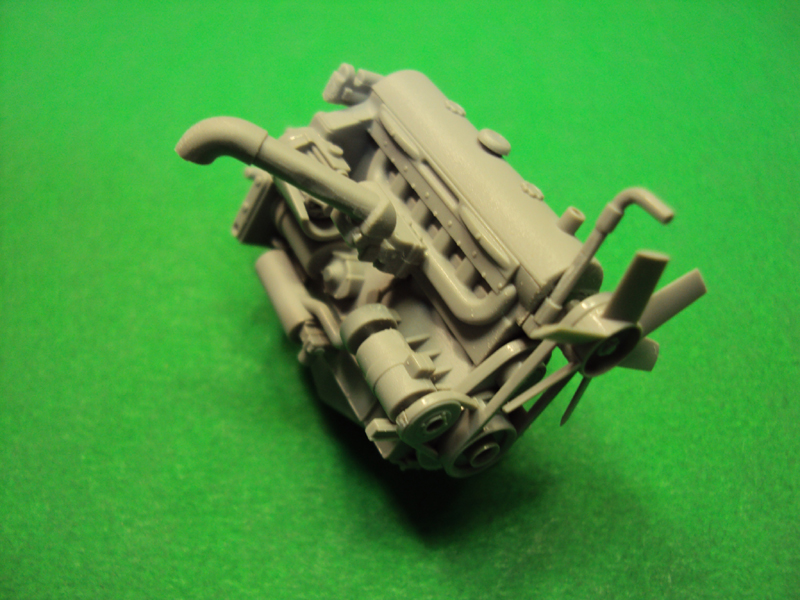
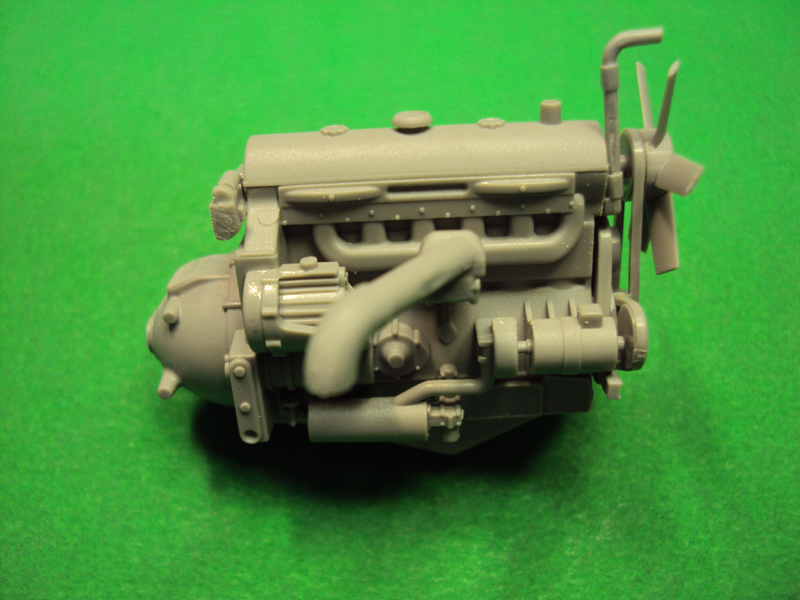
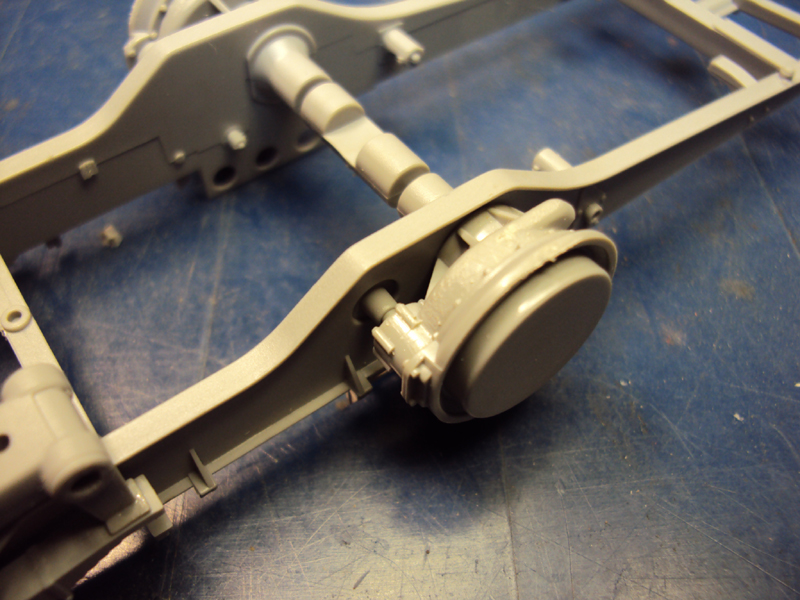
No major issues that I know of (yet) with the assembly of B31 and B30 to the frame. There is really not a positive location so if there is a issue with the running gear sitting flat it may come from this step. Everything looks square to me and there is not a good way to check.


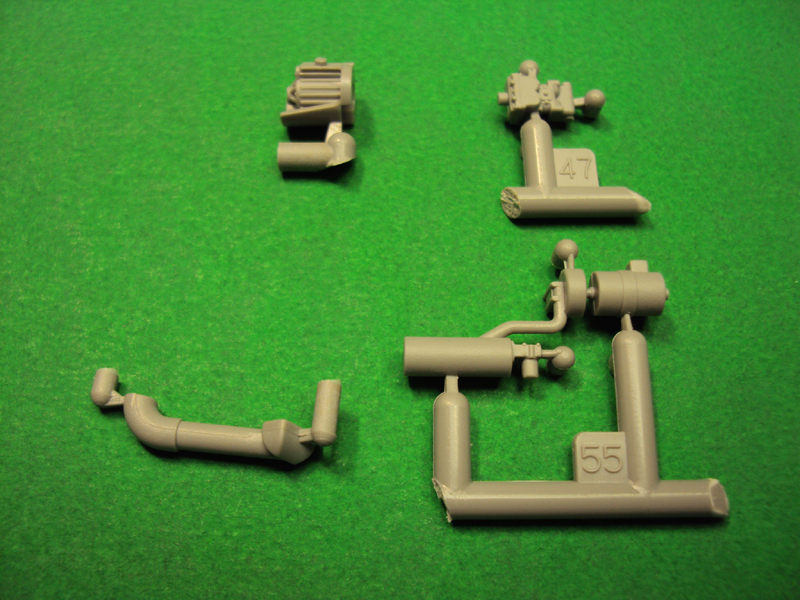
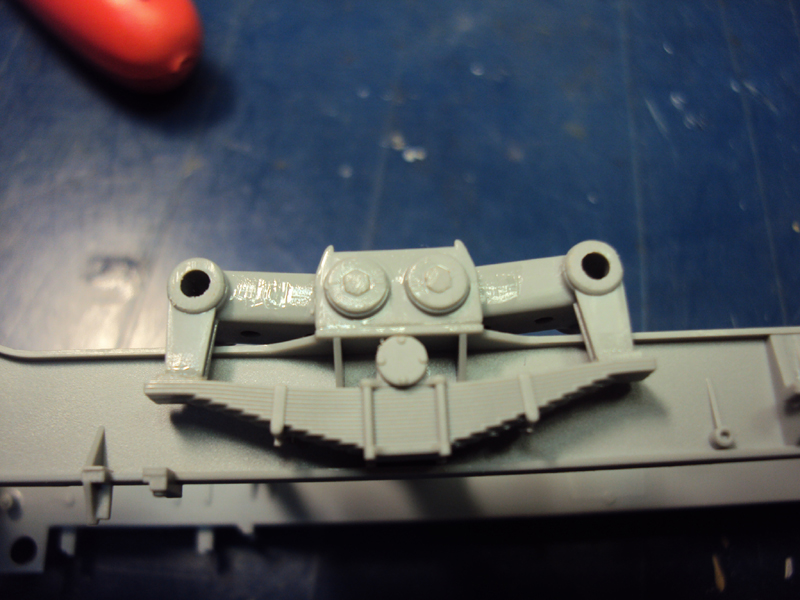
I left off both parts C22 because they looked like something I would break off later and be forced to scratch.

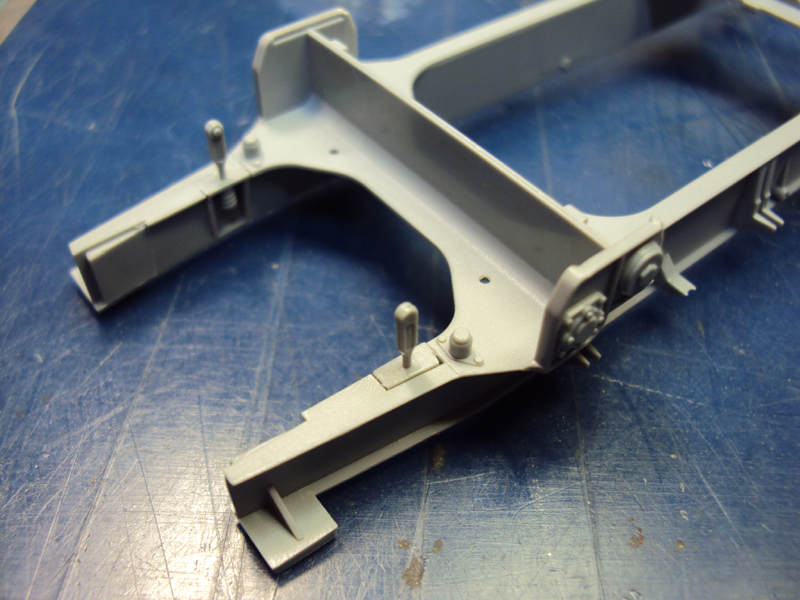
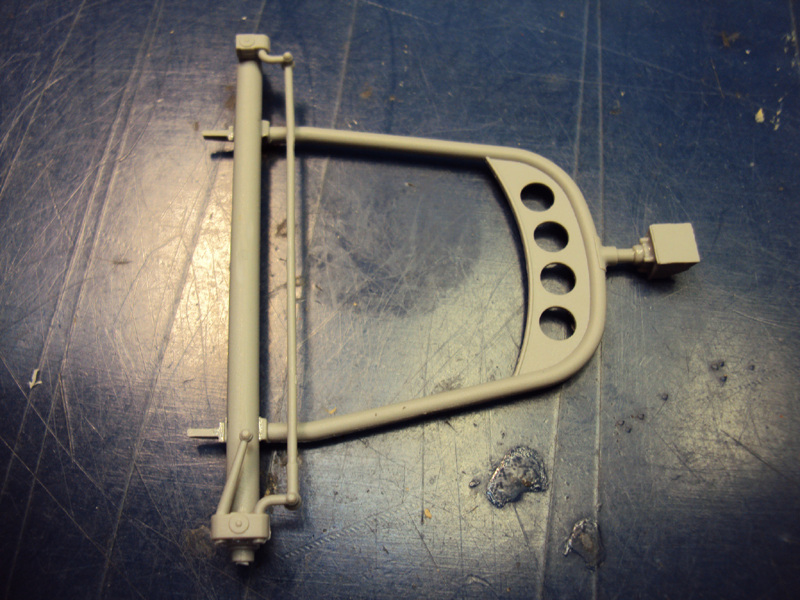
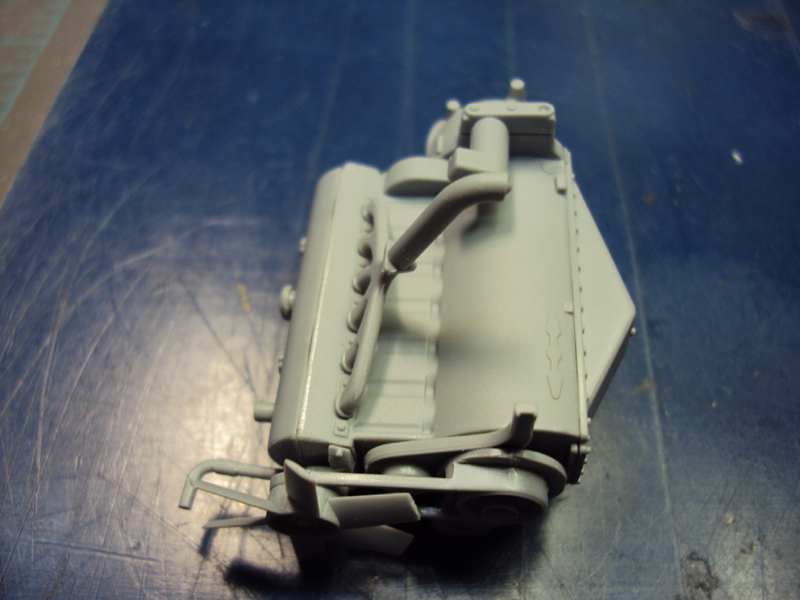
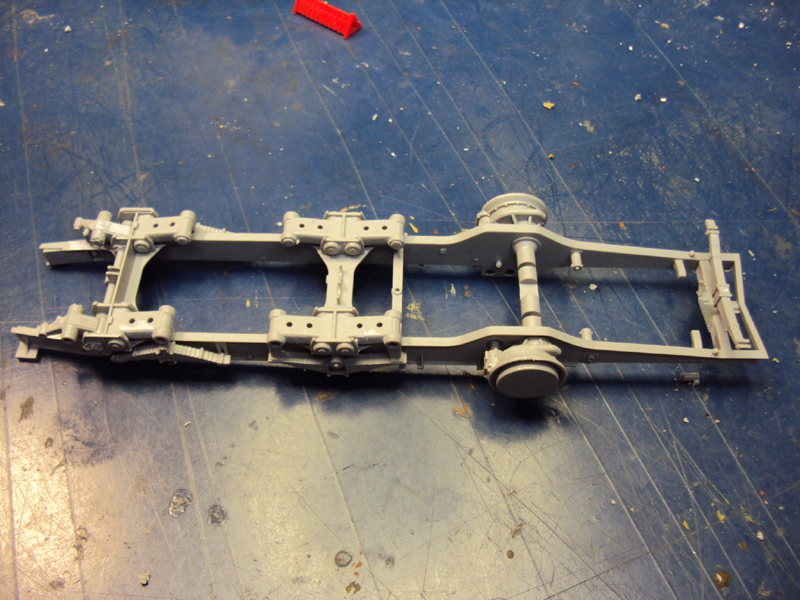
So here is the finished frame. As far as fit and clean up is concerned, this is one of the best kits I have built and I have been at this a while.


Stay tuned.
Questions, comments, feedback welcome as always...

Shaun
bill_c
Staff MemberCampaigns Administrator
MODEL SHIPWRIGHTS
Visit this Community
New Jersey, United States
Joined: January 09, 2008
KitMaker: 10,553 posts
Armorama: 8,109 posts
Posted: Tuesday, September 22, 2009 - 11:24 AM UTC
Looks good, Shaun.
keenan
Visit this Community
Indiana, United States
Joined: October 16, 2002
KitMaker: 5,272 posts
Armorama: 2,844 posts
Posted: Thursday, September 24, 2009 - 11:05 AM UTC
Today's update, step 2.5...
Only three parts in the first half of this step but I was befuddled. There is some clean up involved on the in inside edges of B57 and the off set parting seam needs to be removed both parts B8 and B9. The instructions show this assembly going down with nice straight arrows down on the frame. That ain't happening. I glue the exhaust parts (B8 & 9) to B57 and then tried to glue the assembly to the frame. It won't fit. Leave the exhaust assembly loose. The front end of part B9 needs to slip under the front end of the frame. The back end of part B8 needs to go over and outside the back of the frame.

Hopefully the following photos will help with the placement because in the instructions are unclear.

Front end of B9 tucked under the front of the frame:


Another view of the placement of B9, from the reverse:


Last, a view of what I really hope is the proper placement of the end of part B8:


Hope this is helpful.
Watch this space.
Shaun
keenan
Visit this Community
Indiana, United States
Joined: October 16, 2002
KitMaker: 5,272 posts
Armorama: 2,844 posts
Posted: Thursday, September 24, 2009 - 12:42 PM UTC
Okay, second installment in one day.
Again, only four parts.
One word of advice here: Cut part B18 off the sprue with caution. I cut it completely out of the frame and cleaned it up. If you don't, it will break.
Almost no clean up. Pretty much another shake and bake step.

Pics:
B24:

B17:

Assembly:


Everything lines up fine:


More to come.
Questions and comments welcome.
Shaun
rolf
Visit this Community
Washington, United States
Joined: August 17, 2004
KitMaker: 301 posts
Armorama: 250 posts
Posted: Friday, September 25, 2009 - 10:21 AM UTC
Nice build but one question, which kit is this, Dragon or Trumpeter?

Roy
keenan
Visit this Community
Indiana, United States
Joined: October 16, 2002
KitMaker: 5,272 posts
Armorama: 2,844 posts
Posted: Saturday, September 26, 2009 - 07:31 AM UTC
Dragon, sorry. Over sight on my part. I updated the first post. Thanks for the heads up.
Shaun
keenan
Visit this Community
Indiana, United States
Joined: October 16, 2002
KitMaker: 5,272 posts
Armorama: 2,844 posts
Posted: Sunday, September 27, 2009 - 02:13 AM UTC
Step Three: Engine Assembly
It is a shame most of this will not be visible after the hood is put on...

Quite a bit of clean required on D61, D43, and D41. Again, I cut D61 of the sprue long so I would not break it.


Engine halves, D44 and 45. No issues here.


Parts D49, D39 and D40. One note here: make sure you orient the parts correctly front to back. There are no locators to prevent gluing them on backwards...


Take care cleaning up part D53.


Parts D4, D54 and D64 on the block. I hope I have them on there right.


The locating points on D64 are not very positive. I decided to wait for the joint to set up over night before adding the rest of the parts and doing some minor gap filling and clean up.

Watch this space.
Shaun
keenan
Visit this Community
Indiana, United States
Joined: October 16, 2002
KitMaker: 5,272 posts
Armorama: 2,844 posts
Posted: Sunday, September 27, 2009 - 02:16 AM UTC
Anyone need their appendix out?
Shaun
Plasticbattle
#003
Visit this Community
Donegal, Ireland
Joined: May 14, 2002
KitMaker: 9,763 posts
Armorama: 7,444 posts
Posted: Sunday, September 27, 2009 - 05:44 AM UTC
Good progress so far Shaun.
jimz66
Visit this Community
Connecticut, United States
Joined: December 15, 2006
KitMaker: 1,165 posts
Armorama: 1,105 posts
Posted: Sunday, September 27, 2009 - 01:17 PM UTC

Quoted Text

Anyone need their appendix out?
Shaun


NO thanks Shaun I'll pass on that one. Funny though. Keep up the great progress. Looking good so far.
keenan
Visit this Community
Indiana, United States
Joined: October 16, 2002
KitMaker: 5,272 posts
Armorama: 2,844 posts
Posted: Sunday, September 27, 2009 - 01:39 PM UTC
End of step three, thought I would change the background for the photos to make everything look better...
Last four parts for this step, some very minor cleaning up needed but nothing major.


The directions are clear in this step and the assembly is pretty much shake and bake.
Finished engine:


Onward and upward...
Shaun
Firecaptain
Visit this Community
Virginia, United States
Joined: November 03, 2006
KitMaker: 165 posts
Armorama: 118 posts
Posted: Monday, September 28, 2009 - 06:14 AM UTC
Fantastic WIP pics......never can have too many...I love a WIP with plenty pics.....hate the ones that show the kit box and the next thing you see is the completed and painted model.

Following along as I have all of the Dragon SdKfz's in the stash.....plus a Tamiya Famo...

Any one use those new wheel masks that are out now....with so many wheels and so many versions
I'm tempted to try them. Is it made of plastic or paper and are they re-usable?
Thanks
keenan
Visit this Community
Indiana, United States
Joined: October 16, 2002
KitMaker: 5,272 posts
Armorama: 2,844 posts
Posted: Monday, September 28, 2009 - 02:50 PM UTC
Thanks for the feedback, Joe.
Shaun
GALILEO1
Visit this Community
Maryland, United States
Joined: April 18, 2006
KitMaker: 1,794 posts
Armorama: 1,431 posts
Posted: Tuesday, September 29, 2009 - 05:15 AM UTC
Excellent work so far, Shaun! Kind of eying my kit now thanks to your WIPs.

Rob
Firecaptain
Visit this Community
Virginia, United States
Joined: November 03, 2006
KitMaker: 165 posts
Armorama: 118 posts
Posted: Wednesday, September 30, 2009 - 04:40 AM UTC
Hey Shaun....you caused me to break out my 8T and start construction last night....

The exhaust was in fact a bit of a puzzle, but mine came out looking like your's pictured.
If you look at the muffler those tabs / locators, match up corresponding tabs on the framework.....so with that in mind.......I feel your way shown is correct.

and you are correct.......this is one nice kit.....my Trumpy versions will probably be on the sale table at the next IPMS show......

I pulled out my second kit to build the chassis on that one too since I'm an 'expert" at it now...lol
metooshelah
#011
Visit this Community
Jerusalem, Israel
Joined: February 06, 2009
KitMaker: 1,507 posts
Armorama: 1,304 posts
Posted: Wednesday, September 30, 2009 - 05:29 AM UTC
very nice work so far. I must say i like your clean and precise method of work. I am certainly taking some 'leaves' out of this thread!
keenan
Visit this Community
Indiana, United States
Joined: October 16, 2002
KitMaker: 5,272 posts
Armorama: 2,844 posts
Posted: Wednesday, September 30, 2009 - 02:02 PM UTC
Thanks all. Another step or two tomorrow.
Shaun
Firecaptain
Visit this Community
Virginia, United States
Joined: November 03, 2006
KitMaker: 165 posts
Armorama: 118 posts
Posted: Thursday, October 01, 2009 - 04:15 AM UTC
Shaun...and anyone else building or has built this one.....

The little "pip" or boss on the front axle......


I'm thinking that part B31 should mate up with that boss on axle towards the rear of the vehicle, so that "pip" should therefore be oriented to the rear.....thoughts?


keenan
Visit this Community
Indiana, United States
Joined: October 16, 2002
KitMaker: 5,272 posts
Armorama: 2,844 posts
Posted: Thursday, October 01, 2009 - 01:01 PM UTC
Joe is absolutely right folks. Although it is not called out in the sub assembly step the final assembly step it shows the boss (pip) toward the rear. Mine is on backwards.
There is no going back now so I will make the best of it.
Many thanks Joe, good catch.
Sorry no updates tonight. I have furnace issues. Believe it or not it is already getting down in the mid 30s at night here in the Great State of Indiana. Furnace guys coming tomorrow. Lots this weekend...
Shaun
Firecaptain
Visit this Community
Virginia, United States
Joined: November 03, 2006
KitMaker: 165 posts
Armorama: 118 posts
Posted: Thursday, October 01, 2009 - 01:41 PM UTC
WOW......COLD weather already......

I have 3 chassis going now......

Parts B55, B56, and B12....get those mounted BEFORE the tranny goes in.......much harder
with the tranny mounted........as I found out on my first chassis......
jimz66
Visit this Community
Connecticut, United States
Joined: December 15, 2006
KitMaker: 1,165 posts
Armorama: 1,105 posts
Posted: Thursday, October 01, 2009 - 02:32 PM UTC
What are you guys referring too when you say "pip" or boss? Little help please. Thanks.
Firecaptain
Visit this Community
Virginia, United States
Joined: November 03, 2006
KitMaker: 165 posts
Armorama: 118 posts
Posted: Thursday, October 01, 2009 - 03:15 PM UTC
The round piece dead center on the front axle in the picture shown below......it should face towards the rear of the vehicle

 _GOTOTOP