_GOTOBOTTOM
Constructive Feedback
For in-progress or completed build photos. Give and get contructive feedback!
Dutch M3A1 halftrack 1959
yeahwiggie
Visit this Community
Dalarnas, Sweden
Joined: March 24, 2006
KitMaker: 2,093 posts
Armorama: 1,359 posts
Posted: Friday, September 25, 2009 - 07:41 AM UTC
Hi guys,
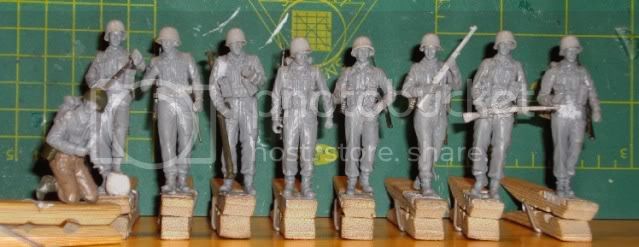
for all you non-campaignfollowers, I thought it might be an interesting idea to show my progress of this build, too.
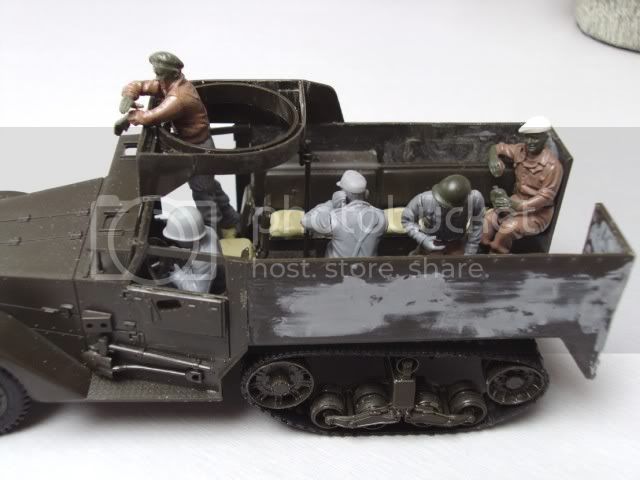
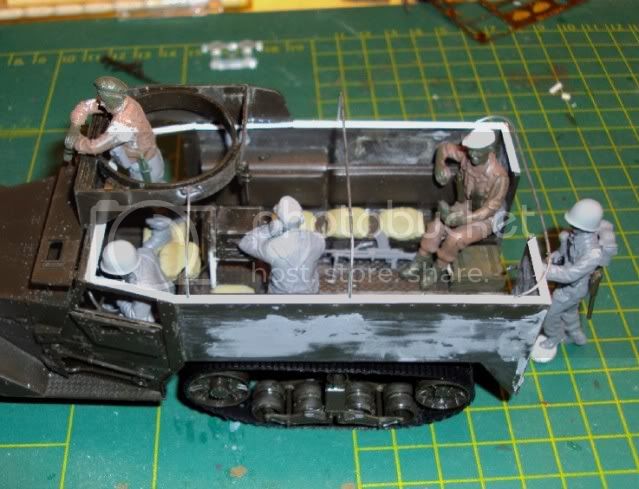
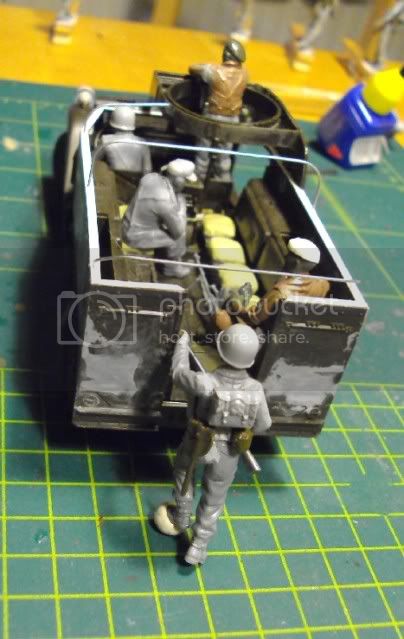
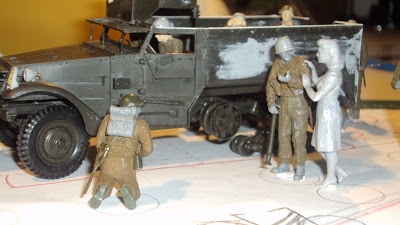
I am using a Tamiya M3A2, backdated to an M3 upgraded to M3A1-standard. Still following me??


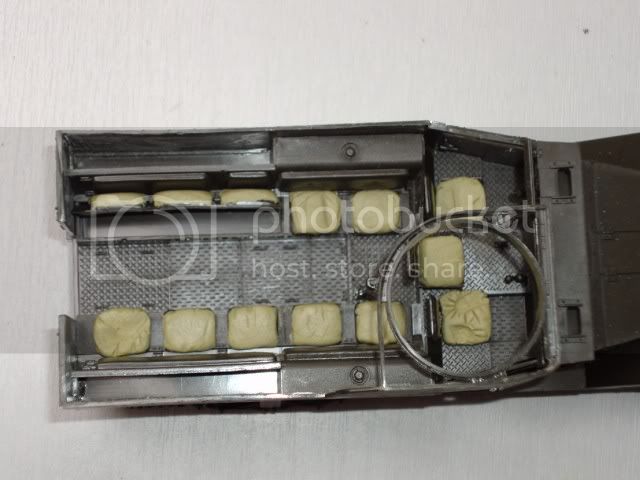
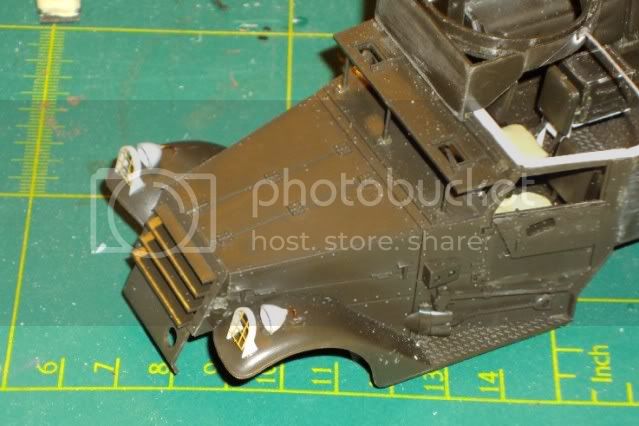
The chassis went together as per instructions, but the crewcompartment was more complicated. First of all I had to remove the detail on the outside, including the racks on the back. Then I filled in the wholes and damaged areas.


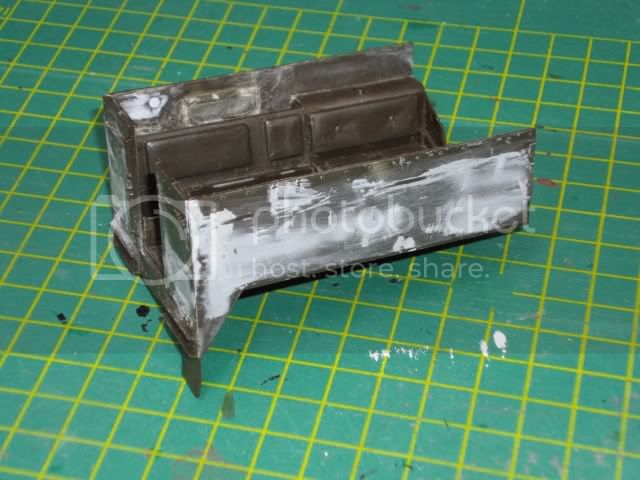
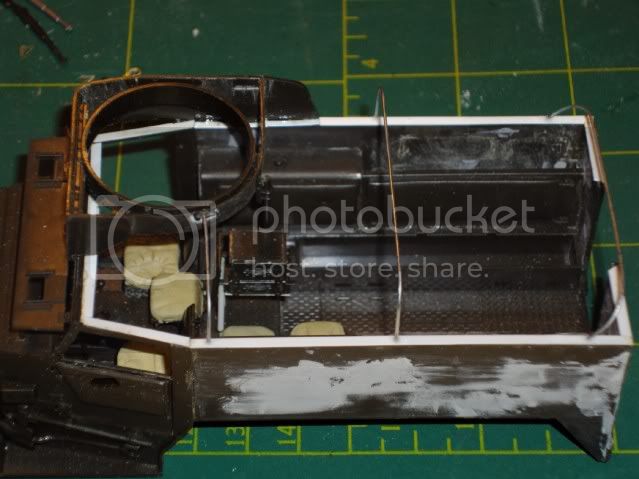
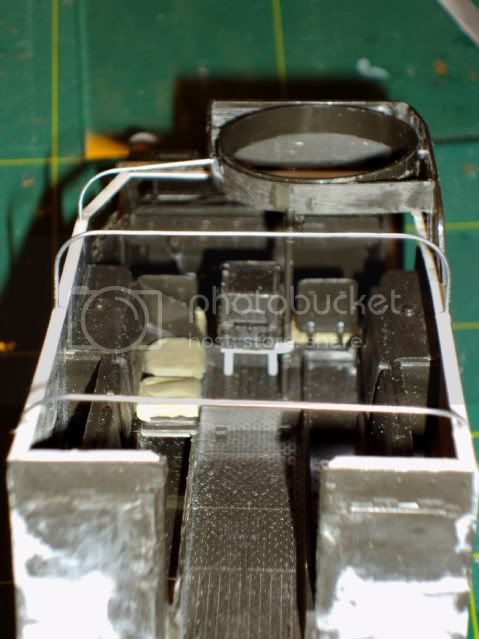
I started work on the interior, but I guess my mind was absent then. I glued in the boxes used in the M3A2 and discovered my mistake when the glue had fully hardened. So I had to do a lot of cutting, sanding and swearing...
I also glued in the long backsides on the wrong sides and have to switch them. The open seatlockers will stay that way; at least one of them, which allows me to add yet more "life: to the interior.
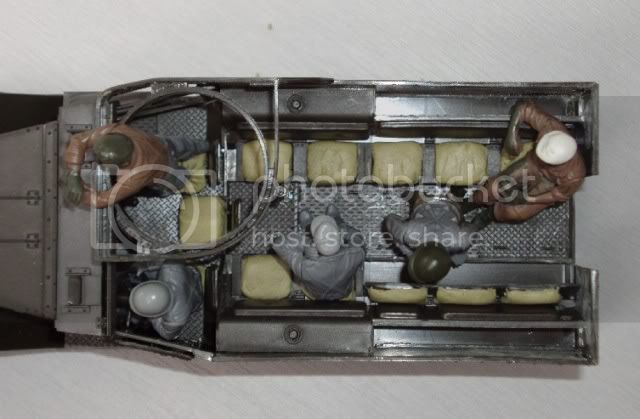
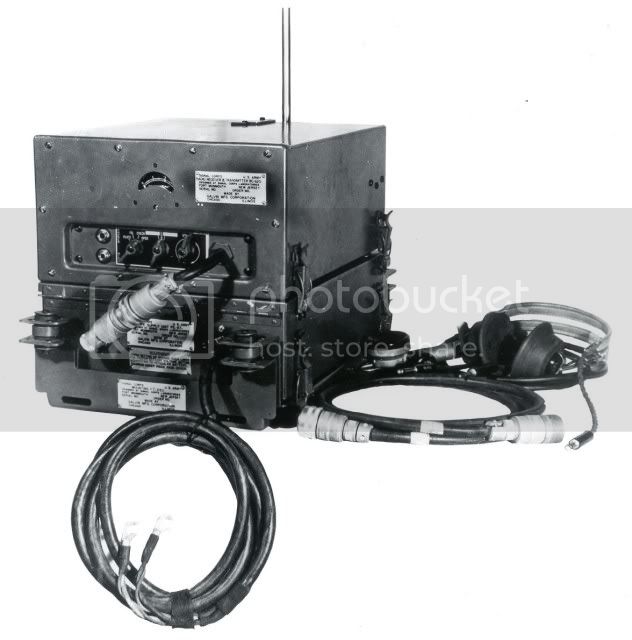
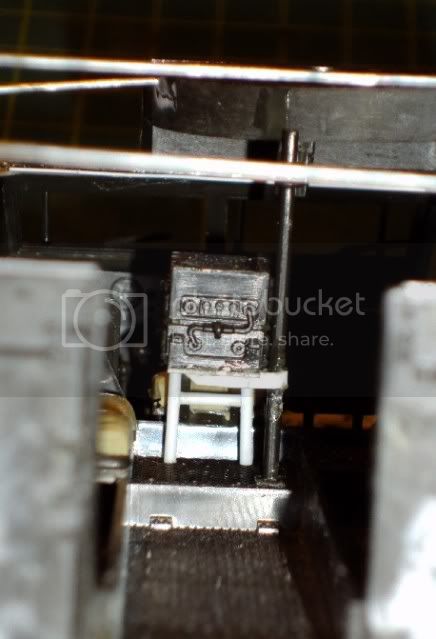
One of the unanswered questions is the position of the radio and what radio to use..


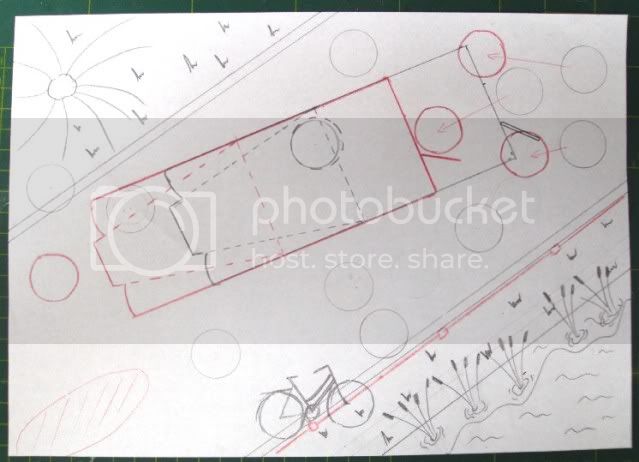
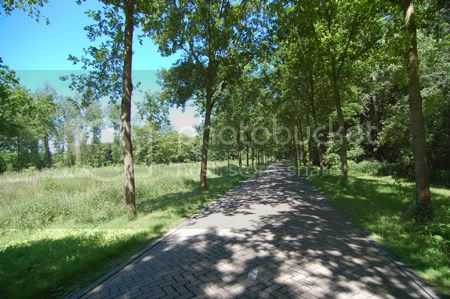
As an underground I have planned a "typical Dutch scenery", being a herringbone style cobbled road, a ditch and some willows. Sort of a mix between these two pictures;


But that's something for the future......


btw, this text has been simply copied form the Cold War Campaignthread
yeahwiggie
Visit this Community
Dalarnas, Sweden
Joined: March 24, 2006
KitMaker: 2,093 posts
Armorama: 1,359 posts
Posted: Tuesday, September 29, 2009 - 02:59 AM UTC
I have a little more progress to show you.
I have been working on the interior, giving spelcial attention to the seats.
The seats in the kit are very flat, so I added a layer of putty, to beef them up a little. In order to make the figures look naturla within the vehicle I also made them, but in a very basic way.
While the putty was still soft I Pushed the appropratie figures into it, so they fit nice and snug. The figures are, as aid, still very basic and need more work and attention.
Here's what things look like now;


I also want to install a radioset. I have a soft spot for those.
The information I was able to gather showed a large radioset on the right rear of the vehicle, which turned out to be a SCR-506, which looks like this;


Unfortunately I do not know of any such radio in 1/35, so that caused a bit of a setback. There are more sets, used in these vehicles, but they have the same problem as the 506; no 1/35. Then I learned that another set was used, being the SCR 510 or 610, whick looks like this;


And, happy happy joy joy, Tamiya has one of those in the old sets, like the M21 and the gun- & mortarteam!
So this one is in and I will be placing it in the centre fornt, right behind the middle seat, as that is the most logical looking place....
yeahwiggie
Visit this Community
Dalarnas, Sweden
Joined: March 24, 2006
KitMaker: 2,093 posts
Armorama: 1,359 posts
Posted: Friday, October 02, 2009 - 10:53 AM UTC
I made some progress, too and waisted some more glue...
I basically finished the figures and will only have to add more details, such as straps and I also added a number of details to the vehicle.
First of all I wanted to show that it is an upgraded M3, so I needed some new headlight. Through a fellow modeller at twenot I got hold of a set of Dragon's M3 headlights... with pe....
The result of this "nosejob":


This kit is lacking some vital and very visible items, such as the rim on the inside of the crewcompartiment and the tarphoops.
This meant a D.I.Y-job. While tacking the pictures I noticed that the front hoop is too low, so that has to be redone.


Is alo put my theory about the radio into practice and was not hindered by any kind of references or lack of imagination.... It is all made up!..... But it looks logical to me.

Detailshot;

And with operator;


As I said, the troop are basically done.
Here's the "vehiclegroup";


And my own "Band of Brothers", the boys on foot;

newfish
Visit this Community
England - West Midlands, United Kingdom
Joined: June 23, 2008
KitMaker: 2,329 posts
Armorama: 2,110 posts
Posted: Friday, October 02, 2009 - 11:22 AM UTC
Ron may I add you've done some fine work with Tamiya's Half track it does look rather nice. It should look rather fetching with some paint slapped on it. I do like your seat coushins they are a really nice touch. Good luck painting your Band of Brothers

Jaymes.

yeahwiggie
Visit this Community
Dalarnas, Sweden
Joined: March 24, 2006
KitMaker: 2,093 posts
Armorama: 1,359 posts
Posted: Saturday, October 17, 2009 - 03:17 AM UTC
Thanks Jaymes!

Sadly enough I haven't touched a kit in 2 weeks.....
Just to show I haven't forgotten about this build I thought I'd show you some sketches I made for the diorama I have in mind.
The basic one;

Looking at it I noticed that it was not good, unbalanced, didn't feel right. It took me a little while to figure out what was wrong.
The main problems with this layout were the overcrowded area in the rear and the large, empty space in front.
The solution proved to be very simple. I moved the vehicle more up the road and relocated a few crewmen et voilá;


Here's a drawing showing the cross section (is it called that way?). again with the alterations in red.
Tanker9
Visit this Community
California, United States
Joined: January 31, 2009
KitMaker: 165 posts
Armorama: 141 posts
Posted: Wednesday, October 21, 2009 - 01:44 PM UTC
Ron,

Very nice work as always. You are making some great work on an oldie but goodie half-track! Keep up the great work. Very Nice work on that radio, I really like the detail! I share your enthusiasm with WWII halktracks. Keep us posted!

cdharwins
Visit this Community
New Jersey, United States
Joined: October 28, 2006
KitMaker: 491 posts
Armorama: 462 posts
Posted: Friday, July 30, 2010 - 06:36 PM UTC
Lookin' good, Ron. Its a nice model and an interesting subject. Any recent pictures?
yeahwiggie
Visit this Community
Dalarnas, Sweden
Joined: March 24, 2006
KitMaker: 2,093 posts
Armorama: 1,359 posts
Posted: Wednesday, April 17, 2013 - 06:25 AM UTC
After many years I have picked up this old project again.
After assessing the damage, only one riflebarrel broken, but also the left idlerwheel of the halftrack, I started working on the lady's bicycle.


the barrel/rifle is easily fixed by just exchanging it, the idlerproblem will be a lot tougher...
I took Tamiya's German army bicycle as a basis and changed it. Took away the centrebar, the pump, modified the seat by adding a strip of evergreen and sanding it to shape, added another luggagerack to the front, added small bars to the luggageracks, repositioned the lamp and changed the position of the frontwheel and handlebars. That was a tricky operation and I added the front luggagerack so I could add additional strength to the weak/small joint of the frontwheel. The front luggagerack is a modification of some sparepart of unknown origin. I thought about adding brakes and cables, but I did not want to overdo it right now.


As you can see I also made a grocerybag with vegetables in it. The bag was preshaped by using miliput, than covered by umbrellafabric for the texture. Handles are twisted copperwire. The vegetables are leek, made by tightly rolling kitchenpaper and cutting up one end for the leaves.

Here's the drioama in mock setup:
overall view


the focal point


The stance of the lady is so strange, because she will receive a wound to the right knee. She is leaning on the bazookagunner in order to relieve the pressure on the wound, when standing.

 _GOTOTOP