Armor/AFV: Canadian Armor
Discuss all types of Canadian Armor of all eras.
Hosted by Darren Baker
Dieppe Churchill Mk 1 Build
csmanning
Visit this Community
Alberta, Canada
Joined: March 23, 2008
KitMaker: 333 posts
Armorama: 321 posts
Posted: Sunday, April 25, 2010 - 12:51 PM UTC
Thanks Brad! It'll be great to see you again! I'm trying to get this beast done for the Spring show... but the goal is to have the whole diorama done by September ... that just means the diorama will be entered next year.

Here's the weekly update: Some post shading done. I lightened the base color with Tamiya Buff. I also used Tamiya Nato Black with a few drops of the base color around where the water proofing was blown off. It looks the part but will really look great after some pin washes and filters. Decals are going on tomorrow. Enjoy!!


I turned off one of my lights for this picture and it's showing my base color more green then what it is in reality.


NebLWeffah
Visit this Community
Alberta, Canada
Joined: October 13, 2004
KitMaker: 1,683 posts
Armorama: 1,248 posts
Posted: Sunday, April 25, 2010 - 02:10 PM UTC
SWEEEEET!!!

Can't wait to see this one in person. Looks excellent Carmen.


Bob
csmanning
Visit this Community
Alberta, Canada
Joined: March 23, 2008
KitMaker: 333 posts
Armorama: 321 posts
Posted: Tuesday, April 27, 2010 - 04:01 PM UTC
Decals are on! I even had a bit of time to paint some of the details... rubber on front sprockets, leather cushions on hatches & muffler extensions...

I can't rave enough about Echelon Decals! This was the easiest Decal application I've ever had!


Next up... knocking back the decals a bit... solid coat of gloss... then pin wash!
Zaltar
Visit this Community
British Columbia, Canada
Joined: May 03, 2008
KitMaker: 272 posts
Armorama: 264 posts
Posted: Wednesday, April 28, 2010 - 03:13 AM UTC
The decals really brought the whole model to life. It looks even better now!

zaltar
csmanning
Visit this Community
Alberta, Canada
Joined: March 23, 2008
KitMaker: 333 posts
Armorama: 321 posts
Posted: Friday, April 30, 2010 - 10:18 AM UTC
Thanks Zaltar! Thanks to everyone for the encouragement!

I've knocked back the decals a bit so they weren't so stark agains the base color. I used the base color and glazed over the decals to fade them a bit. I then took my Nato Black and touched up around where the waterproofing was blown off... you can see it on the turret decal and around the side sponson hatch. Enjoy!

csmanning
Visit this Community
Alberta, Canada
Joined: March 23, 2008
KitMaker: 333 posts
Armorama: 321 posts
Posted: Sunday, May 09, 2010 - 11:44 AM UTC
Here's some shots of BOLSTER with a pin wash of raw umber. It's still in a gloss coat in these photos. I painted the reverse side of the water proofing an off white (almost tan color). The wash darkened it a bit and gave it some contrast.


The next picture you can see some of the subtle washes on the inside armour plate on the side of the sponson.


Here's the muffler before the cover is put on (after a dull coat). I learned this trick from Gary Edmonston. I painted the muffler in a dark brown. I then applied two layers of random chips which were two different shades of light brown (white and brown mixtures).

Once applied I scrubbed on MIG Pigment Russian Earth over the top (a little thinner helps of course). You can still see the chips through the pigment but it's more subtle now. The Pigment gives a real matt finish.


tankmodeler
#417
Visit this Community
Ontario, Canada
Joined: March 01, 2004
KitMaker: 3,123 posts
Armorama: 2,539 posts
Posted: Monday, May 10, 2010 - 05:49 AM UTC
Carmen,

I really like the end result of the Parafilm waterproofing, but aren't you afraid of it changing with time and the pain flaking off? Parafilm is not a stable material. All it takes is a little swelling due to temperature or humidity and, coupled with the natural lack of adhesion, the paint could start to chip off in the future. Is there ar reason you went for the Parafilm and not something more stable like an aluminim or lead foil?

I'd be terrified that the bloody paint would start to separate.

Paul
AlanL
Visit this Community
England - East Anglia, United Kingdom
Joined: August 12, 2005
KitMaker: 14,499 posts
Armorama: 11,675 posts
Posted: Monday, May 10, 2010 - 07:35 AM UTC
Hi Carmen,

Terrific progress, looking really well, coming along in leaps and bounds.

Excelent work.

Al
csmanning
Visit this Community
Alberta, Canada
Joined: March 23, 2008
KitMaker: 333 posts
Armorama: 321 posts
Posted: Monday, May 17, 2010 - 09:37 AM UTC
Paul - Thanks for posting! I'm aware of the risks associated with parafilm. It was a hard decision to make as I wasn't even sure what I was going to use to simulate the water proofing until a few months ago. I'm ok with the possibility that that could happen... live and learn.

Alan -Thanks again for the encouragement!
csmanning
Visit this Community
Alberta, Canada
Joined: March 23, 2008
KitMaker: 333 posts
Armorama: 321 posts
Posted: Monday, May 17, 2010 - 09:52 AM UTC
Here's my latest update:

I drilled out two links of Cromwell Models early style tracks and pinned them. These will be my spares on the rear sides.


I almost forgot the tow cable hooks located just under the side air intakes. These are not in the AFV Club Kit, but are present in the Cromwell Models conversion set. I can't believe I almost missed these. Please note that not all Dieppe Churchills had these hooks, so check your reference before adding/omitting them.


Got the muffler shroud on. I painted it separately, glued it on, the over sprayed with a lightened version of my base color then over sprayed it again with some Nato Black around the edges to help blend it into the engine deck. I then did a pin wash of raw umber oils.


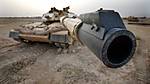
I simulated the shot out front head light with tin foil then washed it with raw umber to tone the silvering back a bit. Please refer to the original photos at the start of this build for reference. I used 32 gauge wire to help pin it in place. I'll have to add some smoke pigment or paint it black so the wire isn't so stark.


Tow cable add to LHS. As per the picture the tow cable was only on the LHS. The RHS cable was used to tow HELEN ashore. I painted the cable in the base color then added a little dust pigment and some metallic pigment to help it look more like a steel cable then a painted string.


I wasn't happen with my water proofing from before so I added more washes to help give contrast between the highs and lows.


OH God! Resin tracks! I despise resin tracks with a passion, just because I've never had any good experience working with them. I was hoping and praying that AFV Club would have their Plastic Early style track sets out by now... yet I find myself still waiting... They've been announced for about a year now! Come on!!

Oh well... I'm using my second Dieppe Churchill kit to help form the tracks, but I'm finding that the resin is either warped or my gluing sucks! I'll have to make a date with some boiling water to help straighten them up at some point...


I've made a list of remaining things left to do... not too much left before I switch to my Dingo, then my diorama... stay tuned!! Thanks in advance for checking my build log out!!
AlanL
Visit this Community
England - East Anglia, United Kingdom
Joined: August 12, 2005
KitMaker: 14,499 posts
Armorama: 11,675 posts
Posted: Monday, May 17, 2010 - 10:01 AM UTC
Hi Carman,

Inspiring stuff. Who's tracks are you using?

Al
csmanning
Visit this Community
Alberta, Canada
Joined: March 23, 2008
KitMaker: 333 posts
Armorama: 321 posts
Posted: Monday, May 17, 2010 - 10:09 AM UTC
Thanks Alan! I'm using Cromwell Models early style tracks. I have a set of the IMA early style tracks, but Cromwell's are better. I don't have any from Resicast to compare. Cheers!
STURMPANZER
Visit this Community
Sao Paulo, Brazil
Joined: June 02, 2006
KitMaker: 7 posts
Armorama: 7 posts
Posted: Monday, May 17, 2010 - 11:23 AM UTC
Lovely work mate!! In my opinion u may add a little orange and red to the muffler. Either way, very nice thread!

Best,
Cadu Souza
junglejim
Visit this Community
Alberta, Canada
Joined: February 18, 2003
KitMaker: 1,728 posts
Armorama: 1,629 posts
Posted: Monday, May 17, 2010 - 03:51 PM UTC
Too bad AFV Club probably won't have their track set out anytime soon, I think those are the same ones? (scroll down to AF 35183):
http://www.perthmilitarymodelling.com/newkitnews/afvclub.html

Jim
csmanning
Visit this Community
Alberta, Canada
Joined: March 23, 2008
KitMaker: 333 posts
Armorama: 321 posts
Posted: Tuesday, May 18, 2010 - 03:50 AM UTC
Yep Jim... those are the ones...
AlanL
Visit this Community
England - East Anglia, United Kingdom
Joined: August 12, 2005
KitMaker: 14,499 posts
Armorama: 11,675 posts
Posted: Tuesday, May 18, 2010 - 05:42 AM UTC
Hi Carmen,

I have a set of the Resicast ones, I was keeping them for the Churchill Ark but I shall probably use them on the Mk III I'm building.

The AFV Club set should be along faily soon if you can wait!

Cheers

Al
csmanning
Visit this Community
Alberta, Canada
Joined: March 23, 2008
KitMaker: 333 posts
Armorama: 321 posts
Posted: Tuesday, May 18, 2010 - 06:55 AM UTC
Hey Alan - How do you like the Resicast tracks?

I think I'm going to paint and mock up the Cromwell Models tracks.. then when the AFV Club tracks come out I'll replace them... I have a show in 2 weeks which I'll have to use the resin tracks, but as long as the AFV Club tracks are out before September I'll be fine.

May the model Gods (and AFV Club...) hear my prays and release these tracks soon!
csmanning
Visit this Community
Alberta, Canada
Joined: March 23, 2008
KitMaker: 333 posts
Armorama: 321 posts
Posted: Saturday, May 22, 2010 - 03:32 PM UTC
Alright gents... the light at the end of the tunnel is blinding....

I finished the track assembling and painting. Once I had them glued in segments I spent an hour working with them and boiling water to straighten them out. It was actually alot easier then what I expected. I've worked with resin tracks before that you needed to hold in boiling water for well over a minute just to get some flexibility. These were alot better. Thumbs up to Cromwell Models for that!

I Primed and painted the tracks Nato Black... Nato black is not 100% black but rather a very dark grey. I like the finished quality of my work but I would recommend using a dark grey a shade or two lighter then Nato Black.

Once painted I gave two heavy washes with Raw Umber. Though most of this is invisible in the end the hint of brown on the tracks gives another little dimension to the finish color.

I then Used Mig Pigment Industrial City which looks like a dark grey pigment... but for those who have used Pigments before they always dry way lighter then what they look like in the bottle... and that's what I was after. Given the shingle beach at Dieppe is rounded stones of Granite and Chert I wanted to a light gray dusting. Once the pigment was on I used another clean brush with thinner to remove any excess or to help move the pigment around until the desired finish.

Once that was done and fully dry I used Migs Gun Metal for some metallic shin. I simply used my pinky finger to apply it and a micro brush for the hard to reach areas.

It's hard to see the difference but here's what it looks like it stages:


I added some of the Industrial City pigment to the track runs... I didn't want to over do it so I went just enough to give a thin layer.


I've also added the extra track links on the rear fenders... in the pictures there was two links on the LHS and three on the RHS... There has been no pigments added to these... but once I compared them to the finished tracks I'm going to be dusting them up just a bit to help blend everything.


Tomorrow the tracks go on! Then some blending of pigment colors and maybe a dusting of over spray along the bottom.... Stay tuned!!

Thanks for watching! Cheers!
AlanL
Visit this Community
England - East Anglia, United Kingdom
Joined: August 12, 2005
KitMaker: 14,499 posts
Armorama: 11,675 posts
Posted: Saturday, May 22, 2010 - 08:55 PM UTC
Hi Carmen,

The Resicxast tracks look good, I shall see how they build.

Kits looking great, good luck at the show.

Al
csmanning
Visit this Community
Alberta, Canada
Joined: March 23, 2008
KitMaker: 333 posts
Armorama: 321 posts
Posted: Friday, May 28, 2010 - 07:05 AM UTC
Thanks Alan! Your Churchill Interior Build is looking amazing as well!!!

Here's my last installment for this build log. The tracks went on with no real issues. I'm curious to see the AFV Club offering and how their tracks compare in plastic.

Anyways enjoy!


I wasn't 100% happy with the track's color... so I over sprayed them with a mixture of thinned Tamiya, White, Light Grey and Buff. I also used this mixture to over spray the lower portion of the running gear, the track rails and lower hull. The finish result blended everything together nicely.

For all of you Dieppe Fans I have a Dieppe Dingo in the works next. This Dingo will be part two of my build before I merge the two projects into a Dieppe Diorama/Vignette. I'm going to start another Build Log for the Dingo under the Canadian Forum. Stay Tuned!

Thanks for everyone who came along on this journey! Happy Modelling!
shopkin4
Visit this Community
Illinois, United States
Joined: March 29, 2009
KitMaker: 1,135 posts
Armorama: 1,030 posts
Posted: Friday, May 28, 2010 - 07:39 AM UTC
Very nice Carmen. This all came together flawlessly. Your work is definitely what I aspire to achieve. Please keep up the good work and get something published already

Congrats again...very spectacular
AlanL
Visit this Community
England - East Anglia, United Kingdom
Joined: August 12, 2005
KitMaker: 14,499 posts
Armorama: 11,675 posts
Posted: Friday, May 28, 2010 - 08:30 AM UTC
Hi Carmen,

Should be a show stopper, excellent work and a brillient finish, enjoyed the build a lot.

Cheers

Al
ChrisDM
Visit this Community
England - South West, United Kingdom
Joined: January 01, 2010
KitMaker: 717 posts
Armorama: 697 posts
Posted: Friday, May 28, 2010 - 08:32 AM UTC
Simply superb Carmen, the most definitive Dieppe churchill I have seen so far

You must be very very pleased with this

Chris
csmanning
Visit this Community
Alberta, Canada
Joined: March 23, 2008
KitMaker: 333 posts
Armorama: 321 posts
Posted: Friday, May 28, 2010 - 10:32 AM UTC
Thanks Alan, Chris and Sean!

I am very pleased with this build. It's like when you paint figures.... you paint the face first because if you're not happy with the face then you're not going to be happy with the rest of the figure... This is the center piece in my diorama so I'm very please on how it turned out. I'm still motivated to continue on with my Dingo and the figures and beach groundwork.

I think I might have to lighten the tracks' color more when I put it on the beach ground work. But other then that I'm very happy.

More importantly... I enjoyed the pleasant discussion and meeting everyone along the way. I hope we all stay in touch. Cheers!

SdAufKla
Visit this Community
South Carolina, United States
Joined: May 07, 2010
KitMaker: 2,238 posts
Armorama: 2,158 posts
Posted: Friday, May 28, 2010 - 03:35 PM UTC
Extroidinary, Carmen! Thanks for taking the time to document the build so carefully. It's been very comprehensive, and not just the build details, but also all the research and deductive reasoning.

I've got this one book-marked in a folder in my favorites for future reference.

I'm really looking forward to your Dingo build. I'm sure it's gonna be a "keeper" too!

Happy Modeling,
Mike