

Constructive Feedback
For in-progress or completed build photos. Give and get contructive feedback!
For in-progress or completed build photos. Give and get contructive feedback!
Hosted by Darren Baker, Dave O'Meara
First ever completed 1/35th Armor

The_Madhatter

Joined: May 14, 2009
KitMaker: 74 posts
Armorama: 42 posts
Posted: Friday, January 08, 2010 - 12:39 AM UTC
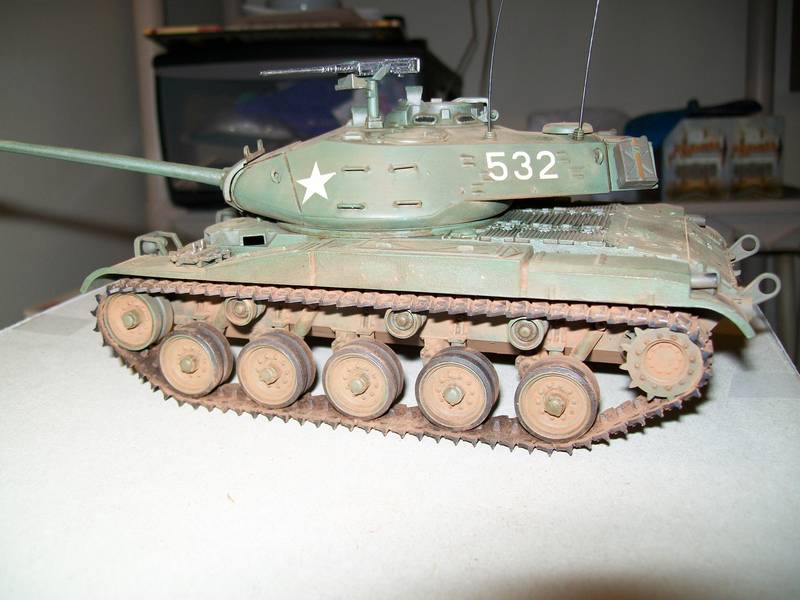
Hey guys, as the title says, this is my first completed 1/35th piece of armor and only the second Military vehicle that I've done. It is the Tamiya M-41 Walker Bulldog. It was an easy build of an inexpensive kit. The only thing I am not happy with and am considering redoing are the aerials. I used the stretched sprue method for them. I am still trying to figure out the the whole adding photos thing so bare with me please. And also the travel lock is missing, and I must give a big shout out to call sign Mech on the boards here because he has a replacement in the mail for me as I type, thanks again buddy. Pleas and comments and suggestions are more than welcome.

Loobes

Joined: August 20, 2007
KitMaker: 409 posts
Armorama: 168 posts

Posted: Friday, January 08, 2010 - 12:51 AM UTC
Is this it?

The_Madhatter
Joined: May 14, 2009
KitMaker: 74 posts
Armorama: 42 posts
Posted: Friday, January 08, 2010 - 01:09 AM UTC
Oh cool ya found it, thank you. I'm not computer illiterate just computer stupid  Now if I can just figure out how in the
  you did that I'll be as happy as a little green frog in the rain.
Now if I can just figure out how in the you did that I'll be as happy as a little green frog in the rain.AJLaFleche
Joined: May 05, 2002
KitMaker: 8,074 posts
Armorama: 3,293 posts
Posted: Friday, January 08, 2010 - 01:16 AM UTC
If that's the kit above, the overall finish and construction look good. The biggest error in the .50 cal. It's upside down and the ammo is on hte wrong side. Less glaring are the exhaust tips...the one closer to the camera appears to have an upward tilt. It should be flat like the one on the other side.
The_Madhatter
Joined: May 14, 2009
KitMaker: 74 posts
Armorama: 42 posts
Posted: Friday, January 08, 2010 - 01:21 AM UTC
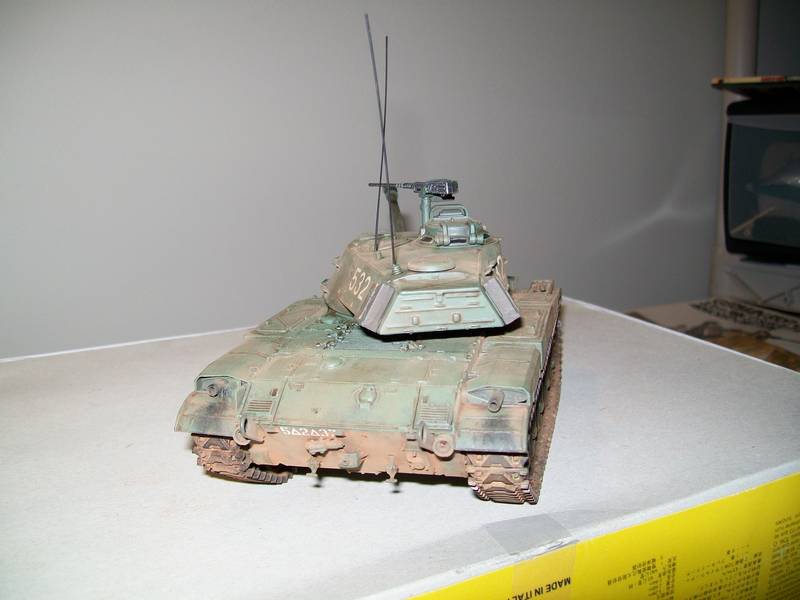
Ok, the .50 cal is an easy fix, its not glued in. The exhaust was in so tight I guess it did that on its own because I had sanded it down a bit to make it slide over some because it was up against the the travel lock mount. Heres another shot......maybe. lol Ok, didnt work, I'll figure it out later, I'm off to bed.
Loobes
Joined: August 20, 2007
KitMaker: 409 posts
Armorama: 168 posts
Posted: Friday, January 08, 2010 - 01:44 AM UTC
To get pictures into your post go to your gallery. Then click the picture you require, scroll down until you see 'Linked Thumbnail' There is a box of text, ignore this but on the same line there is a little picture of a picture (if you get what a mean). Click on this then copy and paste the line of what may appear to be random text, nxt to where ist says HTML code
Hope this helps
Loobes
Hope this helps
Loobes
The_Madhatter
Joined: May 14, 2009
KitMaker: 74 posts
Armorama: 42 posts
Posted: Friday, January 08, 2010 - 04:42 AM UTC

mikey
Joined: March 14, 2006
KitMaker: 229 posts
Armorama: 227 posts

Posted: Friday, January 08, 2010 - 05:43 AM UTC
great work for a first, most definately fix the ma duece, but overall a fine piece of work. The weathering looks great. 
 |

WEB HOSTING BY


Copyright ©2021 Armorama and Kitmaker Network, a subsidiary of Silver Star Enterprises
All Rights Reserved. Please read our Conditions of Use and Privacy Policy.
All Rights Reserved. Please read our Conditions of Use and Privacy Policy.