Dioramas
Do you love dioramas & vignettes? We sure do.
Hosted by Darren Baker, Mario Matijasic
"Laying in wait" WIP
zemzero
Ohio, United States
Joined: May 28, 2005
KitMaker: 177 posts
Armorama: 108 posts
Joined: May 28, 2005
KitMaker: 177 posts
Armorama: 108 posts
Posted: Tuesday, February 09, 2010 - 06:54 PM UTC
This is my first real diorama and it's so much fun to do, it's like a different level of modeling. I made a tree and a small tree stump, something simple, but it was weird how proud I was of making it from scratch.
I'm not too good at keeping photos of my WIP stuff, so these pictures might jump around concerning the progress. The main inspiration came from this photo of an M-18:
M-18 in the street
I liked the idea of the turret/barrel being between two trees and the idea evolved from there.
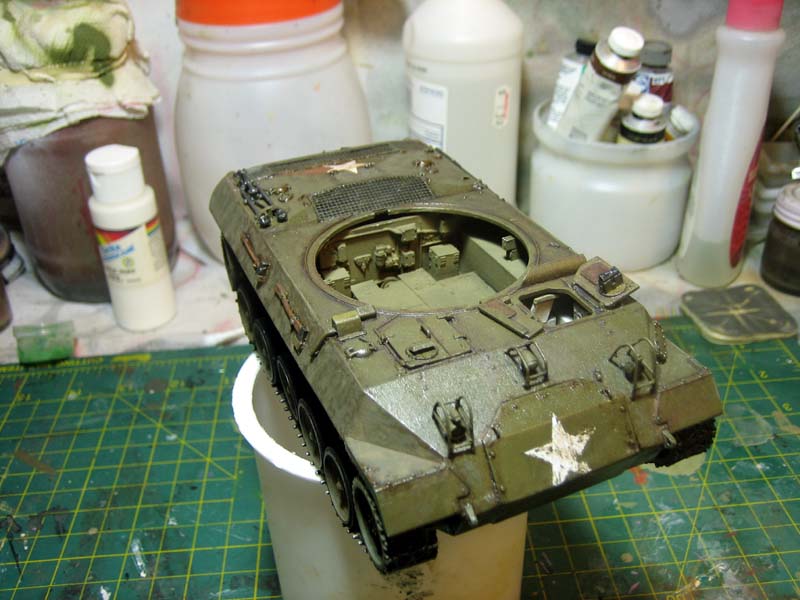
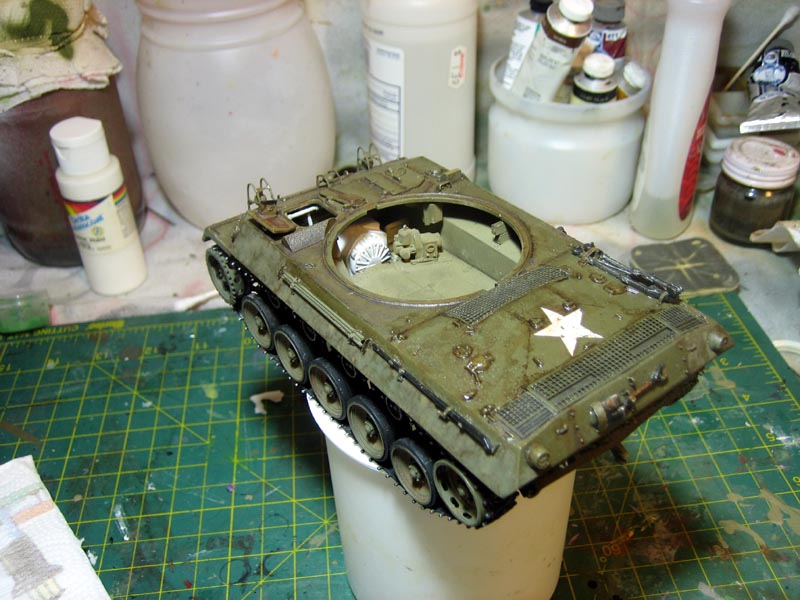
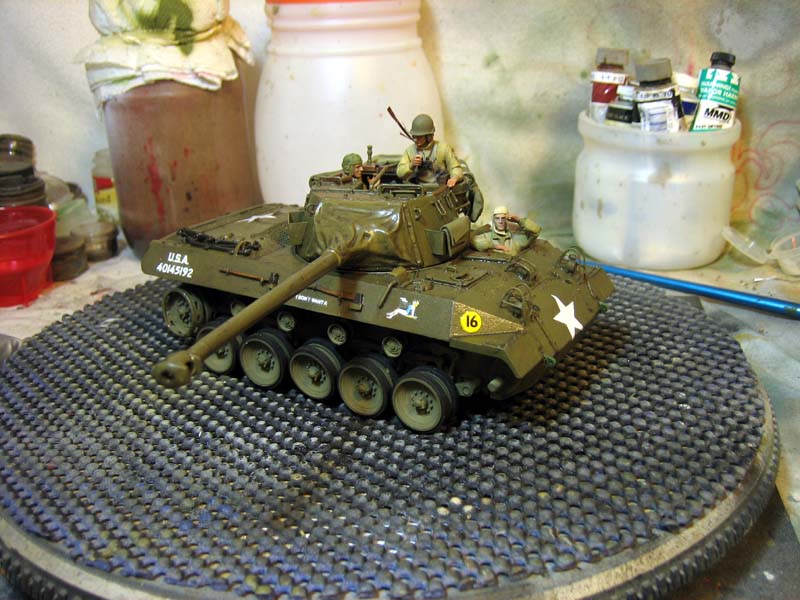
Some in progress shots of the M-18 with Verlindens update sets:
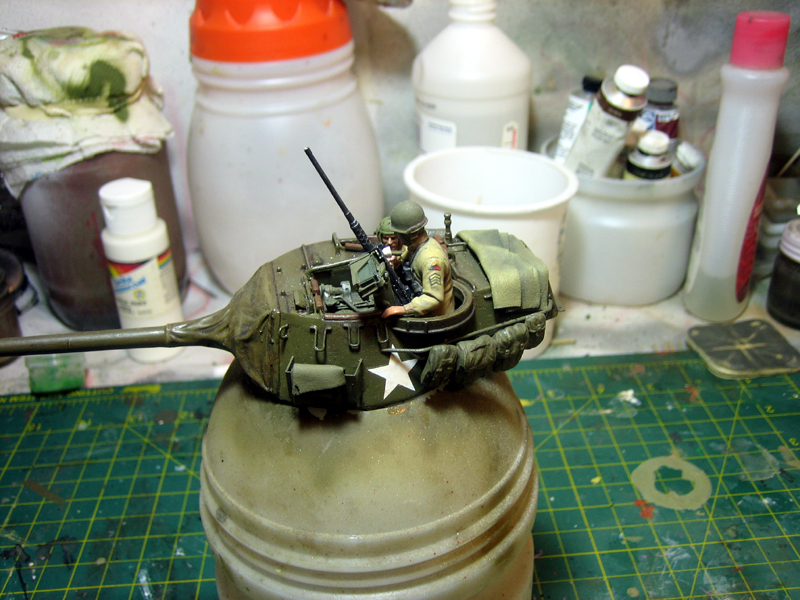
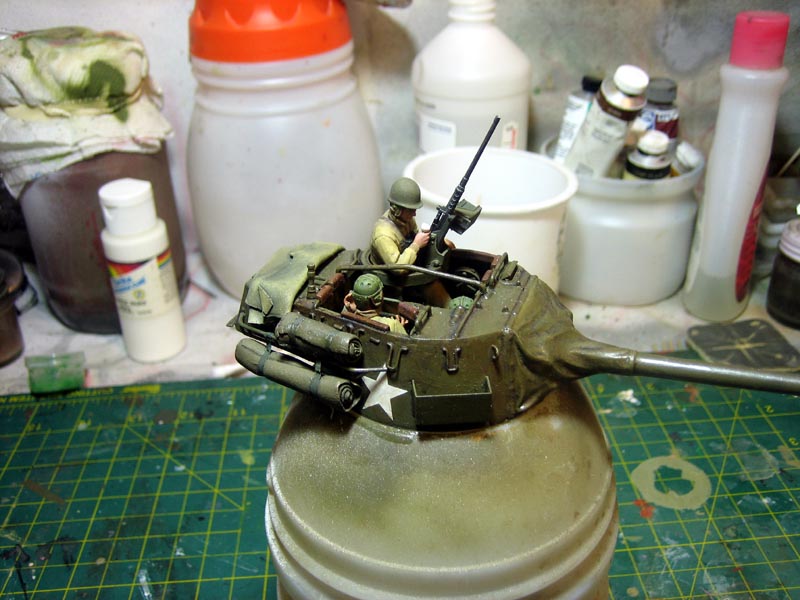
I am trying to convert Dragons US tank crew to fit inside the turret, I will probably make a mess of it, but I will make them fit in the end:
I'm sure the tank is riddled with accuracy problems, it was my first time using an AM kits as well and...well...I never trimmed resin pieces before or any of that. I ended up trimming a couple of resin pieces too short or too wobbly resulting in a lot of filler and sanding. Also the mesh covers at the rear of the tank gave me a lot of trouble too. I had to scrape the moulded on mesh to make room for the PE mesh and that came out wobbly too. Oh well, the tank will be covered in..ahem.."strategically" places foliage camouflage.
Posted: Tuesday, February 09, 2010 - 07:15 PM UTC
Coming along nicely! Which kit of the M18 did you use? I built the Academy one many years ago, they both seem to have issues...
Keep it up, looking forward to it!
Cheers
Stef
Keep it up, looking forward to it!
Cheers
Stef
zemzero
Ohio, United States
Joined: May 28, 2005
KitMaker: 177 posts
Armorama: 108 posts
Joined: May 28, 2005
KitMaker: 177 posts
Armorama: 108 posts
Posted: Wednesday, February 10, 2010 - 10:50 AM UTC
Yeah, it's the kit from Academy. The Verlinden really improved the stock kit, even with me butchering some of the pieces. I update the first post with the kits I might use.
Some painting on the tank and the layout of the base:
slodder
North Carolina, United States
Joined: February 22, 2002
KitMaker: 11,718 posts
Armorama: 7,138 posts
Joined: February 22, 2002
KitMaker: 11,718 posts
Armorama: 7,138 posts
Posted: Wednesday, February 10, 2010 - 12:58 PM UTC
I like the general composition. The techniques are good also. My biggest critique is on how tall the wall is. From what I can see the wall looks to be about 5 feet tall. That's tall. I would expect a wall of field stones to be around 3 maybe 4 feet tall.
Could be wrong, it's been known to happn (a lot).
Overall - I like it.
Could be wrong, it's been known to happn (a lot).
Overall - I like it.
DioRandy
Illinois, United States
Joined: October 04, 2007
KitMaker: 108 posts
Armorama: 84 posts
Joined: October 04, 2007
KitMaker: 108 posts
Armorama: 84 posts
Posted: Wednesday, February 10, 2010 - 04:16 PM UTC
Hey, Eric
Nice start to an interesting project.
I built the Academy version of the Hellcat shortly after it was released and it gave me fits.
I, too, used it in a diorama and dedicated it to my father, who was a Hellcat crewman near the end of the war. Ironically, his unit, which was attached to Patton, was waiting to cross the bridge at Remagen when they heard that the war was over.
Randy
flipper21
Delaware, United States
Joined: October 29, 2006
KitMaker: 268 posts
Armorama: 144 posts
Joined: October 29, 2006
KitMaker: 268 posts
Armorama: 144 posts
Posted: Wednesday, February 10, 2010 - 07:05 PM UTC
Hi Eric, I really like what you've done so far. I agree with Scott that the wall looks alittle too tall. Looking forward to the next update...Vince
Longlance
Galway, Ireland
Joined: June 02, 2009
KitMaker: 89 posts
Armorama: 87 posts
Joined: June 02, 2009
KitMaker: 89 posts
Armorama: 87 posts
Posted: Friday, February 12, 2010 - 03:11 AM UTC
Hi Eric,
great dio, really like the crew for your m18, great job all round
shane
great dio, really like the crew for your m18, great job all round
shane
zemzero
Ohio, United States
Joined: May 28, 2005
KitMaker: 177 posts
Armorama: 108 posts
Joined: May 28, 2005
KitMaker: 177 posts
Armorama: 108 posts
Posted: Saturday, February 13, 2010 - 04:12 PM UTC
Thanks for the comments guys, with all this snow I've gotten a few things done:
The wall is painted with a base of Humbrol enamel and a lot ( I mean a lot) of oil washes, filters and dry bushing. I don't like the color though, it looks too blue up against the green grass. After looking at from different angles and with figures next to it, I agree about the height. I will shorten the wall tommorow then give it a more of a yellow/tan tint (Hopefully).
The trees are made from a wire frame, covered in plaster. A thin layer of sandy tile grout was spread over that to replicate tree bark. The leaves are a couple of different sources, spread over a steel wool canopy (make this very wispy and thin). The taller skinnier tree is mainly parsley but since I ran out for the second tree so I used real leaves from outside (The rose bush still had leaves on it). I laid them on a baking sheet and baked them in the oven until crispy. After that I just crushed them up and sprinkled it on. There are a few leaves that are too large, but I think I removed most of them. The purple bunches are dried flowers from the craft store Michaels.
The grass mat is from the local hobby store. I'm gonna color it as it looks too bright as it is and too neat. I added clumps of grass, bristles cut from a black paint brush (a huge mistake I will never make again, use the tan colored ones as it holds paint better)
grimmo
Queensland, Australia
Joined: January 17, 2006
KitMaker: 752 posts
Armorama: 569 posts
Joined: January 17, 2006
KitMaker: 752 posts
Armorama: 569 posts
Posted: Saturday, February 13, 2010 - 09:51 PM UTC
looking good so far! love the tress. great work on them!
Longlance
Galway, Ireland
Joined: June 02, 2009
KitMaker: 89 posts
Armorama: 87 posts
Joined: June 02, 2009
KitMaker: 89 posts
Armorama: 87 posts
Posted: Thursday, February 18, 2010 - 11:26 AM UTC
hi eric, great work on the wall and trees,
one suggestion for you, the base looks a little flat, id recommend adding a slight change of height which add intrest to the overall scene, like a small ridge or rise where the wall sits would be a example
only a suggestion
keep up the great work
shane
one suggestion for you, the base looks a little flat, id recommend adding a slight change of height which add intrest to the overall scene, like a small ridge or rise where the wall sits would be a example
only a suggestion
keep up the great work
shane
zemzero
Ohio, United States
Joined: May 28, 2005
KitMaker: 177 posts
Armorama: 108 posts
Joined: May 28, 2005
KitMaker: 177 posts
Armorama: 108 posts
Posted: Thursday, February 18, 2010 - 03:06 PM UTC
Thanks Matt
Shane, I did think about that but I got too impatient and glued the grass down, I really wanted to work on the grass right away.
I have both tree's finished but it is way too crowded to have both on the base at once, the leaves obscure pretty much everything. So since I cut out holes for each tree, I had to fill one. So it's a tree stump, oh well.
The wall was shortened by two layers, this was a real improvement. Thanks for the suggestion:
I used both of these for the foliage in the trees, and the purple stuff for flowers on the ground. It seemed to do a good job:
Too crowded, yeah?
So other than the tree and dirt/leaves/debris, the groundwork appears to be done. Any suggestions on what to add or anything?
roudeleiw
Luxembourg
Joined: January 19, 2004
KitMaker: 2,406 posts
Armorama: 2,224 posts
Joined: January 19, 2004
KitMaker: 2,406 posts
Armorama: 2,224 posts
Posted: Thursday, February 18, 2010 - 06:32 PM UTC
Quoted Text
. Any suggestions on what to add or anything?
A cow in front of the barrel! LOL, sorry, i couldn't resist!
Eric, i think for a first one this is not a bad effort. Layout is good, ideas are flowing and you are listening to advices.
Are you considering the wall done? It needs some serious repainting.
Play a bit with different colors, go into the grey greens. Variations between the stones.
Use pigments as moss on one side. Add dirt and grass and moss between the stones.
Next time also i would advice to look for alternative ways to do the foliage on the tree. There are other methods, who all cost time, but they are a lot nicer than this one.
Waiting for the next one!
Cheers
Claude
slodder
North Carolina, United States
Joined: February 22, 2002
KitMaker: 11,718 posts
Armorama: 7,138 posts
Joined: February 22, 2002
KitMaker: 11,718 posts
Armorama: 7,138 posts
Posted: Thursday, February 18, 2010 - 09:33 PM UTC
Nice job, the details added to the grass make this easy to look at. Putting both trees in, while crowded is a much better look.
The lower wall looks a lot better, it could use a bit of work color wise on the tops of the rocks, as pointed out.
Now just crew details, have one on look out, the others either eating or sleeping or prepping gear.
The lower wall looks a lot better, it could use a bit of work color wise on the tops of the rocks, as pointed out.
Now just crew details, have one on look out, the others either eating or sleeping or prepping gear.
pseudorealityx
Georgia, United States
Joined: January 31, 2010
KitMaker: 2,191 posts
Armorama: 1,814 posts
Joined: January 31, 2010
KitMaker: 2,191 posts
Armorama: 1,814 posts
Posted: Friday, February 19, 2010 - 12:45 AM UTC
I like it.
The turf behind where the M-18 pulled into it's current location should be chewed up some from the tracks.
And you're right. It's too crowded, and will be even moreso once you add all the figures.
The turf behind where the M-18 pulled into it's current location should be chewed up some from the tracks.
And you're right. It's too crowded, and will be even moreso once you add all the figures.
zemzero
Ohio, United States
Joined: May 28, 2005
KitMaker: 177 posts
Armorama: 108 posts
Joined: May 28, 2005
KitMaker: 177 posts
Armorama: 108 posts
Posted: Wednesday, January 12, 2011 - 03:24 PM UTC
Oh mama! Can't believe I started this almost a year ago! I know it's been a long time, but a year, yikes.
I did change the color of the wall, many months ago, heh. I think it looks a lot better, more blended in. I added moss and some washes, filters and drybrushing. The leaves under the tree might be a bit too much, but I had to cover up the cut marks in the mat.
zemzero
Ohio, United States
Joined: May 28, 2005
KitMaker: 177 posts
Armorama: 108 posts
Joined: May 28, 2005
KitMaker: 177 posts
Armorama: 108 posts
Posted: Wednesday, January 12, 2011 - 03:28 PM UTC
I don't have any pictures of the crew outside the tank, but I think they look alright. Need to fix the commanders arm patch, that gold doesn't look good around it.
As for the tank, well, humbrol, winsor newton washes/filters. Rolls and tarps are made with apoxie sculpt, first try using it for this. Foil for the straps.
I am having problems with micro set/sol. It's my first time using them and it doesn't seem to be doing anything except clouding up the future coat. None of the decals are wrinkling up or blending in. Maybe it's the thick academy decals or not enough future? I don't know, the tank did get pretty dusty sitting around for months. I couldn't get all the dust off...oh well, enough talk.
The kit came with string for the cable but I didn't think it would look like cable, instead looking like string. I made my own, attaching three strands of wire to a drill and just let it wind itself up. Looks pretty good to me, just need to paint it now.
vonHengest
Texas, United States
Joined: June 29, 2010
KitMaker: 5,854 posts
Armorama: 4,817 posts
Joined: June 29, 2010
KitMaker: 5,854 posts
Armorama: 4,817 posts
Posted: Wednesday, January 12, 2011 - 03:46 PM UTC
This is looking real good, it's nice to see a Hellcat being built up for a diorama like this. My only thought for the time being is that I wish that you took more pictures detailing your progress. Looking forward to the next update
Posted: Wednesday, January 12, 2011 - 07:49 PM UTC
Coming along nicely, great wall, trees and grass!
Just one silly question: Did you change the first post along the way (i.e. add pictures of the box arts) or was I completely nuts when I asked what M18 kit you used?
Cheers!
Stefan
Just one silly question: Did you change the first post along the way (i.e. add pictures of the box arts) or was I completely nuts when I asked what M18 kit you used?
Cheers!
Stefan
zemzero
Ohio, United States
Joined: May 28, 2005
KitMaker: 177 posts
Armorama: 108 posts
Joined: May 28, 2005
KitMaker: 177 posts
Armorama: 108 posts
Posted: Friday, January 14, 2011 - 11:48 PM UTC
Jeremy, thanks and yeah, my picture taking usually takes a back seat.
Stefan, I think I updated my first post after your response, but still you can never be too careful with those paint and glue fumes! Can make you feel wonky sometimes.
As for the tank, I hit a bit of a snag with the decals. I put two coats of future on the tank and I think that wasn't enough as most of the decals have silvering and little bubbles in them. So far I have put about eight coats of micro-sol on and I see no change at all.
I bought micro-sol/set about a year and this is the first time I am using them, they don't deteriorate over time, do they?
zemzero
Ohio, United States
Joined: May 28, 2005
KitMaker: 177 posts
Armorama: 108 posts
Joined: May 28, 2005
KitMaker: 177 posts
Armorama: 108 posts
Posted: Friday, April 08, 2011 - 06:04 PM UTC
Well this one is going real slow, started learning guitar and trying to play sunshine of your love is taking up a lot of time.
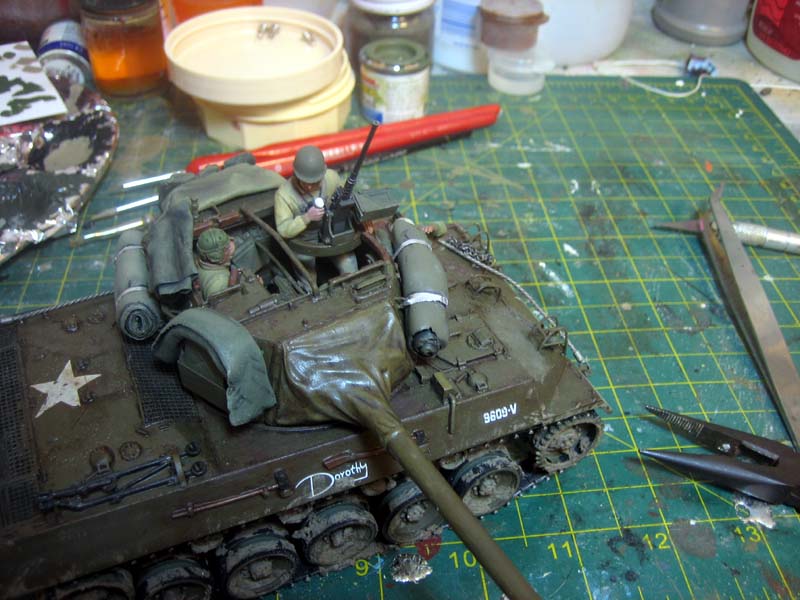
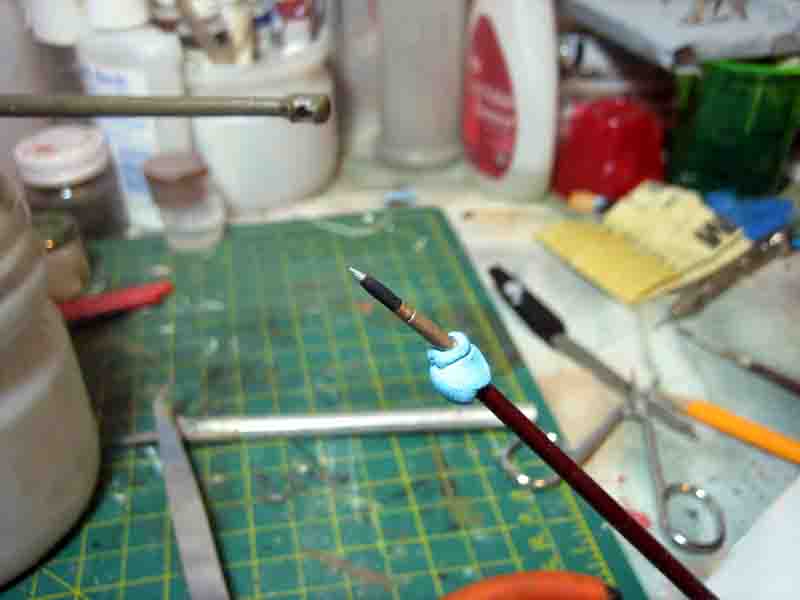
I lost the top of the commanders microphone, so I cut off the tip of a spare tank shell and just sanded down the sharp end and glued it down. Looks to match to me.
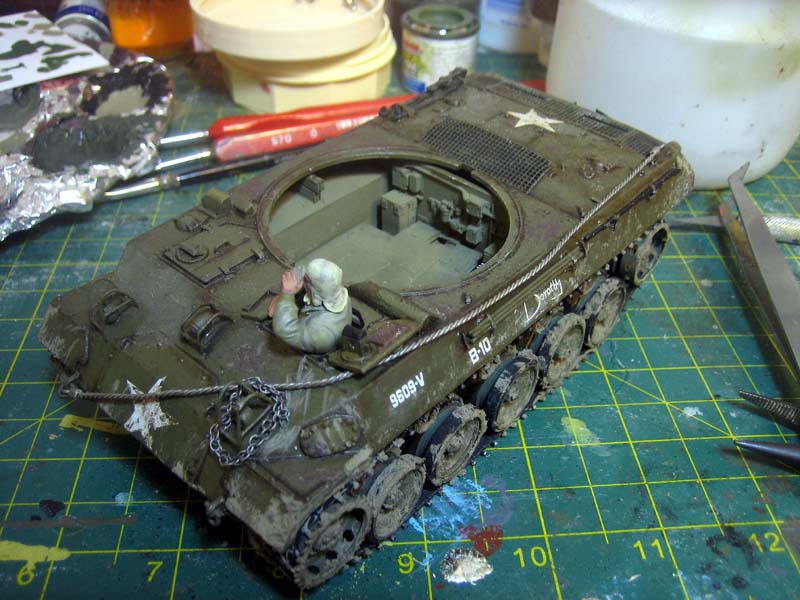
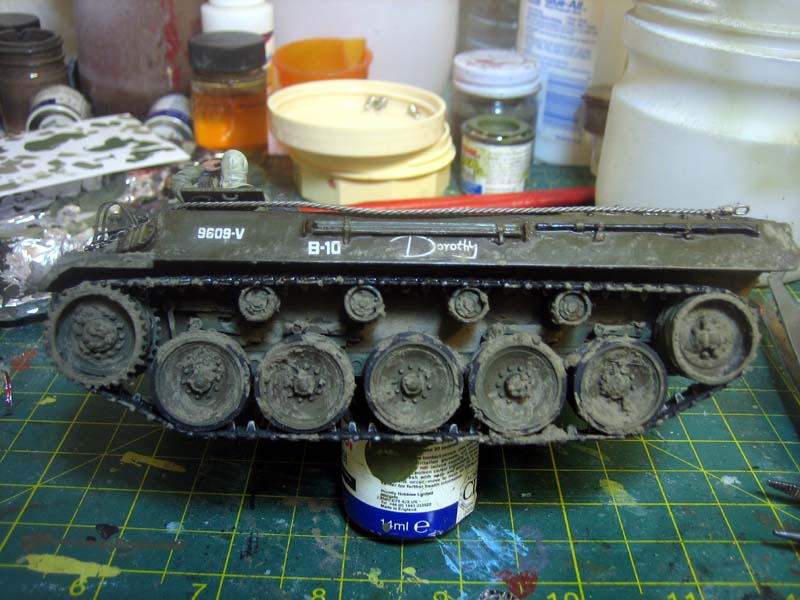
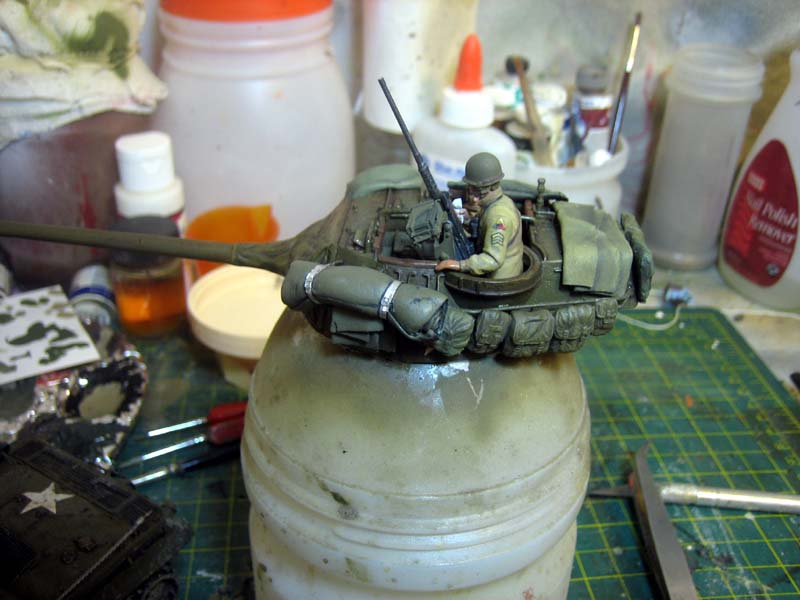
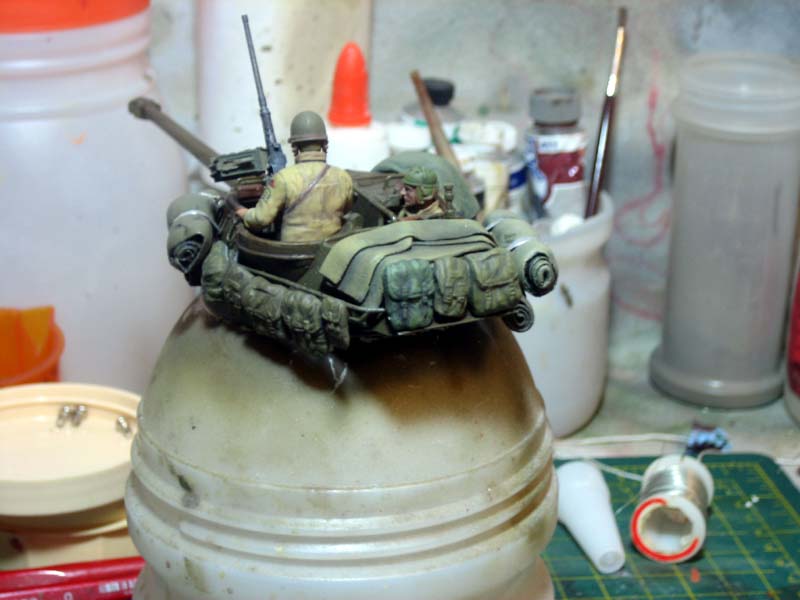
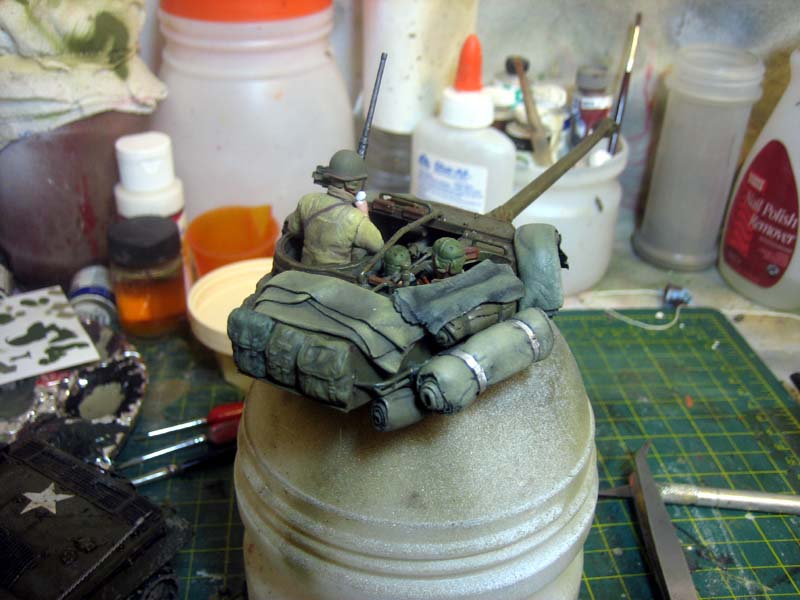
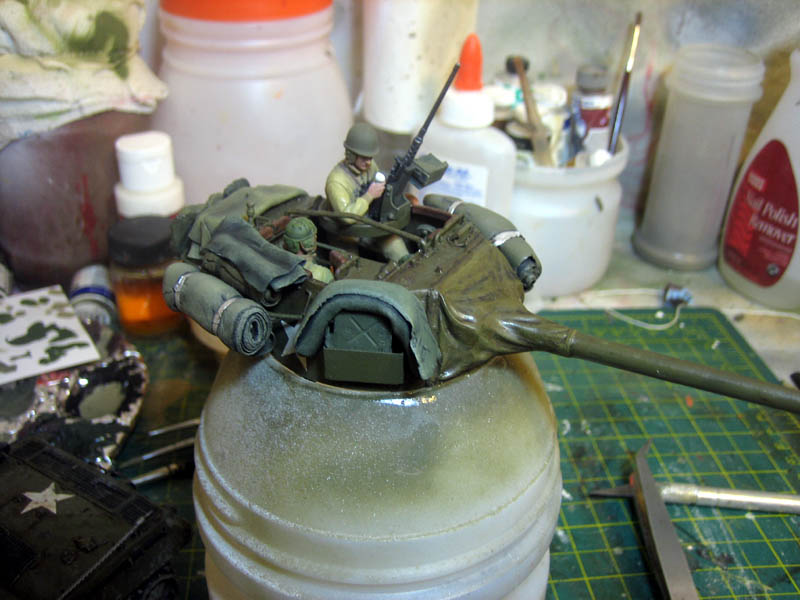
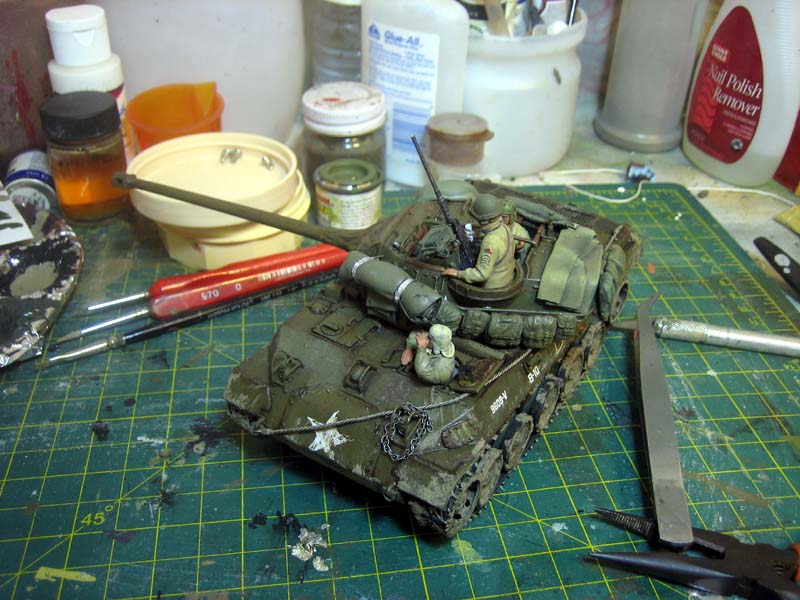
Some washes and packs added:
I had a lot of trouble with the decals. Nothing I did stopped the silvering from happening, put down three coats of future and used micro sol/soft and nada.
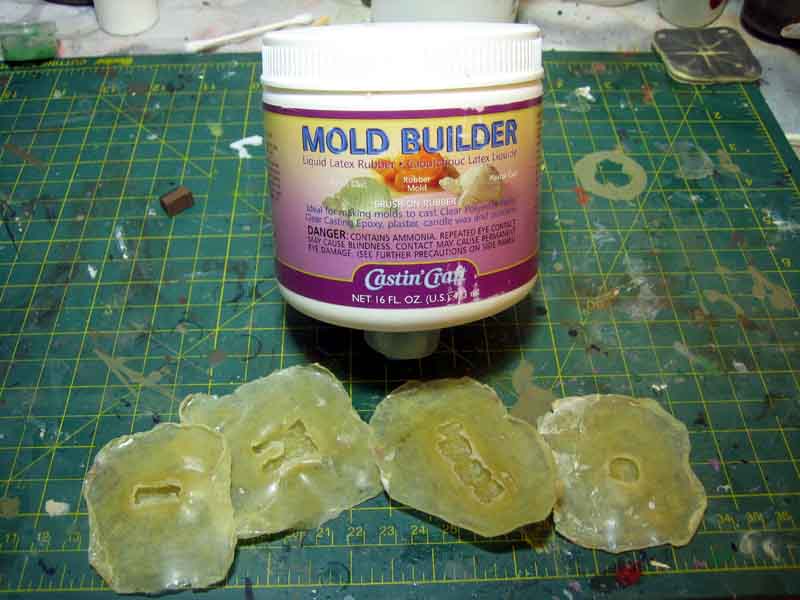
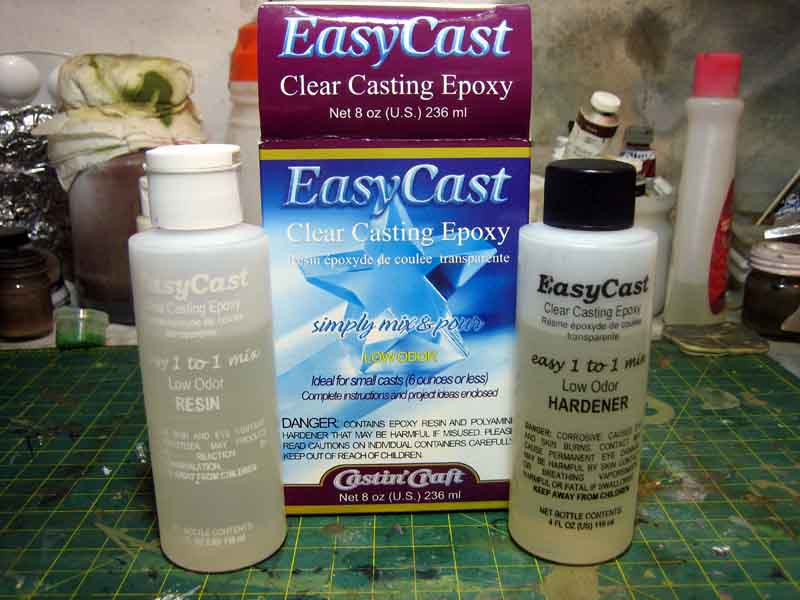
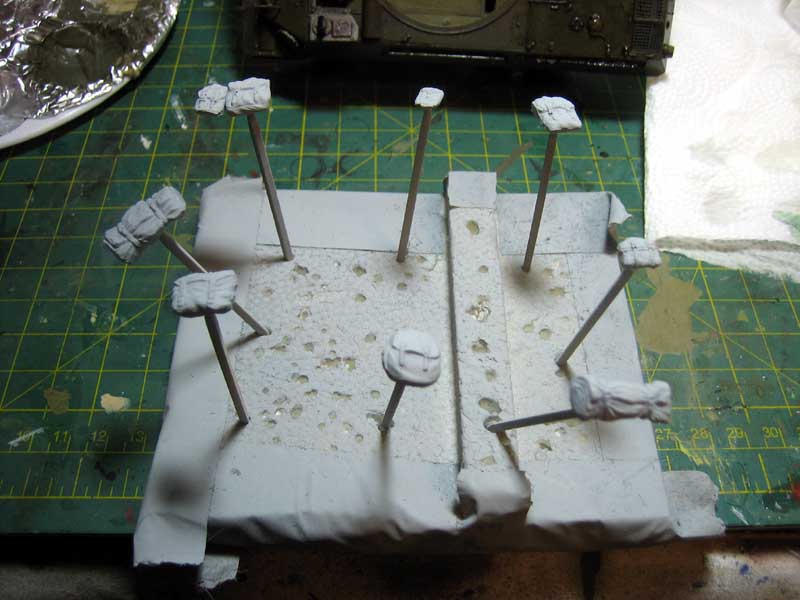
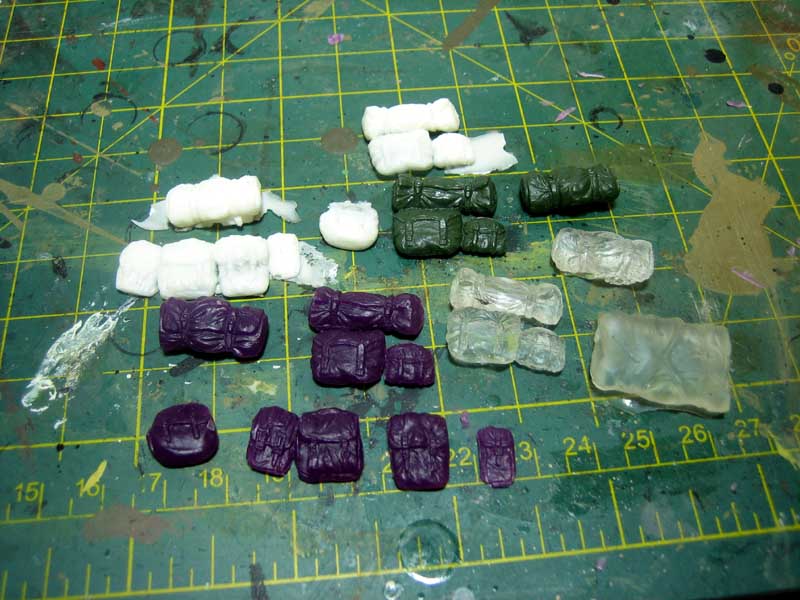
I wanted to make it look like the crew was living out of the tank for a long time, so I wanted to add more packs. I had no extra so I cast some, first time doing it so it took a couple tries but in the end they turned out all right.
I first cast it clear, but when trimming it I couldn't see what the hell I was doing. So I cast a second time in white and I still felt like Stevie Wonder trying to use an xacto knife. So I cast it a third time in a dark purple, as that was the paint I had the most of, and it worked out nice.
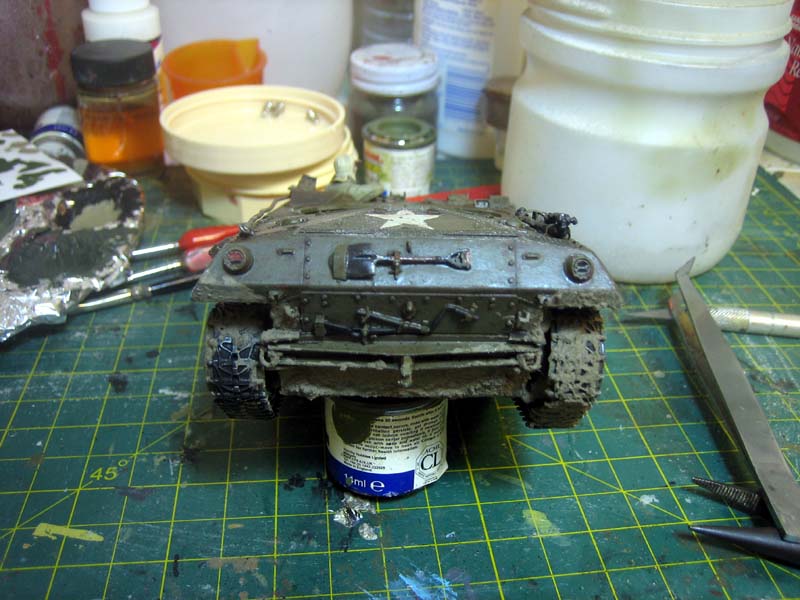
I loaded up the turret with more stuff, I think I have the tail lights correct, not sure if I should keep the chain where it is and...I think the rest speak for themselves.
I put on one flat coat on and it gunked up on the tops of the tools, so it looks really bad there. Not sure what I can do about it. I also put four or five coats of future down before the decals, it was smooth like glass, and they still have some silvering to them. Again, not sure what to do, they do look better than the previous though.
Also, sorry for the crappy picture, but does this look like the right colors for a tank shell? I looked it up but couldn't find anything reliable.
retiredyank
Arkansas, United States
Joined: June 29, 2009
KitMaker: 11,610 posts
Armorama: 7,843 posts
Joined: June 29, 2009
KitMaker: 11,610 posts
Armorama: 7,843 posts
Posted: Friday, April 08, 2011 - 08:39 PM UTC
I'm speechless. This has inspired me to build one last U.S. WWII vehicle(I never new OD could be so addictive). You should try some different foliage techniques for your trees. One issue with the base, that tree stump looks like someone took a chainsaw to it. I believe an axe would be more appropriate. It's just too smooth. The tank is beautifully done, as is the crew. Great work. Keep it up.
dioman13
Indiana, United States
Joined: August 19, 2007
KitMaker: 2,184 posts
Armorama: 1,468 posts
Joined: August 19, 2007
KitMaker: 2,184 posts
Armorama: 1,468 posts
Posted: Saturday, April 09, 2011 - 04:21 AM UTC
Hey Eric, looks good. Getting the flavor of nautre and mixing it together isn't easy.You are doing a pretty good job with it .My only critque is the top of your field stones on the top of the wall. They look dressed, too flat.( the shape, not build angle). Usually, field stone walls are stones pulled from the farmers fields while they plow. It gets rid of them each year they turn up and are mostly used to seperate fields. But, they can be from buildings (dressed stone which is shaped) also. Your figures fit nicely, and that is always hard to do , seems the manufactures of tanks and figs. never mix just right.