Thanks Leo,
I was planning on using Polished Aluminium and some other shiney Alcads, So I think Black will be the go
BTW: Leo, great work on your Polish P-51
Now..................I need to break that 7TP out !!!
@ Bob an airbrush has changed my idea of the hobby, I highly recommend one
Cheers
Paul
Campaigns
Where Armorama group builds can be discussed, organized, and updates posted.
Hosted by Darren Baker, Richard S.
White Eagle Campaign
ppawlak1
Victoria, Australia
Joined: March 14, 2006
KitMaker: 1,973 posts
Armorama: 1,843 posts
Joined: March 14, 2006
KitMaker: 1,973 posts
Armorama: 1,843 posts
Posted: Wednesday, December 22, 2010 - 09:59 PM UTC
vonHengest
Texas, United States
Joined: June 29, 2010
KitMaker: 5,854 posts
Armorama: 4,817 posts
Joined: June 29, 2010
KitMaker: 5,854 posts
Armorama: 4,817 posts
Posted: Thursday, December 23, 2010 - 04:09 PM UTC
Leo: Looking good, the paint and decals came out real nice. What are your plans for weathering techniques?
Bob: I'm finding that I have basically lost the ability to successfully paint by hand even when using Vallejo paints. I'm trying to relearn all of these things and pick up new skills as well. Look forward to seeing how yours comes out
Sal: Nice! Can't wait to see decals and weathering bud
Bob: I'm finding that I have basically lost the ability to successfully paint by hand even when using Vallejo paints. I'm trying to relearn all of these things and pick up new skills as well. Look forward to seeing how yours comes out
Sal: Nice! Can't wait to see decals and weathering bud
warreni
South Australia, Australia
Joined: August 14, 2007
KitMaker: 5,926 posts
Armorama: 712 posts
Joined: August 14, 2007
KitMaker: 5,926 posts
Armorama: 712 posts
Posted: Thursday, December 23, 2010 - 05:21 PM UTC
Finished! Sorry for the lack of a progress pic but I had it finished so fast I forgot about it. Can you ever forgive me?
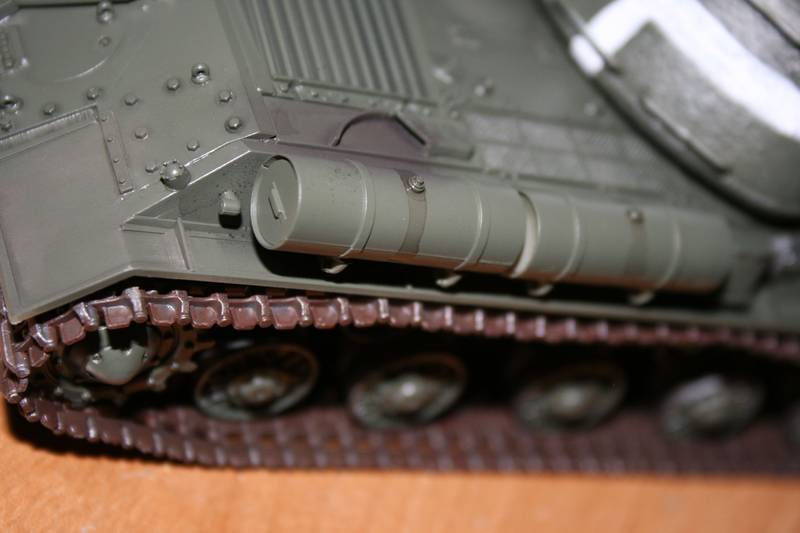
Here is a JS-2 used in the Polish People's Army during the invasion of Berlin in 1945. It is Dragon's old 1/35 JS-2 kit. No problems with the fit of the kit, although the way the hull goes together with the upper part is weird at the back..
Keep up the great work guys and gals.
Merry Christmas to all,
Warren
ppawlak1
Victoria, Australia
Joined: March 14, 2006
KitMaker: 1,973 posts
Armorama: 1,843 posts
Joined: March 14, 2006
KitMaker: 1,973 posts
Armorama: 1,843 posts
Posted: Thursday, December 23, 2010 - 05:36 PM UTC
Good work Warren - or is that "Wazza" ?
You're the second the finish this Campaign - quick work and well done
Make sure you upoad pics to the Campaign Gallery
Cheers
Paul
You're the second the finish this Campaign - quick work and well done
Make sure you upoad pics to the Campaign Gallery
Cheers
Paul
Bigrip74
Texas, United States
Joined: February 22, 2008
KitMaker: 5,026 posts
Armorama: 1,604 posts
Joined: February 22, 2008
KitMaker: 5,026 posts
Armorama: 1,604 posts
Posted: Thursday, December 23, 2010 - 06:31 PM UTC
Warren, well done and I do like your tracks.
Merry Christmas to all and to all a good night.
Bob
Merry Christmas to all and to all a good night.
Bob
warreni
South Australia, Australia
Joined: August 14, 2007
KitMaker: 5,926 posts
Armorama: 712 posts
Joined: August 14, 2007
KitMaker: 5,926 posts
Armorama: 712 posts
Posted: Thursday, December 23, 2010 - 08:26 PM UTC
Thanks Guys.
Tracks can be painful, but these old Dragon ones were not too bad at all. Very tight fit was the only hassle and that came in handy in the end.
Will try and get something else Polish in before the end of the campaign.
Regards
Wazza
Tracks can be painful, but these old Dragon ones were not too bad at all. Very tight fit was the only hassle and that came in handy in the end.
Will try and get something else Polish in before the end of the campaign.
Regards
Wazza
ppawlak1
Victoria, Australia
Joined: March 14, 2006
KitMaker: 1,973 posts
Armorama: 1,843 posts
Joined: March 14, 2006
KitMaker: 1,973 posts
Armorama: 1,843 posts
Posted: Friday, December 24, 2010 - 12:24 AM UTC
Quoted Text
Thanks Guys.
Tracks can be painful, but these old Dragon ones were not too bad at all. Very tight fit was the only hassle and that came in handy in the end.
Will try and get something else Polish in before the end of the campaign.
Regards
Wazza
Thanks again for participating Warren
I'll see you over in the "Wingy Thing Area" when I build some more of those
Paul
Posted: Saturday, December 25, 2010 - 07:47 AM UTC
Guys, a very merry Christmas to all a' youse! 'Been a really kewl year with you!
Jeremy: I was planning on keeping it down weathering-wise. Sort of like my british Sherman V (my first build log )
'Till now i did lots of green filtering too emulate some kind of scc15. And four coats of pinwash. I just misted some Tamiya Buff on the lower hull. I'll finish off with some pigments tomorrow.
Thanks for a nice year again, happy holidays!
ltb073
New York, United States
Joined: March 08, 2010
KitMaker: 3,662 posts
Armorama: 3,078 posts
Joined: March 08, 2010
KitMaker: 3,662 posts
Armorama: 3,078 posts
Posted: Saturday, December 25, 2010 - 09:03 AM UTC
ppawlak1
Victoria, Australia
Joined: March 14, 2006
KitMaker: 1,973 posts
Armorama: 1,843 posts
Joined: March 14, 2006
KitMaker: 1,973 posts
Armorama: 1,843 posts
Posted: Saturday, December 25, 2010 - 01:44 PM UTC
Quick work Sal well done !!!
Did you have the dio base done already ?
A quick tip on eyes for 1/35 figures.
Never paint the whites of the eyes white, if you paint the 'whites' at all and often you wouldnt see it in that scale then you should use a pale skin colour.
Sometimes a simple dark wash will do as far as eyes go ....
1/35 scale is the same as looking at someone 20 foot away, so try this and see how much white you can see. Look in the mirror from 6 footaway, and you'll notice the 'whites' are not white - they are a pale skin colour.
If you do paint eyes, add a very thin strip of this (light flesh) color to the eye, let it dry then add the iris with something like a toothpick splinter (don't add the iris in the middle, offset both slightly to the right of left).
Finally, the eye should also NEVER be round it should be a 'slit', so remove any roundness you end up with with the normal flesh color (by redoing the upper and lower eyelid).
Keep up the great work
I've started my 'Mirage / Toga Ltd" 7TP and I'm using the Frontline Illustration reference book (Crickey - it's in Russian !!), as well as Vol I and II of Tank Powers' '7TP'. All excellent references, with lots of plans, line drawings, and color profiles.
I also have "Vickers E, 7TP, C6P, C7P (Polish Tracks & Wheels)" by Adam Jonca on the way from Amazon :
Vickers E, 7TP, C6P, C7P (Polish Tracks & Wheels)
I'm really looking forward to this build !!
I'll be using the Armo Barrel, Fruil tracks and the ABER PE (Although I may give the Full length PE Fenders a miss ).
A couple of figs are also included in the Togo Ltd kit (these originally were Hornet, Polish Tanker and Commander Sept '39).
Cheers and Seasons Greetings team !
Paul
vonHengest
Texas, United States
Joined: June 29, 2010
KitMaker: 5,854 posts
Armorama: 4,817 posts
Joined: June 29, 2010
KitMaker: 5,854 posts
Armorama: 4,817 posts
Posted: Saturday, December 25, 2010 - 02:53 PM UTC
Warren: Kick-arse bud! You gotta love those JS-2's The Polish Eagle looks really good on there too.
Leo: Sounds good and looking forward to it, I may try that approach on another build of mine if I can get a handle on painting techniques.
Sal: I can tell your weathering techniques are improving!
Paul: Friggin awesome, can't wait to see that thing start coming together! You'll have to let us know how you like the book, looks like it may have a lot of usefull color photographs
Guys, I swear my ISU-152 is sneaking out of the stack and watching me when I'm not looking
ppawlak1
Victoria, Australia
Joined: March 14, 2006
KitMaker: 1,973 posts
Armorama: 1,843 posts
Joined: March 14, 2006
KitMaker: 1,973 posts
Armorama: 1,843 posts
Posted: Saturday, December 25, 2010 - 08:02 PM UTC
Ok I've been playing around with the PE on this 7TP turret.
It's a bit fiddly to locate and glue the armor plates (with rivets) to the sides but I've managed with a few little reworks (by file).
The LHS also had a flaw in the PE near the pistol port, so I've tried to file that flat.
I'll throw some primer on this before I add it to the hull so I can make sure the PE is straight and doesn't need filling - I WILL need to do that in some areas that aren't perfect. Corners, edges etc
I think I'll do a second one of these 7TP's - one will be Olive Green (x Factory), and the other one will be three color Camo
These are cool looking light tanks !!
He's a progress shot (I'll add a scratch built a radio antenna towards the rear, as well as a commanders aerial to LHS of the bustle).
BTW :the Armo Barrel is VERY nice
Cheers, and looking forward to all of your good work !!
Paul
Ascaria
Wroclaw, Poland
Joined: February 01, 2008
KitMaker: 253 posts
Armorama: 103 posts
Joined: February 01, 2008
KitMaker: 253 posts
Armorama: 103 posts
Posted: Saturday, December 25, 2010 - 09:05 PM UTC
Hi everyone, Happy Christmas for all
Yesterday I just found under my Christmas tree Trumpy -Arizona and T-34 from Hobby Boss so, today I am starting my White Eagle campaign
Cheers from Wroclaw - Poland
Wojtek
Yesterday I just found under my Christmas tree Trumpy -Arizona and T-34 from Hobby Boss so, today I am starting my White Eagle campaign
Cheers from Wroclaw - Poland
Wojtek
warreni
South Australia, Australia
Joined: August 14, 2007
KitMaker: 5,926 posts
Armorama: 712 posts
Joined: August 14, 2007
KitMaker: 5,926 posts
Armorama: 712 posts
Posted: Saturday, December 25, 2010 - 09:40 PM UTC
Did you put those under your tree Wojtek?
Ascaria
Wroclaw, Poland
Joined: February 01, 2008
KitMaker: 253 posts
Armorama: 103 posts
Joined: February 01, 2008
KitMaker: 253 posts
Armorama: 103 posts
Posted: Saturday, December 25, 2010 - 10:10 PM UTC
My beloved Santa asked me earlier what I want to find under Christmas Tree... I have my birthday in late December, so it's kind of "joint gift"...
Posted: Saturday, December 25, 2010 - 11:32 PM UTC
Jeremy, you got any questions, just ask. I'd be happy to share. But didn't i see a wonderful build of yours around here somewhere?
OK, guys. Done:
That empty storage rack will be filled with a camo net later on but i forgot to scrounge some gauze from work before the holidays:
Plastic I got for christmas: tasca M4A1 Sherman Free French 2nd Armour. You know where that'll pop up, Paul ! See you all at Sherman Campaign then.
Maybe I'll start a build log of the other kit I got: Trumpy Centauro!!
Fraaaateeeeeeli d' IIIIItaaaaaaaliaaaaaaaa.......!!!!!!!!!!!!!
ltb073
New York, United States
Joined: March 08, 2010
KitMaker: 3,662 posts
Armorama: 3,078 posts
Joined: March 08, 2010
KitMaker: 3,662 posts
Armorama: 3,078 posts
Posted: Sunday, December 26, 2010 - 01:25 AM UTC
Hey Guys, Thanks for the comments all the tips help so does the constant building
Paul thanks for the eye tips, for the whites of the eyes I used an Ivory color then I used the toothpick method, then i went back over it with the flesh color to get rid of the roundness maybe on my next figure i will eliminate the ivory color, thanks again for the tips and yes the Mini Art kit I had built over the summer while I was laid up with my leg
@ Leo great looking build there I like the coffee cup on top
Bigrip74
Texas, United States
Joined: February 22, 2008
KitMaker: 5,026 posts
Armorama: 1,604 posts
Joined: February 22, 2008
KitMaker: 5,026 posts
Armorama: 1,604 posts
Posted: Sunday, December 26, 2010 - 05:24 AM UTC
@ Leo: nice looking build, love the weapons and road dirt.
@ Paul: that is a pretty little turret you have there and I am waiting to see your (3) color camo before I attempt mine.
Bob
@ Paul: that is a pretty little turret you have there and I am waiting to see your (3) color camo before I attempt mine.
Bob
warreni
South Australia, Australia
Joined: August 14, 2007
KitMaker: 5,926 posts
Armorama: 712 posts
Joined: August 14, 2007
KitMaker: 5,926 posts
Armorama: 712 posts
Posted: Sunday, December 26, 2010 - 07:28 AM UTC
Do you mean this three-colour camouflage??
One of my 'learning to weather better' builds. Less than 2 inches long in 1/35.
Keep up the good work people!!
One of my 'learning to weather better' builds. Less than 2 inches long in 1/35.
Keep up the good work people!!
ppawlak1
Victoria, Australia
Joined: March 14, 2006
KitMaker: 1,973 posts
Armorama: 1,843 posts
Joined: March 14, 2006
KitMaker: 1,973 posts
Armorama: 1,843 posts
Posted: Sunday, December 26, 2010 - 09:25 AM UTC
He Guys !
@ Wojtek - nice ! Bring on the build pics
@ Leo - Wow that is Sweet !! Really nicely done, nice shading the wheels look great 'muddy' too
@ Sal - maybe less white / ivory / flesh in the eyes next time, remember they are 'slits'
@ Bob - it'll be a while before I do paint on the 7TP - I need to finish a P47N for the Campaign over at "P47 Heaven" first. I've just finished the cockpit and now need to do the hard bits
@ Warren - I have a few of those Tankettes too Warren, TINY is an understatement
Cheers and best wishes everyone !
Paul
ppawlak1
Victoria, Australia
Joined: March 14, 2006
KitMaker: 1,973 posts
Armorama: 1,843 posts
Joined: March 14, 2006
KitMaker: 1,973 posts
Armorama: 1,843 posts
Posted: Sunday, December 26, 2010 - 11:08 PM UTC
Oh Noooo !
The 7TP Turrets are breeding !!
Paul
The 7TP Turrets are breeding !!
Paul
Bigrip74
Texas, United States
Joined: February 22, 2008
KitMaker: 5,026 posts
Armorama: 1,604 posts
Joined: February 22, 2008
KitMaker: 5,026 posts
Armorama: 1,604 posts
Posted: Monday, December 27, 2010 - 06:33 AM UTC
Paul, you are suppose to keep them in seperate boxes but now you have a turret that I cuould have used before the scratch.
Bob
Bob
vonHengest
Texas, United States
Joined: June 29, 2010
KitMaker: 5,854 posts
Armorama: 4,817 posts
Joined: June 29, 2010
KitMaker: 5,854 posts
Armorama: 4,817 posts
Posted: Monday, December 27, 2010 - 08:37 AM UTC
Wojtek Lol! And awesome!
Leo: Thanks, I'll be taking you up on that offer As for an awesome build, I doubt it, I'm just starting to develop my skills
Paul: Oy vey! I thought we talked with you about this kind of thing before!
Leo: Thanks, I'll be taking you up on that offer As for an awesome build, I doubt it, I'm just starting to develop my skills
Paul: Oy vey! I thought we talked with you about this kind of thing before!
Bigrip74
Texas, United States
Joined: February 22, 2008
KitMaker: 5,026 posts
Armorama: 1,604 posts
Joined: February 22, 2008
KitMaker: 5,026 posts
Armorama: 1,604 posts
Posted: Monday, December 27, 2010 - 01:11 PM UTC
Ok! guys I need a little help. I pulled the airbrush out of its cubby hole while cleaning my room set up a home made spraybooth and painted my 7TP for the experiance (it has been awhile) not bad, but more time at the controls will be needed. My question is.
1. some of you airbrush Future.
2. How do you apply it.
3. How do you clean the gun.
4. Last time that I tried, I got an orange peel effect.
5. I am a little slow upstairs and need step by step instruction.
6. OH! I use Tamiya acrylics mainly.
For real guys the last time I tried it was not a pleasant experiance either for me or the airbrush..
After the paint drys I will post some pics of my airbrushing
Bob
ppawlak1
Victoria, Australia
Joined: March 14, 2006
KitMaker: 1,973 posts
Armorama: 1,843 posts
Joined: March 14, 2006
KitMaker: 1,973 posts
Armorama: 1,843 posts
Posted: Monday, December 27, 2010 - 01:28 PM UTC
Quoted Text
Ok! guys I need a little help. I pulled the airbrush out of its cubby hole while cleaning my room set up a home made spraybooth and painted my 7TP for the experiance (it has been awhile) not bad, but more time at the controls will be needed. My question is.
1. some of you airbrush Future on.
2. How do you apply it.
3. How do you clean the gun.
4. Last time that I tried, I got an orange peel effect.
5. I am a little slow upstairs and need step by step instruction.
6. OH! I use Tamiya acrylics mainly.
For real guys the last time I tried it was not a pleasant experiance both for me or the airbrush..
After the paint drys I will post some pics of my airbrushing
Bob
Not sure about the other guys Bob, but I don't use Future, I use Vallejo clear varnish ( I tend to use Satin finish these days). This sprays beautifully - I thin with Vallejo thinner.
I clean my Airbrush as soon as I finish applying the coat by putting some Tamiya Acrylic Thinner in the reservoir, spraying it through, rinsing in water, and then filling it with water and spraying that.
In the mean time I will wipe the reservoir with a cloth soaked in the thinner also. Q Tips are good too.
When I finished the build I pull the airbrush apart and clean the bits with Airbrush cleaner, then rinse it.
I then lubricate the needle with a airbrush lubricating oil.
For tough cleaning I will use Lacquer thinner (Tamiya). Keep this away from seals.
90 % of the paints I shoot are Tamiya Acrylics also
Cheers
Paul