MichaelSatin
 Campaigns Administrator
Colorado, United States
Joined: January 19, 2008
KitMaker: 3,909 posts
Armorama: 510 posts
Posted: Monday, August 08, 2011 - 11:03 AM UTC
OK, sigh, I'm in.
I have a week off and should be working on my 1/32 F2A for the Midway campaign, but I want to do something different. SO...
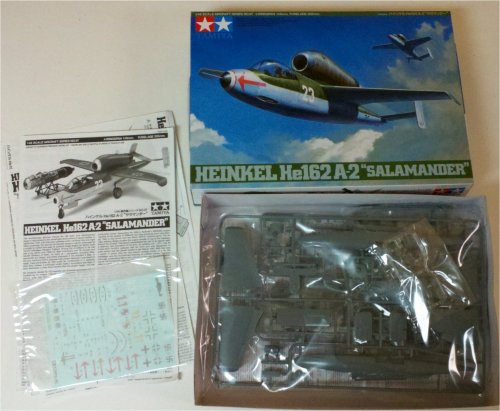
here's what I'll be doing for this campaign! Started the pre-painting already, planning on doing the removable engine pod and everything but we'll see how that goes.
Michael
On the bench:
Sorta depends on your definition of "on the bench"...
MichaelSatin
Campaigns Administrator Colorado, United States
Joined: January 19, 2008
KitMaker: 3,909 posts
Armorama: 510 posts
Posted: Wednesday, August 10, 2011 - 05:17 AM UTC
Some progress on the He162:
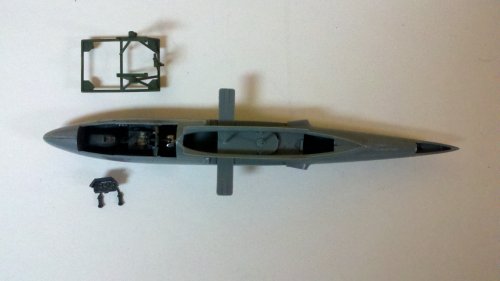

I'm doing this one out of the box, including the decal seat belts and instruments. Not bad though, I'd say!
Michael
On the bench:
Sorta depends on your definition of "on the bench"...
Victoria, Australia
Joined: March 14, 2006
KitMaker: 1,973 posts
Armorama: 1,843 posts
Posted: Thursday, August 11, 2011 - 12:05 AM UTC
My 'Old' Leopard 1 has been assembled, and it is time for some primer after I get the seam out of that barrel

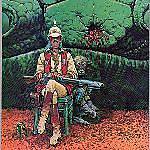
The Verlinden Tank Crew is done


Cheers
Paul
OddBall: "It's a wasted trip baby. Nobody said nothing about locking horns with no Tigers"
KIlgore: " I love the smell of napalm in the morning. ...The smell, you know that gasoline smell, the whole hill. Smelled like... victory."
MichaelSatin
Campaigns Administrator Colorado, United States
Joined: January 19, 2008
KitMaker: 3,909 posts
Armorama: 510 posts
Posted: Thursday, August 11, 2011 - 11:31 AM UTC
About ready for painting on the He162. Here's where I'll depart from the instructions and use non-Tamiya paints for the finish, RLM 76, 81 and 82.

The wings and stabilizers fit so well I won't have to glue them in place until after I paint, making that job a lot easier, especially given the kind of odd way the airplane is painted! Thanks Tamiya!
Michael
On the bench:
Sorta depends on your definition of "on the bench"...
Canada
Joined: May 23, 2011
KitMaker: 28 posts
Armorama: 27 posts
Posted: Thursday, August 11, 2011 - 03:14 PM UTC
Good job on those figures, Paul.

#110
Florida, United States
Joined: September 20, 2005
KitMaker: 248 posts
Armorama: 224 posts
Posted: Friday, August 12, 2011 - 04:21 AM UTC
Tamiya-philes,
Trying to get started while building a couple other models for other campaigns.
Here are my 'Sprueshots' for the venerable 1/35 SU-85 :


The items that will probably be used include the SU-85 kit as the base, Eduard metal barrel, Eduard photoetch grills, On The Mark photoetch and ModelKasten track links. I currently have the suspension built and will start on the upper hull soon.
thanks,
Stephen
Victoria, Australia
Joined: March 14, 2006
KitMaker: 1,973 posts
Armorama: 1,843 posts
Posted: Friday, August 12, 2011 - 11:36 AM UTC
Quoted Text
Good job on those figures, Paul.
I really like the Verlinden figures Chris, there should be more NATO AFV figures available

I've now painted the lower hull and the road wheels
Next will be the painting of the 'vinyl' tracks and the base coat on the hull & turret.
Highlighting will follow that

Cheers
Paul
OddBall: "It's a wasted trip baby. Nobody said nothing about locking horns with no Tigers"
KIlgore: " I love the smell of napalm in the morning. ...The smell, you know that gasoline smell, the whole hill. Smelled like... victory."
England - North West, United Kingdom
Joined: January 02, 2007
KitMaker: 781 posts
Armorama: 676 posts
Posted: Monday, August 15, 2011 - 09:44 PM UTC
hi guys so heres my update on the tiger tank
ive not been able to get pictures done and uploaded for a while as of work, but here we go


as you can see with the exhaust pipes theres abit off corection going on
id stuck the wrong exhaust pipes on and dint realise till a couple of days later when i was reading through the instructions, so getting the little haxsaw out i cut away and made the adjustments. luckily enough the covers for the exhausts will cover the mistake!
the important thing really as all the instructions state '' read the instructions carefully before assembly ''
ill try and get an update again this week if can
any comment welcome
tony
Singapore / 新加坡
Joined: July 10, 2007
KitMaker: 38 posts
Armorama: 37 posts
Posted: Tuesday, August 16, 2011 - 06:20 AM UTC
some updates.
Interior seats are done.The floor were given some chipping.

The tracks are done too.

California, United States
Joined: June 30, 2008
KitMaker: 2,408 posts
Armorama: 2,394 posts
Posted: Friday, August 19, 2011 - 05:15 PM UTC
Canada
Joined: May 23, 2011
KitMaker: 28 posts
Armorama: 27 posts
Posted: Saturday, August 20, 2011 - 03:52 AM UTC
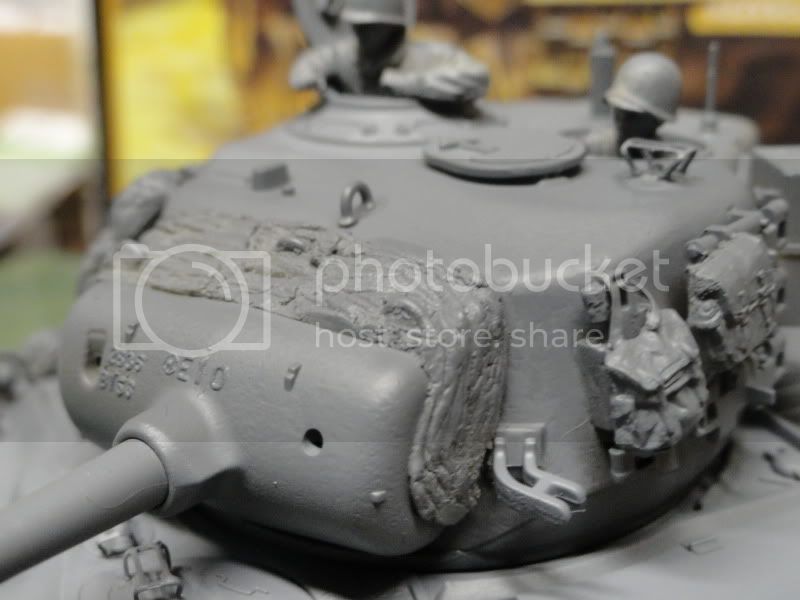
Nice-looking fender damage, Greg. Like the texture.
California, United States
Joined: June 30, 2008
KitMaker: 2,408 posts
Armorama: 2,394 posts
Posted: Saturday, August 20, 2011 - 05:11 AM UTC
MichaelSatin
Campaigns Administrator Colorado, United States
Joined: January 19, 2008
KitMaker: 3,909 posts
Armorama: 510 posts
Posted: Saturday, August 20, 2011 - 07:24 AM UTC
Finis! Tamiya 1/48 He 162A-2 Oberleutnant Emil Demuth, Staffelkapitan of 3./JG1 at Leck in May, 1945

I actually made it so I can swap out the engine, open or closed, and it really works if you're careful! I posted a couple of pics in the gallery to show how it looks:
Total Tamiya! gallery Thanks for the great campaign, some excellent models out there and I look forward to seeing how the rest come out! Have a look at the
Osprey Duel campaign, now enlisting members!
Michael
On the bench:
Sorta depends on your definition of "on the bench"...
California, United States
Joined: June 30, 2008
KitMaker: 2,408 posts
Armorama: 2,394 posts
Posted: Saturday, August 20, 2011 - 08:56 AM UTC
Very nice Michael - Congrats! It's one I haven't seen before. What did you do to mask the top/bottom?
MichaelSatin
Campaigns Administrator Colorado, United States
Joined: January 19, 2008
KitMaker: 3,909 posts
Armorama: 510 posts
Posted: Saturday, August 20, 2011 - 09:57 AM UTC
Greg,
Thanks! I didn't mask except between the stabilizers, everything else is free-hand (which explains why the demarcation line is too low
).
Appreciate the appreciation!
Michael
On the bench:
Sorta depends on your definition of "on the bench"...
California, United States
Joined: June 30, 2008
KitMaker: 2,408 posts
Armorama: 2,394 posts
Posted: Saturday, August 20, 2011 - 06:02 PM UTC
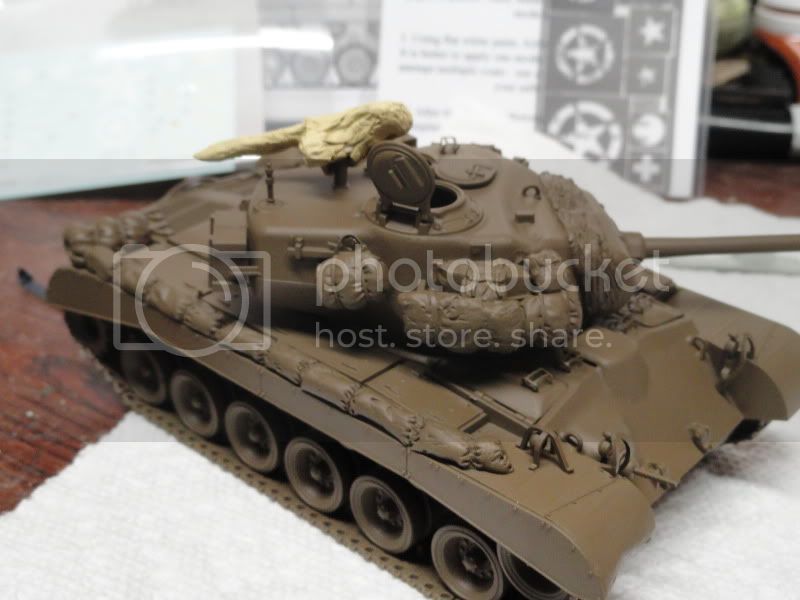
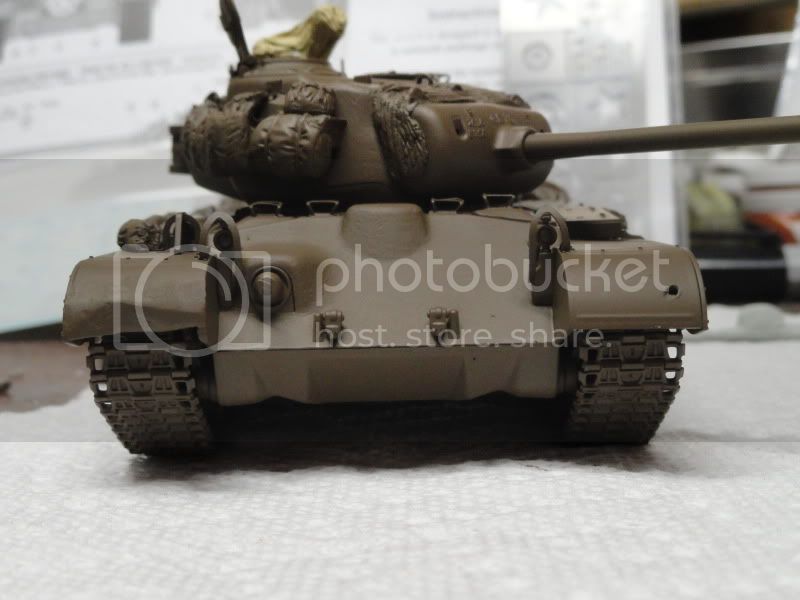
@Michael - that's good free hand work!
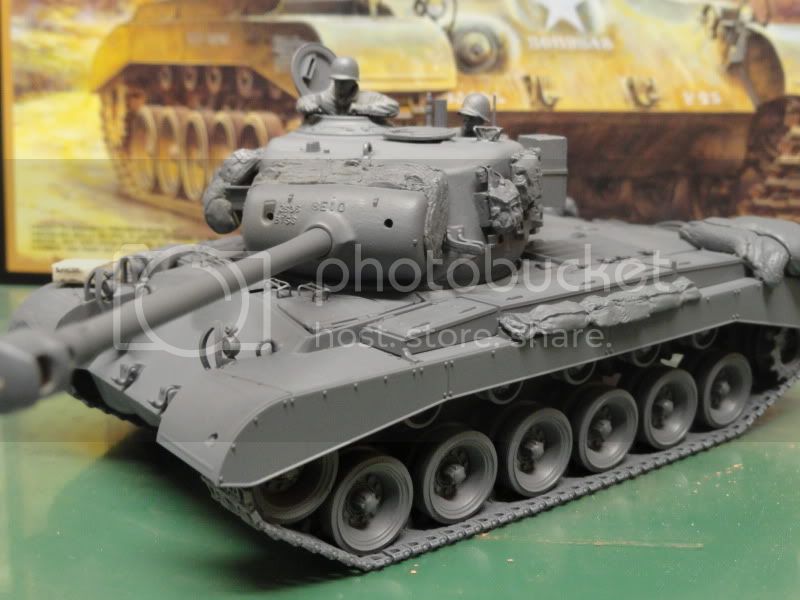
Got the tissue paper initiated on the 50cal but I'll be adding 1 strap and some more touch up to it. I was lucky I found one last bottle of Tamiya Olive Drab and mixed it with Dark Yellow to have enough paint to spray. I'm thinking I'll use the Verlinden mask to add a Star to the rear deck. Decals and detail painting next.
Croatia Hrvatska
Joined: January 29, 2011
KitMaker: 977 posts
Armorama: 553 posts
Posted: Monday, August 22, 2011 - 06:09 AM UTC
http://svenharjacekmodels.blogspot.com/
Joined: December 30, 2007
KitMaker: 885 posts
Armorama: 796 posts
Posted: Saturday, August 27, 2011 - 01:47 AM UTC
Greg,
nice progress so far - looking forward to the result.
"I'm thinking I'll use the Verlinden mask to add a Star to the rear deck"Ja, try to avoid the Tamiya decals wherever you can...and the Star is only monocolor. You should go this extra mile

California, United States
Joined: June 30, 2008
KitMaker: 2,408 posts
Armorama: 2,394 posts
Posted: Sunday, August 28, 2011 - 09:10 AM UTC
Thanks Marco, I'm waiting on some Tamiya paint on order since my LHS is all out. Should get back on this in a couple weeks

Yucatan, Mexico
Joined: January 16, 2011
KitMaker: 45 posts
Armorama: 43 posts
Posted: Sunday, August 28, 2011 - 02:55 PM UTC
Tiger campaign. 1/35 elefant.
Tamiya campaign. 1/35 Sd.kfz 7/1 flak
Strictly out of the box campaign. 1/35 jagdpanzer IV/70 alkett
Canada
Joined: May 23, 2011
KitMaker: 28 posts
Armorama: 27 posts
Posted: Sunday, August 28, 2011 - 06:24 PM UTC
Nice additions Jose. That alligator clip holding the kit scares me...
Scotland, United Kingdom
Joined: December 07, 2007
KitMaker: 2,096 posts
Armorama: 1,983 posts
Posted: Monday, August 29, 2011 - 07:45 AM UTC
Hay gang great work going on here. I have a 1/12 scale Tamiya Kawasaki ZX12-R in my stash that is part started can I enter it in to this campaign??
CUIDICH 'N RIGH
life is a river, it always runs.
Removed by original poster on 09/05/11 - 15:40:18 (GMT).
Ecuador
Joined: March 25, 2004
KitMaker: 84 posts
Armorama: 36 posts
Posted: Monday, September 05, 2011 - 04:43 AM UTC
Hi All:
I´m finally starting my build.

Cockpit progress

Victoria, Australia
Joined: March 14, 2006
KitMaker: 1,973 posts
Armorama: 1,843 posts
Posted: Tuesday, September 06, 2011 - 08:10 PM UTC
Hey guys !!
Great work by all

I've finished off my OOTB Leopard 1. Not accurate by any means, but a fun simple build. The tracks look a bit dodgy, but this was a good relaxing build
Here are some finished pics


Pics uploaded to the Gallery also

Cheers
Paul
OddBall: "It's a wasted trip baby. Nobody said nothing about locking horns with no Tigers"
KIlgore: " I love the smell of napalm in the morning. ...The smell, you know that gasoline smell, the whole hill. Smelled like... victory."