Trumpeter Famo tank transporter
Attica, Greece / Ελλάδα
Joined: February 17, 2010
KitMaker: 625 posts
Armorama: 608 posts
Posted: Monday, October 25, 2010 - 05:29 AM UTC

This is a nice kit from Trumpeter. Looks like it's going to take some time.
The box is bigger than most 1/72 kits and actually it's 2 kits in 1, the famo and the trailer which are sold separately too.
There are 8 frets which include a link by link track but you also get vinyl tracks. Funny enough is that the tires provided are vinyl too. Haven't worked with any of these yet, so I don't know if its for good or bad.

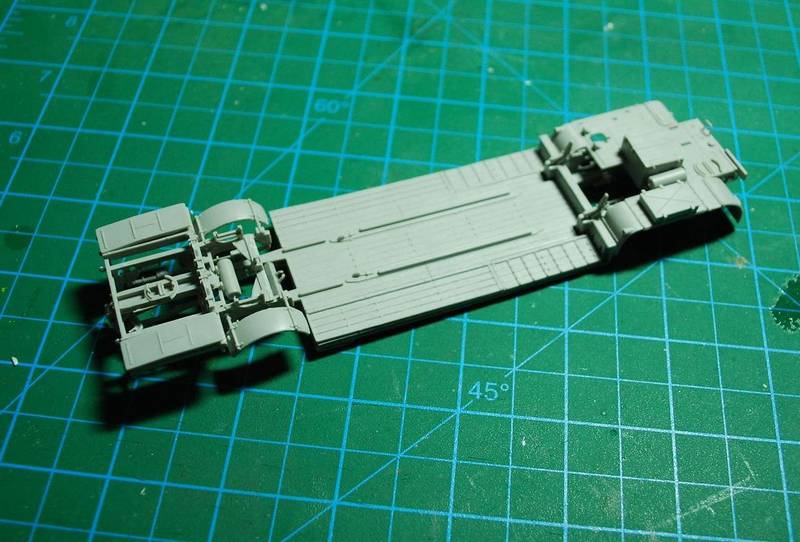
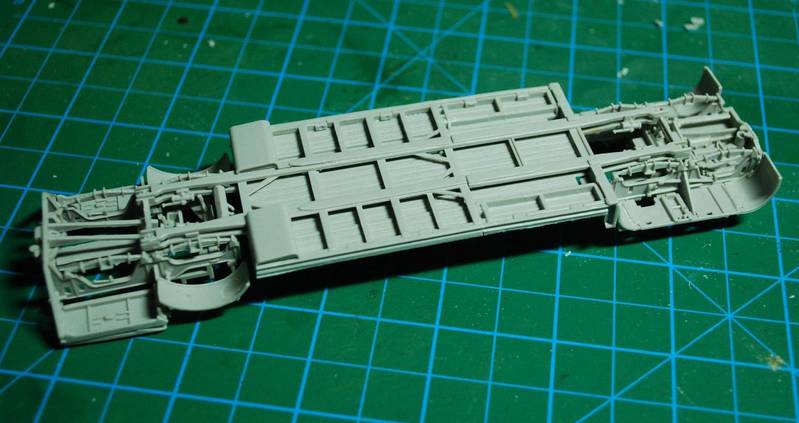
Since I am waiting for a PE upgrade kit for the Famo I started from the trailer.
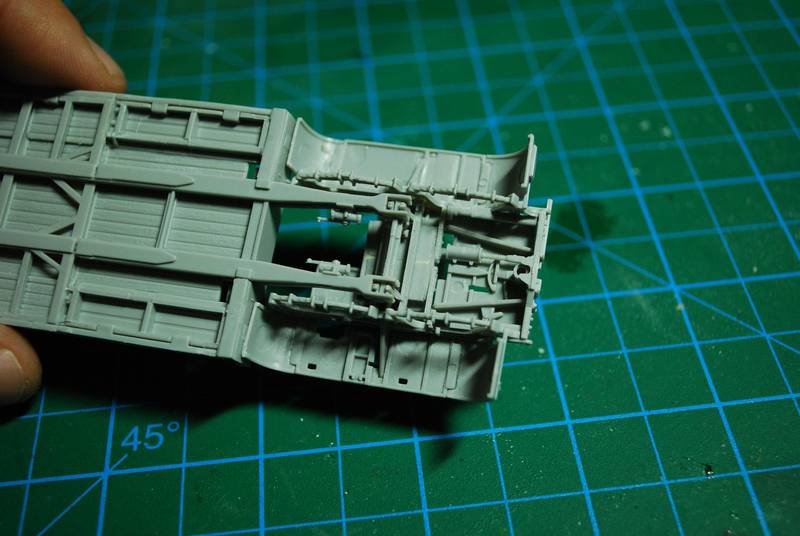
The parts have excellent detail. Some sink marks here and there but nothing serious.The plastic Trumpeter uses seems harder than usual so I use I small hammer to tap the pieces from the fret.
Progress so far.

P.A.
I used to be a scale modeler like you. Then I took an arrow in the knee.
Ontario, Canada
Joined: March 23, 2008
KitMaker: 2,847 posts
Armorama: 2,667 posts
Posted: Monday, October 25, 2010 - 06:15 AM UTC
Alex, my most heartfelt good wishes and luck to you on this project.

I bought the Trumpeter half-track part of this kit as they had two on sale at the LHS. When I opened it and saw the contents I came close to fainting.

The kit for this scale is nearly insane with detail. They even provide you with a jig to assist in assembling the tracks (each link is two pieces). Unfortunately mine did not come with the optional vinyl tracks.
I have built two multi wheeled Trumpeter kits with the vinyl tires (Stryker, BTR-80). I haven't read anything negative about Trumpeters vinyl but some others vinyl tires have been known to melt the styrene. Just to be on the safe side I followed a recommendation that the rims be coated with oil based enamel paint. The Stryker is over a year old and I have seen no problems arise with the vinyl. I even used acrylic paint to weather the tires and that has held up well also.
Someone here has already built this beast and did a
build review here. There are some issues with the front of the half-track that he pointed out in detail.
Cheers,
Jan

Queensland, Australia
Joined: October 06, 2009
KitMaker: 382 posts
Armorama: 378 posts
Posted: Monday, October 25, 2010 - 06:47 PM UTC
Hi Alex
looking forward to seeing your progress on this one
I built both a couple of years ago.
I agree with Jan. The hardest part was removing all the pieces of the track from the sprue, sanding off the burrs, and assembling them. It took a lot of patience, but was a good feeling to get it all done, though the track took a long time. Not a kit for someone looking for a quick build.
I couldnt get a good result out of the "track assembly jig" so didnt use it, assembled the track without its assistance.
update us with posts and pictures as you go,
cheers
Neil
http://www.armorama.com/images/awards/425.gif
Attica, Greece / Ελλάδα
Joined: February 17, 2010
KitMaker: 625 posts
Armorama: 608 posts
Posted: Tuesday, October 26, 2010 - 06:44 AM UTC
Hi Jan, Neil
Indeed the Famo kit is very well detailed. They even include the engine which can be used in a PzIII if you choose not to use it.
As for the jig, I'll put it to use and see what'll happen. The tracks are obviously a pain since every link is two parts and it;s going to take patience.
I ma saving the vinyl tracks for a Sdkfz 7 from Hasegawa whose tracks are primitive

Thanks for the tips for the wheels, I'll remember to coat the rims with enamel paint.
I noticed a seam line on the wheels. Does vinyl accept sand paper or there is another way?
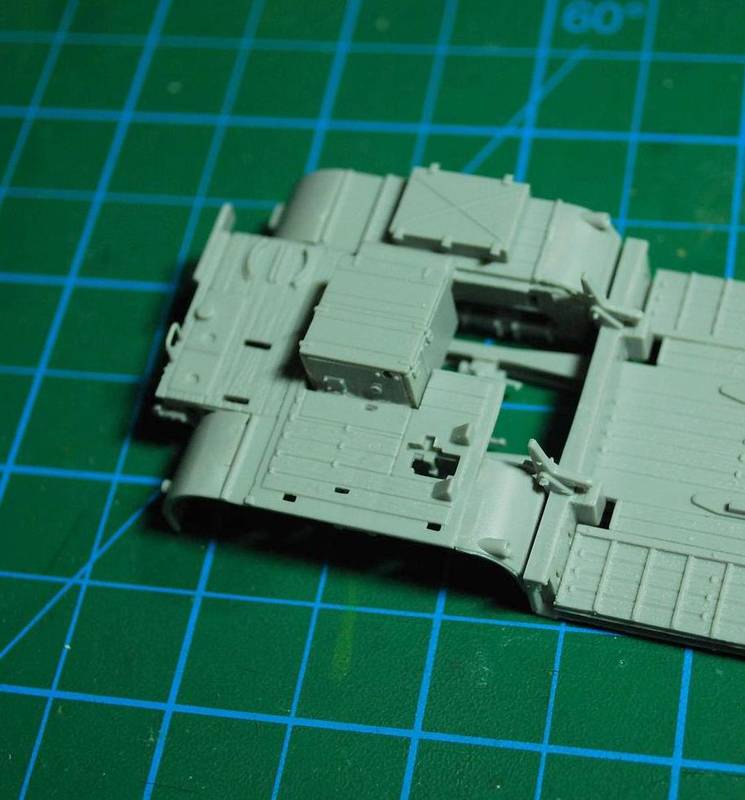
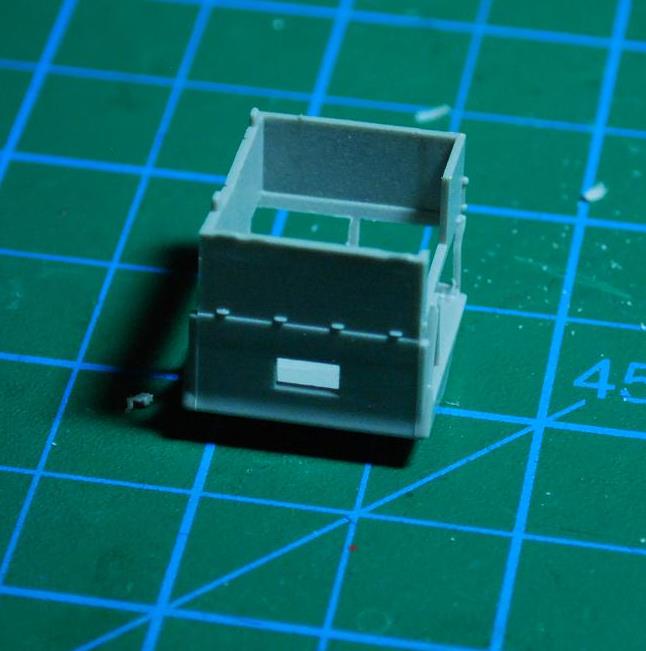
Today I made quite a progress and nearly completed the trailer. It looks impressive. Because of the length of the pieces it's very important to check for warped parts and do dry fittings first.
Although the build is going fast it's not a kit for a beginner.
More soon
I used to be a scale modeler like you. Then I took an arrow in the knee.
Ontario, Canada
Joined: March 23, 2008
KitMaker: 2,847 posts
Armorama: 2,667 posts
Posted: Tuesday, October 26, 2010 - 07:09 AM UTC
Nice progress, Alex. That sure went together fairly fast.
Quoted Text
I noticed a seam line on the wheels. Does vinyl accept sand paper or there is another way?
I checked my kit and the tires look perfect. No seams or other blemishes. In my experience dealing with vinyl wheels or tracks, I have found that the best way to remove seams is with a brand new and sharp Xacto blade. It's sort of like shaving or scraping over the flaw. You require a light touch and let the sharp blade do the work. A company called Excel makes what they call "super sharp" #11 blades that are perfect for the job. However, you must be
EXTREMELY careful with those blades as I have yet to run into anything as sharp as them.
Cheers,
Jan
England - South East, United Kingdom
Joined: November 19, 2008
KitMaker: 2,249 posts
Armorama: 2,007 posts
Posted: Wednesday, October 27, 2010 - 02:15 AM UTC
Quoted Text
I noticed a seam line on the wheels. Does vinyl accept sand paper or there is another way?
While in no way contradicting Jan's advice (actually, I am stalking him), I have found that it is sometimes possible to use emery paper on vinyl if it is fine enough, such as 1500 grade. You can get this type of thing in car spares shops as people use it for smoothing down between coats of car bodywork paint to get a perfect shiny finish. It's almost like it polishes rather than abrades, although it obviously does abrade a little.
The point is that being so fine it doesn't ruck up the vinyl and produce bobbly bits, or rather tha bobbly bits are so tiny it is OK. The advantage I think can be that with a knife it is all too easy to remove too much (and then you're stuffed) or get down to that point where there's so little left of the seam that you can't get purchase on it with the blade... if you know what I mean. So you could start trimming with a knife, then finish off with emery paper.
Anyway, if you can find something that fine give it a go. You can also use paper of this grade to restore a shiny surface to polysterene pieces when you've already used a rougher grade on it and you end up with that kind of white effect which is produced by all the tiny scratches. One thing to note is that you can't use it many times before the abrasive surface gets clogged and it just becomes like a piece of normal paper.
Hunedoara, Romania
Joined: May 06, 2008
KitMaker: 354 posts
Armorama: 343 posts
Posted: Wednesday, October 27, 2010 - 03:00 AM UTC
Alexander,
nice begining,thanks for sharring.I have this kit myself, but I don't had the courage to grab it .

.Maybe after i seen yours completed...
Cheers,
Dani
Rhone, France
Joined: December 02, 2002
KitMaker: 12,719 posts
Armorama: 12,507 posts
Posted: Wednesday, October 27, 2010 - 03:18 AM UTC
Quoted Text
While in no way contradicting Jan's advice (actually, I am stalking him), I have found that it is sometimes possible to use emery paper on vinyl if it is fine enough, such as 1500 grade. You can get this type of thing in car spares shops as people use it for smoothing down between coats of car bodywork paint to get a perfect shiny finish. It's almost like it polishes rather than abrades, although it obviously does abrade a little.
Putting the vinyl tires in the freezer for a few hours before sanding them should make things even easier

: while the vinyl will not become completely solid, the seam line will become stiff enough to respond to sanding...
HTH
Frenchy
"Find the Bastards, then Pile On"
Col. George W.Patton III 's standing order for the troopers of the 11th Armoured Cavalry Regiment
British Columbia, Canada
Joined: March 12, 2010
KitMaker: 791 posts
Armorama: 592 posts
Posted: Wednesday, October 27, 2010 - 06:57 AM UTC
I've built Revell's FAMO, if this kit is better it will be one impressive model indeed. Will enjoy watching your progress.
On the Bench:
Diopark Mercedes
AFV Club CM-11
Attica, Greece / Ελλάδα
Joined: February 17, 2010
KitMaker: 625 posts
Armorama: 608 posts
Posted: Wednesday, October 27, 2010 - 08:12 AM UTC
Thank you all for leaving your comments. I definitely have many options for correcting those wheels
.
As for the blade that Jan claims, I use surgical type and I don't know if it can get sharper than that.
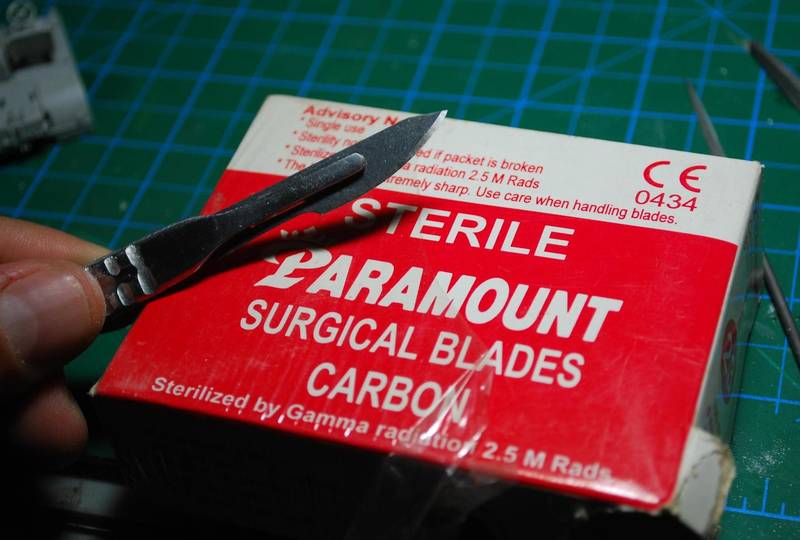
Caution is needed because carbon steel breaks without warning if stressed to much.
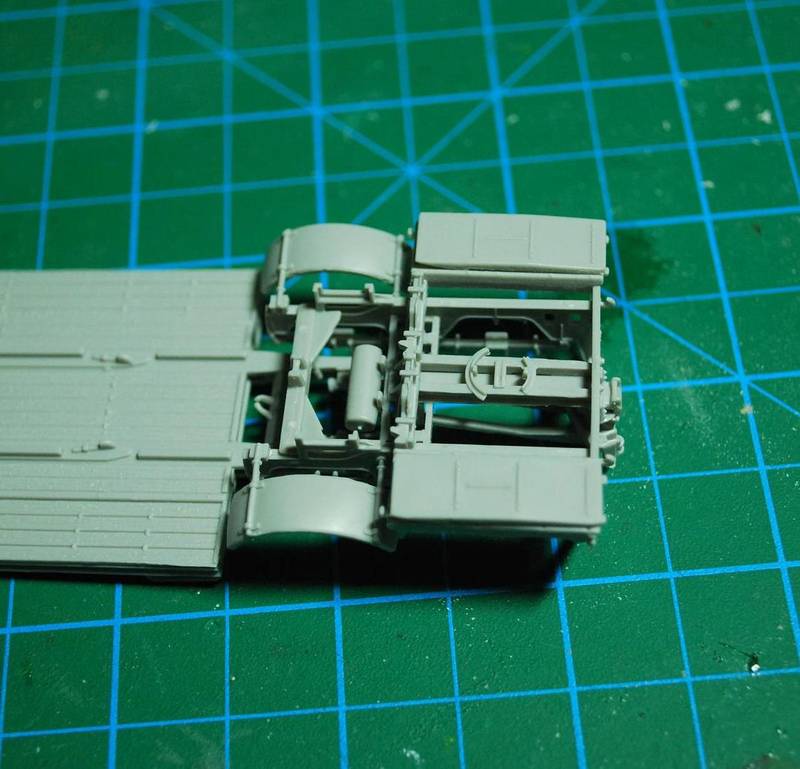
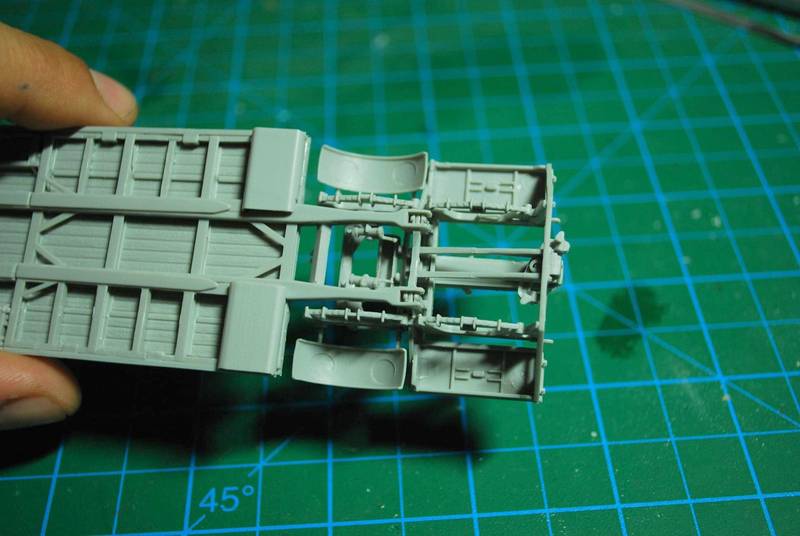
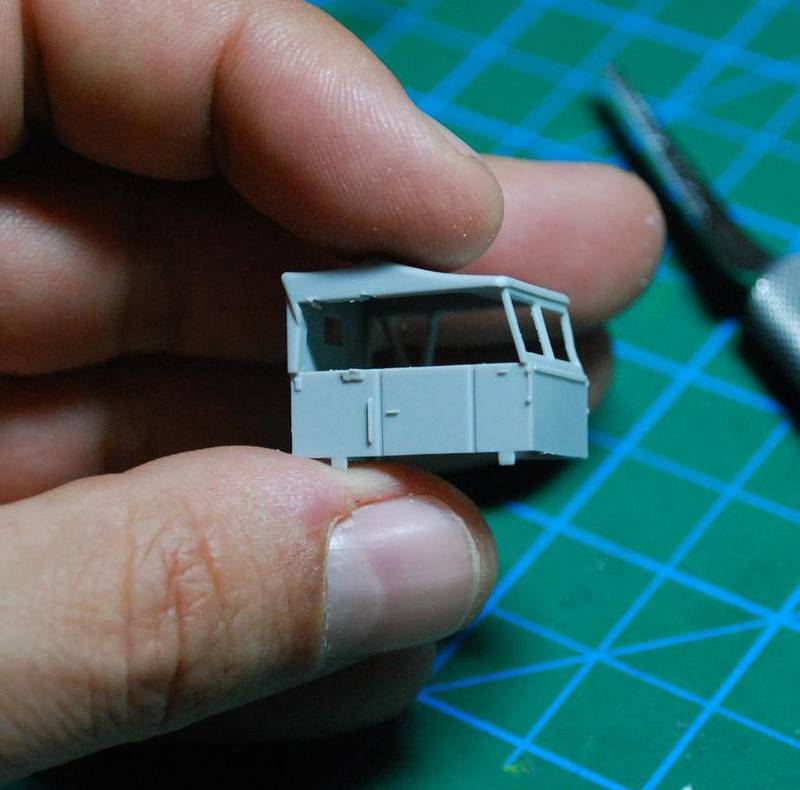
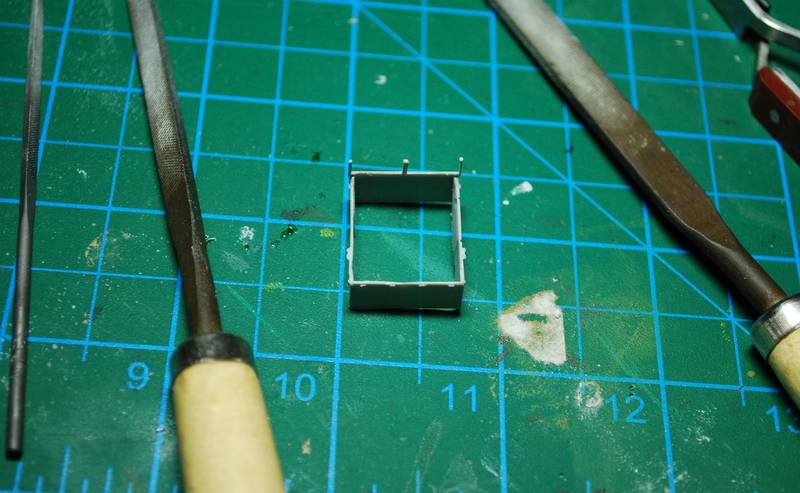
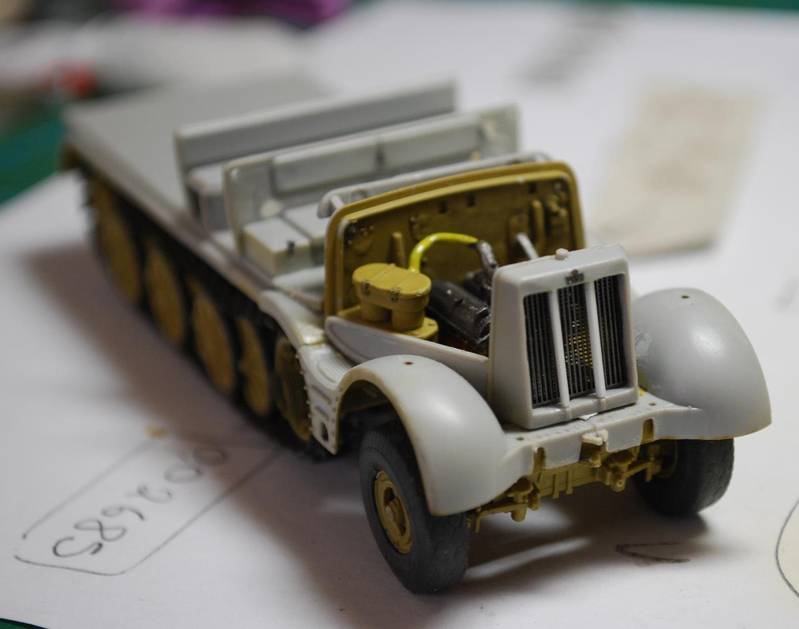
Today was time to work with the little operating cabin at the far back of the trailer. The one provided in the kit is crudely made and needs some care.
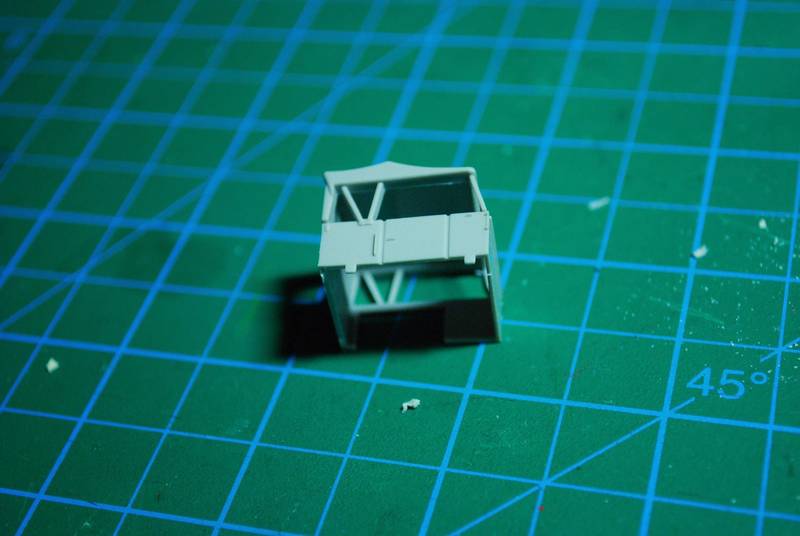
The sides are very thick and the beams supporting the tent the same.
So I totally removed the tent and worked to thin the sides.
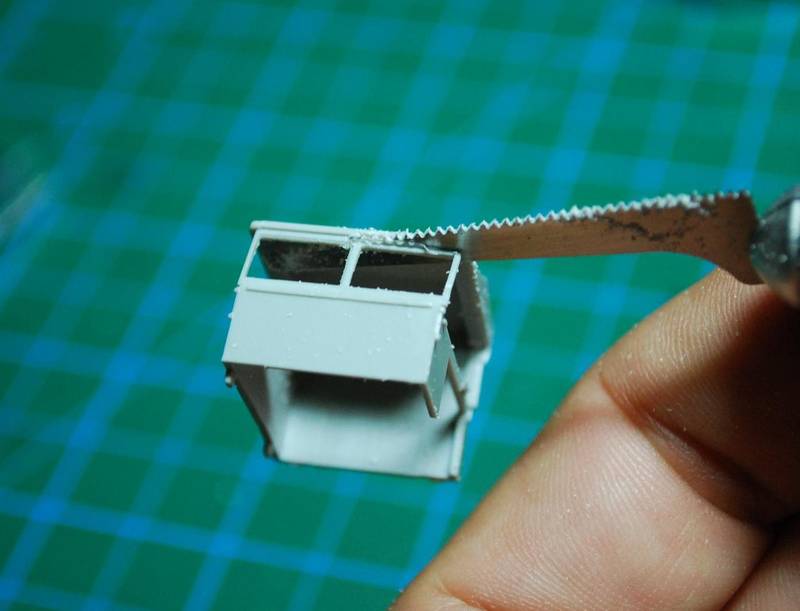
It's safety first so I always use goggles because I work very close to the model.
The result.
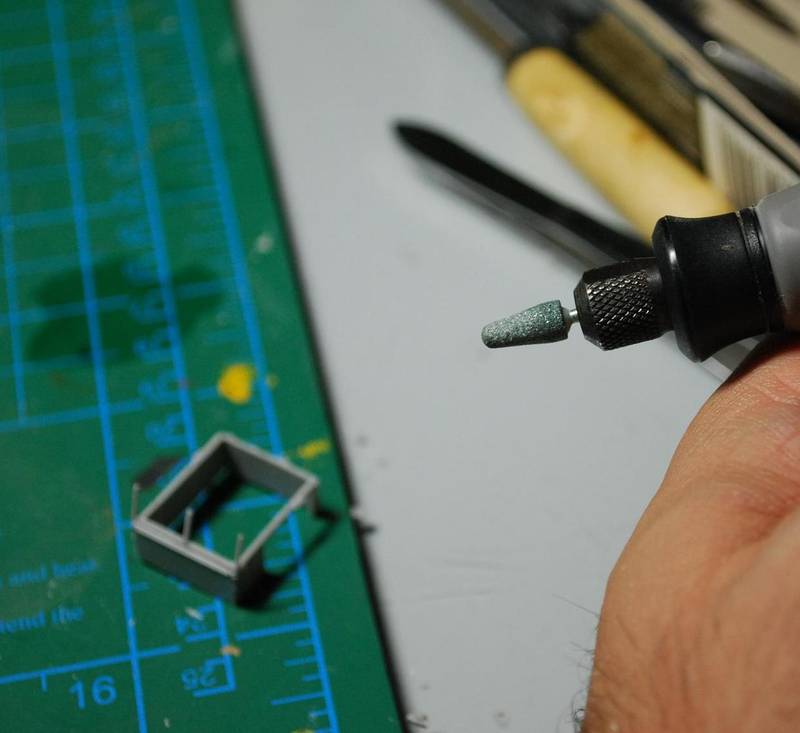
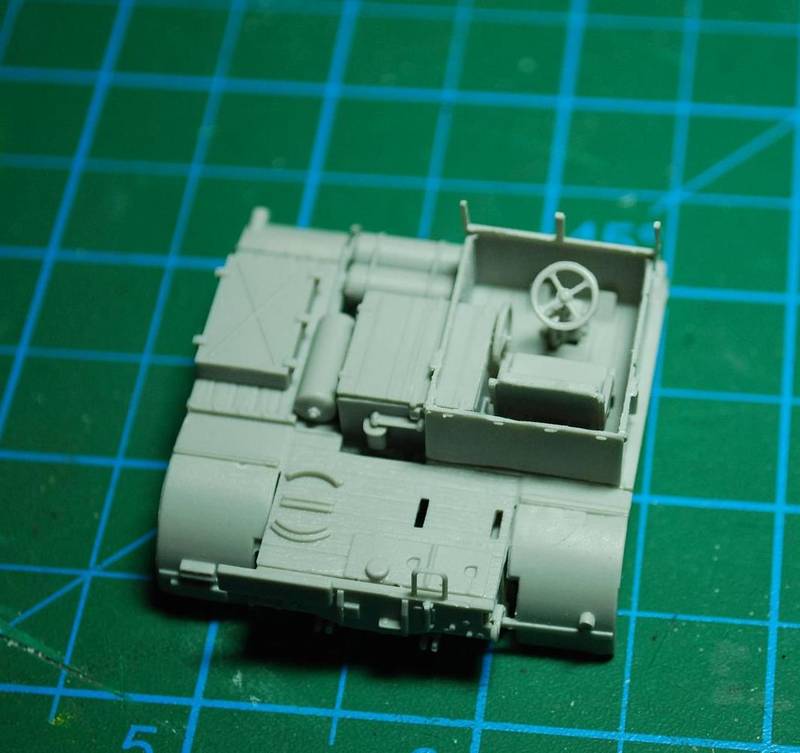
According to the instructions the seat glued directly on the floor but that looked unrealistic so I took the liberty to make a column.
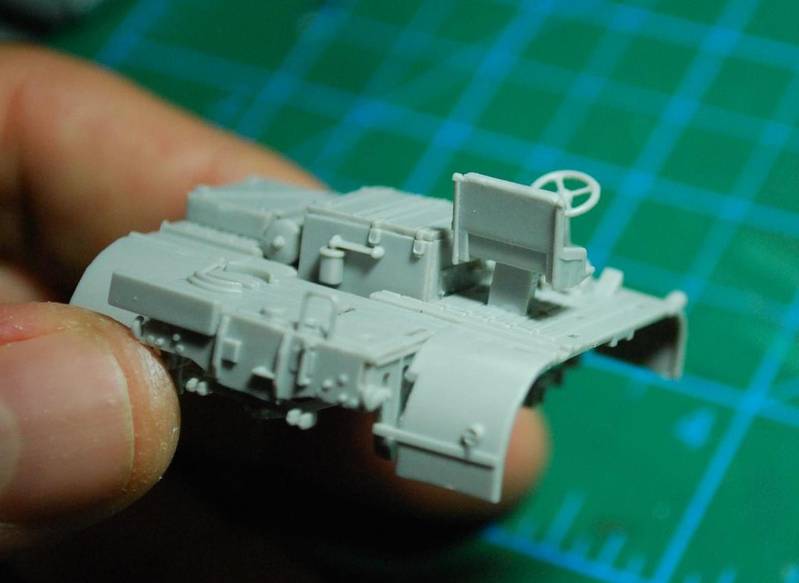
Today's work :
More pics next week.
Thanks for watching.
I used to be a scale modeler like you. Then I took an arrow in the knee.
Ontario, Canada
Joined: March 23, 2008
KitMaker: 2,847 posts
Armorama: 2,667 posts
Posted: Wednesday, October 27, 2010 - 08:49 AM UTC
Despite what my "stalker" has said, it's always a pleasure to hear about new and potentially useful techniques (tricks). And thanks to "Frenchy" for adding yet another to my expanding database.
Alex, one often hears/reads about someone using a scalpel but it usually turns out that they are referring to a hobby knife that most use. The EXCEL blades that I refer to are Super Sharp - Carbon Steel Double Honed Blade. Whether this is scalpel equivalency, I can't say. However, they make all other hobby blades and even razor blades seem dull. They carve up styrene like the proverbial hot knife through butter.
The rear cab and the work you are doing to it look marvellous. Be careful! You may have been bitten by the obsessive compulsive detailing virus.
Cheers,
Jan (super_sharp_tread_geek)
Ontario, Canada
Joined: April 04, 2009
KitMaker: 458 posts
Armorama: 456 posts
Posted: Sunday, October 31, 2010 - 02:09 AM UTC
Alexander, you have my admiration and thanks for showing this kit and building it. My local shop had two on sale the last time I was in. The box felt quite heavy for a 1/72 kit but I wondered why or for what reason they were marked down to half price. Thanks to your pictures I think that I will pass on buying one for the time being. I'll be watching your progress with great interest.
Regards,
AJ
Attica, Greece / Ελλάδα
Joined: February 17, 2010
KitMaker: 625 posts
Armorama: 608 posts
Posted: Sunday, October 31, 2010 - 06:23 AM UTC
Hello again, thanks for dropping a comment.
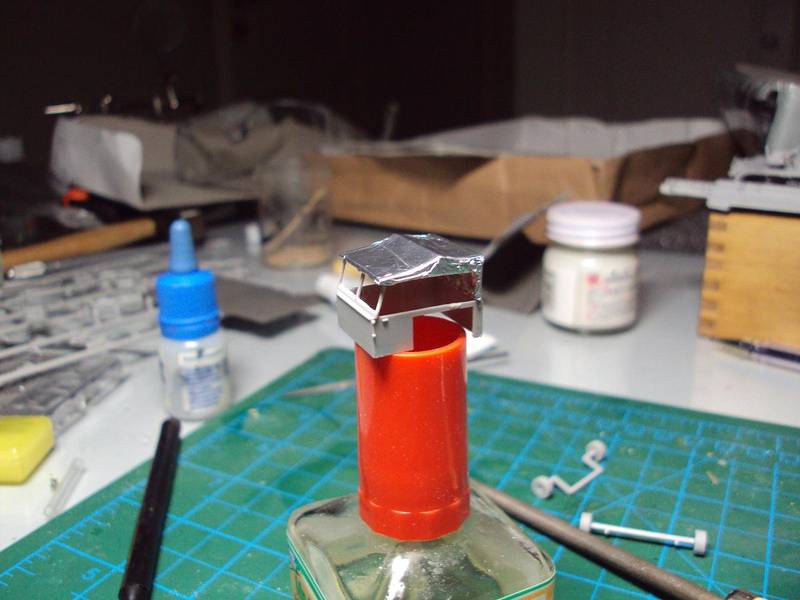
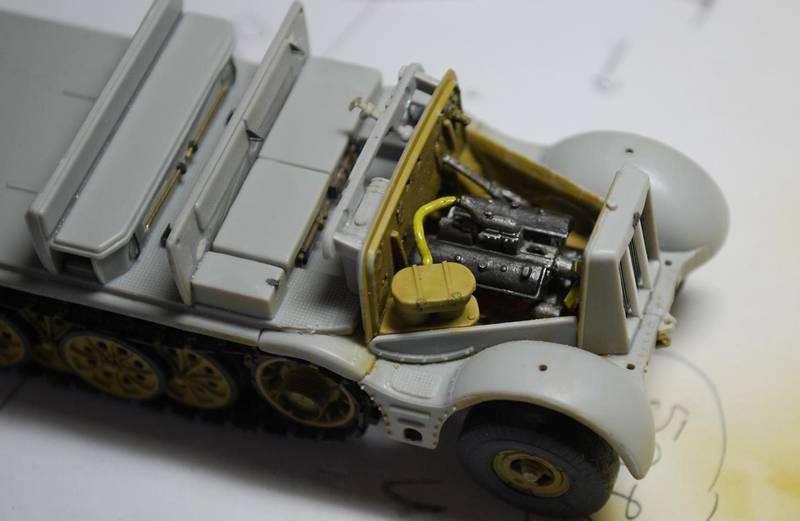
Not much work today, just added some foil to simulate the tent over the rear cab and some work on the wheels.
The wheels as they came in the kit.
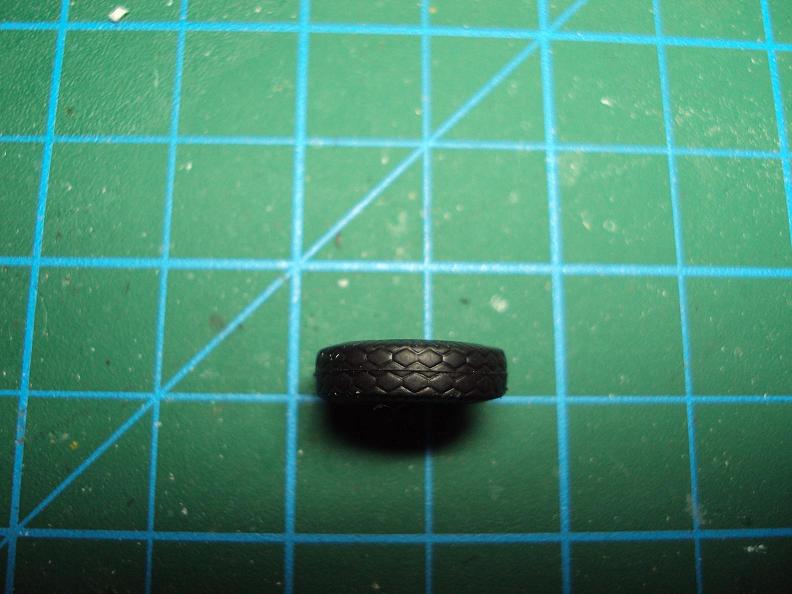
Notice that the tire is lightly warped and this is giving me fitting problems.
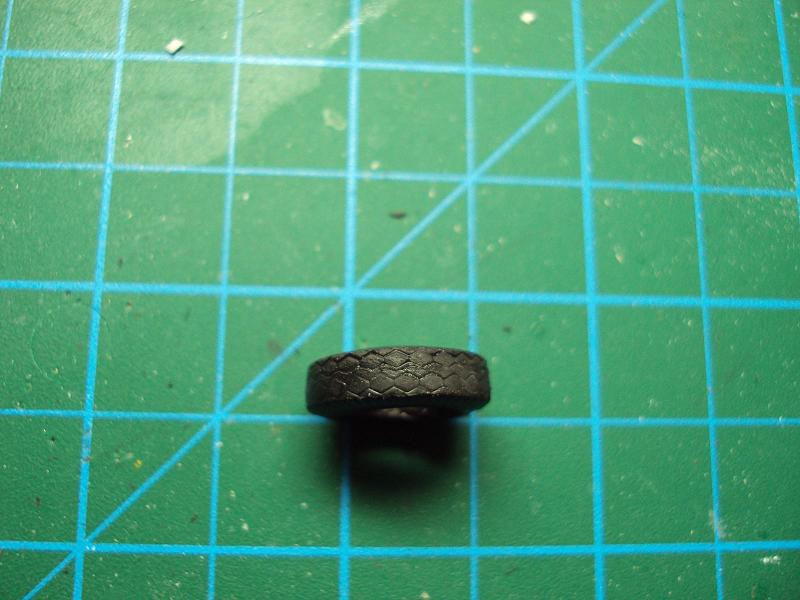
I started by sanding them with a rasp to lower the seam line. After that 2 sand papers were used #400 and #1000. I had to take away much of the tire's tread this way and I still don't know how the final look will be.
Here is the wheel right now.
Here is a nice article about WWII tank movers but in Spanish :
http://www.de1939a1945.com/armas/040transportestanques.htmMore pics soon.
I used to be a scale modeler like you. Then I took an arrow in the knee.
Minnesota, United States
Joined: May 07, 2009
KitMaker: 84 posts
Armorama: 78 posts
Posted: Sunday, October 31, 2010 - 05:55 PM UTC
Gotta love the big German prime-movers! Can't wait to watch this through!!!
on the bench:
In 1/72,...... Trumpeter KV-II and a KV-I with interior,
Trumpeter BTR-80 with major mods plus custom crew,
some Russian Spetsnaz figures custom sculpted (5 so far)
Dragon's T-34/85 with full interior minus engine and transmission
I
Queensland, Australia
Joined: October 06, 2009
KitMaker: 382 posts
Armorama: 378 posts
Posted: Sunday, October 31, 2010 - 10:11 PM UTC
Hi Alexander
Thanks for all the details. Very interesting to see.
You did a good job on the tarpaulin cover with the foil, it has a much more realistic shape and creases, than the moulded plastic.
The tyre tread still looks fine, tyres wear fast anyway, they would often have a lot of weight on them !
cheers
Neil
http://www.armorama.com/images/awards/425.gif
Ontario, Canada
Joined: March 23, 2008
KitMaker: 2,847 posts
Armorama: 2,667 posts
Posted: Monday, November 01, 2010 - 03:25 AM UTC
Beautiful job on the tarp.
I have to fully agree with Neil that the worn tires are quite natural for this type of vehicle and will add to the overall effect.
Cheers,
Jan
Attica, Greece / Ελλάδα
Joined: February 17, 2010
KitMaker: 625 posts
Armorama: 608 posts
Posted: Wednesday, November 03, 2010 - 04:55 AM UTC
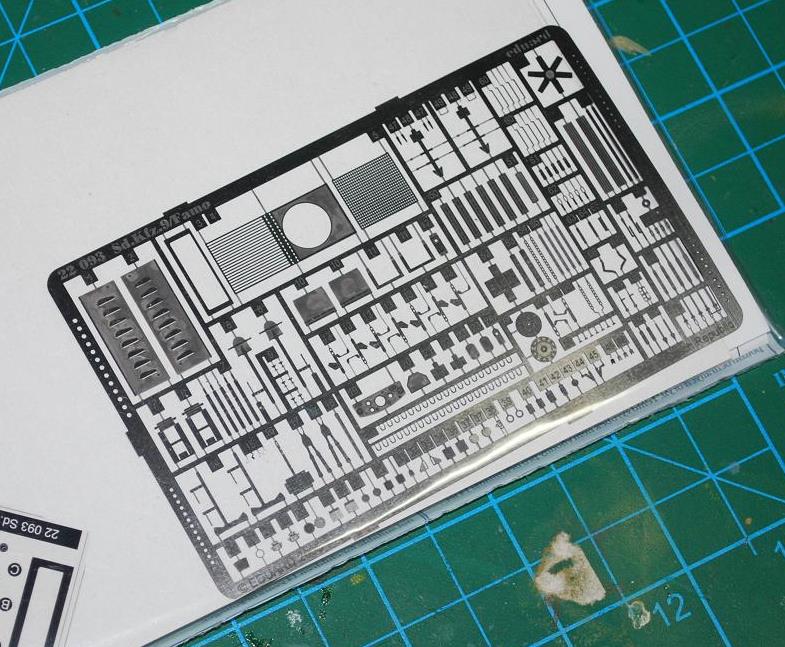
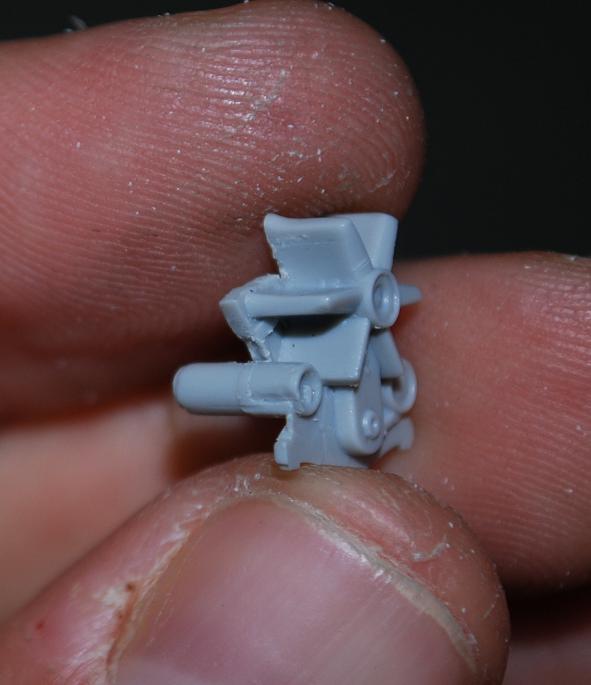
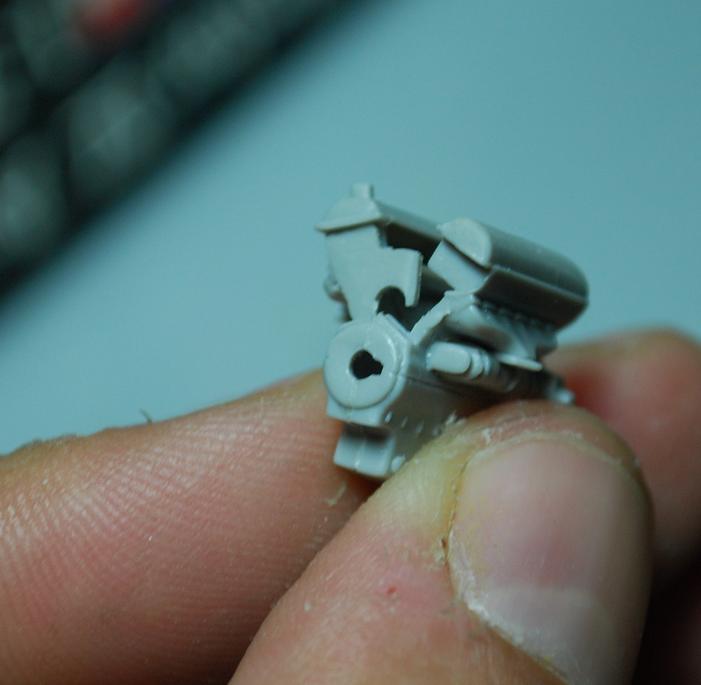
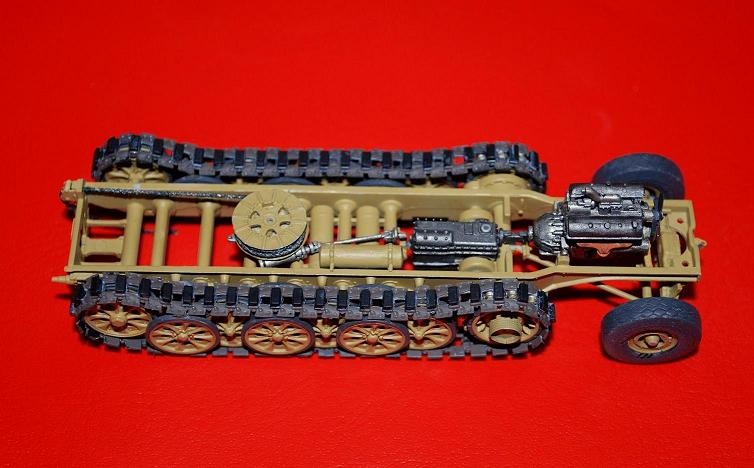
The PE details from Eduard have arrived so I got the Famo started.
I doubt if I can use everything in the PE fret.
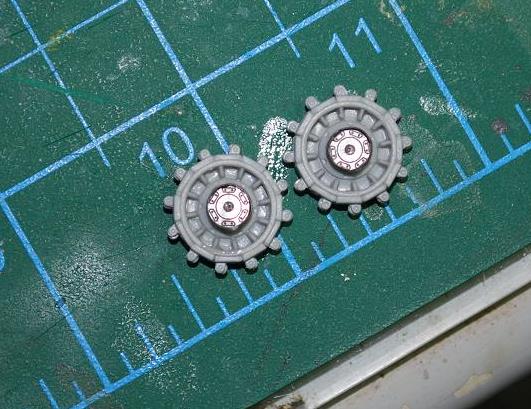
Some details in the drive sprocket
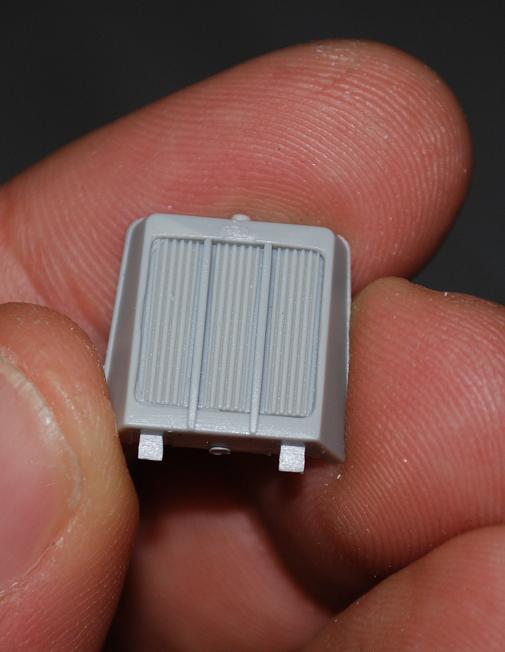
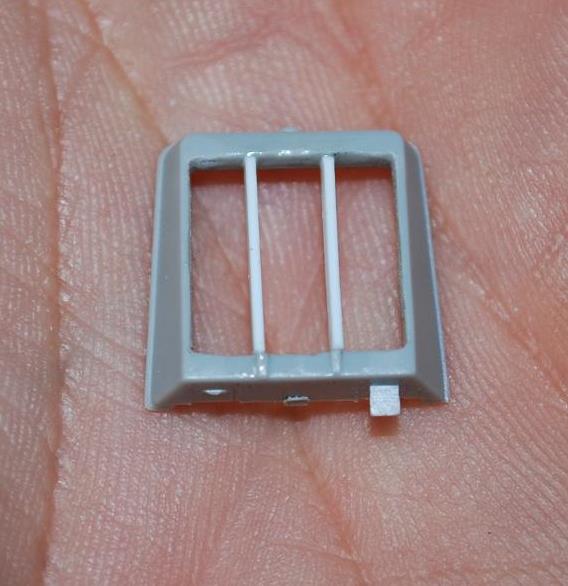
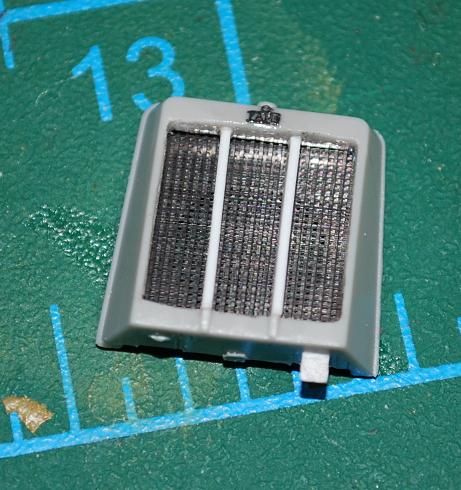
The radiator
The engine
The fan was molded with the front cover of the engine and I had to scrap it as it was crudely made. By using white putty plastic and masking tape I reshaped it.
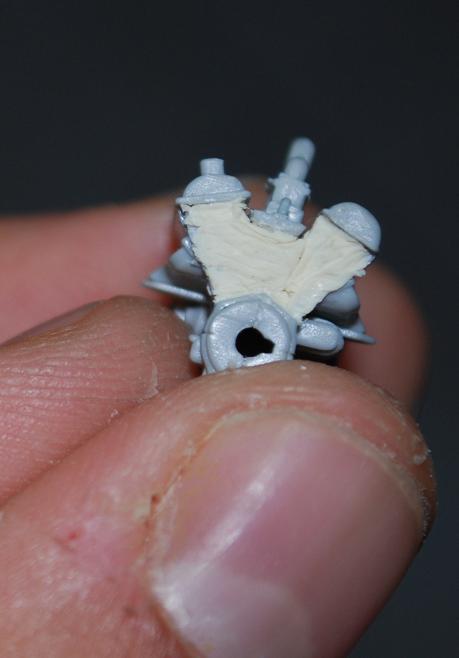

Hopefully it will look good once painted
P.A.
I used to be a scale modeler like you. Then I took an arrow in the knee.
Attica, Greece / Ελλάδα
Joined: February 17, 2010
KitMaker: 625 posts
Armorama: 608 posts
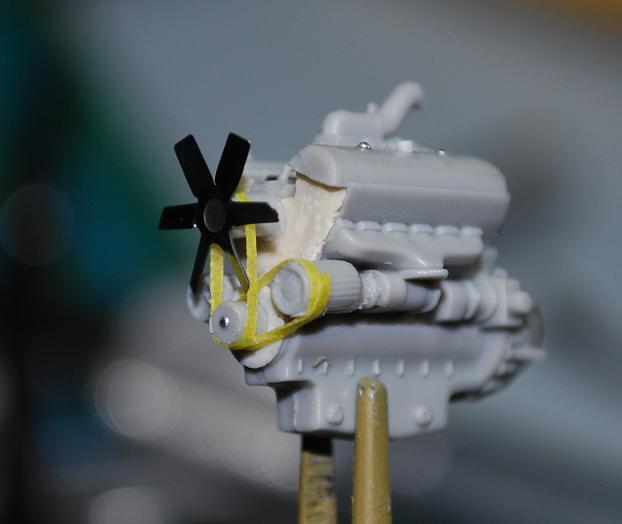
Posted: Friday, November 05, 2010 - 10:05 PM UTC
An update on the engine:
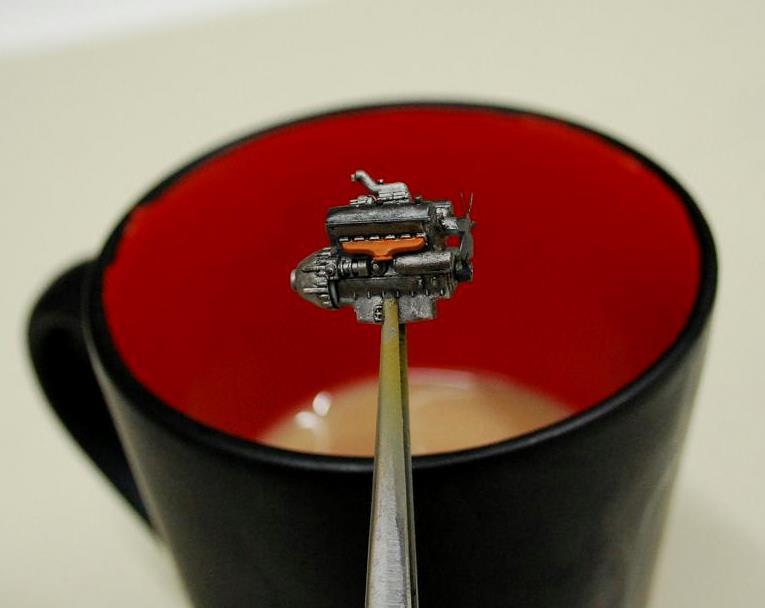
P.A.
I used to be a scale modeler like you. Then I took an arrow in the knee.
California, United States
Joined: May 04, 2009
KitMaker: 123 posts
Armorama: 121 posts
Posted: Saturday, November 06, 2010 - 09:15 AM UTC
Really great work so far - That engine is a beauty!

#135
California, United States
Joined: August 05, 2007
KitMaker: 1,501 posts
Armorama: 1,485 posts
Posted: Saturday, November 06, 2010 - 08:53 PM UTC
Alexander,
I'm now following your build with interest. Anyone would have there hands full with this kit just out of the box. It's nice to see your taking the time to improve on the kits parts. It is time consuming but worth all of the effort once finished in the way your going about it. I'm really enjoying it! That engine sure looks the part. Where you considering stirring up the sugar in your coffee with the engine? I can almost hear it idling . . .
-Eddy

If you absolutely must have a city completely destroyed overnight . . . call the MARINES
Currently on the bench:
1:12 Bandia Star Wars K-2SO
1:35 Takom T-54B Late
England - West Midlands, United Kingdom
Joined: May 23, 2010
KitMaker: 642 posts
Armorama: 593 posts
Posted: Sunday, November 07, 2010 - 05:17 AM UTC
Hi Alexander,
Like Eddy, I am following this fascinating build with avid interest. I have often thought about getting this kit and now I am convinced I should. It is a bit of a beast, but the final result will be stunning. Keep up the good work.
All the best,
Paul
Queensland, Australia
Joined: October 06, 2009
KitMaker: 382 posts
Armorama: 378 posts
Posted: Sunday, November 07, 2010 - 09:35 AM UTC
Hi Alexander
the engine looks good, as does the radiator. You are making what is already a good kit out of the box, into a gem. Some of those P.E. parts are almost microscopic

cheers
Neil
http://www.armorama.com/images/awards/425.gif
Attica, Greece / Ελλάδα
Joined: February 17, 2010
KitMaker: 625 posts
Armorama: 608 posts
Posted: Wednesday, November 10, 2010 - 12:28 AM UTC
Thanks for your replies.
I tried to assemble the tracks by using the jig that the kit provided. Unfortunately, it proved to be a rather time consuming process. Given the fact that by the use of P.E. this kit is going to take long to finish I decided to use the vinyl that are ok.
Progress so far :
P.A.
I used to be a scale modeler like you. Then I took an arrow in the knee.
Ontario, Canada
Joined: April 04, 2009
KitMaker: 458 posts
Armorama: 456 posts
Posted: Wednesday, November 10, 2010 - 04:38 AM UTC
Coming along beautifully, Alexander. The rubber band tracks do not look bad at all. You did a nice job painting them. After having my first exposure to L&L tracks I think that I would take the rubber band any day.
Regards,
AJ
Attica, Greece / Ελλάδα
Joined: February 17, 2010
KitMaker: 625 posts
Armorama: 608 posts
Posted: Thursday, November 18, 2010 - 09:14 AM UTC
The construction part is nearly finish. I have used almost 70% of the PE fret too.
After priming some preshading

More later.
P.A.
I used to be a scale modeler like you. Then I took an arrow in the knee.


