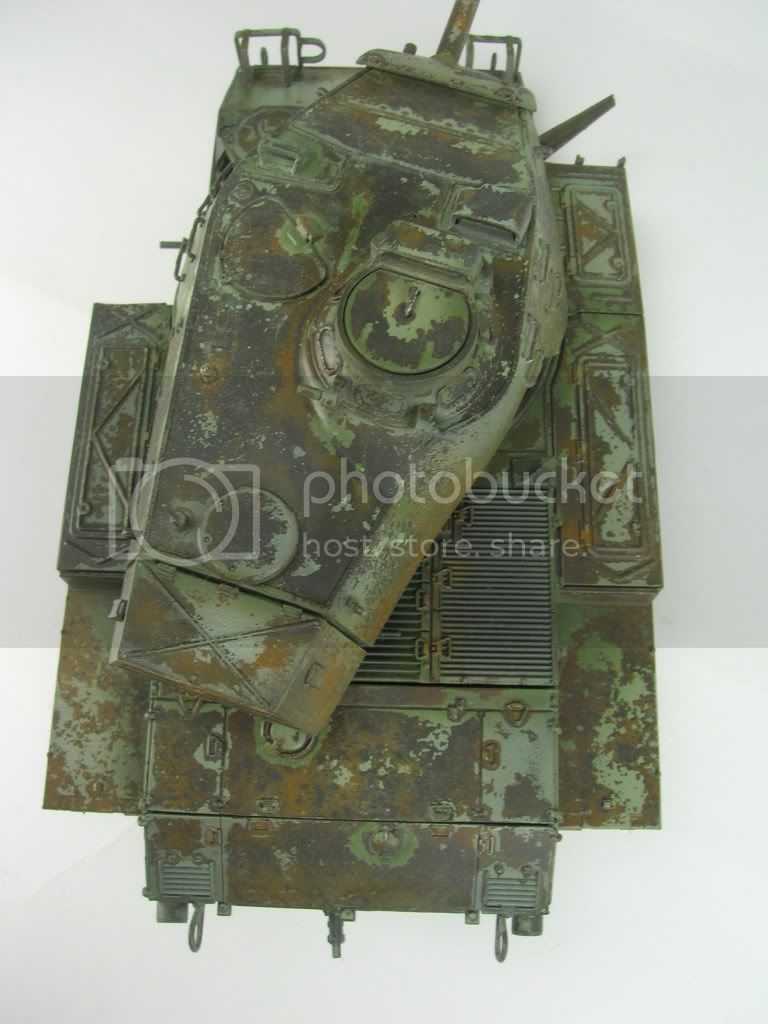
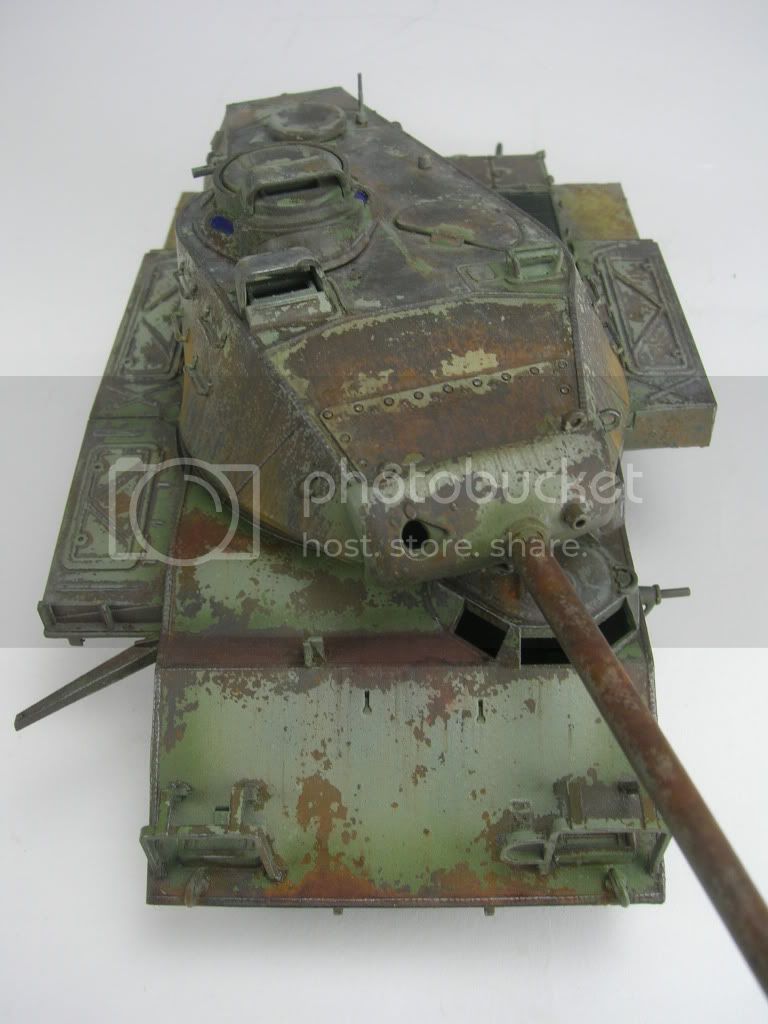
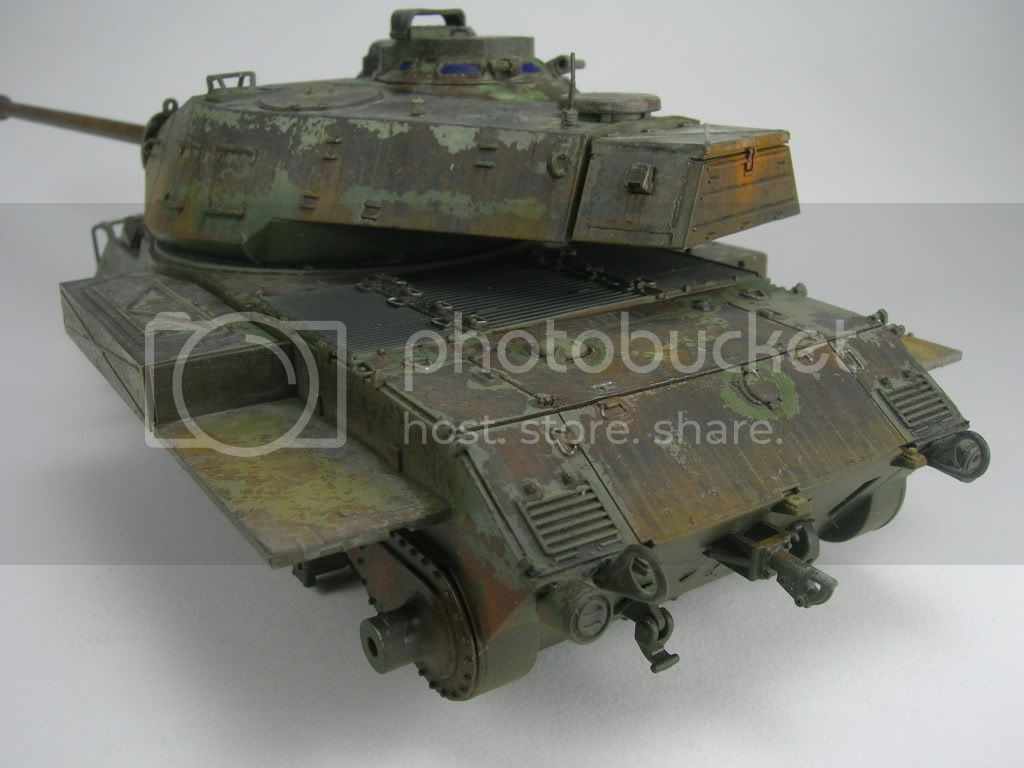
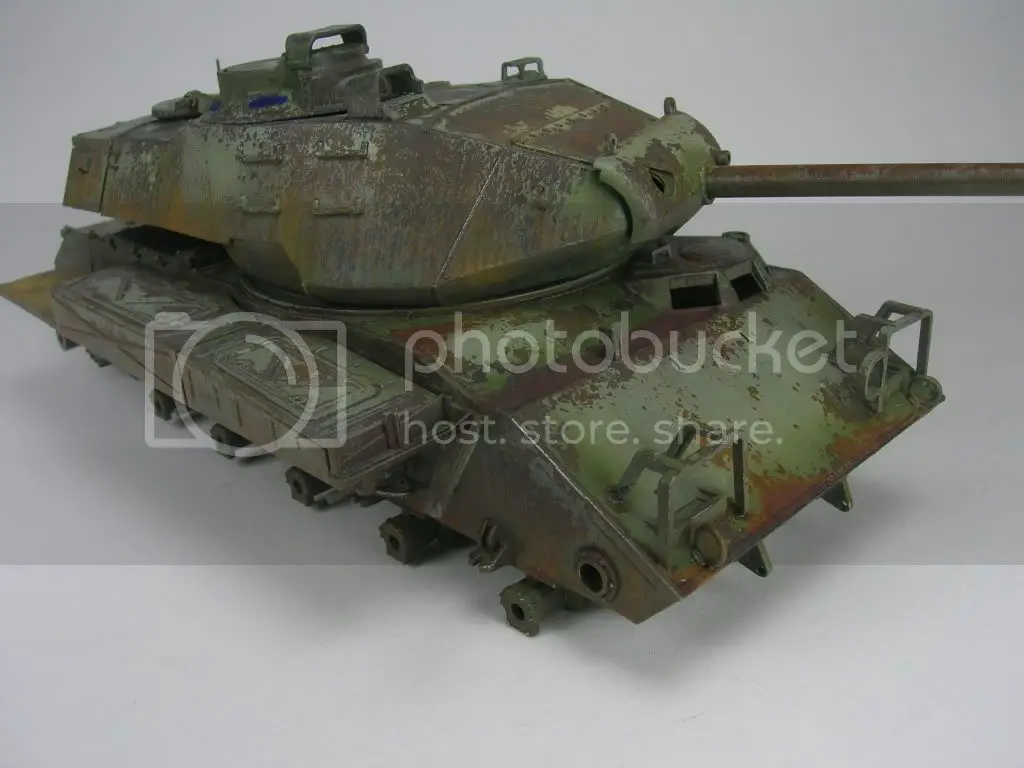
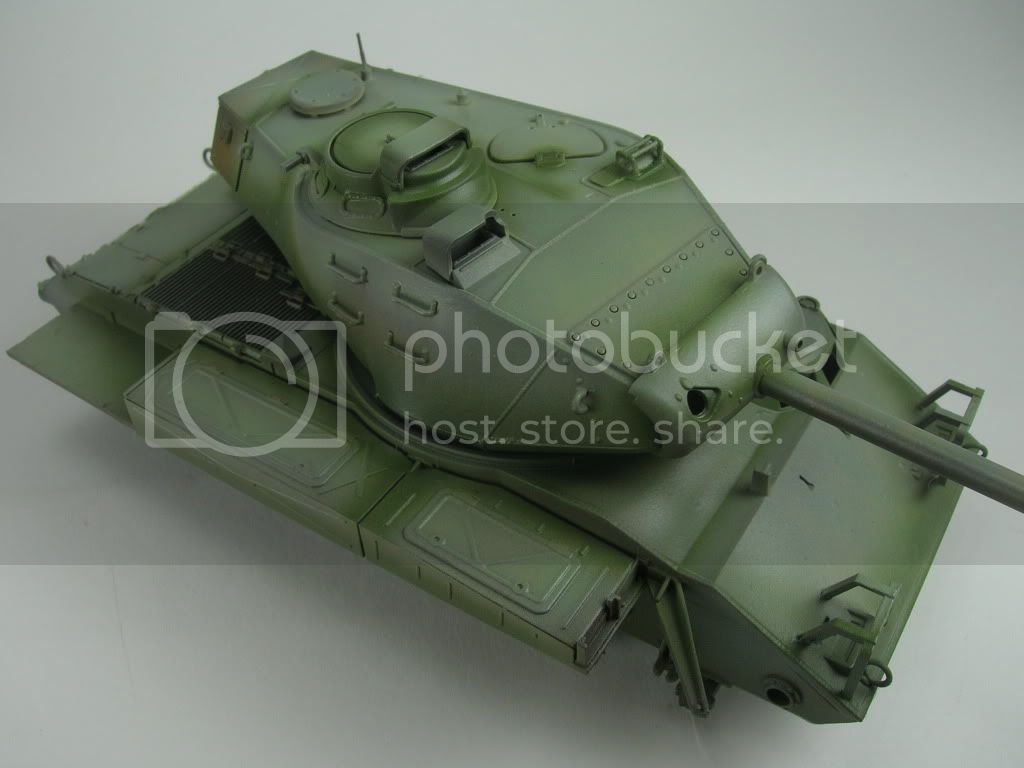
Progress pics for the M41. First images show the base sun bleached O.D. Green applied over another layer of flat laquer and hairspray. This is Tamiya XF-27 Black Green, XF-58 Olive Green, X-2 White, & X-22 Clear. The clear is critical.....this gives the top coat a satin finish creating depth and contrast with the flat rust colors.
The next images show the O.D. GReen removed to show the rust tones underneth. This is removed one area at a time with a stiff brush, a tooth pick, and warm tap water.
Next, the real weathering! Oils, washes, etc........
Constructive Feedback
For in-progress or completed build photos. Give and get contructive feedback!
Hosted by Darren Baker, Dave O'Meara
M41 Progress
collin26
Connecticut, United States
Joined: March 24, 2007
KitMaker: 317 posts
Armorama: 259 posts
Joined: March 24, 2007
KitMaker: 317 posts
Armorama: 259 posts
Posted: Thursday, November 04, 2010 - 01:29 PM UTC
210cav
Virginia, United States
Joined: February 05, 2002
KitMaker: 6,149 posts
Armorama: 4,573 posts
Joined: February 05, 2002
KitMaker: 6,149 posts
Armorama: 4,573 posts
Posted: Friday, November 05, 2010 - 04:10 AM UTC
Collin26--- Very nice work! It seem a shame to show a beauty of a tank rusting, but thus is life.
Great job
DJ
Great job
DJ
Kuno-Von-Dodenburg
England - North, United Kingdom
Joined: February 20, 2007
KitMaker: 1,453 posts
Armorama: 1,319 posts
Joined: February 20, 2007
KitMaker: 1,453 posts
Armorama: 1,319 posts
Posted: Friday, November 05, 2010 - 04:40 AM UTC
Great work. It really looks the part.
- Steve
- Steve
collin26
Connecticut, United States
Joined: March 24, 2007
KitMaker: 317 posts
Armorama: 259 posts
Joined: March 24, 2007
KitMaker: 317 posts
Armorama: 259 posts
Posted: Friday, November 05, 2010 - 07:52 AM UTC
Hello All,
Almost done.....in these pics. I have added some weathering using A.K. Interactive "Rust Streaks", "Winter Streaking Grime", "Dust Effects", & "Streaking Grime" to create washes and weathering.
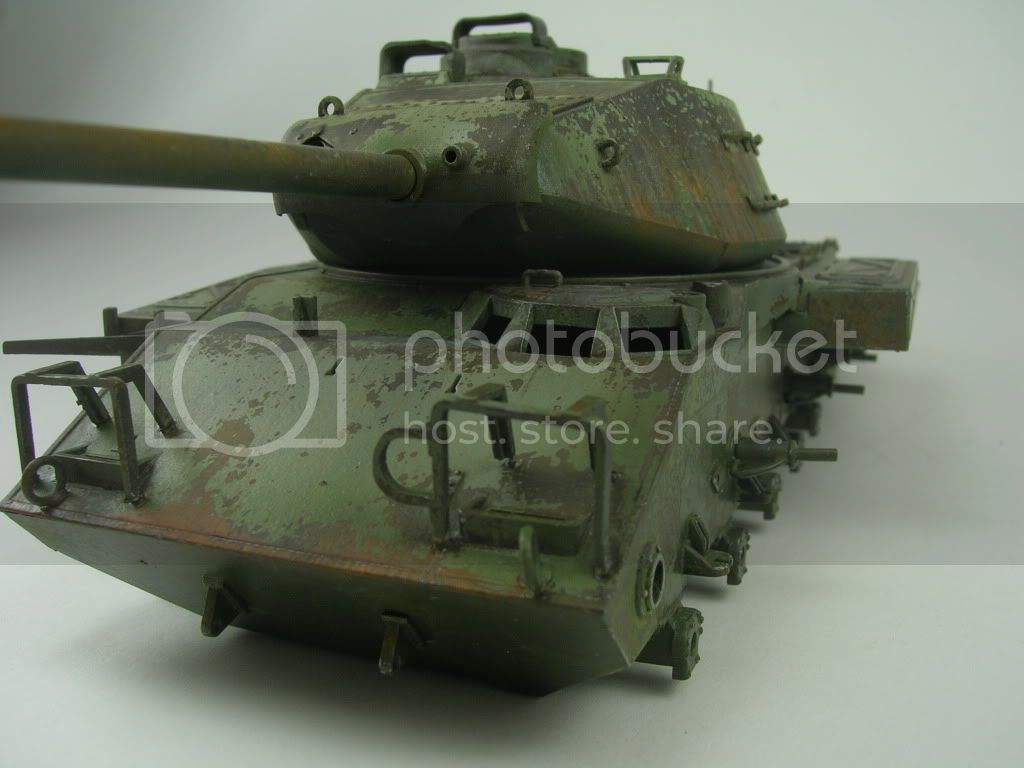
A.K. "Dust Effects" were used to create rain marks and a film of dust on the horisontal surfaces
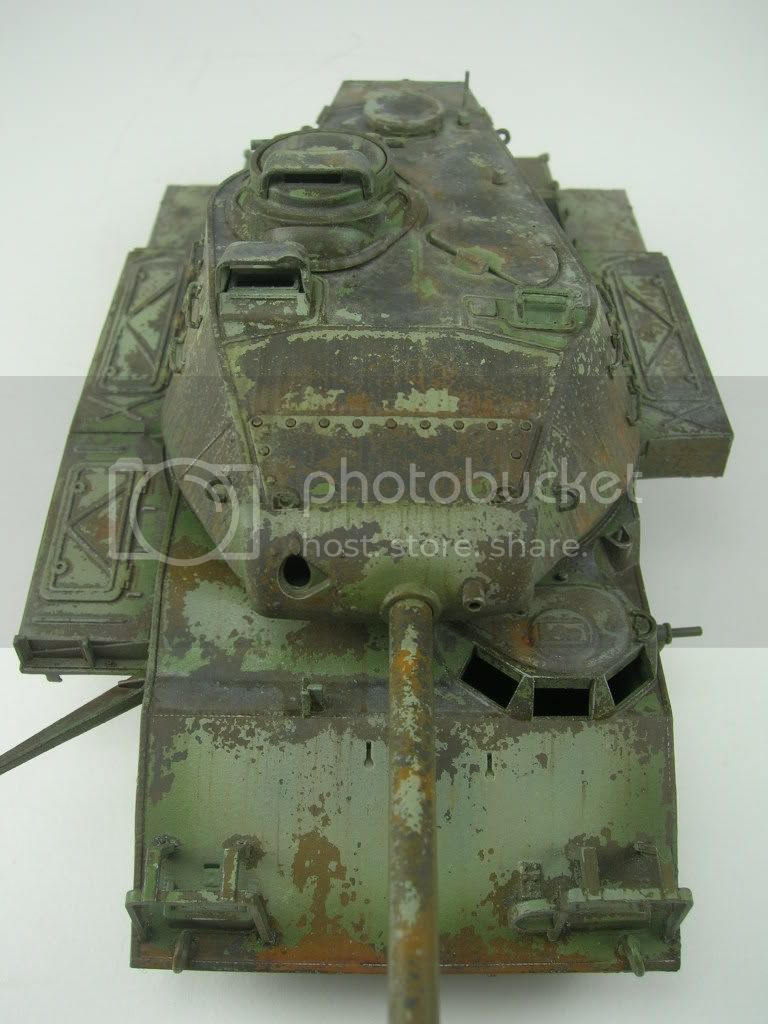
A.K. "Rust Effects" and MIG Productions "Standard Rust Effects" along with Windsor Newton oils were used to create rust washes and streaking rust.
A.K. "Winter Streaking Grime" & "Streaking Grime" were used along with Lamp Black oils to create washes for the resesed areas and weld beads.
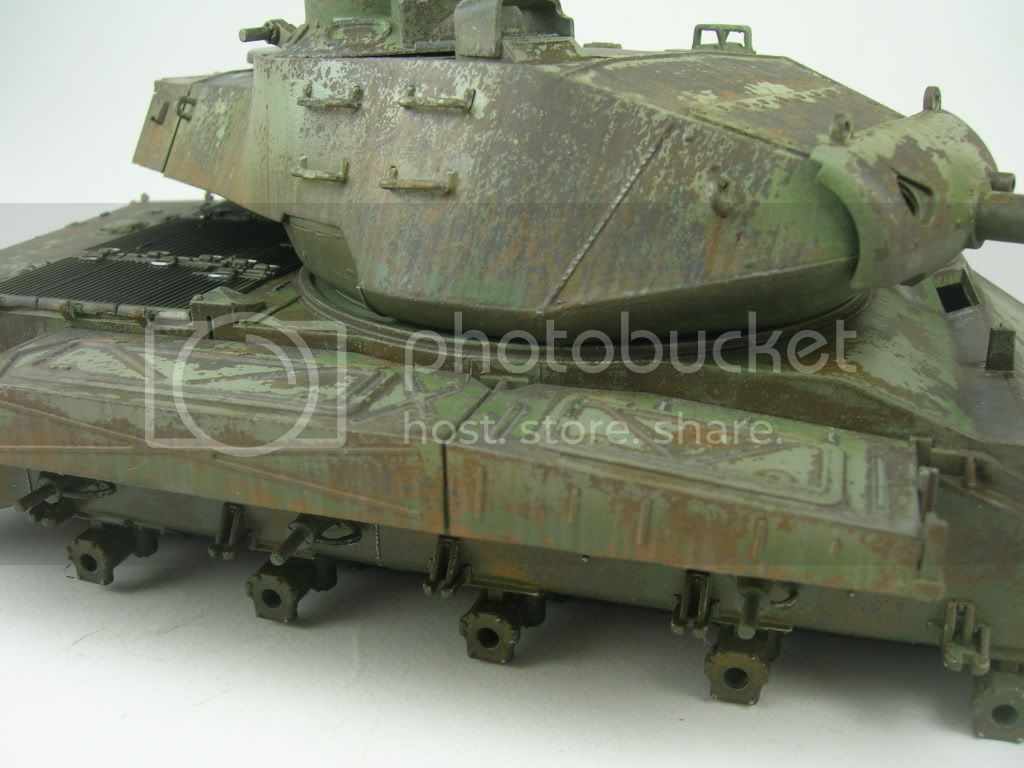
NEXT: Rust and dust pigments and some Graphite powder for the leading edges of pannels
Thanks for the feedback guys.
Berlin45
Washington, United States
Joined: June 25, 2009
KitMaker: 96 posts
Armorama: 74 posts
Joined: June 25, 2009
KitMaker: 96 posts
Armorama: 74 posts
Posted: Saturday, November 06, 2010 - 04:18 AM UTC
VERY nice! Reminds me on one of these that I saw in a park on the way to Las Vegas from LA last year... of course that one was desert yellow... but it sure had the same weathering!
tjkelly
Maryland, United States
Joined: May 04, 2007
KitMaker: 1,132 posts
Armorama: 1,123 posts
Joined: May 04, 2007
KitMaker: 1,132 posts
Armorama: 1,123 posts
Posted: Saturday, November 06, 2010 - 11:36 PM UTC
Wonderful paint job and weathering so far! Am impressed, especially with the pics showing the progression.
Awesome! Looking forward to seeing some more. Cheers -
Tim
Awesome! Looking forward to seeing some more. Cheers -
Tim
collin26
Connecticut, United States
Joined: March 24, 2007
KitMaker: 317 posts
Armorama: 259 posts
Joined: March 24, 2007
KitMaker: 317 posts
Armorama: 259 posts
Posted: Monday, November 08, 2010 - 11:49 AM UTC
Thank you for all of the feedback guys. I have worked in pigments, oils, and streaking dust, rust, and gime to bring the weathering around and dust and rain marks to tie the M41 to it's monsoon environment in the tea and rubber plantation regions of South Vietnam.
Next on the bench: Hobby Boss's Sd.Kfz. 222 Leichter Panzerspahwagen 2cm
afvaficionado
New Zealand
Joined: February 16, 2010
KitMaker: 160 posts
Armorama: 159 posts
Joined: February 16, 2010
KitMaker: 160 posts
Armorama: 159 posts
Posted: Monday, November 08, 2010 - 02:25 PM UTC
Hi Iain
Very nice. Just one little detail - the gunners sight guard is on backwards, the cut out should face towards the TC's cupola (RHS).
May I ask what model & scale this is?
I'm working on a Heng Long 1/16th M41A3 Airsoft RC, converting it to a NZ Early Production M41A1, see http://www.hobbyhavoc.com/forum/index.php?topic=725.msg14025#new - but it's a very slow Work in Progress.
Mal
Very nice. Just one little detail - the gunners sight guard is on backwards, the cut out should face towards the TC's cupola (RHS).
May I ask what model & scale this is?
I'm working on a Heng Long 1/16th M41A3 Airsoft RC, converting it to a NZ Early Production M41A1, see http://www.hobbyhavoc.com/forum/index.php?topic=725.msg14025#new - but it's a very slow Work in Progress.
Mal
Posted: Monday, November 08, 2010 - 06:40 PM UTC
Excellent rust effects Iain. Very realistic and natural.
collin26
Connecticut, United States
Joined: March 24, 2007
KitMaker: 317 posts
Armorama: 259 posts
Joined: March 24, 2007
KitMaker: 317 posts
Armorama: 259 posts
Posted: Tuesday, November 09, 2010 - 02:06 AM UTC
Thanks for the feedback guys,
Malcom, Thanks for pointing this detail out to me, unfortunately, I think it is going to be to late for this one. This is 1:35 scale and if memory serves me, it was from AFV Club. I had built the kit a while ago and it sat waiting for paint for a year + . I could be wrong about the manufacturer.
cdharwins
New Jersey, United States
Joined: October 28, 2006
KitMaker: 491 posts
Armorama: 462 posts
Joined: October 28, 2006
KitMaker: 491 posts
Armorama: 462 posts
Posted: Tuesday, November 09, 2010 - 11:08 AM UTC
Man, that looks great. Great work.
Chris
Chris
scratchmod
Massachusetts, United States
Joined: November 07, 2008
KitMaker: 796 posts
Armorama: 763 posts
Joined: November 07, 2008
KitMaker: 796 posts
Armorama: 763 posts
Posted: Tuesday, November 09, 2010 - 04:20 PM UTC
Guys I got a chance to see this model in person this past Sunday at a local IPMS model show. It looks freaking awesome. The pics do the model no justice, it has to be seen in person.
Congrats on the gold and best finish award. Well deserved bro.
Rob
www.scratchmod.com
Congrats on the gold and best finish award. Well deserved bro.
Rob
www.scratchmod.com
burton2663
Luzon, Philippines
Joined: September 25, 2014
KitMaker: 1 posts
Armorama: 1 posts
Joined: September 25, 2014
KitMaker: 1 posts
Armorama: 1 posts
Posted: Thursday, September 25, 2014 - 06:35 AM UTC
hi collins
do you have a previous step-by-step that came before you applied the OD greens on the M41? May I ask the colors of the rust tones underneath?
thanks
do you have a previous step-by-step that came before you applied the OD greens on the M41? May I ask the colors of the rust tones underneath?
thanks
1stjaeger
Wien, Austria
Joined: May 20, 2011
KitMaker: 1,744 posts
Armorama: 1,727 posts
Joined: May 20, 2011
KitMaker: 1,744 posts
Armorama: 1,727 posts
Posted: Sunday, September 28, 2014 - 12:28 AM UTC
Iain, that's absolutely brilliant!
Especially those different surface structures, slightly rough where rust is going deeper already, almost sleek where just the colour is faded or worn off....very realistic indeed!!
And I readily believe the beast to look even better in the flesh!!
Congratulations Sir!
Cheers
Romain