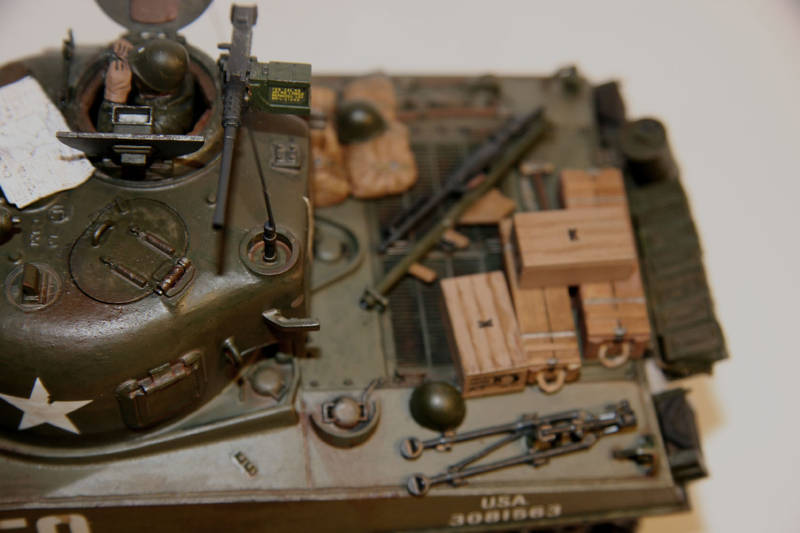
Hi all, new to the site and just finished my second tank last month.
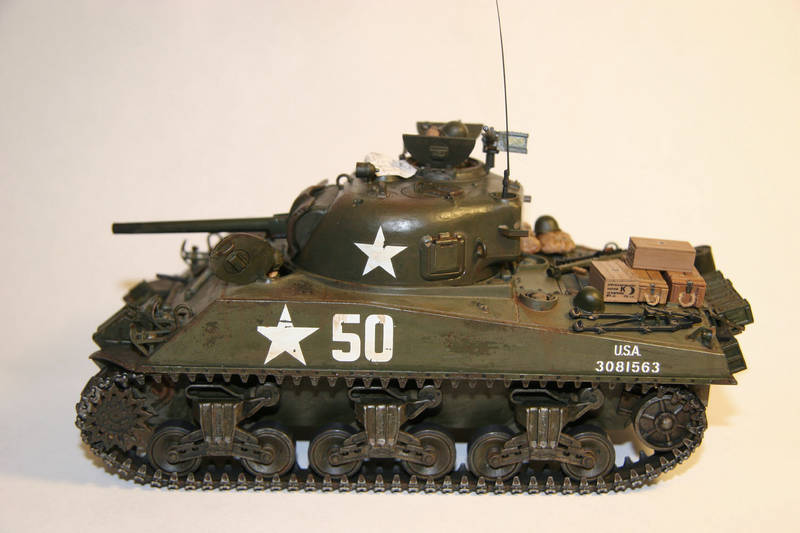
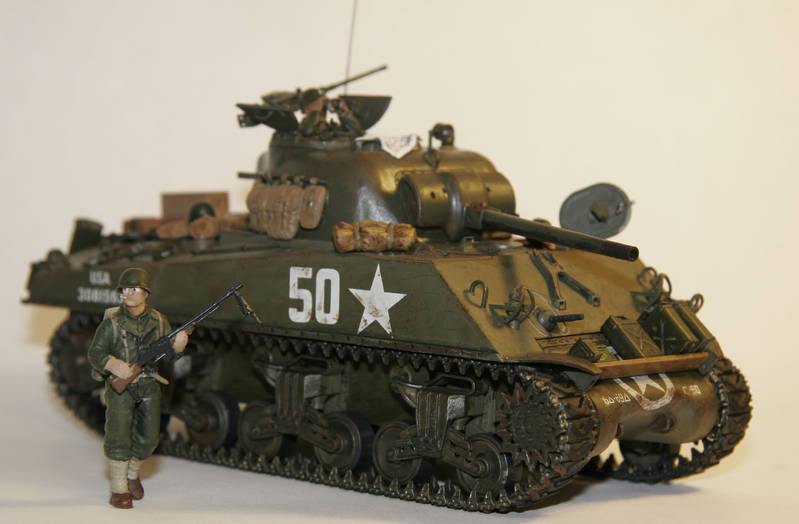
Tamiya M4A3 w/old school Tamiya infantry figures and Academy gear. I didn't use the kit figures becuase I wanted some practice first.
I added some scratch-built stuff based on a few posts I've seen on the site too. Decals are a mix -- creative liberty.
Thanks for any and all comments.
Constructive Feedback
For in-progress or completed build photos. Give and get contructive feedback!
Hosted by Darren Baker, Dave O'Meara
Feedback wanted Tamiya M4A3
SSgtWhite
Montana, United States
Joined: November 17, 2010
KitMaker: 26 posts
Armorama: 22 posts
Joined: November 17, 2010
KitMaker: 26 posts
Armorama: 22 posts
Posted: Wednesday, December 08, 2010 - 05:29 PM UTC
Posted: Wednesday, December 08, 2010 - 07:53 PM UTC
Not bad for your second try Dillon. My second one certainly did not look this way (didn't even paint at the time...) More practice and trying something new every time will get you there!
Some pointers:
- Try to lighten the base color. It seems very dark now and with a lightened base color you can take the dark wash into account.
- Give it a dull coat, it's too shiny at the moment.
- Find a way to attch the stowage on the engine deck, for example with sewing thread. Right now it would all fall off as soon as the tank moved.
With time a you will also learn the finer details of Shermaholicism, such as weld beads (not trenches), rivets on the lower end of the bogies, PE for the light guards etc, etc...
Keep on!
Cheers!
Stefan
GeraldOwens
Florida, United States
Joined: March 30, 2006
KitMaker: 3,736 posts
Armorama: 3,697 posts
Joined: March 30, 2006
KitMaker: 3,736 posts
Armorama: 3,697 posts
Posted: Wednesday, December 08, 2010 - 10:23 PM UTC
Quoted Text
Hi all, new to the site and just finished my second tank last month.
Tamiya M4A3 w/old school Tamiya infantry figures and Academy gear. I didn't use the kit figures becuase I wanted some practice first.
I added some scratch-built stuff based on a few posts I've seen on the site too. Decals are a mix -- creative liberty.
Thanks for any and all comments.
You're certainly off to a good start. You've put a lot of thought into it, and there's a lot to like, but I'd like to suggest some minor tweaks. The overall model has a shine from the washes, so apply a clear flat overspray like Testors Dullcote to kill the shine. The weathering appears to be all dark washes, but real dirt is usually lighter in color than US Olive Drab, so consider applying some light earth tone washes to the lower third of the vehicle. You can also achieve similar effect with light colored dry pigments or ground-up pastel artists chalks.
You've added a periscope to the turret roof, but you misunderstood how it works. The little rectangular projection in the center of the disk is a cover, hinged along its back edge, which flips up 45 degrees as the periscope is extended from below. You've stuck the periscope on top of the cover. There are photos available online which will show you how it works.
Figures can be an important feature in a model display, as they give it a sense of scale. Painting faces is a subject in and of itself, and there are figure building forums which go into great detail on it, but for our purposes, just remember that men in bright sunlight tend to squint, and often all that is visible is a dark slit. Those huge whites with dark irises look kind of like fried eggs (easy to repaint, and hey, we all started there). Also, remember, even if everything is supposedly Olive Drab, a piece of painted metal gear is never going to be the same shade as a piece of fabric. For that matter, no two batches of paint (or fabric) ever quite match, so get used to the idea of varying shades as a matter of course. If you visit historical re-enactor websites, or websites that cater to antique uniform collectors, you can look at photos of US uniforms and equipment as they were actually worn, and you'll see the amazing variety of tones and colors.
retiredyank
Arkansas, United States
Joined: June 29, 2009
KitMaker: 11,610 posts
Armorama: 7,843 posts
Joined: June 29, 2009
KitMaker: 11,610 posts
Armorama: 7,843 posts
Posted: Thursday, December 09, 2010 - 01:04 AM UTC
Give it a dull coat. To secure the stowage, you can dope up facial tissue with some thinned white school glue. Drape this over the stowage and criss-cross a length of thread over it. Other wise, a excellent model for your second attempt. Keep up the good work.
SSgtWhite
Montana, United States
Joined: November 17, 2010
KitMaker: 26 posts
Armorama: 22 posts
Joined: November 17, 2010
KitMaker: 26 posts
Armorama: 22 posts
Posted: Thursday, December 09, 2010 - 01:34 AM UTC
Awesome feedback -- thanks for all your help! I'll post some more photos as I add your suggestions.
~Dillon
~Dillon
SSgtWhite
Montana, United States
Joined: November 17, 2010
KitMaker: 26 posts
Armorama: 22 posts
Joined: November 17, 2010
KitMaker: 26 posts
Armorama: 22 posts
Posted: Thursday, December 09, 2010 - 01:53 PM UTC
-----------------------------------------------------------------------------------------------------------------------------------------
"You've added a periscope to the turret roof, but you misunderstood how it works. The little rectangular projection in the center of the disk is a cover, hinged along its back edge, which flips up 45 degrees as the periscope is extended from below. You've stuck the periscope on top of the cover. There are photos available online which will show you how it works.
Figures can be an important feature in a model display, as they give it a sense of scale. Painting faces is a subject in and of itself, and there are figure building forums which go into great detail on it, but for our purposes, just remember that men in bright sunlight tend to squint, and often all that is visible is a dark slit. Those huge whites with dark irises look kind of like fried eggs (easy to repaint, and hey, we all started there). Also, remember, even if everything is supposedly Olive Drab, a piece of painted metal gear is never going to be the same shade as a piece of fabric. For that matter, no two batches of paint (or fabric) ever quite match, so get used to the idea of varying shades as a matter of course. If you visit historical re-enactor websites, or websites that cater to antique uniform collectors, you can look at photos of US uniforms and equipment as they were actually worn, and you'll see the amazing variety of tones and colors."
~Gerald Owens
-----------------------------------------------------------------------------------------------------------------------------------------
The eyeballs do look way too big. I see.
Also, I followed your advice and found some re-enactment uniform sites and you're totally right. The shades are all over the board.
http://www.atthefront.com
You're dead on with the periscope too. I thought it would have the top come above the turret, but didn't take the time to really research it first. Lesson learned there.
SSgtWhite
Montana, United States
Joined: November 17, 2010
KitMaker: 26 posts
Armorama: 22 posts
Joined: November 17, 2010
KitMaker: 26 posts
Armorama: 22 posts
Posted: Thursday, December 09, 2010 - 02:19 PM UTC
Quoted Text
Not bad for your second try Dillon. My second one certainly did not look this way (didn't even paint at the time...) More practice and trying something new every time will get you there!
Some pointers:
- Try to lighten the base color. It seems very dark now and with a lightened base color you can take the dark wash into account.
- Give it a dull coat, it's too shiny at the moment.
- Find a way to attch the stowage on the engine deck, for example with sewing thread. Right now it would all fall off as soon as the tank moved.
With time a you will also learn the finer details of Shermaholicism, such as weld beads (not trenches), rivets on the lower end of the bogies, PE for the light guards etc, etc...
Keep on!
Cheers!
Stefan
Thanks!
Shermans were built in so many variations between British, Russian Lend-Lease and Isreali post-war it's hard to imagine building evvery Sherman type. This tank was a lot of fun and I'm looking forward to the next one.
This hobby always leaves room for improvement, which keeps it interesting.
Again, thanks for the feedback!