Truly impressive job, Dustin !
question about TUSK II upgrade : why choosed Legend and not Perfect Scale ?
more detailed ?
I will follow your progress and save the post for my future M1A2 :-D
happy new year !
Hosted by Darren Baker
Build Log: DML M1A2 w/ Legends Tusk II
Willydav

Joined: January 07, 2006
KitMaker: 18 posts
Armorama: 13 posts

Posted: Tuesday, December 28, 2010 - 01:20 AM UTC
charging_rhinos

Joined: June 16, 2010
KitMaker: 89 posts
Armorama: 76 posts

Posted: Tuesday, December 28, 2010 - 04:35 AM UTC
Quoted Text
Truly impressive job, Dustin !
question about TUSK II upgrade : why choosed Legend and not Perfect Scale ?
more detailed ?
I will follow your progress and save the post for my future M1A2 :-D
happy new year !
Thanks very much. Glad you like it.
I decided on the Legends kit for two main reasons. The first was the price. It can be purchased from www.LuckyModel.com for $60 with free shipping. Dirt cheap!! Other sites sell it for around 95 bucks. That was probably enough alone to get me on board with the Legends kit. The second item is that of detail. The PSM kit seems to have some very nice casting, and things like the coaxial M2 50 cal are much more to scale than the Legends offering. It also employs much less photo-etch parts, for better or worse. Overall, it seems more user-friendly to install and get decent results. If you hate photo-etch, you probably want to steer away from the Legends kit, as there is a LOT of it. But the PSM kit does fall short on a number of things that the Legends kit does very well. The first is that of the Commander's hand-held spot light in the 360 shield. It's not there. The ballistic glass in the shields is also held in place with some rather clumsy looking resin-cast brackets, where the Legends kit used pure photo-etch to do the job more elegantly. The resin base plates for the turret's ERA tiles are also far too thick. Legends uses photo-etch, and it looks far better and more accurate. PSM also does the same thing for the front skirt panels that go up to the fenders. Actual Tusk 2 tanks replace that with a steel plate version of the skirt that is much thinner. Legends also does this out of photoetch, and it looks great. Legends also depicts the straps on the backs of the XM32 tiles, which is a completely unnecessary but really cool touch. Oh, and one thing I'm absolutely crazy about with the Legends kit is the little bag of copper wire they give you. Coil it up and you can depict the cords from the TC's spot light and the optical electronics controls for the loader's machine gun. Even my wife said that looked really cool, and she doesn't often say stuff like that.
If you want a very good explanation of the PSM kit, look HERE.
It all came down to one major choice for me: accuracy vs ease of building. The PSM kit seems to be a bit easier to build, and the Legends kit is more detailed and accurate. In the end, I went with accuracy and detail because I'd hate to look at that model on my shelf and know that despite my building it the best I could, it was still missing some really neat details that could have made it even better. Neither kit is perfect, but man, the Legends kit is trying really hard.
charging_rhinos

Joined: June 16, 2010
KitMaker: 89 posts
Armorama: 76 posts

Posted: Tuesday, December 28, 2010 - 04:45 AM UTC
Oh, and one thing that might be useful to those that do this kit. When I went to coil the little copper wires that go to the TC's spot light and the loader's mg scope, I realized that I had NOTHING in my entire house that was the correct diameter for the job. Rather than make a special trip to the LHS for something, I found a piece right on the model itself that worked great.
I used the shorter antenna that sits on the right-rear corner of the turret. It was about the perfect diameter, and it was really easy. Just make a few wraps, scrunch them down with your fingernails, and repeat. Then gently twist/slide the whole thing off of the antenna, and stretch it out very slowly until it looks right. Just be careful not to coil the wire too aggressively, or you'll be needing a new antenna.
I used the shorter antenna that sits on the right-rear corner of the turret. It was about the perfect diameter, and it was really easy. Just make a few wraps, scrunch them down with your fingernails, and repeat. Then gently twist/slide the whole thing off of the antenna, and stretch it out very slowly until it looks right. Just be careful not to coil the wire too aggressively, or you'll be needing a new antenna.
Cuny12

Joined: April 04, 2010
KitMaker: 378 posts
Armorama: 348 posts

Posted: Wednesday, December 29, 2010 - 02:08 AM UTC
Hey there nice build
in reference to the bolts or rivets on the shield they are normaly on a separate block but saying that on my last legends kit there were only half of what was needed if you already havnt go through your parts and double check it took about two hours alone to put them on the turret on the hercules conversion,it is acheivable but very time consuming the result is realy cool, your Build seems to be coming along realy well cant wait to start my own.
Cheers cuny12.
charging_rhinos

Joined: June 16, 2010
KitMaker: 89 posts
Armorama: 76 posts

Posted: Thursday, December 30, 2010 - 06:52 AM UTC
Quoted Text
Hey there nice build
in reference to the bolts or rivets on the shield they are normaly on a separate block but saying that on my last legends kit there were only half of what was needed if you already havnt go through your parts and double check it took about two hours alone to put them on the turret on the hercules conversion,it is acheivable but very time consuming the result is realy cool, your Build seems to be coming along realy well cant wait to start my own.
Cheers cuny12.
I just checked the entire package. Unless you're supposed to build them from scraps of the resin, there's nothing in the kit. Maybe they forgot to package some parts or something? I'll see if my LHS has anything I can substitute, and maybe some extra super thin CA glue that won't show up as badly around them.
charging_rhinos

Joined: June 16, 2010
KitMaker: 89 posts
Armorama: 76 posts

Posted: Friday, December 31, 2010 - 06:11 PM UTC
So I broke out the airbrush today and started laying base coats of ModelMasters Sand to the turret and hull. So far, so good. I did notice through it that I need to fill and correct a few little ugly spots, as well as one paint drip on a turret armor tile. I'm a bit too tipsy from thinner fumes to take pics and post them at present, so that'll come tomorrow.
On another note, I think I've decided that I want to place this tank in a small vignette / diorama setting. I've never done one before, so it should be a nice learning experience. I'm playing with some 3D modeling software (Solidworks) and trying to come up with a mock-up of what I want. Right now, It's looking like a road and sidewalk scene, with metal roll-up doors that are shut on a shop. Inspiration is coming from the Iraq Street dio kit by Dioramas Plus. There'll also be a fair bit of Arabic graffiti on one section of wall, some conduit and wiring, and a lot of less-than-legal power lines coming from the nearby power pole. I'd estimate that by tomorrow I'll post theoretical pics of something that I can scratch-build without too much hassle. But this new development does leave me with a lot of new questions. Most pressing at the moment:
What do people recommend I do to texture a realistic looking street, if I'm starting from a bare slab of styrene? Is there some sort of standard material or technique to make it look like a beat-up piece of asphalt?
charging_rhinos

Joined: June 16, 2010
KitMaker: 89 posts
Armorama: 76 posts

Posted: Monday, January 03, 2011 - 08:25 AM UTC
Here are the photos with some paint. It's a dark, steel-ish gray primer, followed up with a preliminary thin layer of Model Masters Sand enamel thinned with a bit of lacquer thinner. The lacquer thinner makes for some interesting effects in the paint when sprayed from my brush at different psi settings... I got almost a bit of a natural weathered panel lines look without pre-shading at all. I did spray it a tiny bit too thick in a few spots though, and it crazed as it dried due to the hotter lacquer solvents.  Time to sand and get me some Rust-oleum textured spray. The overall look is pretty good, I think. It's not where I want it yet, but it is coming together. My camera doesn't do it justice, and it warps the images a bit without a good macro lens. I do have a LOT of touching up to do, and it's still missing a lot of the details. Oh, and after these photos, I added the little resin mounting brackets on the seams of each skirt ERA tile. They were a real pain at first, cleaning them with a hobby knife, one by one. After about 7 bricks I started removing the pour bridges with a set of small fingernail clippers, then cleaning them up with one or two scalpel swipes. That made them go very quickly, and I highly recommend it. Saved me a few hours. They really add a lot to the look of the skirt armor, that's for sure.
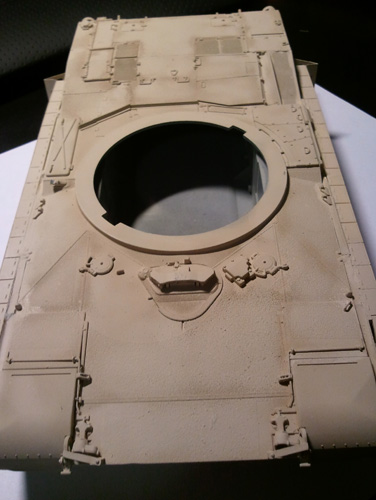
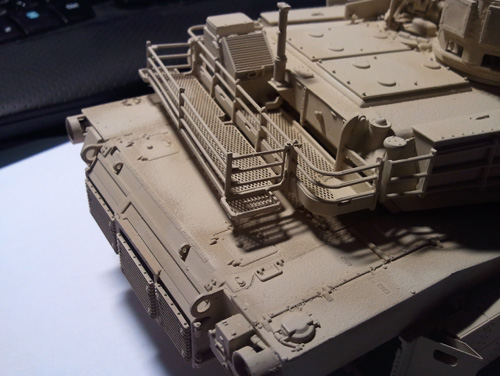
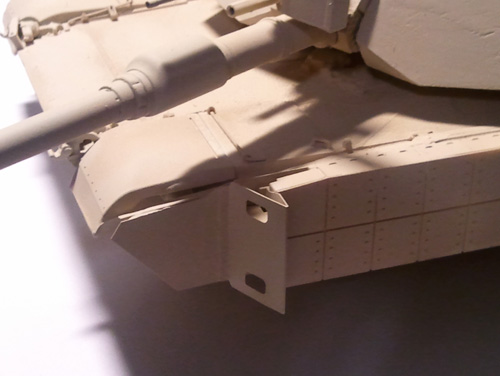
Any thoughts or suggestions on improvements at this point? I love criticism. It makes me better
 Time to sand and get me some Rust-oleum textured spray. The overall look is pretty good, I think. It's not where I want it yet, but it is coming together. My camera doesn't do it justice, and it warps the images a bit without a good macro lens. I do have a LOT of touching up to do, and it's still missing a lot of the details. Oh, and after these photos, I added the little resin mounting brackets on the seams of each skirt ERA tile. They were a real pain at first, cleaning them with a hobby knife, one by one. After about 7 bricks I started removing the pour bridges with a set of small fingernail clippers, then cleaning them up with one or two scalpel swipes. That made them go very quickly, and I highly recommend it. Saved me a few hours. They really add a lot to the look of the skirt armor, that's for sure.


Any thoughts or suggestions on improvements at this point? I love criticism. It makes me better
charging_rhinos

Joined: June 16, 2010
KitMaker: 89 posts
Armorama: 76 posts

Posted: Tuesday, January 04, 2011 - 02:11 AM UTC
The 'Spanish tiles' as my wife calls them are on! They went on with very little issue once I got a bit of a system going. The ERA blocks beneath the XM32 tiles have two columns of little bolt heads sticking up that make it crucial to get good glue coverage, or the XM32s will fall off quite easily. Yes, experience taught me this. I ended up dipping the mounting rails of each part in a little puddle of CA glue, which worked great (although it did waste a bit more glue than I care to admit). It simplified installation and ensured a good application without adding any more than needed. I just started with the top row, and lined the bottom of each tile up with the horizontal seam in the center of each 'Tusk 1' ERA block. One more thing for those that do this build: the front four tiles are positioned lower on the skirts than the others by about 2-3mm. Not sure why this is, but it's correct. Total time spent installing the tiles: ~25 minutes.
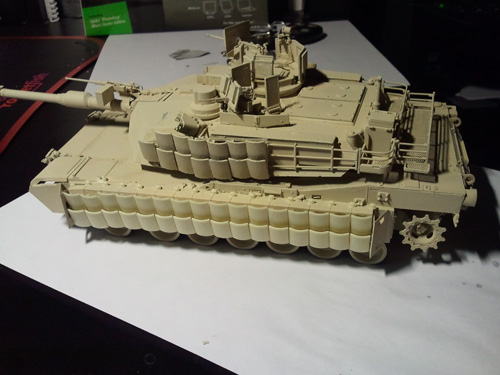
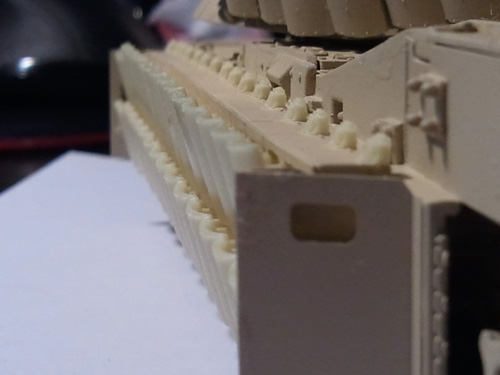
Time to work a bit more on those tracks...


Time to work a bit more on those tracks...
charging_rhinos

Joined: June 16, 2010
KitMaker: 89 posts
Armorama: 76 posts

Posted: Tuesday, January 04, 2011 - 05:16 PM UTC
Here's a non-colored, non-textured, non-detailed 3D model framework for what I'm thinking of making for my diorama. All scratch built. I'm going for a middle eastern urban street scene, where a tusk 2 might be found patrolling. I plan on having a rough, cracked plaster look to the building walls, with broken sections that show rough brick underneath it. Rusted and dirty garage door, arabic graffiti and possibly a small closed window with bars on the blank wall section to the right. There will also be plenty of stolen power lines coming from the telephone pole and some conduit.

Thoughts? Suggestions?
Thoughts? Suggestions?
charging_rhinos

Joined: June 16, 2010
KitMaker: 89 posts
Armorama: 76 posts

Posted: Friday, January 14, 2011 - 04:46 AM UTC
Sorry it's been so long since an update. The holidays were especially hectic this year with my younger sister getting married last weekend. Super glad she's happy and super relieved to get back to my normal schedule.
Started on the tracks yesterday. These DS soft tracks are pretty cool thus far. First time using them, and overall, they're pretty darn nice. Easier to do than the Magic Links for sure. And the fact that I can still use regular styrene glue is quite a nice perk as well.
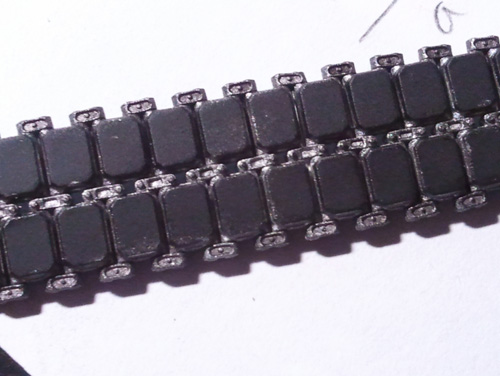
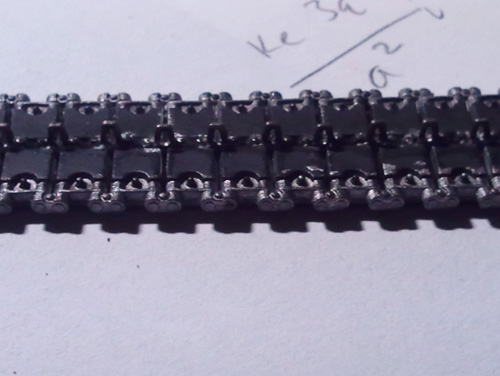
Here's the base paint scheme:
1. Testors ModelMasters enamel Flat Black base coat
2. Washed metal portions with Tamiya acrylic flat aluminum thinned with Tamiya acrylic thinner @ 3:1
3. Washed over flat aluminum with some Gunze Sangyo H038 Steel Red acrylic paint, thinned @ 4:1
4. Dry-brush guide horns with pure Gunze Steel Red
That Gunze steel red is a really nice color. It isn't as red as their swatches indicate, and it tones down the aluminum base but highlights still can show through. The tiniest bit of red in the paint provides just enough color to make it look like there might be the slightest bit of rust forming in the crevices (it doesn't stay on for long with a quick romp through the sand though).
Not done yet though. I still have to retouch the rubber pads with flat black, do a bit lighter steel dry-brushing on the guide horns, wash/dry-brush the pad edges with my secret mix of flat black, gray and deck tan, and hit the whole thing with a mountain of ever-so-slightly dampened sand-colored pastel chalk dust. Then they'll look like real OIF M1 tracks.
Started on the tracks yesterday. These DS soft tracks are pretty cool thus far. First time using them, and overall, they're pretty darn nice. Easier to do than the Magic Links for sure. And the fact that I can still use regular styrene glue is quite a nice perk as well.


Here's the base paint scheme:
1. Testors ModelMasters enamel Flat Black base coat
2. Washed metal portions with Tamiya acrylic flat aluminum thinned with Tamiya acrylic thinner @ 3:1
3. Washed over flat aluminum with some Gunze Sangyo H038 Steel Red acrylic paint, thinned @ 4:1
4. Dry-brush guide horns with pure Gunze Steel Red
That Gunze steel red is a really nice color. It isn't as red as their swatches indicate, and it tones down the aluminum base but highlights still can show through. The tiniest bit of red in the paint provides just enough color to make it look like there might be the slightest bit of rust forming in the crevices (it doesn't stay on for long with a quick romp through the sand though).
Not done yet though. I still have to retouch the rubber pads with flat black, do a bit lighter steel dry-brushing on the guide horns, wash/dry-brush the pad edges with my secret mix of flat black, gray and deck tan, and hit the whole thing with a mountain of ever-so-slightly dampened sand-colored pastel chalk dust. Then they'll look like real OIF M1 tracks.
charging_rhinos

Joined: June 16, 2010
KitMaker: 89 posts
Armorama: 76 posts

Posted: Monday, January 17, 2011 - 04:27 PM UTC
getting closer to the finish line...

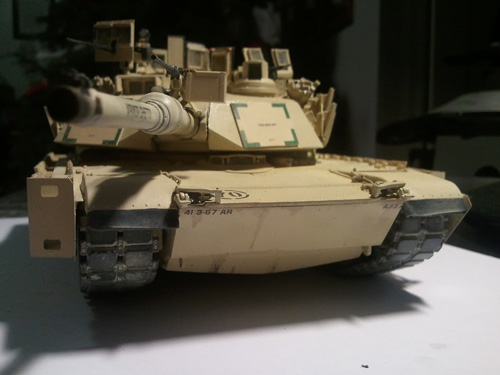
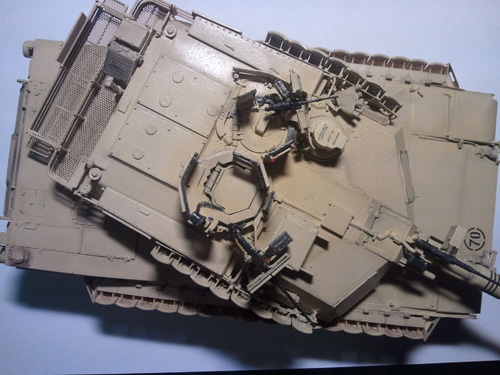
this one shows the true color of the tracks a little better. Curse my phone's camera and harsh desk light: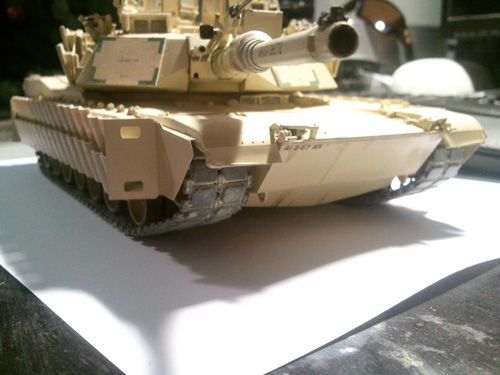
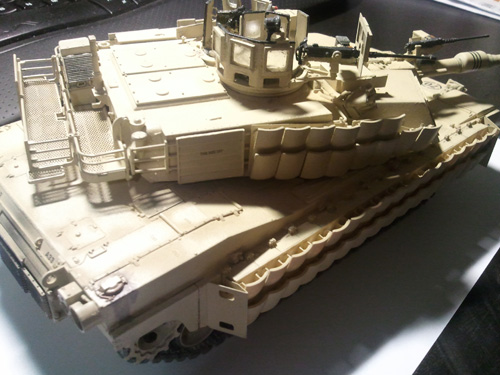
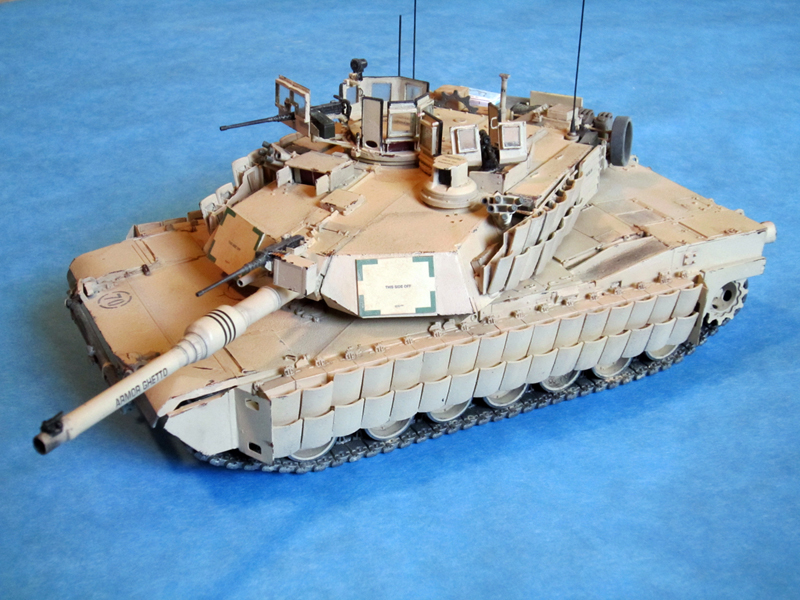
Oh, and the tank's name on the barrel is "Armor Ghetto." Seemed pretty fitting since it's got armor, on top of more armor, on top of even more armor...


this one shows the true color of the tracks a little better. Curse my phone's camera and harsh desk light:


Oh, and the tank's name on the barrel is "Armor Ghetto." Seemed pretty fitting since it's got armor, on top of more armor, on top of even more armor...
charging_rhinos

Joined: June 16, 2010
KitMaker: 89 posts
Armorama: 76 posts

Posted: Thursday, January 20, 2011 - 10:28 AM UTC
even closer now. The smoke poppers were horrid, so I redid them from the spares box. Much cleaner now. I also did a bit more weathering, paint chipping, etc. Still lacks a bit of stowage and a few final touches.
Any suggestions on how it can be improved? Any input, even 'It sucks' is welcomed.
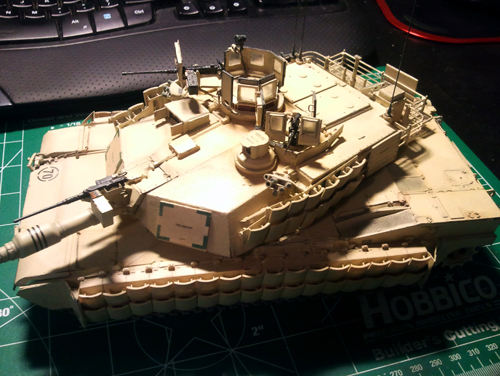
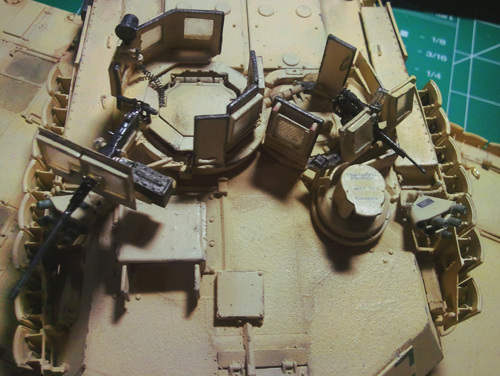
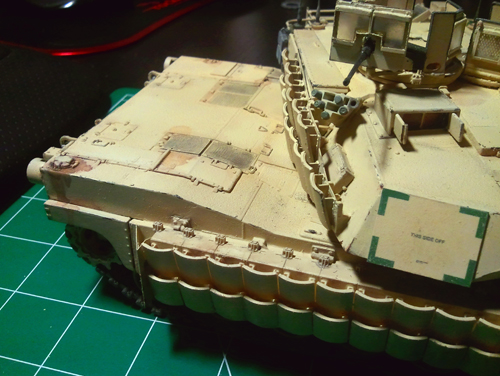
Any suggestions on how it can be improved? Any input, even 'It sucks' is welcomed.


hedorah59

Joined: May 04, 2009
KitMaker: 123 posts
Armorama: 121 posts

Posted: Thursday, January 20, 2011 - 10:57 AM UTC
That is a really nice looking build - Thanks for taking the time to post all the in progress pics, as a beginner those types of pics really help me with my modeling skills 

charging_rhinos

Joined: June 16, 2010
KitMaker: 89 posts
Armorama: 76 posts

Posted: Thursday, January 20, 2011 - 11:28 AM UTC
Thanks very much, Kirk. It's been a really educational build for me too thus far. Humbling might be a better word for it though. I also consider myself a beginner, and I'm learning mostly by trial-and-error. The TUSK II kit isn't an 'easy' build, even though the kit is very well-done. It's just got so many small, fiddly resin bits, microscopic photo-etch parts and the like. I think I'll be taking a bit of a break from photo-etch after this build to restore some sanity 
I'm definitely not as good as most on this site, but what little I have figured out, I'll gladly share. If there's ever anything specific you want to know (hints, colors, mix ratios, techniques, etc), I'll gladly give you more detailed info.

I'm definitely not as good as most on this site, but what little I have figured out, I'll gladly share. If there's ever anything specific you want to know (hints, colors, mix ratios, techniques, etc), I'll gladly give you more detailed info.

HeavyArty


Joined: May 16, 2002
KitMaker: 17,694 posts
Armorama: 13,742 posts

Posted: Thursday, January 20, 2011 - 11:38 AM UTC
It looks like it came out really nicely. Can you take some better pics against a solid background. I think a medium blue looks best. Also add some lighting. You can use a couple desk lamps or outside, natural lighting is even better. Better pics would really make this one look great.
charging_rhinos

Joined: June 16, 2010
KitMaker: 89 posts
Armorama: 76 posts

Posted: Thursday, January 20, 2011 - 11:51 AM UTC
Quoted Text
It looks like it came out really nicely. Can you take some better pics against a solid background. I think a medium blue looks best. Also add some lighting. You can use a couple desk lamps or outside, natural lighting is even better. Better pics would really make this one look great.
Thanks for the advice. I've been taking them at about 2-6am with my cheesy cell phone camera before heading off to work, so a real photo shoot hasn't happened just yet. I'll do a shoot with a nice SLR this weekend and post the results.
DieselRocket

Joined: October 21, 2004
KitMaker: 128 posts
Armorama: 119 posts

Posted: Friday, January 21, 2011 - 03:07 AM UTC
Thanks for sharing this build - fun to watch, fun to learn what someone else is doing with this resin kit. I bought the same TUSK add-on for my Abrams, and this has kind of got me itching to build mine too  Thanks again!

 Thanks again!
hliu24

Joined: November 19, 2010
KitMaker: 798 posts
Armorama: 797 posts

Posted: Sunday, January 23, 2011 - 04:31 AM UTC
HI, Dustin
Very Good Finishing.I wish I can paint like that.
Jay
Very Good Finishing.I wish I can paint like that.
Jay
charging_rhinos

Joined: June 16, 2010
KitMaker: 89 posts
Armorama: 76 posts

Posted: Sunday, January 23, 2011 - 02:44 PM UTC
thanks very much, Jay. I'm sure you can paint at least this well. I'm the king and court of trial and error with this stuff. If you saw how many times I've had to sand, respray and try again... simply shameful 

charging_rhinos

Joined: June 16, 2010
KitMaker: 89 posts
Armorama: 76 posts

Posted: Sunday, January 23, 2011 - 03:11 PM UTC
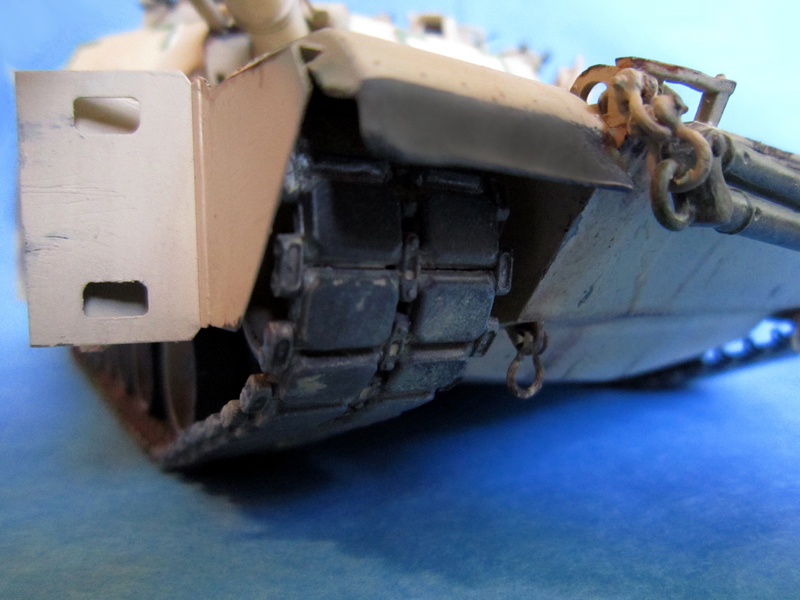
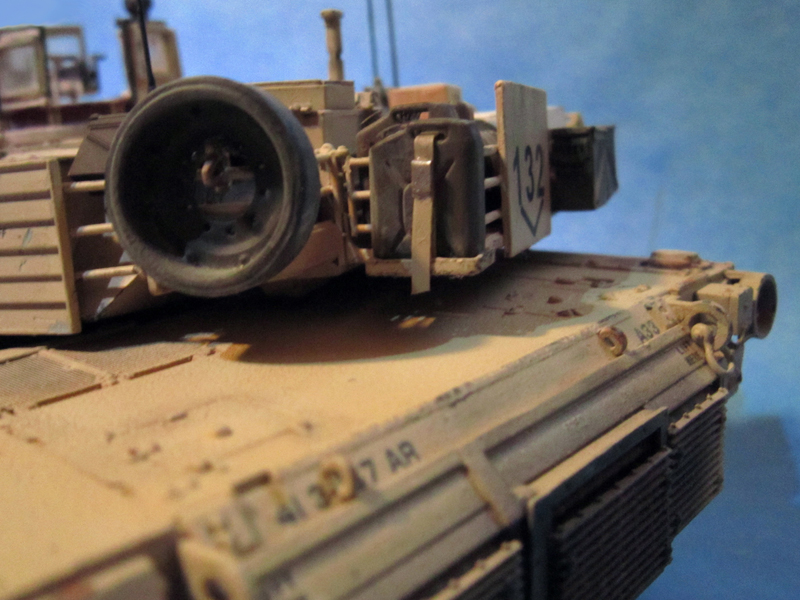
Ok folks. Here she is, ready (I think) to go. I'm going to hold off for a little on the vignette scene so I have time to actually do my homework and kill off a few other projects, including a 1/48 Reaper UAV, a 1/72 B-17 and a 1/35 rendition of 'Oddball's Sherman.' But it will come within the next few months.
Anyway, I hope this Abrams doesn't make all the experts out there dry-heave on their monitors. It's not perfect by any means, but I'm pretty proud of it for my first real experience with resin. If there are any last-minute fixes or suggestions I should make, by all means, please lemme have 'em. I haven't put any tools or paint away yet.
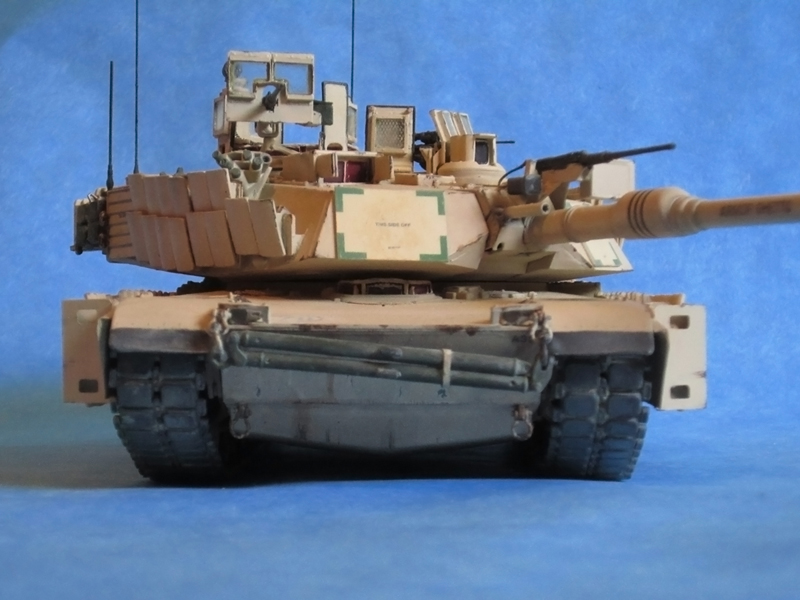
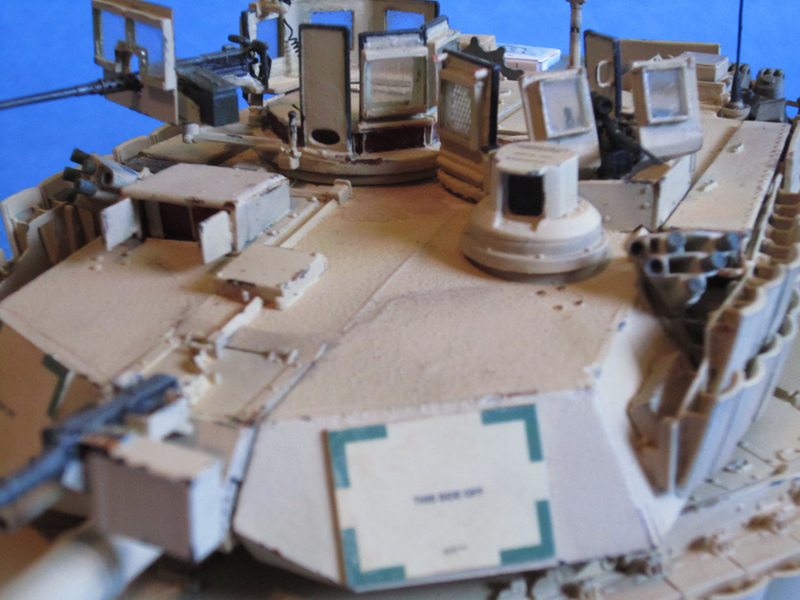
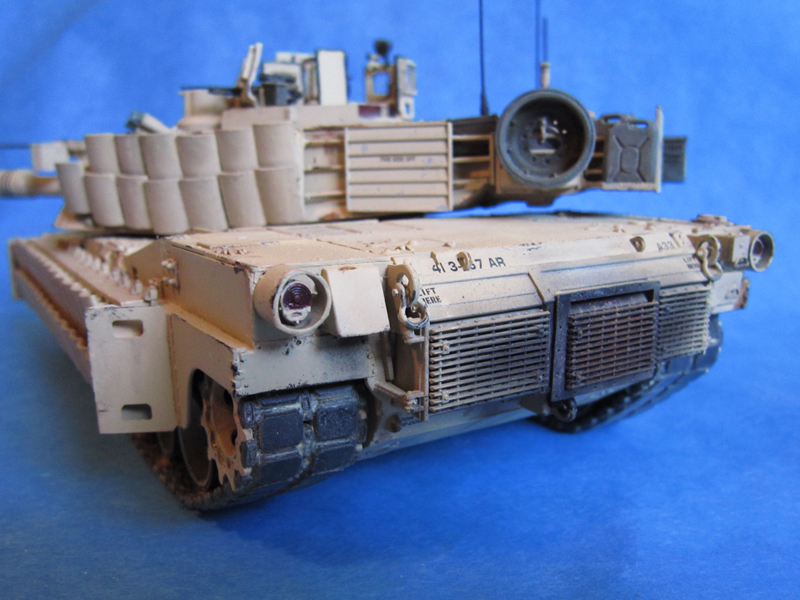
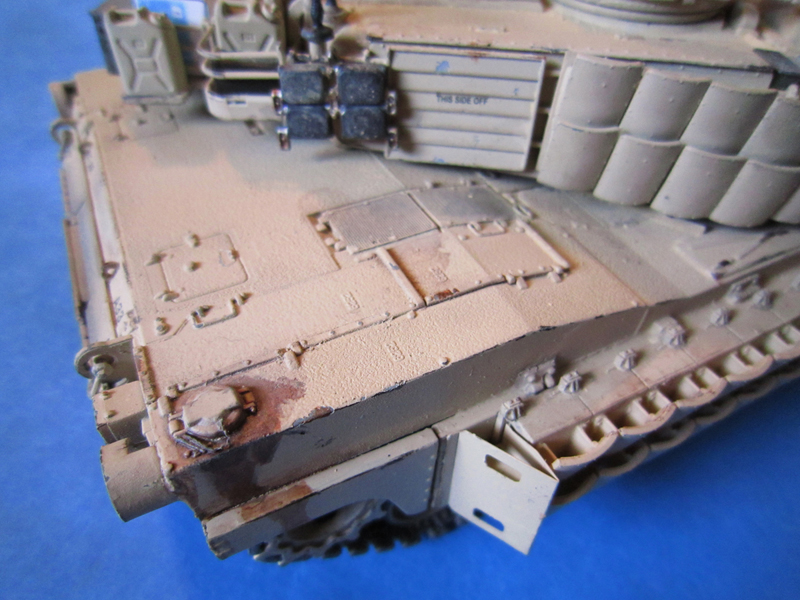
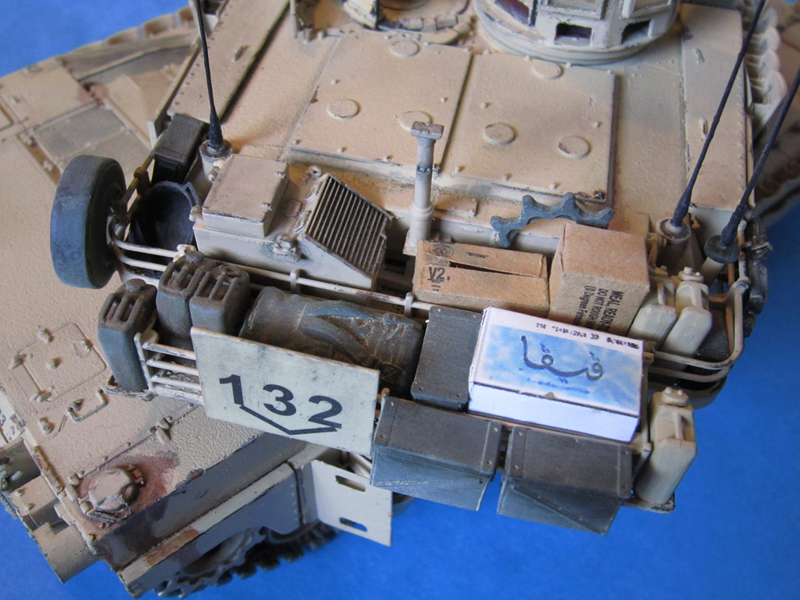
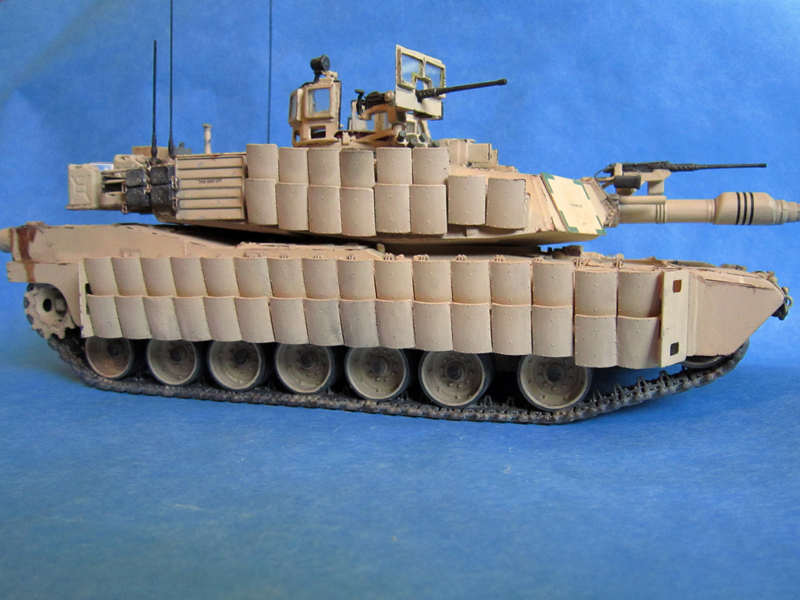
Again, thanks to all for the advice and kind words through this.
Anyway, I hope this Abrams doesn't make all the experts out there dry-heave on their monitors. It's not perfect by any means, but I'm pretty proud of it for my first real experience with resin. If there are any last-minute fixes or suggestions I should make, by all means, please lemme have 'em. I haven't put any tools or paint away yet.


Again, thanks to all for the advice and kind words through this.

HeavyArty


Joined: May 16, 2002
KitMaker: 17,694 posts
Armorama: 13,742 posts

Posted: Monday, January 24, 2011 - 12:19 AM UTC
It looks like it came out great to me. Good job on it.
charging_rhinos

Joined: June 16, 2010
KitMaker: 89 posts
Armorama: 76 posts

Posted: Tuesday, January 25, 2011 - 05:05 AM UTC
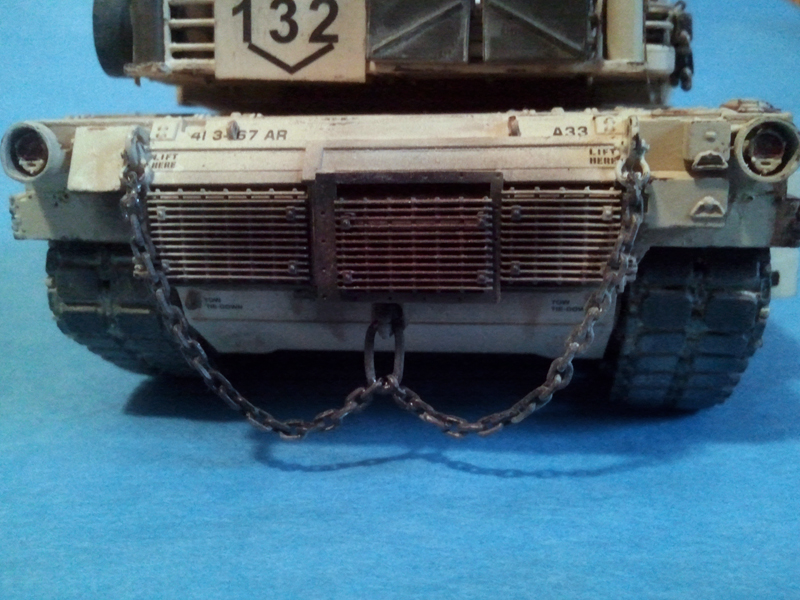
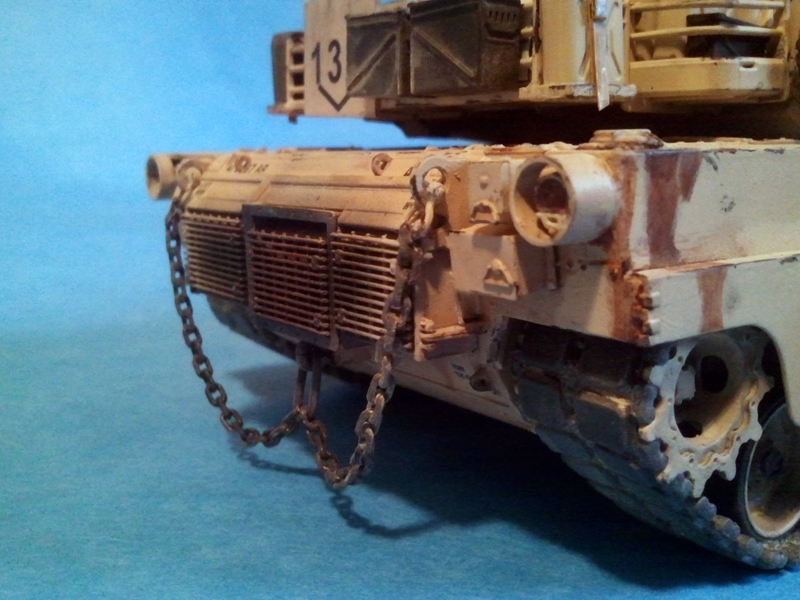
in typical fashion, I couldn't leave the model alone after I had declared it finished. Am I the only one who does this on a routine basis? Anyway, I was flipping through the Tankograd book, and saw that image of the TUSK with the home-brewed tow chain system. I had never seen that on a model before (although I'm sure somebody has done it). Since the XM19 tiles on the turret block the location of the regular tow cables, and those chains looked so unique and tough, I just had to do it. Here are the results. Please let me know if I blew it big time, and I'll revert back, but I kinda like it.


hliu24

Joined: November 19, 2010
KitMaker: 798 posts
Armorama: 797 posts

Posted: Tuesday, January 25, 2011 - 06:36 AM UTC
Haha, Dustin
That looks very COOL
Jay
That looks very COOL

Jay
210cav

Joined: February 05, 2002
KitMaker: 6,149 posts
Armorama: 4,573 posts

Posted: Tuesday, January 25, 2011 - 06:48 AM UTC
Dustin-- outstanding. An award winning model
Well done
DJ
Well done
DJ
charging_rhinos

Joined: June 16, 2010
KitMaker: 89 posts
Armorama: 76 posts

Posted: Tuesday, January 25, 2011 - 07:40 AM UTC
thanks very much guys. I really appreciate it.
 |


