CyberHobby firefly hybrid
Scotland, United Kingdom
Joined: October 04, 2010
KitMaker: 275 posts
Armorama: 260 posts
Posted: Sunday, February 13, 2011 - 05:49 AM UTC
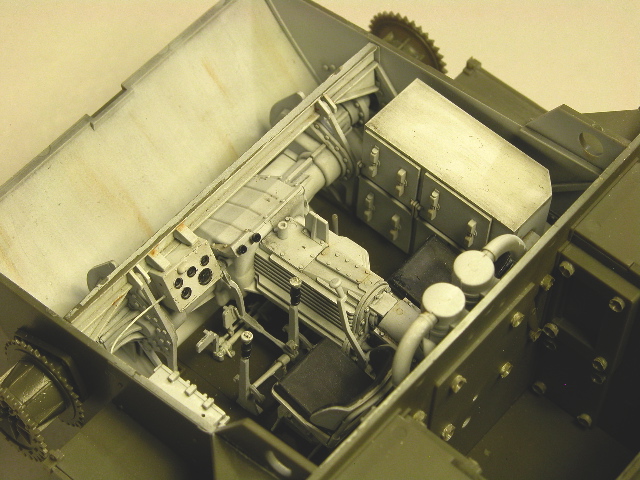
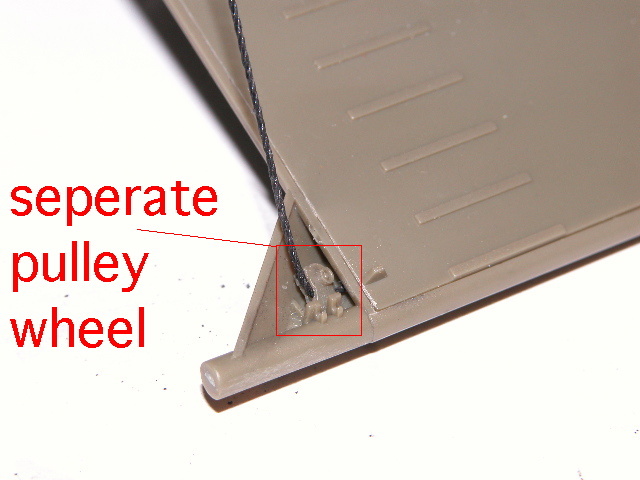
Has anyone any experience of this kit?
It was a toss up between this or ordering a tasca sherman. Beginning to wish I'd shelled out the extra for the Tasca. The rear idler wheels are rubbish if you use the ones the dodgy instructions tell you, if on the other hand you use the other set with the insert for the inside of the wheel they don't fit very well on the stub axle/adjuster which in turn don't fit precisely to the rear hull. Also the front diff housing has been a nightmare if I put it together as instructions I am left with with a 2mm! gap between the front bolt strip and the edge of the housing on top. I have filed and sanded and eventually tilted the housing up a shade and am still going to have to use filler while trying to make sure the drive sprockets are at the right height and not to far back on the horizontal. And now I have to tackle the front mudguards which are etch brass plate leading onto styrene which have to fit to the afore mentioned diff housing! This after having to cut off the corners of the lower hull tub and file to fit the upper. The fun just goes on.
United Kingdom
Joined: April 02, 2010
KitMaker: 234 posts
Armorama: 207 posts
Posted: Sunday, February 13, 2011 - 06:11 AM UTC
Yep its a bit of a rubbish kit, just wait untill you try to put the tracks together.
I eneded up binning mine and got the Tasca version which light years ahead in quallity.
Paul
Arkansas, United States
Joined: June 29, 2009
KitMaker: 11,610 posts
Armorama: 7,843 posts
Posted: Sunday, February 13, 2011 - 06:29 AM UTC
Guess I'll be avoiding this kit like the plague.
Ideals are peaceful. History is violent.
Florida, United States
Joined: March 30, 2006
KitMaker: 3,736 posts
Armorama: 3,697 posts
Posted: Sunday, February 13, 2011 - 11:18 AM UTC
Quoted Text


Has anyone any experience of this kit?
It was a toss up between this or ordering a tasca sherman. Beginning to wish I'd shelled out the extra for the Tasca. The rear idler wheels are rubbish if you use the ones the dodgy instructions tell you, if on the other hand you use the other set with the insert for the inside of the wheel they don't fit very well on the stub axle/adjuster which in turn don't fit precisely to the rear hull. Also the front diff housing has been a nightmare if I put it together as instructions I am left with with a 2mm! gap between the front bolt strip and the edge of the housing on top. I have filed and sanded and eventually tilted the housing up a shade and am still going to have to use filler while trying to make sure the drive sprockets are at the right height and not to far back on the horizontal. And now I have to tackle the front mudguards which are etch brass plate leading onto styrene which have to fit to the afore mentioned diff housing! This after having to cut off the corners of the lower hull tub and file to fit the upper. The fun just goes on.
I gather this is the Cyber Hobby Orange Box kit. It's better than the original Imperial Series release, as it has inherited some improved parts from more recent Sherman kits, and the upper hull texture has been cleaned up a bit. But it also has a turret that is almost certainly the wrong type for this variant. The low bustle turrets being delivered in the autumn of 1943 had the thickened casting at the right front, and no pistol port on the left rear. The Orange Box kit retains the turret from the Sherman VC Firefly, which is an early 1943 type without the thickened armor and with the pistol port. It probably wouldn't be seen on this tank unless it got another tank's turret for some reason.
The recent Smart Kit version of this subject has a completely new upper hull and the correct turret shell. It also has the excellent new DS soft plastic track rather than Dragon's rather dodgy link to link tracks of olden times.
Scotland, United Kingdom
Joined: October 04, 2010
KitMaker: 275 posts
Armorama: 260 posts
Posted: Sunday, February 13, 2011 - 01:48 PM UTC
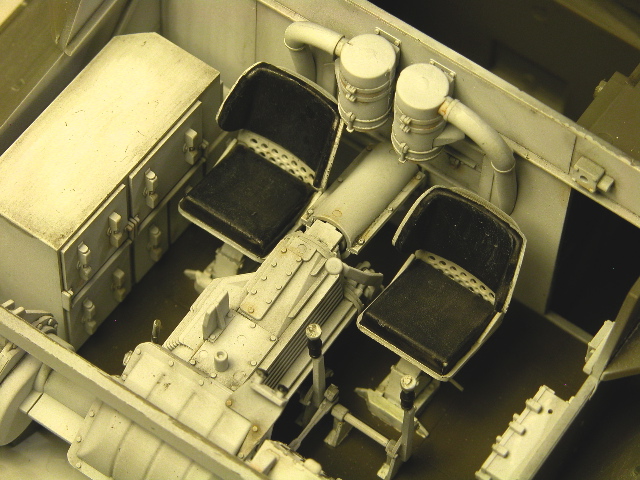
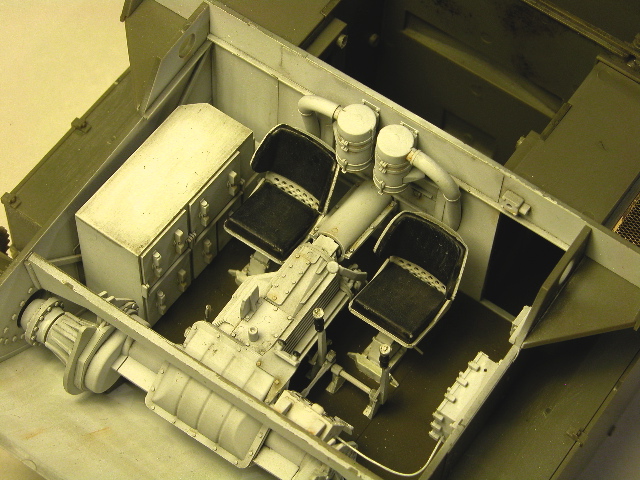

Hi all, been at this most of the day it's been pouring here so no excuses, think i,ve finally cracked it and am now pressing on. Gerald, yes it is the orange box version but it does have the new one piece DS tracks I have never done the individual link ones and don't intend to! Once past the afore mentioned problems it's not bad the casting texture on the upper hull is good and the quality of moulding is really pretty nice. But the instructions are grim and I have been constantly going back and forth between the bench and the internet for references. Many parts are included in the box but not noted in the instructions and I keep finding bits and have to find a relevant pic to locate them. I take your point about the turret I've read elsewhere that this is the case but I'm going with the one in the box, like you said, replaced in the field! I got given a proper airbrush for Xmas and this one will be it's first challenge apart from a wee 1/76 Chafee which turned out to be quite encouraging so if you don't see any further posts on this one you know why.
cheers Paul
South Australia, Australia
Joined: August 14, 2007
KitMaker: 5,926 posts
Armorama: 712 posts
Posted: Sunday, February 13, 2011 - 02:22 PM UTC
I recently completed the Orange Box M4A4 and the instructions for it were woeful as well. Model itself was fine though...

You may be right, I may be crazy.
Joined: June 12, 2006
KitMaker: 1,027 posts
Armorama: 683 posts
Posted: Sunday, February 13, 2011 - 02:57 PM UTC
Quoted Text


Has anyone any experience of this kit?
It was a toss up between this or ordering a tasca sherman. Beginning to wish I'd shelled out the extra for the Tasca. The rear idler wheels are rubbish if you use the ones the dodgy instructions tell you, if on the other hand you use the other set with the insert for the inside of the wheel they don't fit very well on the stub axle/adjuster which in turn don't fit precisely to the rear hull. Also the front diff housing has been a nightmare if I put it together as instructions I am left with with a 2mm! gap between the front bolt strip and the edge of the housing on top. I have filed and sanded and eventually tilted the housing up a shade and am still going to have to use filler while trying to make sure the drive sprockets are at the right height and not to far back on the horizontal. And now I have to tackle the front mudguards which are etch brass plate leading onto styrene which have to fit to the afore mentioned diff housing! This after having to cut off the corners of the lower hull tub and file to fit the upper. The fun just goes on.
Man I thought that it was just me! I've built plenty of Dragon Shermans and have never run into problems like I have on this kit!
Scotland, United Kingdom
Joined: October 04, 2010
KitMaker: 275 posts
Armorama: 260 posts
Posted: Monday, February 14, 2011 - 12:19 AM UTC
Just a couple of pointers for anyone unlucky enough to be stuck with this


The seprate bolt heads for the track skid mounting bolts are on sprue "V" parts "33" you'll need a good microscope and a steady hand
I nearly came unstuck (excuse pun) with fuel caps there are three patterns, two have bent lever arms for opposing sides and one has a straight arm this one has to be used for the location inside of the turret ring.
I was a bit disappointed at first to find no clear lenses for the headlights, but... if you look at the clear sprue there is in fact two complete headlights so I'll need to replace the ones I've already put on.
This is it so far but I feel sure there are more surprises in store.
"Super Value Pack"? definitely, you get a model and a puzzle in the one box!
Scotland, United Kingdom
Joined: October 04, 2010
KitMaker: 275 posts
Armorama: 260 posts
Posted: Friday, February 18, 2011 - 02:27 PM UTC


Think I am now ready for some paint after a bit of a struggle with the brass, I'd put on the rear brush guards which according to the instructions were plastic parts and then discovered that there were in fact brass ones on the fret also the wee plate that supports the loaders hatch when open broke when bending and became a right drama to get it fixed {much cursing and spitting of dummys). The joint between upper and lower turrets also required a lot of work to get smooth and will probably show up with paint, we'll see. I am not sure about the look of the radio box most pics show a smooth side plate but did find one with the join at rear seemingly denoting armour plate, anybody ?
Oh aye and another thing the driver and bow gunners fixed periscope covers are missing entirely had to make them myself.
This is the first time I've made a Dragon model all my other efforts have been Tamiya with one AFV club I think the trick is to look carefully at the sprues to see what you've got and just use the instructions as a rough guide .Guess I've just been spoiled up till now.
Joined: June 12, 2006
KitMaker: 1,027 posts
Armorama: 683 posts
Posted: Friday, February 18, 2011 - 02:40 PM UTC
I've built a lot of Dragon Shermans and I have to say that this kit is NOT representative of them as a whole. It is true that you need to fiddle with some things here and there, and a good reference to the subject (like a squadron walk around) is a big help considering some generally poor instructions, but usually they are fairly easy builds, with good detail and fit.
Florida, United States
Joined: March 30, 2006
KitMaker: 3,736 posts
Armorama: 3,697 posts
Posted: Friday, February 18, 2011 - 10:24 PM UTC
Before you paint the model, you might want to use some putty to blend the coaming that surrounds the pistol port into the surrounding casting, as it was not an applique--it was part of the turret shell casting.
Dublin, Ireland
Joined: November 27, 2004
KitMaker: 6,048 posts
Armorama: 4,619 posts
Posted: Saturday, February 19, 2011 - 03:17 AM UTC
Quoted Text
Yep its a bit of a rubbish kit, just wait untill you try to put the tracks together.
I eneded up binning mine and got the Tasca version which light years ahead in quallity.
Paul
There is no Tasca version of this kit.
Pat
work to become not to acquire
Scotland, United Kingdom
Joined: October 04, 2010
KitMaker: 275 posts
Armorama: 260 posts
Posted: Monday, February 21, 2011 - 05:37 AM UTC


Well got some paint on, first real attempt with new airbrush, tricky business this, in the words of Danny Dyer "proper brickin it mate" still I'm quite pleased with result. Thanks for comments particularly about pistol port, think I've sorted it.
While here I'd just like to express my appreciation to the staff and contributors of this site, for a relatively inexperienced modelmaker this place is a godsend.
cheers Paul
Alberta, Canada
Joined: July 23, 2010
KitMaker: 786 posts
Armorama: 753 posts
Posted: Monday, February 21, 2011 - 12:10 PM UTC
Paul, your machine is looking great especially with the preshading you seem to have done. you may want to thin your paint a bit more and make sure the nozzle is staying clean and unblocked as it looks to me as you are getting a splatter effect in your paint.
if you're using acrylics, expect to have to clean the needle/nozzle mid-way (even a couple of times) during your airbrushing as these types of paints dry quickly.
look forward to seeing this one completed. cheers, bd.
the opposite of courage in our society is not cowardice, it is conformity.
Scotland, United Kingdom
Joined: October 04, 2010
KitMaker: 275 posts
Armorama: 260 posts
Posted: Monday, February 21, 2011 - 12:44 PM UTC
Thanks for that BD, very helpful;
Because this was the first proper outing for the AB I was taking my time also the the first base coat of Tamiya Olive drab took ages, think my pressure was too low. I did notice by the time I'd got round to putting down the third shade that it was beginning to spatter quite badly and I had to thin and mix on the run. So a number of lessons learnt today.
Maine, United States
Joined: February 11, 2011
KitMaker: 1,654 posts
Armorama: 1,565 posts
Posted: Monday, February 21, 2011 - 12:53 PM UTC
Paul,I am building Dragons M4A1.I had the same problem.Since Cyber is Dragon and Dragon Is Cyber (i think,correct me if i'm wrong)I may have a fix for you.Is the idler wheel a V18?That's what mine called for,did not fit for BLEEEEEP!.The 2 piece was not any better.My kit had a billion extra parts.By looking around in all those parts I found a D15 wheel.It's the same size and width as the V18,but has a hole all the way through the center.I also found a D22 wheel cap to cover the hole .Fits the arm like a glove.I was concerned that the tracks would not fit ,but have one side put together and mounted and had no problems.And yes the tracks are a bear .Hope this works for you.Jeff
The building lamp is lit.Build'em if you got'em.
Scotland, United Kingdom
Joined: October 04, 2010
KitMaker: 275 posts
Armorama: 260 posts
Posted: Monday, February 21, 2011 - 01:28 PM UTC
Jt, just saw your post yes it's V18. I found the idler you mentioned, on mine it's D21 and it fits beautifully but it has no detail on the inside and the insert I have won't fit so my plan is to try and sleeve the existing wheel for a tighter fit. I have still to figure out how to put the tracks on once painted, thought it may be easier to leave the drive sprocket free to rotate and ease them over the rear idler, Sounds good in theory eh ?
Cheers Paul
Maine, United States
Joined: February 11, 2011
KitMaker: 1,654 posts
Armorama: 1,565 posts
Posted: Monday, February 21, 2011 - 01:53 PM UTC
Quoted Text
Jt, just saw your post yes it's V18. I found the idler you mentioned, on mine it's D21 and it fits beautifully but it has no detail on the inside and the insert I have won't fit so my plan is to try and sleeve the existing wheel for a tighter fit. I have still to figure out how to put the tracks on once painted, thought it may be easier to leave the drive sprocket free to rotate and ease them over the rear idler, Sounds good in theory eh ?
Cheers Paul
Take a V32,the inner part of the 2 piece wheel ,drill out the center to fit over the stud on the D21,sand the outside edge of V32 and it should slide right in.Are your drive sprockets glued on?If not I think I can help you out with the tracks,can't figure out how to post pics,but will try to help you out in a later post.JT
The building lamp is lit.Build'em if you got'em.
Scotland, United Kingdom
Joined: October 04, 2010
KitMaker: 275 posts
Armorama: 260 posts
Posted: Sunday, February 27, 2011 - 10:30 AM UTC


Tracks on at last after another battle. I painted and weathered them and was really looking forward to getting them on, to find that they looked ridiculous like a toy out a lucky bag when in place and ended up cutting two links off each run to get some tension. This tank is turning me into a gibbering wreck.
Arkansas, United States
Joined: June 29, 2009
KitMaker: 11,610 posts
Armorama: 7,843 posts
Posted: Sunday, February 27, 2011 - 10:46 AM UTC
Ideals are peaceful. History is violent.
Scotland, United Kingdom
Joined: October 04, 2010
KitMaker: 275 posts
Armorama: 260 posts
Posted: Thursday, March 03, 2011 - 01:03 PM UTC
Texas, United States
Joined: June 29, 2010
KitMaker: 5,854 posts
Armorama: 4,817 posts
Posted: Thursday, March 03, 2011 - 04:13 PM UTC
As far as I'm concerned this build turned out great. Look at the forest and forget the trees, I'd be proud to display this on my shelf

Scotland, United Kingdom
Joined: October 04, 2010
KitMaker: 275 posts
Armorama: 260 posts
Posted: Friday, March 04, 2011 - 11:08 AM UTC
Thanks for your comment that's very encouraging. I think I have overdone the filtering a little specially the lighter tones on the front. This was done under natural light in the kitchen rather than at my bench where I think I need to improve the lighting also the photography thing needs some research. Still, I've stretched the envelope a bit more with this one and despite the earlier hassles I would do another Dragon/CyberHobby.
Cheers Paul
Removed by original poster on 03/05/11 - 03:12:12 (GMT).
Florida, United States
Joined: March 30, 2006
KitMaker: 3,736 posts
Armorama: 3,697 posts
Posted: Friday, March 04, 2011 - 03:10 PM UTC
Quoted Text
Think the battle is nearly won.....
One question re decals; I sprayed Klear on before application but the big Allied star on rear has silvered a bit although I was quite careful over trying to set it down firmly by rolling a cotton bud over it, should I have used some other solution than just tap water ? The smaller unit ones are fine.
You need a setting solvent to soften the decal film and get it to conform. Micro Sol and Micro Set are the strong and weak setting solutions sold by Micro. Solvaset is another popular brand. There are also setting agents available Testors and the Japanese paint companies, as well.
All is not lost--they can be applied over decals that are already in place. If a large area of air is trapped under the decal, the decal film should be pricked with a needle, so the solvent can get in and the air can get out. Once the decal solvent is in place, do not touch the decal until it is dry. In some cases, the decal will wrinkle as it absorbs the solvent, but it will flatten out again on its own as it dries, so don't disturb it. If necessary, the process can be repeated until the decal conforms fully. Once you have the silvering taken care of, and the decal is dry, you can overspray with a clear gloss (if you plan to do further weathering) or a clear flat.


