

They look excellent, inspires me to get off my bum and get some more figures painted
Figures
Military figures of all shapes and sizes.
Military figures of all shapes and sizes.
Hosted by Darren Baker, Mario Matijasic
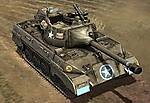
Men of the 761st Tank Btn.

thomokiwi

Joined: January 11, 2006
KitMaker: 438 posts
Armorama: 359 posts

Posted: Friday, April 29, 2011 - 09:58 PM UTC


VLADPANZER

Joined: December 20, 2010
KitMaker: 568 posts
Armorama: 549 posts
Posted: Friday, April 29, 2011 - 10:45 PM UTC
Hi Don,
Looking at your work is truly inspiring, it's just so well painted!
Looking forward to see more!
Regards,


Looking at your work is truly inspiring, it's just so well painted!
Looking forward to see more!
Regards,

ProfessorP

Joined: February 20, 2007
KitMaker: 339 posts
Armorama: 325 posts

Posted: Saturday, April 30, 2011 - 04:46 AM UTC
Hi Guys, thanks again for the nice words.
Frank, thanks for the recommendation. I have already planned for a some diversity between the two. If you look at the first photo of the two models together, you will see that the base coats are different. I'm actually planning to go for a little more of a "mocha" color on the second model. The one I've just completed is actually a little darker than it would appear since the photos are taken under bright lights and there's that gloss issue I'm dealing with. Viewed at scale distance under normal lighting conditions, the tone appears correct for what I'm going for.
It's a bit ham-handed to post the image below, but it best illustrates the subtle difference I'm going for.

The gamut of skin tones represented in the African American community is vast, so there is no right or wrong here. But in order for the details of the faces to register at viewing distance, I didn't want to go too dark with the actual paint colors.
Frank, thanks for the recommendation. I have already planned for a some diversity between the two. If you look at the first photo of the two models together, you will see that the base coats are different. I'm actually planning to go for a little more of a "mocha" color on the second model. The one I've just completed is actually a little darker than it would appear since the photos are taken under bright lights and there's that gloss issue I'm dealing with. Viewed at scale distance under normal lighting conditions, the tone appears correct for what I'm going for.
It's a bit ham-handed to post the image below, but it best illustrates the subtle difference I'm going for.
The gamut of skin tones represented in the African American community is vast, so there is no right or wrong here. But in order for the details of the faces to register at viewing distance, I didn't want to go too dark with the actual paint colors.

AgentG
Joined: December 21, 2008
KitMaker: 1,109 posts
Armorama: 1,095 posts

Posted: Saturday, April 30, 2011 - 04:49 PM UTC
I'm really liking that. I wondered how you'd pull it off without losing detail due to the faces being too dark.
I myself paint figures in such a way that even a Nordic type, think SS,......looks ahem, well, like he has a very bad skin condition.
The tip about using the ink as a glaze has me thinking I really need to try that. I truly need all the help I can get.
Where'd you get them there inks?
G
P.S. sunny, 75, but very windy here
ProfessorP
Joined: February 20, 2007
KitMaker: 339 posts
Armorama: 325 posts
Posted: Saturday, April 30, 2011 - 06:25 PM UTC
Wayne, picked up the Dr Martin's at Dick Blick art supplies but any good art store should have them. Technically they are not inks but concentrated water colors. However, they work much like the other ink brands I've used such as Koh-I-Noor and Higgins but the color selection on the Dr Martins is much broader. Citadel also makes acrylic inks that they call "washes" but these dry to a water-fast finish so they are not as forgiving.

errains

#045
Joined: September 23, 2005
KitMaker: 362 posts
Armorama: 350 posts
Posted: Saturday, April 30, 2011 - 11:18 PM UTC
Awesome, Awesome Work Don!!
Please keep the posts coming as you continue to paint these figures. Ill be starting on one for my current build here soon and since I never really have painted up one Im a bit apprehensive as to the level of skill. Hoping that by following your progress Ill pick some excellent tips.
Keep up the outstanding work!!

Bodeen
#026
Joined: June 08, 2002
KitMaker: 1,744 posts
Armorama: 1,359 posts
Posted: Saturday, April 30, 2011 - 11:50 PM UTC
 Awesome paint job on the faces. I have some Heller Senegalese troops that I've been afraid to paint but this thread is a huge help. Thanks much!
Jeff

ProfessorP
Joined: February 20, 2007
KitMaker: 339 posts
Armorama: 325 posts
Posted: Wednesday, May 04, 2011 - 07:18 PM UTC
OK. Figure 2's face complete. I used the same method as the previous figure with a slightly different color palette. Started with a mix of Flat Brown, Cork Brown and Orange Brown as the base tone. Continued to add Cork Brown and Orange Brown for highlights one and two. For shadows one and two I added more Flat Brown to the base coat. I used straight Reaper Dark Shadow only sparingly in the darkest areas. A couple of very thin filters/glazes were added using a mix of Burnt Sienna and Burnt Umber Com-Art Airbrush Colors from Iwata. Since this product is not actually an ink, but an opaque airbrush paint, it covered a little better even when thinned so I did not need as many layers as I would have with the Dr. Martins. I chose this medium because the colors were more akin to traditional artist oils colors and I figured they would be useful over a wider variety of colors.
Finally, I added a thin mustache to give him some extra character. Based on a number of reference photos I have seen, these were apparently fairly common among African American troops.

I'm quite pleased with how this face has turned out but I think his right eye could use a minor bit of touch-up on the lower lid to eliminate the dark outline and better incorporate it into the cheekbone.

Here are the two figures side-by-side with helmets and collars basecoated to frame up the faces. The contrast between the two skin tones is noticeable but not stark.

Now I'm ready to move on to the uniforms.
Finally, I added a thin mustache to give him some extra character. Based on a number of reference photos I have seen, these were apparently fairly common among African American troops.
I'm quite pleased with how this face has turned out but I think his right eye could use a minor bit of touch-up on the lower lid to eliminate the dark outline and better incorporate it into the cheekbone.
Here are the two figures side-by-side with helmets and collars basecoated to frame up the faces. The contrast between the two skin tones is noticeable but not stark.
Now I'm ready to move on to the uniforms.
youpey
Joined: March 11, 2008
KitMaker: 528 posts
Armorama: 468 posts
Posted: Thursday, May 05, 2011 - 12:29 AM UTC
i think that man on the right is stunnning. they are both very good, but the one on the right is awesome.
great job
great job

badger66
Joined: April 09, 2005
KitMaker: 251 posts
Armorama: 232 posts

Posted: Thursday, May 05, 2011 - 02:59 AM UTC
Great work
VLADPANZER
Joined: December 20, 2010
KitMaker: 568 posts
Armorama: 549 posts
Posted: Monday, May 09, 2011 - 02:43 AM UTC
Beautiful work ...

Plasticbattle
#003

Joined: May 14, 2002
KitMaker: 9,763 posts
Armorama: 7,444 posts

Posted: Monday, May 09, 2011 - 04:15 AM UTC
Quoted Text
The contrast between the two skin tones is noticeable but not stark.
Very nice Don. The differences can be seen in the photographs as well.


andyevans

Joined: October 04, 2008
KitMaker: 369 posts
Armorama: 249 posts

Posted: Monday, May 09, 2011 - 05:04 AM UTC
Lovely work on those faces Don, thanks for sharing the colour mixes too.
Andy
Andy

AgentG
Joined: December 21, 2008
KitMaker: 1,109 posts
Armorama: 1,095 posts
Posted: Tuesday, May 10, 2011 - 11:58 AM UTC
Yet again, my lovely wife's only comment was "OH MY GOD!"
She said they look as if they could begin speaking any moment.
I agree.
Brilliant sir, brilliant!
G
She said they look as if they could begin speaking any moment.
I agree.
Brilliant sir, brilliant!
G
ProfessorP
Joined: February 20, 2007
KitMaker: 339 posts
Armorama: 325 posts
Posted: Tuesday, May 10, 2011 - 01:51 PM UTC
ProfessorP
Joined: February 20, 2007
KitMaker: 339 posts
Armorama: 325 posts
Posted: Thursday, May 12, 2011 - 03:36 PM UTC
Here's a couple of quick shots of the jacket on Figure 1 which is 98% done...still need to add the armor division patch (which just arrived today from Archer! ) and I will probably add an ink glaze/filter after I finish the pants to help differentiate the two and at the same time unify the colors used to light and shade the jacket.


It's not shown in these pics but the gloves are now completed and pants are about 50% done. Tonight I'll finish those and try to get started on the boots and helmet.
I feel like I'm rapidly running out of time on this project as the show is on the 21st and I still have the other figure and the base to complete. Been a lot of late nights this week and it will be a busy weekend and more late nights next week but I think I can do it!
Thanks as always for all the nice comments. It is very encouraging and humbling to see so many folks enjoying my work as much as I am! More to come in the next couple days.
) and I will probably add an ink glaze/filter after I finish the pants to help differentiate the two and at the same time unify the colors used to light and shade the jacket. It's not shown in these pics but the gloves are now completed and pants are about 50% done. Tonight I'll finish those and try to get started on the boots and helmet.
I feel like I'm rapidly running out of time on this project as the show is on the 21st and I still have the other figure and the base to complete. Been a lot of late nights this week and it will be a busy weekend and more late nights next week but I think I can do it!
Thanks as always for all the nice comments. It is very encouraging and humbling to see so many folks enjoying my work as much as I am! More to come in the next couple days.
thewrongguy

Joined: October 17, 2002
KitMaker: 448 posts
Armorama: 306 posts
Posted: Friday, May 13, 2011 - 02:50 AM UTC
Add one more to the growing group of people humbly enjoying your work. Between the figures, Sherman build and spray booth DIY everything you've posted on the site as of late has been amazing. I hope when you're finished at least some of this is featured on the main page.
Cheers
Jeff
Cheers
Jeff

Big-John
Joined: August 12, 2010
KitMaker: 731 posts
Armorama: 711 posts

Posted: Friday, May 13, 2011 - 02:29 PM UTC
Don,
Those figures are outstanding!! Truly some amazing talent.
I know your crunched for time, but could you give us a run down on the colors for the uniforms you used after the show?
Those figures are outstanding!! Truly some amazing talent.
I know your crunched for time, but could you give us a run down on the colors for the uniforms you used after the show?
ProfessorP
Joined: February 20, 2007
KitMaker: 339 posts
Armorama: 325 posts
Posted: Saturday, May 14, 2011 - 11:08 AM UTC
Figure 1 now about 95% complete. Still needs a little work on the helmet, division insignia added to the shoulder and a few minor touch ups...


Jacket
Colors used are as follows:
Base color = #912 Tan Yellow + #983 Flat Earth
1st Highlights = Base color + Tan Yellow
2nd Highlights = Tan Yellow + #819 Iraqi Sand
1st Shadow = Base color + Flat Earth
2nd Shadow = 1st Shadow + Flat Earth.
Collar, waistband and cuffs = Flat Earth; add #918 Ivory for highlights.
After my last post, I realized the contrast between the dark and light on the jacket was a little harsh so I pushed it down a bit by using several extremely thin glazes of the 1st highlight color washed into the darkest areas (except the collar cuffs and waist). Once I was satisfied with the contrast level, I used several very thin glazes of ComArt Raw Umber to add some richness to the color and smooth everything out. I painted a mixture of #998 Bronze and Citadel Boltgun Metal over a line of the 2nd shadow color for the zipper.
Bib Pants:
Although the jacket and pants are made of the same materials and therefore should be the same color, I wanted the pants to look a little different to add interest and represent different dye lots, different wear rate, fading, etc. I started with the same base color as the jacket but added a bit of Game Color Cold Grey to the mix. Highlight colors were also the same colors as the jacket except for a touch of Cold Grey added in and I also added a bit of 918 Ivory to the final highlight. Finally, I gave the pants several very thin glazes of #914 Green Ochre mixed with a touch of black ink. I used the same color mix for the zippers as on the jacket.
It 's a bit difficult to see in the photos but the pants now have a slight greenish-grey tinge to them, especially in the shadow areas, while the jacket is a richer tan with more brown tones in the shadows. After looking at the latest photos, I'm contemplating another round of very light highlights, in order to add a little more pop to the figure and have it photograph better. While I ponder that, I'll move on to Figure 2.
Thanks for tuning in...
BigSmitty
Joined: October 01, 2008
KitMaker: 597 posts
Armorama: 439 posts

Posted: Saturday, May 14, 2011 - 11:43 AM UTC
To those not fortunate enough to see these figures in person, the photos will have to suffice. I saw these two gents last night at our monthly meeting, and they are phenomenal.
My hat is off to Don for the step by step on the figures (and the spray booth too). Having him regale the story over some Applebee's after the meeting last night was probably the hardest I've laughed in a long time...pesky main circuit breakers...
My hat is off to Don for the step by step on the figures (and the spray booth too). Having him regale the story over some Applebee's after the meeting last night was probably the hardest I've laughed in a long time...pesky main circuit breakers...
ProfessorP
Joined: February 20, 2007
KitMaker: 339 posts
Armorama: 325 posts
Posted: Saturday, May 14, 2011 - 03:41 PM UTC
Thanks Matt. I am looking forward to someday seeing your stash of models that you have organized by model designation, years of operation, date purchased, serial number, UPC code and box art ink saturation levels!
Yeah, NOW my wiring snafu story is pretty funny. It wasn't so funny at the time when I blew the circuit and was running around in a panic thinking I had blacked out the the whole neighborhood though! Lesson learned...don't mess with electrical wiring unless you KNOW what you are doing!

Looking forward to next Saturday...trying hard to get these guys done. It will be close but I think I will make it. Depending on how it goes, I may even make it over Friday night for pre-registration.
See ya there!
Yeah, NOW my wiring snafu story is pretty funny. It wasn't so funny at the time when I blew the circuit and was running around in a panic thinking I had blacked out the the whole neighborhood though! Lesson learned...don't mess with electrical wiring unless you KNOW what you are doing!
Looking forward to next Saturday...trying hard to get these guys done. It will be close but I think I will make it. Depending on how it goes, I may even make it over Friday night for pre-registration.
See ya there!
PolishBrigade12
Joined: January 31, 2009
KitMaker: 380 posts
Armorama: 366 posts

Posted: Sunday, May 15, 2011 - 03:26 AM UTC
Hi Don,
Sorry for not seeing this thread earlier, you are doing an excellent job on these figures, love em. Looking forward to seeing the finale and armor if you plan on adding any. Below is a link I found useful if you haven't already seen it, great ref for multiple shades and tones.
Cheers, Ski.
http://www.coolminiornot.com/articles/1310
ProfessorP
Joined: February 20, 2007
KitMaker: 339 posts
Armorama: 325 posts
Posted: Sunday, May 15, 2011 - 09:01 AM UTC
Yes, that article was a great starting point. In fact, it's where I got the Vallejo color numbers for painting African American skin. The color range was a little broad however so I only ended up using some of the recommended colors. Still, a very thorough and informative article. No one should be afraid to try doing darker skin tones with that as a reference!
I also studied some photos of work done by a Spanish painter named Pepa Saavedra. She's done some amazing work on a couple of African busts and you can see a much broader range of colors used there:
http://2.bp.blogspot.com/_YoL0AqJwowE/S_lLZRe1VEI/AAAAAAAAAkY/jg7oJ9MhiH8/s1600/blak+bashibouzuk+11.jpg
However, I felt that on a 1/35 scale figure it would be too difficult to blend all those colors on such a small surface so i stuck to a smaller pallet.
badger66
Joined: April 09, 2005
KitMaker: 251 posts
Armorama: 232 posts
Posted: Sunday, May 15, 2011 - 01:38 PM UTC
Looks good Don
 |

WEB HOSTING BY


Copyright ©2021 Armorama and Kitmaker Network, a subsidiary of Silver Star Enterprises
All Rights Reserved. Please read our Conditions of Use and Privacy Policy.
All Rights Reserved. Please read our Conditions of Use and Privacy Policy.