Pennsylvania, United States
Joined: May 17, 2006
KitMaker: 370 posts
Armorama: 368 posts
Posted: Wednesday, April 13, 2011 - 02:44 PM UTC
OK, next up the Dragon sFH18 smart kit. In researching this I found some pretty nice builds here and on the web. So I thought I would give it a go. Plus I needed something without ind link tracks for a change.

No indication in directions what side is up, had to research

Again poor instructions, goofed it up and thankfully got it apart and fixed

Building in sections to get a more uniform paint job

Actually removed a seam from on top of the leaf springs that is actually there in reality. Always read reviews FIRST
Nice PE firing data plate

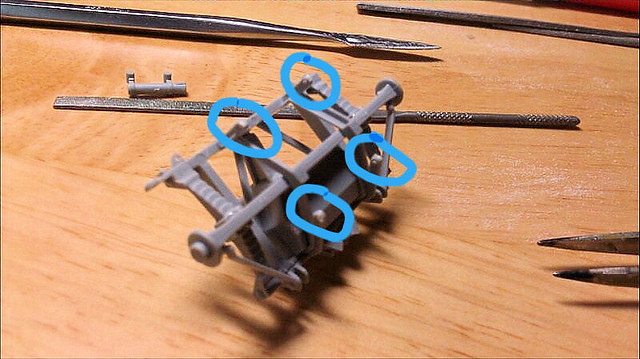
No info again on location for handle at the bottom of the breech, some fit issues also

Again fit/fill issues

Pennsylvania, United States
Joined: May 17, 2006
KitMaker: 370 posts
Armorama: 368 posts
Posted: Saturday, April 16, 2011 - 01:11 PM UTC
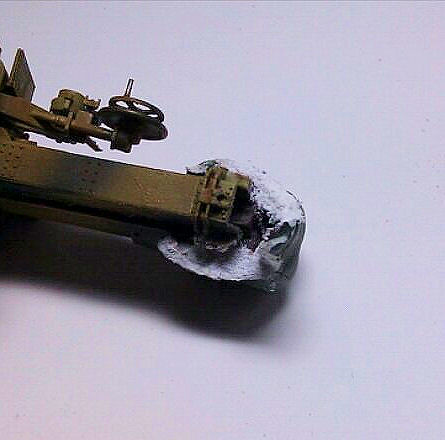
Ok, the update is as follows. The hardest part so far in the build has been the trailer. The directions are not exact, the parts are small and delicate. Here the directions ahow the underside supports being positioned so that the flat sides face inwards and the routed out sides face out.

When I assembled them then went to attach theses plates underneath nothing lined up. The directions for how and exactly where to install them arent there, just an arrow. Parts E11 & E12

So I had to fill in the cutouts for the legs and somehow attach the plates. Glad everything is on the bottom
The gunners sight is another area with poor instruction on location. Reference books helped. I will be modelling this gun in the travelling mode so I will make a cover for the gunsight.

I also had to sand part of the lower traverse gear off to allow the gun to be installed to the mount. Thanks to another modellers review I was aware of this.

Overall it is coming along well. Need to finish priming them start the painting process.

New Jersey, United States
Joined: August 01, 2007
KitMaker: 179 posts
Armorama: 144 posts
Posted: Sunday, April 17, 2011 - 12:15 PM UTC
Hey Tim she looks awesome i also have this kit in my stash.
So far she is comming along great keep it up.
You are not the first person to comment on the wrong directions.
i know that over on the Perth military modelling site they have a detailed
Heads up tutorial on this kit and it might help.
Anyway great build.
Regards
Horst
Pennsylvania, United States
Joined: May 17, 2006
KitMaker: 370 posts
Armorama: 368 posts
Posted: Sunday, April 17, 2011 - 02:38 PM UTC
Thanks Horst, that review on Perth was a big help as are those on here. I got my magic sculp yesterday and today finished priming so tomorrow starts the painting.
Shanghai, China / 简体
Joined: March 27, 2011
KitMaker: 127 posts
Armorama: 123 posts
Posted: Sunday, April 17, 2011 - 03:03 PM UTC
Nice build Timothy!
i love ur detail and those metal parts.Keep up the good work,

Regards
Eric
If u want sth u've never had,u must do sth u've never done.
Pennsylvania, United States
Joined: May 17, 2006
KitMaker: 370 posts
Armorama: 368 posts
Posted: Tuesday, April 19, 2011 - 12:25 PM UTC
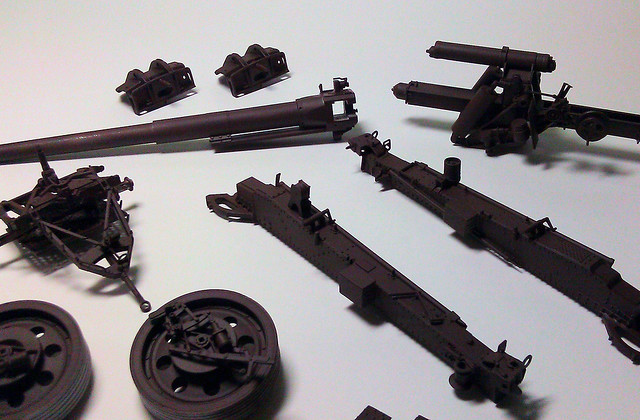
Thanks Eric, I appreciate the comments. Todays update is applying the Panzer Aces "Dark Rust" for the chipping later. I applied this with my new Paasche Talon airbrush. What a dream! Quite a step up from my Aztec.
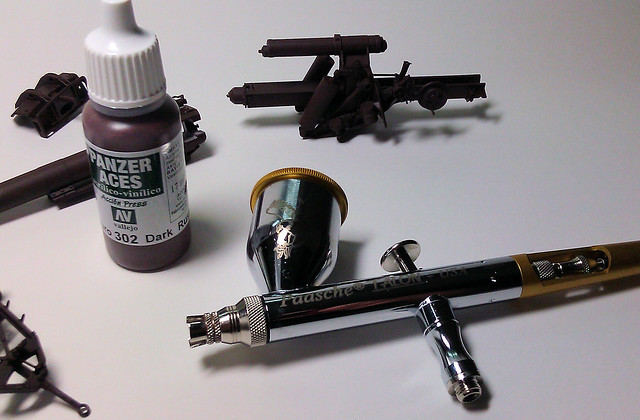
Just 2 shots showing most of the subassemblies. Next will be hairspray and base coat. Now comes the fun.

Pennsylvania, United States
Joined: May 17, 2006
KitMaker: 370 posts
Armorama: 368 posts
Posted: Thursday, April 21, 2011 - 03:22 PM UTC
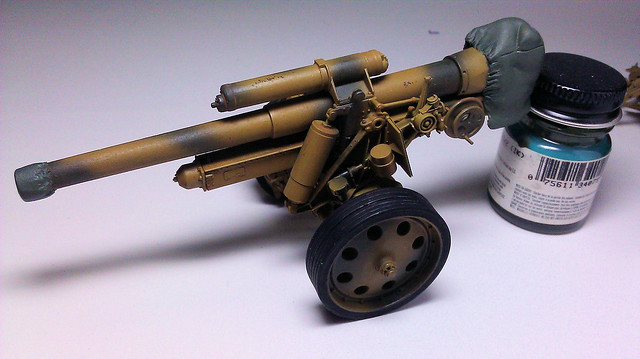
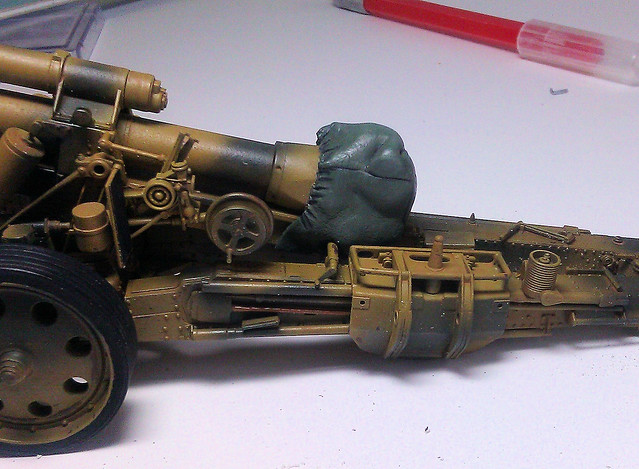
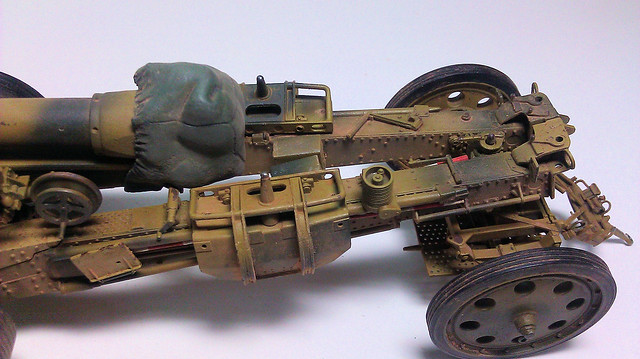
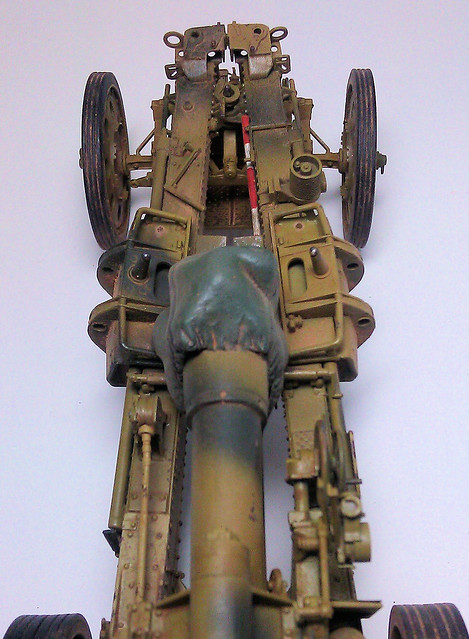
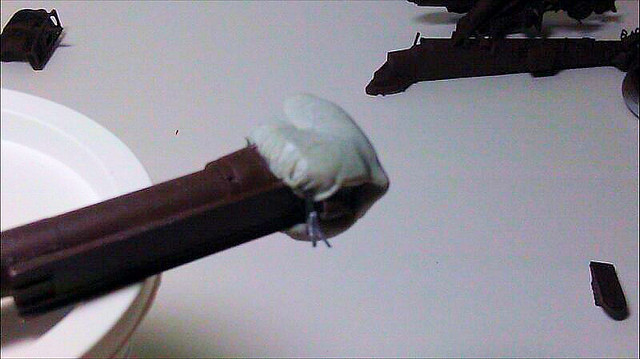
OK, tonight and last night my first attempts with "magic sculp". A breach cover and a muzzle cover. These were done without any reference pics, couldnt find any. Next is reprime and paint. Lead foil ties were made also.
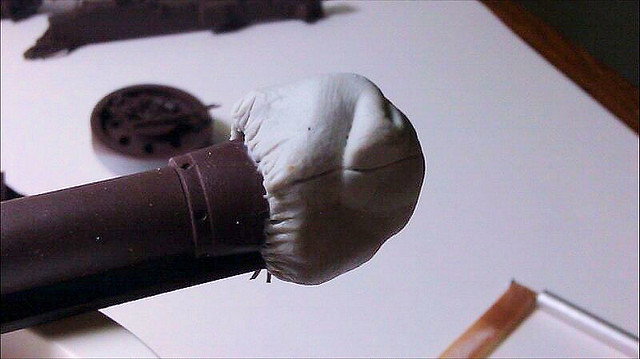
Sorry for the bad pic

Sachsen, Germany
Joined: November 28, 2007
KitMaker: 1,462 posts
Armorama: 1,289 posts
Posted: Thursday, April 21, 2011 - 08:22 PM UTC
Hi, nice kit and build!
I also build one of Dragons guns, the smaller 10cm K18. (it´s in progress, including a diorama)
Ahh... I see, you also have some trouble with the kit´s instructions
But your build looks good so far!.

I like the both covers!
greetings...
Soeren
progress:
- Venera-14-lander on Venus
- Dragon s.10cm K18 at the Atlantic-wall
completed:
- Venera-10 lander on Venus
Pennsylvania, United States
Joined: May 17, 2006
KitMaker: 370 posts
Armorama: 368 posts
Posted: Monday, May 02, 2011 - 02:09 PM UTC
OK, here we go again. Tonight was hairspray, paint, paint, and scrub. I have since modified my breach cover (didnt take into account I actually had to mate the gun with the cradle). Reprimed the gun and applied hairspray. My airbrush then gave me fits all night. Too much pressure (I dont have a regulator) kept blowing my hose apart from my moisture trap. Absolute pain. So I sprayed Tamiya dark yellow as the base color and added Tamiya Japanese Navy Green and stripes. Then came the scrubbing. I wanted to show some wear and tear but not much. I think the fact that I allowed too much time after painting to scrub with water didnt allow me to chip too much anyway. So here is the trailer.

The trail legs and barrel in camo

The Rt trail leg with chips, some touchup of bolt heads is required
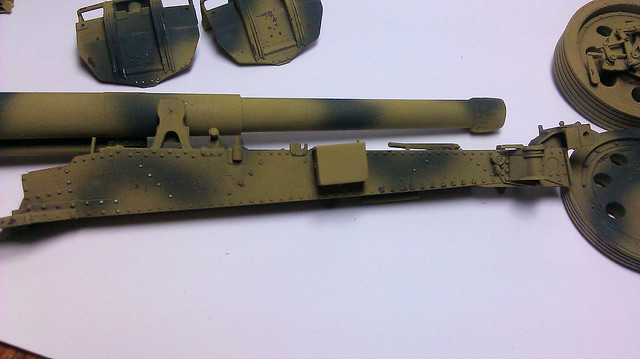
The spades

The Lt trail leg

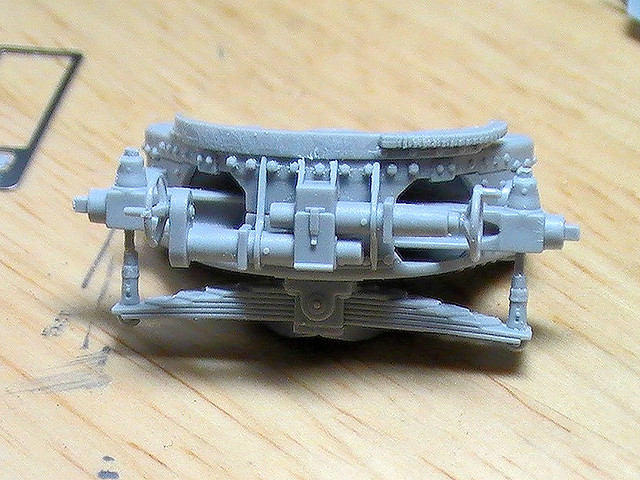
Main gun cradle

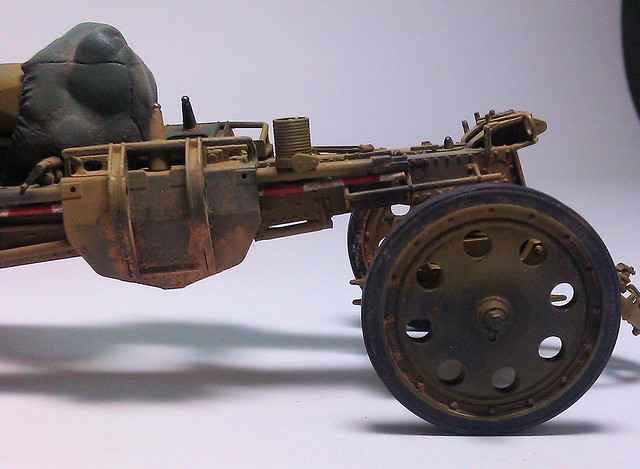
Trailer wheels, the Lt is chipped, the Rt is not

The recoil rails?

All the wheels in camo
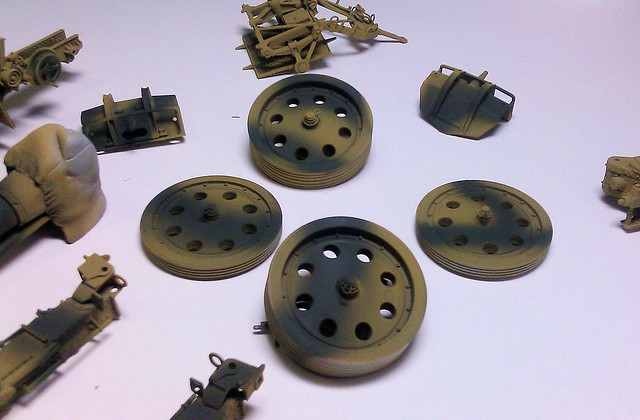
Next is sealing, then filters.
England - South East, United Kingdom
Joined: December 13, 2004
KitMaker: 2,192 posts
Armorama: 1,615 posts
Posted: Tuesday, May 03, 2011 - 09:58 AM UTC
Nice clean build Tim, and nice paintwork also. I'm very envious of the airbrush!
The recoil rails need to be polished bright metal, as the they are "polished" by the recoil of the barrel cradle assembly. Otherwise looking good!
From some of the other builds, I've also learnt that guns in transport mode (I suspect that's the way you are heading with the breech cover, which I like) have the recuperator piston rod removed, also the sights.
"Lord Raglan wishes the cavalry to advance rapidly to the front, follow the enemy, and try to prevent the enemy carrying away the guns. Troops of Horse Artillery may accompany. French cavalry is on your left. Immediate. Airey."
Pennsylvania, United States
Joined: May 17, 2006
KitMaker: 370 posts
Armorama: 368 posts
Posted: Tuesday, May 03, 2011 - 03:12 PM UTC
Steve, yes I looked tonight and with the gun in travel mode it will be in the recoil position. So the rails wont be seen. otherwise yes they should be polished. I am making a cover for the sight mount also, because I understand the sight would be removed during travel. Yes the rod is gone also. i have learned alot by reading other builds and reviews which has helped in my project. Thanks for the comments. Yes the Talon is a great airbrush, I am very pleased with it.
Sachsen, Germany
Joined: November 28, 2007
KitMaker: 1,462 posts
Armorama: 1,289 posts
Posted: Wednesday, May 04, 2011 - 09:07 AM UTC
Looks good so far!
Also it shows me a possible view of my gun, using nearly these colors.
On my s.10cm K18 I planned to use a medium grey as a base and a sandy-brown as the secound color using hard edges.

greetings...
Soeren
progress:
- Venera-14-lander on Venus
- Dragon s.10cm K18 at the Atlantic-wall
completed:
- Venera-10 lander on Venus
Pennsylvania, United States
Joined: May 17, 2006
KitMaker: 370 posts
Armorama: 368 posts
Posted: Tuesday, May 10, 2011 - 01:46 PM UTC
Florida, United States
Joined: December 31, 2009
KitMaker: 399 posts
Armorama: 157 posts
Posted: Tuesday, May 10, 2011 - 03:51 PM UTC
Awesome build, paint and weathering.
If only Dragon's instructions would be as great as their models the building part would be a lot easier.

Too little time, too many models to build..........
Pennsylvania, United States
Joined: May 17, 2006
KitMaker: 370 posts
Armorama: 368 posts
Posted: Tuesday, May 10, 2011 - 04:10 PM UTC
Thanks Soeren & Ernie for the comments. Yes Ernie I couldnt agree more, its almost as if you have to proof the instructions before you remove the first piece from the sprue. But the end results are quite nice for an OOB build.
Pennsylvania, United States
Joined: May 17, 2006
KitMaker: 370 posts
Armorama: 368 posts
Posted: Monday, May 16, 2011 - 01:12 PM UTC
Maryland, United States
Joined: April 18, 2006
KitMaker: 1,794 posts
Armorama: 1,431 posts
Posted: Monday, May 16, 2011 - 02:12 PM UTC
Wow, this is a great build! Really like the scheme yo chose on this one.
Great job!
Rob
Pennsylvania, United States
Joined: May 17, 2006
KitMaker: 370 posts
Armorama: 368 posts
Posted: Monday, May 16, 2011 - 03:31 PM UTC
Thanks Rob I am glad you like it. It is a much needed break from the normal treadhead stuff I do. My very limited sculpting abilities make me appreciate the scratchbuilders who know what they are doing all the more. But this is a very enjoyable build even with the "aw... #$%&*@" involved.
Maryland, United States
Joined: April 18, 2006
KitMaker: 1,794 posts
Armorama: 1,431 posts
Posted: Monday, May 16, 2011 - 03:58 PM UTC
You really did great. For the record, this kit kicked my behind as I got too involved with AM parts and the such. I ended up putting it away and may one day pick it up again. Yours is certainly inspiring!
Rob
Pennsylvania, United States
Joined: May 17, 2006
KitMaker: 370 posts
Armorama: 368 posts
Posted: Tuesday, June 14, 2011 - 01:14 PM UTC
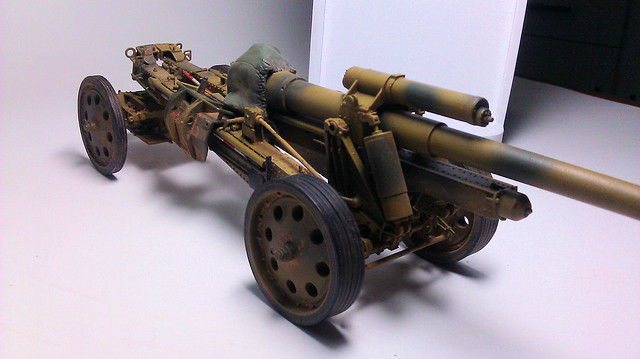
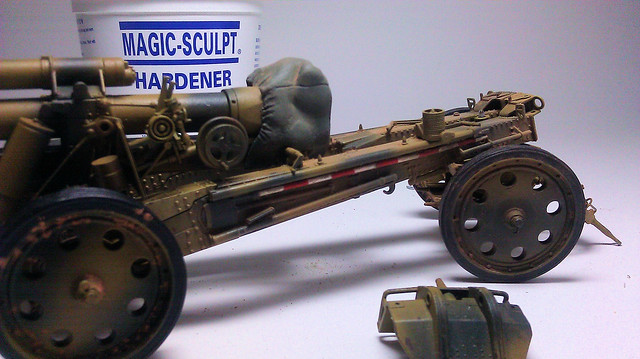
Well just when you'd hoped I had gone away, the weather cooled off here. So back at it. Glued both trail legs in place, painted the aiming stakes and weathered with Mig pigments the wheels and aft part of the trail legs and breach cover. Trying to get done by this Sat. for a modellers get together, just for discussion purposes.

Pennsylvania, United States
Joined: April 10, 2011
KitMaker: 7,941 posts
Armorama: 7,934 posts
Posted: Wednesday, June 15, 2011 - 05:07 AM UTC
Hey Tim!
Just came across this great build. You have some super painting skills my friend and the dust covers look nice as well.
I have done some research into the arty thing lately and noticed that a lot of the muzzle covers had the "issued" cover that had a strap that connected the cover with the bottom of the recoil slide. When in firing mode,the cover was clipped to the bottom of the recoil slide. Just something to consider as you were alrady given a heads up on the site removal and recoil rod dis-engagement. Wonderful build so far.
Where in Pa are you dude? I am in Behtlehem.
J
Pennsylvania, United States
Joined: May 17, 2006
KitMaker: 370 posts
Armorama: 368 posts
Posted: Wednesday, June 15, 2011 - 08:16 AM UTC
Thanks Jerry, any little scribble drawing describing what u r talking about would be much appreciated. I am in Pittsburgh. Its having the right tools that make the difference Jerry, my skills are basic at best.
Pennsylvania, United States
Joined: April 10, 2011
KitMaker: 7,941 posts
Armorama: 7,934 posts
Posted: Saturday, June 18, 2011 - 03:47 AM UTC
Tim,
Sorry for the delay,life interferes too much! Here is a very rough sketch.
Pittsburg huh... nice town and people.
For what it's worth,in researching German arty for my dio on this forum,I found that most guns were really loded up with extra gear on the gun trails when in the travel moad,sometimes laughingly so.
J
bill_c
 Campaigns Administrator
New Jersey, United States
Joined: January 09, 2008
KitMaker: 10,553 posts
Armorama: 8,109 posts
Posted: Saturday, June 18, 2011 - 05:15 AM UTC
The other thing to remember is that when in travel mode, the barrel was unhooked from the recuperator slide as you have done here. Some modelers overlook that fact.
Nice work.
Pennsylvania, United States
Joined: May 17, 2006
KitMaker: 370 posts
Armorama: 368 posts
Posted: Saturday, June 18, 2011 - 09:38 AM UTC