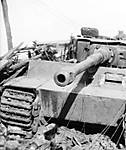
seems like I forgot to update some time ago
I added the Voyager Initial Tiger II exhaust stacks onto the backplate: the right one I cut in half so it looks a bit twisted like on photos of '11' shown.
Meanwhile the interior got some pigment wash and after that the upperhull was glued fixed. I also added some etch brackets to the hull sides (mix of Dragon and Lion Roar stuff - I strongly got the impression that Lion Roar produced this kits etch though - but I must say it's not as fun to work with as Voyager stuff)
The Griffon ammo racks were finished too and are ready to be painted (no photos of that yet)
On the photos you can see that I was trying to get a diorama set up for number '11 (photos are taken before I added the etch stuff)
that's it so far (still got to score me some 62 kg muzzle brake since the kit doesn't provide it...)
Cheers
Hosted by Darren Baker
Tiger ausf B s.Pz.Kp.(Fkl) 316 "11"
GewoonWouter
Antwerpen, Belgium
Joined: March 31, 2010
KitMaker: 227 posts
Armorama: 123 posts
Joined: March 31, 2010
KitMaker: 227 posts
Armorama: 123 posts
Posted: Tuesday, August 23, 2011 - 10:04 AM UTC
GewoonWouter
Antwerpen, Belgium
Joined: March 31, 2010
KitMaker: 227 posts
Armorama: 123 posts
Joined: March 31, 2010
KitMaker: 227 posts
Armorama: 123 posts
Posted: Saturday, August 27, 2011 - 10:12 AM UTC
I gave the turret interior parts today a primer coat of Vallejo Grey Primer and after that I sprayed it with Tamiya paints.
I wanted to get an off white color like the Elfenbein is supposed to be, but I mixed a bit too much Buff into the Flat White...though I kind of like the result, even if it's not really a white color.
The ammo got a bit of paint too.
When I showed my girlfriend my work I dropped it when putting it back on the bench...It dropped on the floor and all pieces came loose . Luckily I could reattach them and not much to be seen of the damage...
Photos
That's all folks!
Cheers
GewoonWouter
Antwerpen, Belgium
Joined: March 31, 2010
KitMaker: 227 posts
Armorama: 123 posts
Joined: March 31, 2010
KitMaker: 227 posts
Armorama: 123 posts
Posted: Thursday, September 01, 2011 - 09:32 AM UTC
paint has come on, all courtesy of Tamiya...after that the Bison Decals...will need more applications of SOL though:
Cheers
Cheers
retiredyank
Arkansas, United States
Joined: June 29, 2009
KitMaker: 11,610 posts
Armorama: 7,843 posts
Joined: June 29, 2009
KitMaker: 11,610 posts
Armorama: 7,843 posts
Posted: Thursday, September 01, 2011 - 09:50 AM UTC
I would have been following along, but I'm not cat expert and forgot to subscribe. This is an excellent looking build. I like the weathering on the drive sprocket. For some reason I never considered showing wear on it. My build has been pushed back, as I now have 10 kits in my stash. Love watching people pimp models.
seanmoriarty
Scotland, United Kingdom
Joined: January 09, 2008
KitMaker: 63 posts
Armorama: 61 posts
Joined: January 09, 2008
KitMaker: 63 posts
Armorama: 61 posts
Posted: Thursday, September 01, 2011 - 10:44 PM UTC
Looks Amazing! I've stopped dead on my KT, and i'm going to restart it with a fresh new kit and friul tracks sometime in the new year, in order to introduce some new detail changes i'm adopting as standard. Now I have some inspiration!
Great work on the KT!!!!!!
BillGorm
New Jersey, United States
Joined: November 02, 2009
KitMaker: 609 posts
Armorama: 433 posts
Joined: November 02, 2009
KitMaker: 609 posts
Armorama: 433 posts
Posted: Thursday, September 01, 2011 - 11:09 PM UTC
Nice work, Wouter. Is there any trick to bending the fenders? They don't look difficult individually, but what about getting them consistent down the side of the vehicle? Also, how securely do they attach to the model? Your fourth photo shows how the fenders are attached along their small top edges ... are they as delicate as they look?
GewoonWouter
Antwerpen, Belgium
Joined: March 31, 2010
KitMaker: 227 posts
Armorama: 123 posts
Joined: March 31, 2010
KitMaker: 227 posts
Armorama: 123 posts
Posted: Friday, September 02, 2011 - 01:15 AM UTC
thanks for the kind words fellas, glad you all like it
Bill: very good point you got there: Like you mentioned bending them individually is easy peasy, but in order to make the correct bend on a all of them so they can line up I used the plastic kit parts as a template to check wether the bends are in the correct angle...even then it wasn't very simple
they are actually quite firlmy attached I must say, they are less fragile as it may look. The Lion Roar kit provides the little square blocks to be attached to the hull (dunno how I should call them: but you can see two of them on the hull where the fenders are missing: the thingies with two holes in ). The fenders sit on top of them just like on the real deal, only in my case with CA glue ^^
Hope this was a bit clearly explained
Cheers
ivanhoe6
Wisconsin, United States
Joined: April 05, 2007
KitMaker: 2,023 posts
Armorama: 1,234 posts
Joined: April 05, 2007
KitMaker: 2,023 posts
Armorama: 1,234 posts
Posted: Friday, September 02, 2011 - 08:31 AM UTC
Nice touch on the paint run on the number 1. Maybe a wee bit to"fat" but a good looking build over all. Thank you for sharing your hard work with us !
GewoonWouter
Antwerpen, Belgium
Joined: March 31, 2010
KitMaker: 227 posts
Armorama: 123 posts
Joined: March 31, 2010
KitMaker: 227 posts
Armorama: 123 posts
Posted: Friday, September 02, 2011 - 09:02 AM UTC
thanks mate, though I can't take credit for the paint run on the turret number: it's from Bison Decals and when looking at the photos of '11' it's actually quite accurate ^^
Cheers
Cheers
spitfire303
Vendee, France
Joined: December 22, 2006
KitMaker: 1,437 posts
Armorama: 1,406 posts
Joined: December 22, 2006
KitMaker: 1,437 posts
Armorama: 1,406 posts
Posted: Saturday, September 03, 2011 - 08:43 AM UTC
Good work. It looks really good. Did you put the third "11" decal on the rear hatch?
spit
spit
GewoonWouter
Antwerpen, Belgium
Joined: March 31, 2010
KitMaker: 227 posts
Armorama: 123 posts
Joined: March 31, 2010
KitMaker: 227 posts
Armorama: 123 posts
Posted: Saturday, September 03, 2011 - 09:01 AM UTC
thanks Pawel!
Well, I haven't yet...still thinking 'bout it but I think it will be very difficult to get the decal to set nicely on the back of the turret and not much will be seen of it afterwards...unless someone has a good trick to get it right I might leave it...Or try to handpaint it...haven't figured it out...^^
Cheers
spitfire303
Vendee, France
Joined: December 22, 2006
KitMaker: 1,437 posts
Armorama: 1,406 posts
Joined: December 22, 2006
KitMaker: 1,437 posts
Armorama: 1,406 posts
Posted: Saturday, September 03, 2011 - 09:18 AM UTC
Apply it and then use the decal softener (I use the well know Micro sol). Use a lot of it. It should work quite well. Yuor build is quite accurate it would be a shame to not to apply this decal. We don't see it on the "11" but is sitting on 02 and 10 so normally it was applied on all vehicles.
spit
spit
barkmann424
England - North West, United Kingdom
Joined: November 23, 2008
KitMaker: 357 posts
Armorama: 353 posts
Joined: November 23, 2008
KitMaker: 357 posts
Armorama: 353 posts
Posted: Sunday, September 11, 2011 - 10:26 PM UTC
Excellent stuff Wouter! Really enjoying this one coming together! She is really going to be something when finished.
Also great to glean all the information being given by your 'crew' along the way!
Cheers Phil!
Also great to glean all the information being given by your 'crew' along the way!
Cheers Phil!
Johnnygers
England - East Anglia, United Kingdom
Joined: July 03, 2012
KitMaker: 4 posts
Armorama: 3 posts
Joined: July 03, 2012
KitMaker: 4 posts
Armorama: 3 posts
Posted: Tuesday, July 03, 2012 - 04:46 AM UTC
Looking good Wouter. Hope you blog some more of the Tiger. I have got my snorkel cover on my panther D now. See you on the other place.
Johnny Gers .
Johnny Gers .
Big-John
Ohio, United States
Joined: August 12, 2010
KitMaker: 731 posts
Armorama: 711 posts
Joined: August 12, 2010
KitMaker: 731 posts
Armorama: 711 posts
Posted: Wednesday, July 04, 2012 - 09:25 AM UTC
Hey Wouts, Looking forward to more progress on this one. Shes looking good buddy!
GewoonWouter
Antwerpen, Belgium
Joined: March 31, 2010
KitMaker: 227 posts
Armorama: 123 posts
Joined: March 31, 2010
KitMaker: 227 posts
Armorama: 123 posts
Posted: Thursday, July 05, 2012 - 02:44 AM UTC
wow, thanks fellas, she 's on hold at the moment but not forgotten it seems . I had some issues with the decals on the zimmerit, but I hope I can continue a bit soon (though, it will be a couple of months, too many builds currently going on )
Cheers
Cheers