_GOTOBOTTOM
Armor/AFV: 48th Scale
1/48 scale discussion group hosted by Rob Gronovius
Hosted by Darren Baker
Gaz MM
lespauljames
Visit this Community
England - South West, United Kingdom
Joined: January 06, 2007
KitMaker: 3,661 posts
Armorama: 2,764 posts
Posted: Tuesday, May 17, 2011 - 12:21 AM UTC
Hey guys, im just on the stage of weathering and final construction of my unimodel GAZ MM.
some parts required strip styrene replacements, and filler! but overall it was a fun kit to build.
completely hand painted using tamiya vallejo and lifecolour.
Tools and toolbox-Aber
stowage, hobbyboss kv2 and sherman ( boxes)
there will be other things in the rear ( smaller items, ) but i am still deciding on those.
anyway.
Photos..


I'll pop up a size comparison to a 48th and a 35th tank soon!
richtlv3
Visit this Community
Tel Aviv-Yafo, Israel
Joined: April 10, 2011
KitMaker: 95 posts
Armorama: 94 posts
Posted: Tuesday, May 17, 2011 - 08:00 AM UTC
very clean and nice work, I like open window, it's makes realistic view, maybe to add more dust on the wheels will be better. good job !!!
vonHengest
Visit this Community
Texas, United States
Joined: June 29, 2010
KitMaker: 5,854 posts
Armorama: 4,817 posts
Posted: Tuesday, May 17, 2011 - 04:32 PM UTC
The wheels do look like they could use a good dusting. Nice job though, makes me glad that I didn't get rid of my GAZ MM kit.
Spiderfrommars
Visit this Community
Milano, Italy
Joined: July 13, 2010
KitMaker: 3,845 posts
Armorama: 3,543 posts
Posted: Tuesday, May 17, 2011 - 06:52 PM UTC
Very good indeed James, congrats
ModelBuildingTanks
Visit this Community
Washington, United States
Joined: August 05, 2010
KitMaker: 146 posts
Armorama: 143 posts
Posted: Tuesday, May 17, 2011 - 08:46 PM UTC
Another amazing build with fantastic weathering.
lespauljames
Visit this Community
England - South West, United Kingdom
Joined: January 06, 2007
KitMaker: 3,661 posts
Armorama: 2,764 posts
Posted: Tuesday, May 17, 2011 - 10:14 PM UTC
Hey Guys, thanks for the kind words! although the dusting is in the works, the photos above are still work in progress!! i have added a tarp/sheet in the back, and the front bumber has fallen off. the photo etch was too fragile and broke at the joint where you bend the bumper holders out. i barely touched it aswell, i will reinforce it with new etch from the spares, or leave it off as general damage.
This is going in a diorama with a KV2, the kv2 will be based on a picture in "Captured tanks under the German flag-Russian battle tanks "
page 46 picture at the top. ( if you have the book that is,! i will supply the picture with the KV blog anyways)
anyhoo, back to the bench.
once more, thanks for the comments!
lpj out
Spiderfrommars
Visit this Community
Milano, Italy
Joined: July 13, 2010
KitMaker: 3,845 posts
Armorama: 3,543 posts
Posted: Tuesday, May 17, 2011 - 11:45 PM UTC
Thanks to you for sharing your builds

They inspire me a lot

cheers
lespauljames
Visit this Community
England - South West, United Kingdom
Joined: January 06, 2007
KitMaker: 3,661 posts
Armorama: 2,764 posts
Posted: Wednesday, May 18, 2011 - 10:27 PM UTC
Thanks Mauro, that means alot to me
Hey guys!
Here is the size comparison between a 1/35 panther, 1/48 t-34 and the 1/48 gaz

More soon!
lespauljames
Visit this Community
England - South West, United Kingdom
Joined: January 06, 2007
KitMaker: 3,661 posts
Armorama: 2,764 posts
Posted: Thursday, May 19, 2011 - 12:16 AM UTC
Hey guys!

Okay. so i declare this 100%(99%) comeplete 1% taken off for the cargo.
I will now write a VERY basic Build story,

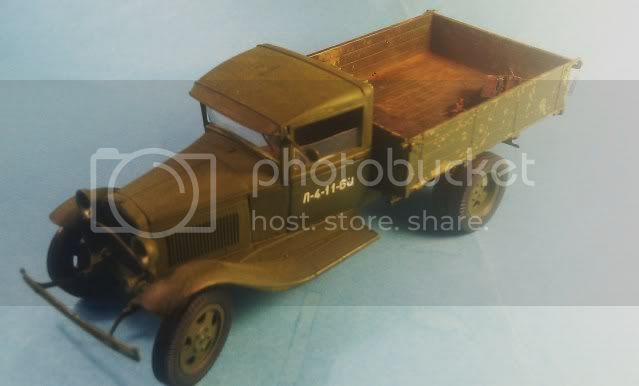
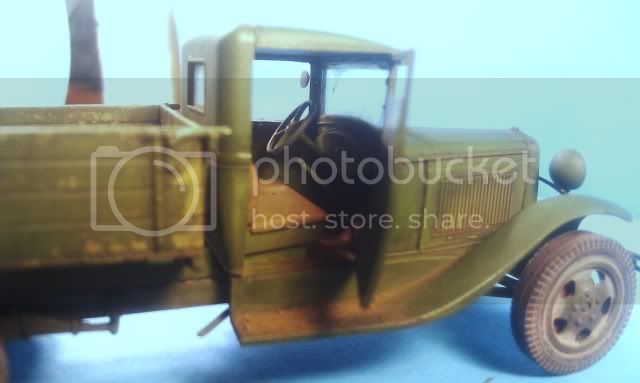
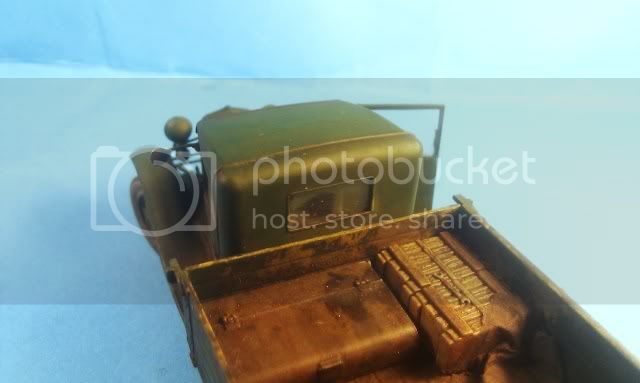
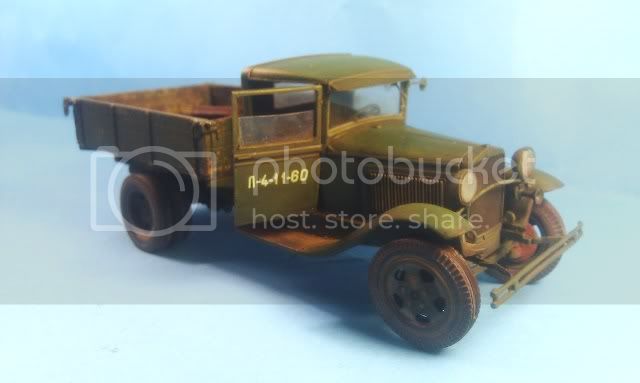
The base kit looked very toyish in the box, but i was eager to start, the plastic was very workable, and all sprue nubs were easy to remove, there was minor flash in areas, but the main qualm was some lack of detail, the cab was very basic, but is small enough for it to be overlooked so I didnt fuss.
The tyres are rubber or vinal. I dont mind these, although some of the tread was mismoulded, having some flat areas where tread is supposed to go.

the engine was less then detailed, so i left most of it off ( it wont be seen anyway and the side walls are mega thick so posing it open would be, well innacurate without a lot of work)

I added brake lines e.t.c and remade the exhaust pipe with fuse wire,

Painting,
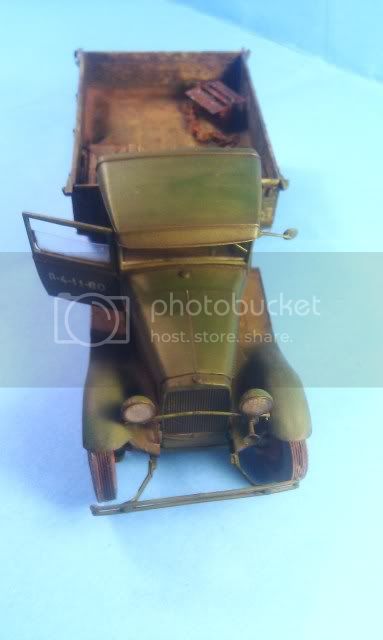
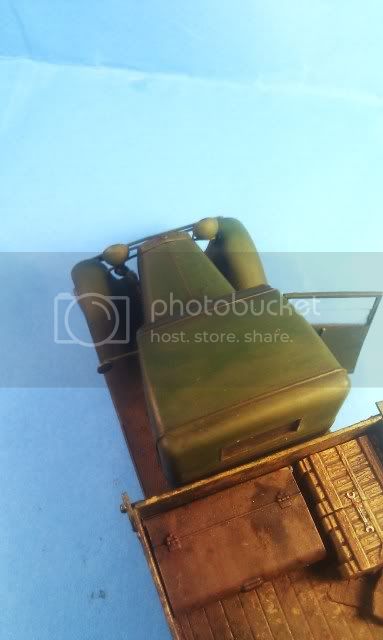
I used a custom mix of paints that i cannot recall, although the colour is close to the toy soldier green of the plastic, and is based with tamiya XF-5 Flat green.
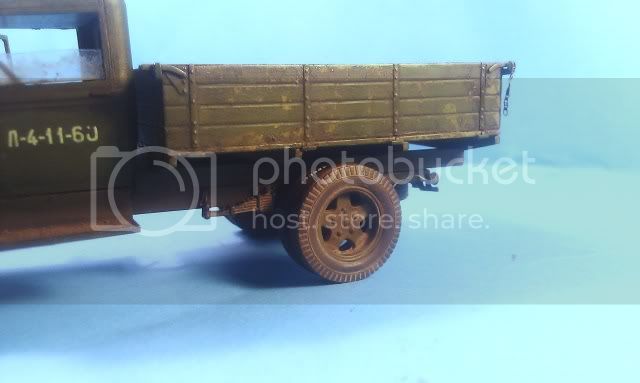
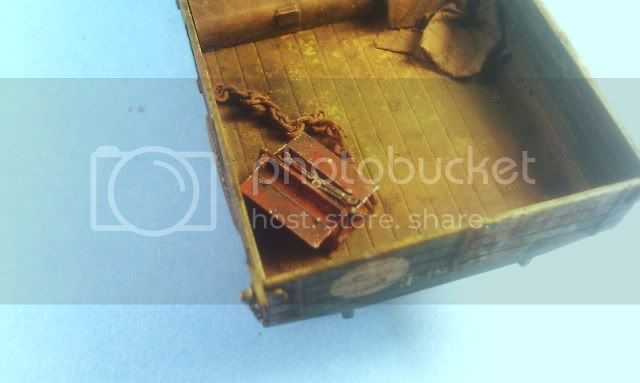
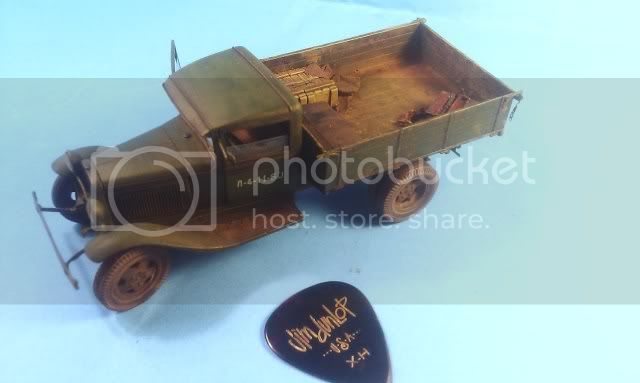
The Bed was painted various yellows and browns, the i stippled on humbrol maskol with a spounge, trying to avoid the metal areas,
i like using maskol, as i brushpaint is is resiliant enough for a few light coats of paint, and you can choose what areas you wish to chip, this for a more controlled application surpasses salt or hairspray in this case.

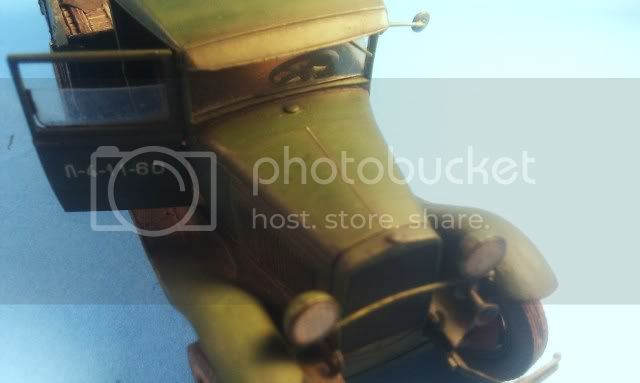
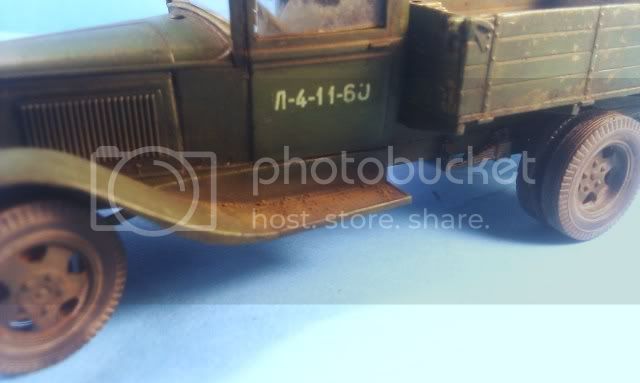
Decals Were FLAT. fantastic decals, although they are quite tall off the backing paper, and quite thick they were the flattest decals i hve used barring dry transfers,
wiht my decals i apply Vallejo acrylic resin satin varnish, decal, Micro sol , Satin again, then Vallejo Acrylic resin Matt varnish ( onlt to the panels the decals are applied, so only the doors, and Bed Door section were painted in this way, once again all by brush)

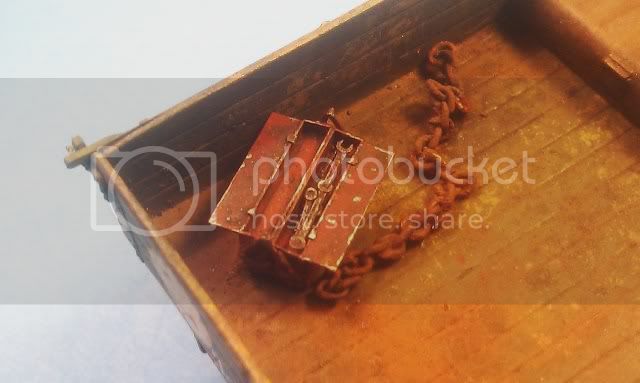
I was keen to crak into my New k products for this build but held off, of course, the bed was messy, but from veicles i have seen, the cab and bonnet are usually a lot better than the cargo bed, so i held off the streaking on the front, the back being painted wood, would have collected more dirt and grime due to the grain. Various pigments, and washes were applied in the bed, as well as some AK washes and a little streaking on the KV storage box that had been " borrowed"

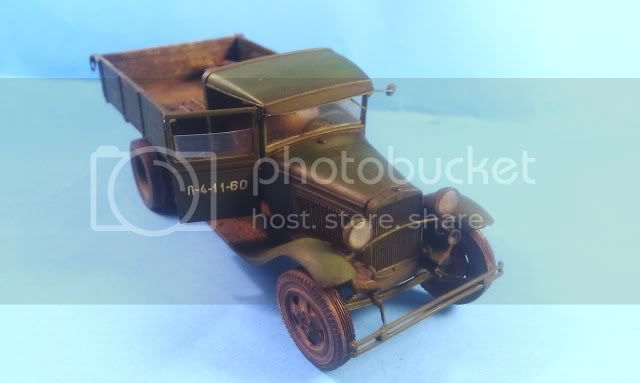
the cab eas chipped with a mix of brown and german grey ( i couldnt get a good looking light chip, so i went straight to the dark ones!)

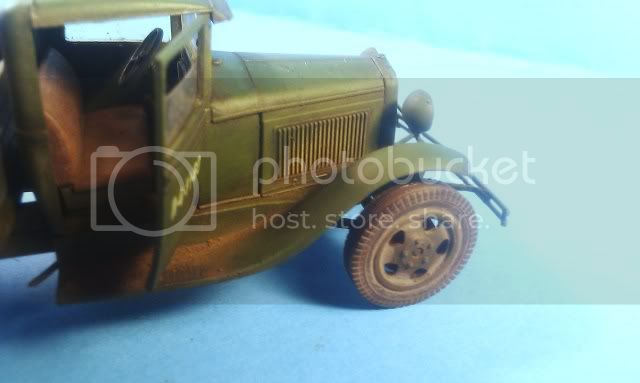
i highlighted the middle of panels, roof, bonnet and some areas of the bed with Sap green oil paint after a few controlled pin washes or various shades of oil.

the tyres were coated liberally with MIG industrial city earth mixed with Dark mud. then remoxed with a cotton bud ( q tip) when dry ( obviously not completely though!)


EDIT>>>
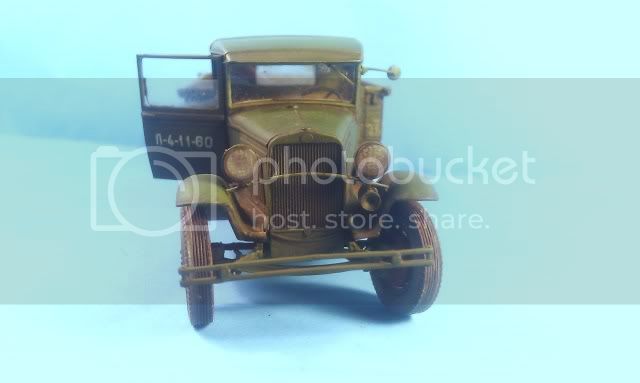
I replaced the horn with a spare form a t-34. the lights were replaced from kv1 lenses and the bar across the front was replaced with fure wire as the plastic one broke!!
and here we are.
One of my favorites !...


Im thinking of popping this on MOM thoughts?
vonHengest
Visit this Community
Texas, United States
Joined: June 29, 2010
KitMaker: 5,854 posts
Armorama: 4,817 posts
Posted: Thursday, May 19, 2011 - 04:10 AM UTC
Go for it!!
lespauljames
Visit this Community
England - South West, United Kingdom
Joined: January 06, 2007
KitMaker: 3,661 posts
Armorama: 2,764 posts
Posted: Friday, May 20, 2011 - 03:20 AM UTC
Hey Jeremy, i might pop it in this or next month!! whoop!
so pleased with this one
GregCloseCombat
Visit this Community
California, United States
Joined: June 30, 2008
KitMaker: 2,408 posts
Armorama: 2,394 posts
Posted: Friday, May 20, 2011 - 07:09 PM UTC
This turned out really EXCELLENT!!!! Congrats

go for MOM
Spiderfrommars
Visit this Community
Milano, Italy
Joined: July 13, 2010
KitMaker: 3,845 posts
Armorama: 3,543 posts
Posted: Friday, May 20, 2011 - 08:25 PM UTC
I think that wooden parts and stencils are incredibly convincing

In my opinion it's quite a pity that you don't have some pics taken during the mounting process. It would have been very interesting seeing how you've reached those results.

Anyway I hope next time you won't forget to do it James.

Congrats again

Cheers
lespauljames
Visit this Community
England - South West, United Kingdom
Joined: January 06, 2007
KitMaker: 3,661 posts
Armorama: 2,764 posts
Posted: Saturday, May 21, 2011 - 07:35 AM UTC
Thanks Greg!! do you know of a buld photo resizer?
and Mauro, thankyou, i will next time try to produce a better in progress series of photos!
GregCloseCombat
Visit this Community
California, United States
Joined: June 30, 2008
KitMaker: 2,408 posts
Armorama: 2,394 posts
Posted: Saturday, May 21, 2011 - 07:26 PM UTC
I use a mac laptop and you click on the pic and choose a smaller resolution. I think in photobucket you can just re-size it. I'm not much of a photo expert.
lespauljames
Visit this Community
England - South West, United Kingdom
Joined: January 06, 2007
KitMaker: 3,661 posts
Armorama: 2,764 posts
Posted: Sunday, May 22, 2011 - 10:56 AM UTC
Ah i found a bulk one eventually online, saved a whole lot of time i tell ya!
 _GOTOTOP