_GOTOBOTTOM
Armor/AFV: Large Scale
1/16 and Larger Armor Modeling
Hosted by Darren Baker
Trumpeter 1/16 King Tiger
Matt182
Visit this Community
United Kingdom
Joined: May 20, 2010
KitMaker: 269 posts
Armorama: 243 posts
Posted: Friday, May 27, 2011 - 10:17 AM UTC
Hi All,

Its been a while since i've posted here but i've been working away on a 1/16 King tiger.

I have finally got to the point of sealing up the hull so I thought I would share the photos of the completed interior. Its taken over 60 hours so far! building OOB except for a few scratch parts and the atak resin zimmerit.

Any comments or questions welcome


Tojo72
Visit this Community
North Carolina, United States
Joined: June 06, 2006
KitMaker: 4,691 posts
Armorama: 3,509 posts
Posted: Friday, May 27, 2011 - 10:44 AM UTC
A very impressive build,nice job
kevinboodts
Visit this Community
Oost-Vlaanderen, Belgium
Joined: August 24, 2009
KitMaker: 518 posts
Armorama: 16 posts
Posted: Friday, May 27, 2011 - 09:52 PM UTC
This is so epic mate, hope to build one soon :-)
Matt182
Visit this Community
United Kingdom
Joined: May 20, 2010
KitMaker: 269 posts
Armorama: 243 posts
Posted: Tuesday, May 31, 2011 - 01:59 AM UTC
Thanks for your comments guys

Kevin, If you are planning to build one I would say the most epic thing about this kit is the poor part fit! Be prepared for many hours of sanding, filling and removing flash and mould seems. Not to mention the huge amount of ejector pin marks on visable surfaces.

When I came to put the hull roof on it has become apparent that the sponsons are warped and are sagging downwards leaving a big gap. Due to the thickness and how rigid the plastic is it is going to take some surgery to sort it out

Also have to scratch build the driver and radio operators periscopes. Trumpeter must believe these men were trained to see through 150mm of armoured plate and therefor did not need them!

And then theres all the accuracy issues and other missing parts. Thankfully this is mostly the interior and as I am building it as 'through the hatches' I haven't bothered to sort all of these issues

Anyway just a heads up before you build one. I'm just slightly annoyed that such an expensive kit could have so many issues. Still I'm glad i'm building it and would still recommend it but just don't expect to get through the build quickly! (A good thing I would say considering the price!)

Cheers
Matt
kevinboodts
Visit this Community
Oost-Vlaanderen, Belgium
Joined: August 24, 2009
KitMaker: 518 posts
Armorama: 16 posts
Posted: Tuesday, May 31, 2011 - 02:59 AM UTC
Thx for pointing that out! It's a sad thing though, but still, once I will build some 1/16 kits... maybe some other company will start building those
GregCloseCombat
Visit this Community
California, United States
Joined: June 30, 2008
KitMaker: 2,408 posts
Armorama: 2,394 posts
Posted: Tuesday, May 31, 2011 - 03:10 AM UTC
It's cool-looking. It's always a shame to close them up. Nice work
WARDUKWNZ
Visit this Community
Auckland, New Zealand
Joined: June 01, 2011
KitMaker: 1,716 posts
Armorama: 1,638 posts
Posted: Wednesday, June 01, 2011 - 01:26 AM UTC
Hello Matt ..
A little while back i built the Trumpeter T34-85 in 16th for a mate of mine ,,,strange thing is your King Tiger shares many of the same problems ..most of the interior went together quite nicely ..but i had to cut down the bulk heads to get the upper hull to fit ..and then i found out that it was warped ..so had to spend many a hour getting that to sit right .. then it was time for the turret ,,oh man that was a nightmare ,,most of the turret fittings ,,didn't fit ..the photo etch had to be modifed so much there wasn't much left.was thankful you couldn't see most of it ..the main gun assembly wouldn't slot into its place so more cutting and shaping took place ..I could go on and on but hell it would be a book and not a post when i had finished.,,I felt pretty sorry for my mate Andy ..this cost him a fare bit of coin and it sure wasnt worth it .very nice work you've done so far ,,can't wait to see it finished
Matt182
Visit this Community
United Kingdom
Joined: May 20, 2010
KitMaker: 269 posts
Armorama: 243 posts
Posted: Wednesday, June 08, 2011 - 08:52 AM UTC
Phill,

Thats a shame, I did have an idea of a big 1/16 dio the King Tiger passing a KO'd T34-85. It sounds like the fit is even worse than the King Tiger and I don't quite think I can stomach that all over again! Nice one for finishing what sounds like a dog of a kit!

Anyway......

Seeing as I have posted the interior pictures I thought I might as well post progress photos as the build continues. I will only post when a decent amount of progress has been made each time.

This week is the tracks, which i must say was a very boring but easy job. Only problem I have noticed is the kit mounts the idler wheels slightly too far back so there maybe slightly too much tension in the tracks. I'm thinking they will look more like the Panther than the King Tiger! I haven't connected them yet but pulling them together shows this. I also added the rear plate and zimmerit. The atak kit fits well and is very ease to use.


And a size comparison between a 1/35 panther and the king tiger


Cheers
Matt182
Visit this Community
United Kingdom
Joined: May 20, 2010
KitMaker: 269 posts
Armorama: 243 posts
Posted: Thursday, June 16, 2011 - 11:40 AM UTC
Hi all,

Update time! I finished the hull and fitted the tracks. Turns out that the positioning of the idler wheel is wrong. The kit makes you mount it too far back making the tracks very tight. They looked like rubber bands and put way to much pressure on the suspension. So I had to add 2 links each side which has made the tracks a little too slack. It doesn't look completely right but i can live with it.

The rest of the hull went together smoothly. I also got started on the turret. You will notice I have made the cut out for the charging knight emblem which I think is about the right size? Still got some touching up to do on the zimmerit.


Looking forward to getting the turret interior done so I can finish off the exterior and get painting
sgtSprue
Visit this Community
Nevada, United States
Joined: June 28, 2008
KitMaker: 26 posts
Armorama: 12 posts
Posted: Thursday, June 16, 2011 - 12:49 PM UTC
Very nice and very clean build. Very clean Zimmerit job. Awsome. keep up the great work
Headhunter506
Visit this Community
New York, United States
Joined: December 01, 2007
KitMaker: 1,575 posts
Armorama: 1,509 posts
Posted: Thursday, June 16, 2011 - 01:59 PM UTC

Quoted Text

Hi all,

Update time! I finished the hull and fitted the tracks. Turns out that the positioning of the idler wheel is wrong. The kit makes you mount it too far back making the tracks very tight. They looked like rubber bands and put way to much pressure on the suspension. So I had to add 2 links each side which has made the tracks a little too slack. It doesn't look completely right but i can live with it.

The rest of the hull went together smoothly. I also got started on the turret. You will notice I have made the cut out for the charging knight emblem which I think is about the right size? Still got some touching up to do on the zimmerit.


Looking forward to getting the turret interior done so I can finish off the exterior and get painting


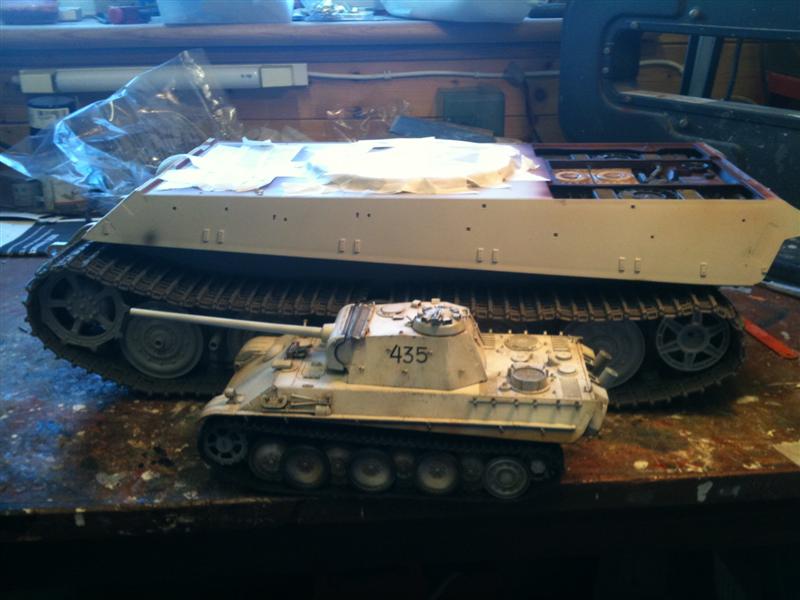
Nice work, Matt. Although, you will encounter some real problems when you start working on the turret/turret floor:

1. the hull ammo racks are incorrect, in construction and in the way they are mounted. The turret will not traverse the ammo racks will cause the turret basket to "catch" on the racks because the racks need to be positioned inward, at an angle, toward the center point between the two hull racks. This leads to:

2. Unless you've removed, by scraping or sanding, the plastic from the inside of the turret ring guard, the turret will not traverse because of the tight fit of the turret floor and the turret ring.

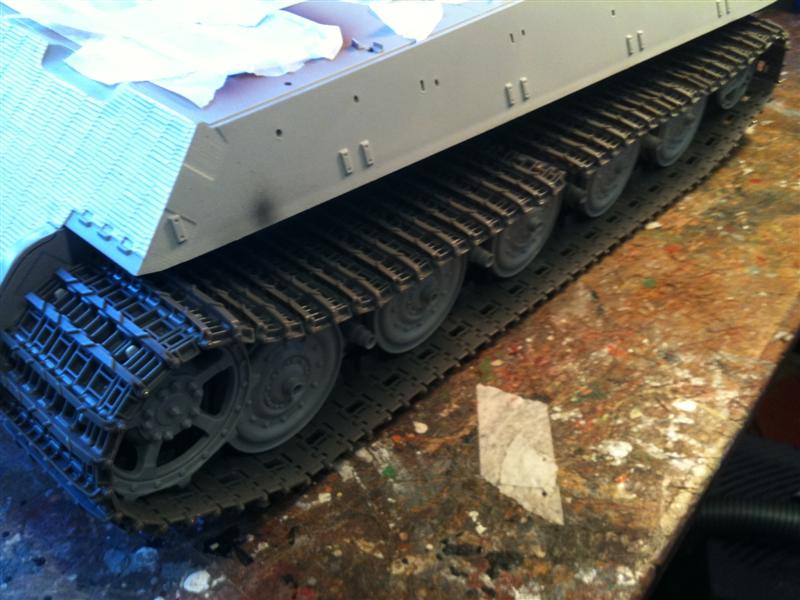
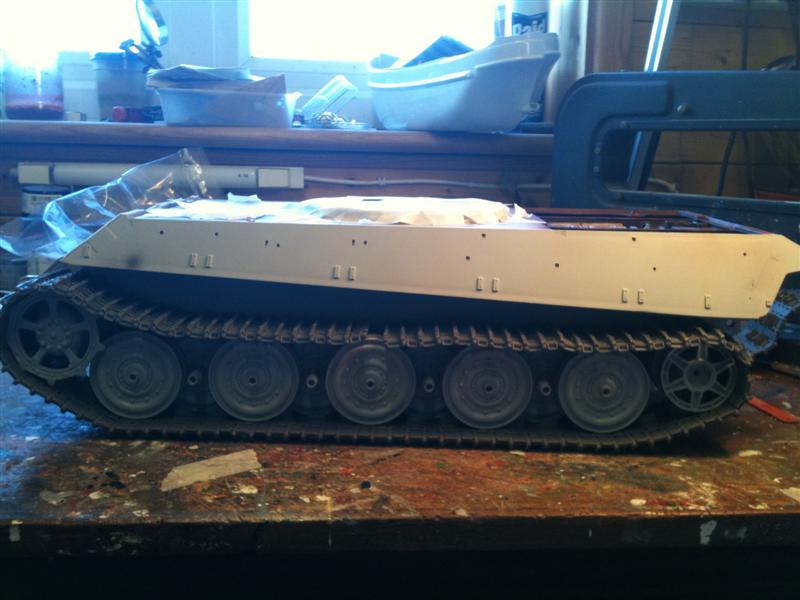
The inner track horns need to be trimmed down about 1.5mm in order for the track links to fit properly around the drive sprocket. The shorter inner horns are found on the actual vehicle.

I've been working on my KT for the better part of two years, most of the time spent correcting the glaring mistakes in the kit. There are lots of them, too.

You might want to check out

AFV Modeller :: Trumpeter Tiger 2 :: A build & info resource!

There is a lot of information about the kit, and the actual vehicle itself, which you will find useful.

P.S.

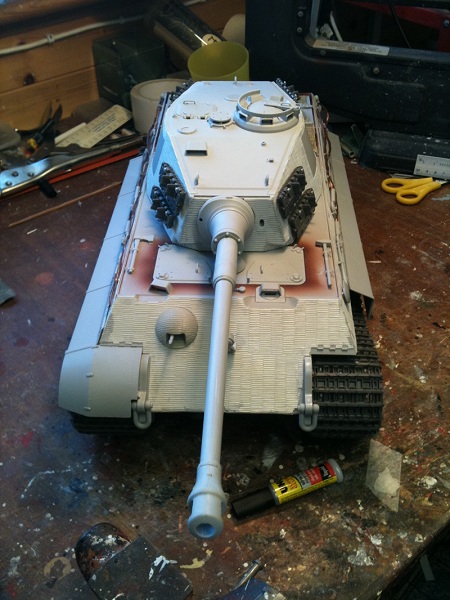
I spent 60 hours just building and detailing the gun carriage.
Matt182
Visit this Community
United Kingdom
Joined: May 20, 2010
KitMaker: 269 posts
Armorama: 243 posts
Posted: Thursday, June 16, 2011 - 11:00 PM UTC
Thanks for your comments guys,

Joesph,

I have been following the builds on the AFV forum for sometime now and I must say they are mighty impressive. Some of them are no longer models but 3D blueprints! Respect to all of you for taking on such a huge challenge.

Me personally, I am more interested in the external apperance than the interior so I decided to just deal with the accuracy problems as most of it wont be seen. If trumpeter had released an exterior version only (and they should) I would have got that.

As to the issues you pointed out, I have been aware of these for some time thanks to the AFV forum and all the builds on there. I ruled out scratch building the racks and decided against the resin items. I had already taken the decsion to have the turret facing striaght once on display, there will be no ground work or dio as such so no need to rotate it.

The ring guard has been shaved down to allow the turret to fit easily. I wanted to have the turret easy to lift of so if anyone wants to view the interior they can.

Are there any more fit issues I should be worried about at this stage. Theres been enough already so hopefully no more!

Oh yeah, 60 hours on the gun carriage, crazy!
Joel_W
Staff MemberAssociate Editor
AUTOMODELER
Visit this Community
New York, United States
Joined: December 04, 2010
KitMaker: 11,666 posts
Armorama: 1,143 posts
Posted: Friday, June 17, 2011 - 04:24 AM UTC
Simply an amazing build. Looking forward to following your build to completion.

Plasticbattle
#003
Visit this Community
Donegal, Ireland
Joined: May 14, 2002
KitMaker: 9,763 posts
Armorama: 7,444 posts
Posted: Friday, June 17, 2011 - 09:16 AM UTC
Hi Matt. Very nice clean build. Looks great with the zimmerit ... didn´t know there was a resin item available.
Matt182
Visit this Community
United Kingdom
Joined: May 20, 2010
KitMaker: 269 posts
Armorama: 243 posts
Posted: Wednesday, June 29, 2011 - 09:34 AM UTC
Thanks for your comments guys

Time for an update.

I completed the turret basket, built most of the main gun and finished the turret roof. Again poor part fit and plenty of filling to do!


I also quickly built up the barrel. Its not great, going to need a fair amount of sanding and filling to look half decent. I dry fitted it to get an overall idea of the final size of this monster!


CMOT
Staff MemberEditor-in-Chief
ARMORAMA
Visit this Community
England - South West, United Kingdom
Joined: May 14, 2006
KitMaker: 10,954 posts
Armorama: 8,571 posts
Posted: Wednesday, June 29, 2011 - 10:00 AM UTC
This looks a promising build and the first one I can recall that looks as if it will get finished. Any chance you would consider sending in a build feature for the site?
Matt182
Visit this Community
United Kingdom
Joined: May 20, 2010
KitMaker: 269 posts
Armorama: 243 posts
Posted: Wednesday, June 29, 2011 - 10:59 AM UTC
Hi Darren,

I would be more than happy to write up a feature for the site. I will send you a PM shortly.

Cheers
Matt
RickJZ
Visit this Community
Ohio, United States
Joined: March 21, 2008
KitMaker: 35 posts
Armorama: 30 posts
Posted: Wednesday, June 29, 2011 - 11:19 AM UTC
awesome build! Your work is very impressive. Thanks for sharing all the pics.
PantherF
Visit this Community
Indiana, United States
Joined: June 10, 2005
KitMaker: 6,188 posts
Armorama: 5,960 posts
Posted: Wednesday, June 29, 2011 - 12:10 PM UTC
The interior work on this is mind boggling!


- Jeff
Matt182
Visit this Community
United Kingdom
Joined: May 20, 2010
KitMaker: 269 posts
Armorama: 243 posts
Posted: Saturday, July 02, 2011 - 09:48 AM UTC
Hello again guys, thanks for all your kind comments

The building stage is now 99% complete. I finished off the main gun, built the turret ammo racks, finished the turret and fitted the side skirts and fenders. Just a few things to sort out and clean up now. I just dryfitted the parts to show the completed exterior. Next up - Painting the turret interior


Matt182
Visit this Community
United Kingdom
Joined: May 20, 2010
KitMaker: 269 posts
Armorama: 243 posts
Posted: Tuesday, July 05, 2011 - 11:03 AM UTC
Hi guys, just another small update. I started painting the turret interior


Matt182
Visit this Community
United Kingdom
Joined: May 20, 2010
KitMaker: 269 posts
Armorama: 243 posts
Posted: Wednesday, July 20, 2011 - 11:21 AM UTC
Well after a couple of weeks break from the kit I got back to work. I have completed the turret interior and have sealed the turret up. I decided to not have any ammo in the turret so you can see as much as possible through the rear hatch. I also had to glue the main gun in the position I wanted as the spring to control the gun elevation is far to stiff.

I just have to finish off a few extior details and it's ready to paint. Time to make a bulk order of Vejello dark yellow!


Matt182
Visit this Community
United Kingdom
Joined: May 20, 2010
KitMaker: 269 posts
Armorama: 243 posts
Posted: Tuesday, July 26, 2011 - 09:10 AM UTC
Another update

Painting has begun. firstly I pre shaded with black and then coated it in dark yellow. I then sprayed lightened yellow in the panel centres and applied the camo. The paint is still in its basic state and theres still plenty to do!


Matt182
Visit this Community
United Kingdom
Joined: May 20, 2010
KitMaker: 269 posts
Armorama: 243 posts
Posted: Saturday, August 13, 2011 - 06:38 AM UTC
Hi Guys,

Just another little update. I decided that the camo need to be toned down a little so I tried to blend it together. I did this by giving the whole model a light coat of dark yellow and then a light coat of buff. I think this did the trick.

Next I started painting the tools and other details. At the moment they are just at a basic stage and will be detailed later.


I've been thinking about how I am eventually going to display this. I have decided to go against my original idea of having it as 'through the hatches' display. I'm now going to display it with all the panels removed like in the photos. I'm going to build a stand for the turret and have it suspended over the hull so you can see also see the fighting compartment.

I also bought a cheap second hand fish tank to display it in! A decent display case will be purchased later when I have more money for it. I think I will have to have one custom made as the overall length of the kit is over 60cm.

Thats all for now

Matt
Matt182
Visit this Community
United Kingdom
Joined: May 20, 2010
KitMaker: 269 posts
Armorama: 243 posts
Posted: Tuesday, August 16, 2011 - 09:56 AM UTC
Well it's really starting to look a tiger now

The decals are on along with a gloss coat. The tracks have been base coated in tamiya red brown. I need to buy another set of decals to replace the number on the right side of the barrel as I ruined it

Still plenty to do, next I will be working on the wheels.


 _GOTOTOP