California, United States
Joined: June 30, 2008
KitMaker: 2,408 posts
Armorama: 2,394 posts
Posted: Monday, August 15, 2011 - 07:18 PM UTC
California, United States
Joined: June 30, 2008
KitMaker: 2,408 posts
Armorama: 2,394 posts
Posted: Friday, August 19, 2011 - 04:02 PM UTC
California, United States
Joined: June 30, 2008
KitMaker: 2,408 posts
Armorama: 2,394 posts
Posted: Saturday, August 20, 2011 - 06:00 PM UTC
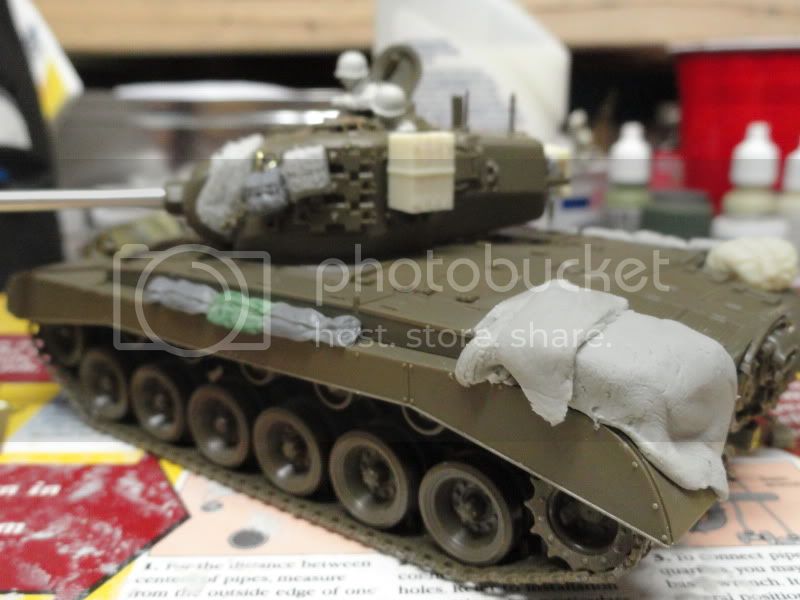
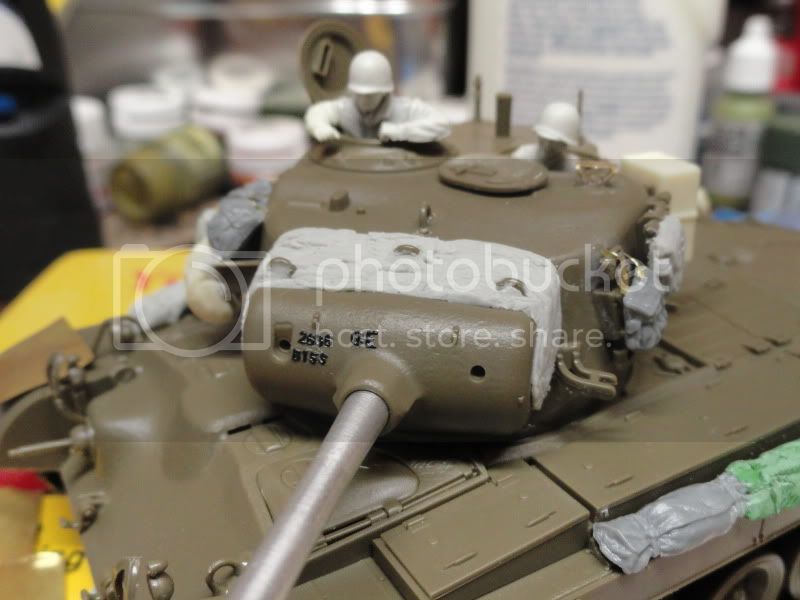
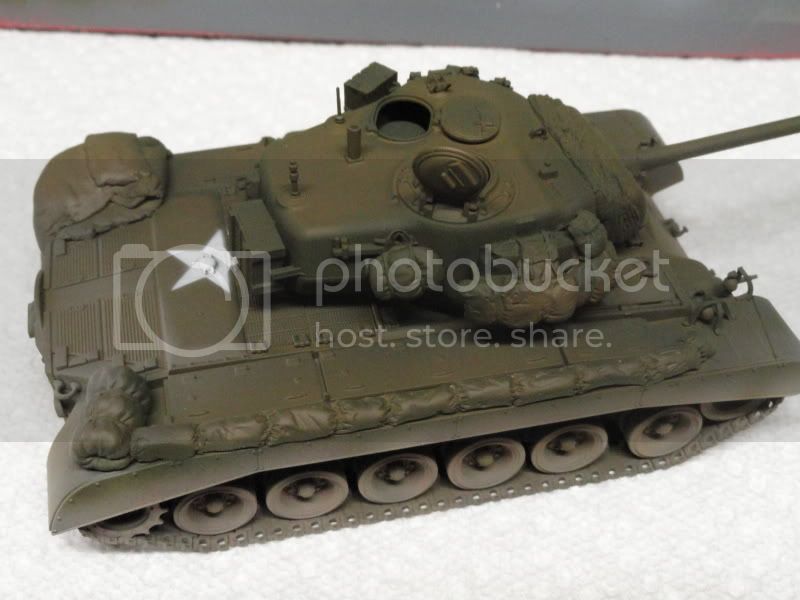
The tissue paper initiated on the 50cal but I'll be adding 1 strap and some more touch up to it. I was lucky I found one last bottle of Tamiya Olive Drab and mixed it with Dark Yellow to have enough paint to spray. I'm thinking I'll use the Verlinden mask to add a Star to the rear deck. Decals and detail painting next.
CMOT
 Editor-in-Chief
England - South West, United Kingdom
Joined: May 14, 2006
KitMaker: 10,954 posts
Armorama: 8,571 posts
Posted: Saturday, August 20, 2011 - 09:02 PM UTC
Looks to be coming along well Greg and the canvas covers you have made looks fair as well.
California, United States
Joined: June 30, 2008
KitMaker: 2,408 posts
Armorama: 2,394 posts
Posted: Sunday, August 21, 2011 - 06:12 AM UTC
Thanks Darren, I'm trying new stuff and learning with this build

California, United States
Joined: June 30, 2008
KitMaker: 2,408 posts
Armorama: 2,394 posts
Posted: Tuesday, September 13, 2011 - 03:41 PM UTC
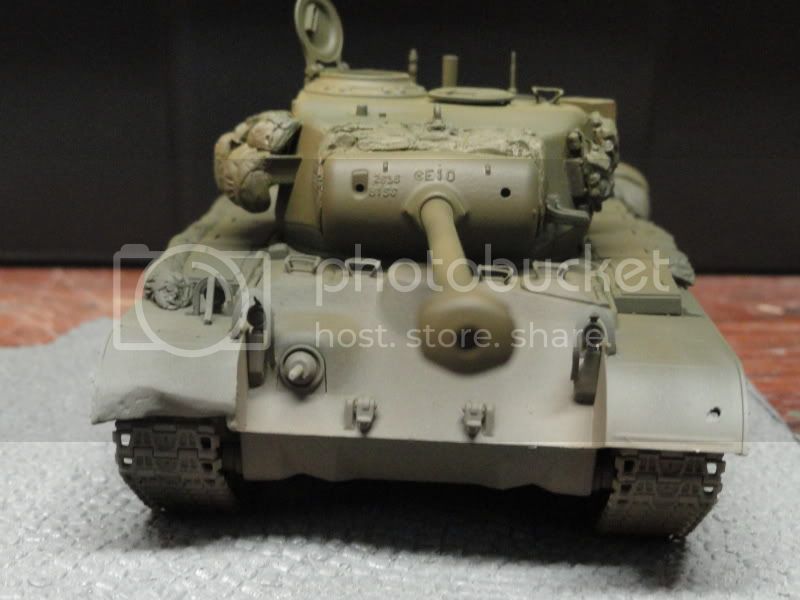
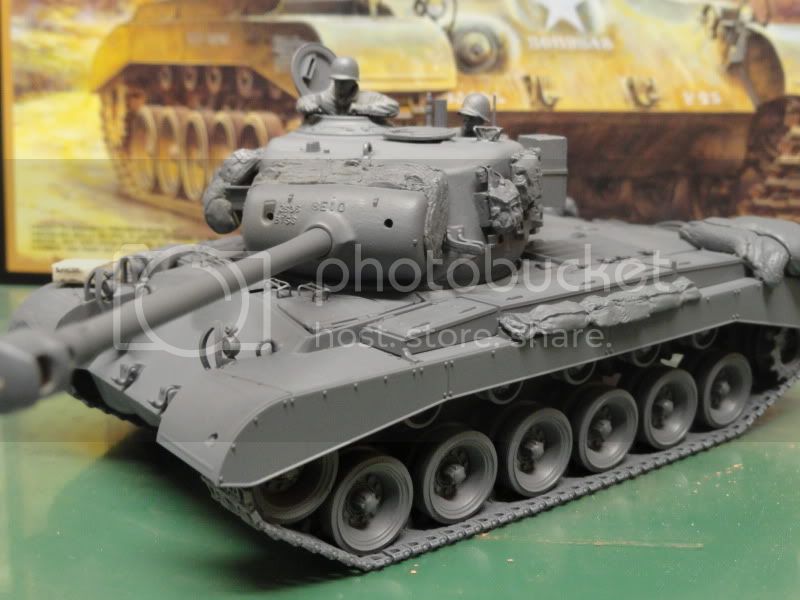
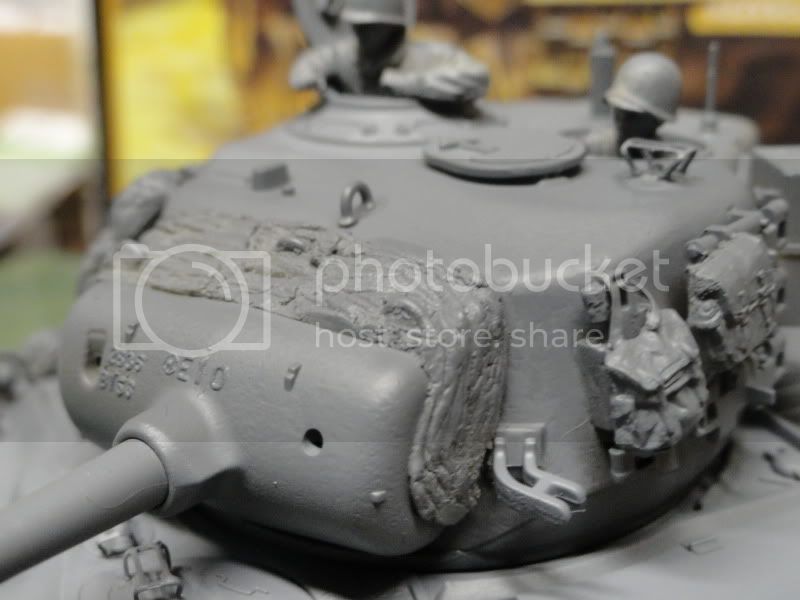
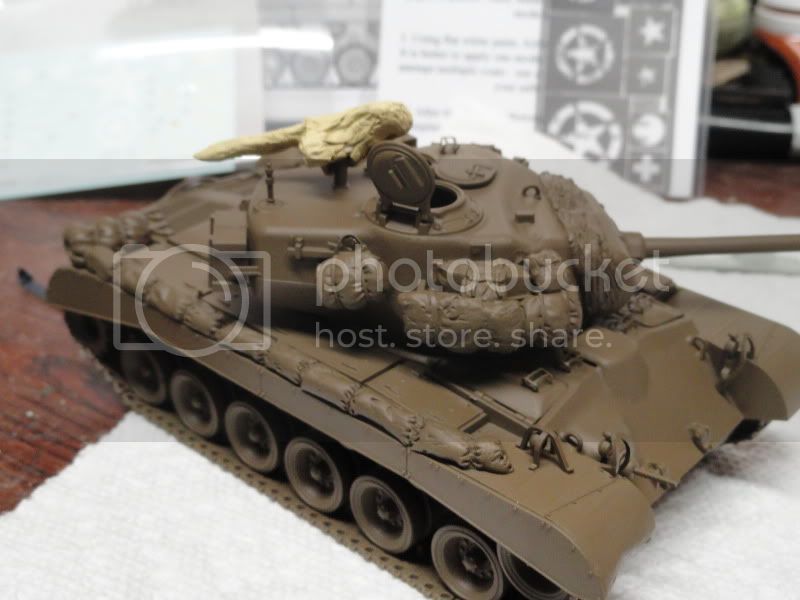
quickly did some spraying today - I bit heavy handed I think - too stark?. Maybe I'll try to mix it up a little more and the dust washes may also help bring it together. Spraying a star and Decals next

#023
Zurich, Switzerland
Joined: March 13, 2009
KitMaker: 2,058 posts
Armorama: 1,656 posts
Posted: Tuesday, September 13, 2011 - 09:51 PM UTC
Greg, nice work on the Pershing. Looks like some heavy duty scratch stowage! Who's the barrel from?
cheers!
Stefan
Too many models - too little time...
Joel_W
Associate Editor New York, United States
Joined: December 04, 2010
KitMaker: 11,666 posts
Armorama: 1,143 posts
Posted: Wednesday, September 14, 2011 - 02:30 AM UTC
Outstanding work on the stowage. Looking forward to updated pictures.

On my Workbench:
Monogram 1/24 scale 427 Shelby Cobra
Just Completed:
Beemax 1/24 scale BMW M3 E30 1992 Evolution II
California, United States
Joined: June 30, 2008
KitMaker: 2,408 posts
Armorama: 2,394 posts
Posted: Wednesday, September 14, 2011 - 03:09 AM UTC
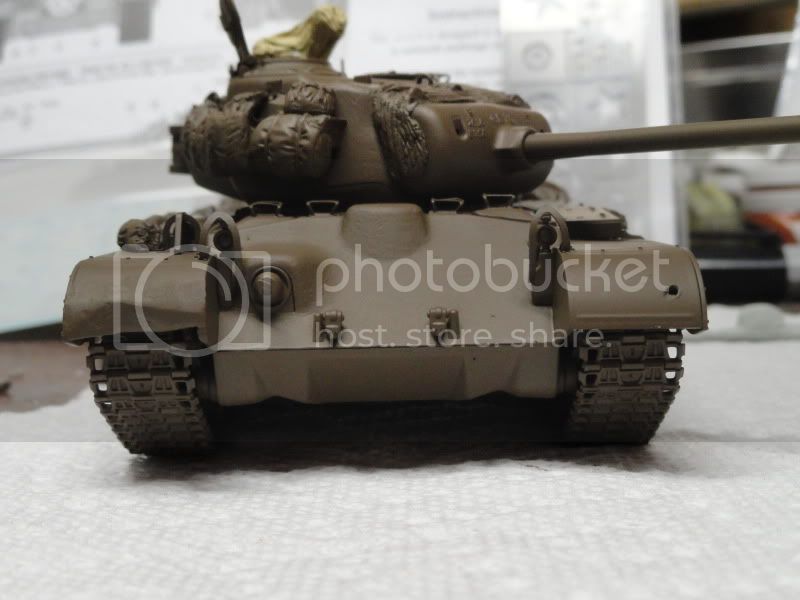
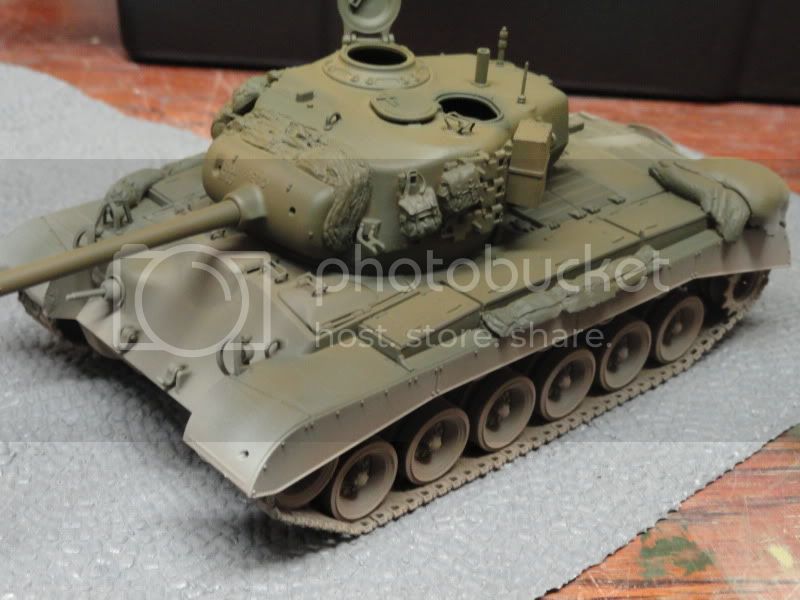
Thanks guys. It's an RB Barrel I got on sale at the Fighting48th shop. The stowage is scratch, Legend and Tamiya. I'm not happy with the color right now in some areas and going to try to spray some more.
#023
Zurich, Switzerland
Joined: March 13, 2009
KitMaker: 2,058 posts
Armorama: 1,656 posts
Posted: Wednesday, September 14, 2011 - 09:08 AM UTC
Greg, I think the colors will turn out great once you start with washes etc. My 2 cents...
Too many models - too little time...
California, United States
Joined: June 30, 2008
KitMaker: 2,408 posts
Armorama: 2,394 posts
Posted: Wednesday, September 14, 2011 - 03:12 PM UTC
Hello Stefan
, I'm thinking just a little more OD dark green around the mantlet and sides of the turret to make it a little more even there. That's for the perspective as it's hard to 'see' your own work sometimes if you know what I mean.

New Jersey, United States
Joined: July 25, 2006
KitMaker: 1,139 posts
Armorama: 946 posts
Posted: Thursday, September 15, 2011 - 05:37 AM UTC
Very nice work Greg. I'm a paint the stowage seperate modeler though, don't know how you guys do it.
Tom
"ALLONS" 11TH ACR BLACKHORSE
"Death Before Dismount"
19K40/ Dino Rider 19F10
California, United States
Joined: June 30, 2008
KitMaker: 2,408 posts
Armorama: 2,394 posts
Posted: Thursday, September 15, 2011 - 03:32 PM UTC
Thanks Thomas. I used to do stowage separate but then glue would smudge the paint wrong while trying to get a part to fit just right, or it wouldn't stick well enough, or I would just forget to weather it together with the rest of the model. So now I use Shep Paine's motto, "If you can see it, you can paint it!"
California, United States
Joined: June 30, 2008
KitMaker: 2,408 posts
Armorama: 2,394 posts
Posted: Monday, October 10, 2011 - 06:50 PM UTC
Texas, United States
Joined: June 29, 2010
KitMaker: 5,854 posts
Armorama: 4,817 posts
Posted: Tuesday, October 11, 2011 - 11:34 AM UTC
Looking good Greg. How do you recommend the base kit? It seems like it is probably more accurate than the 1/35 offerings.
California, United States
Joined: June 30, 2008
KitMaker: 2,408 posts
Armorama: 2,394 posts
Posted: Tuesday, October 11, 2011 - 04:37 PM UTC
I think it's pretty similar to the 1/35 Tamiya except the metal hull. The PMMS site I believe compares the two. I think it'll move along faster now - at least once I get the stars right on the Hellcat then I can just paint stowage at the same time on both tanks.