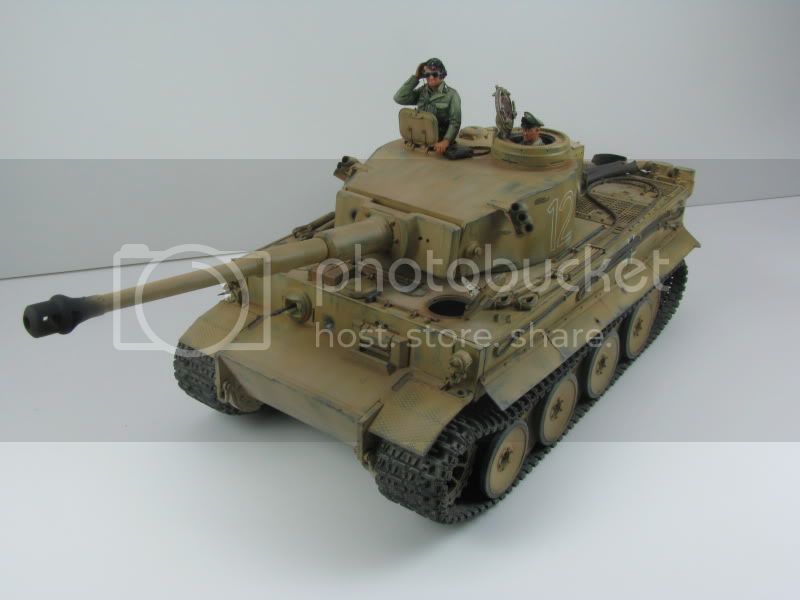
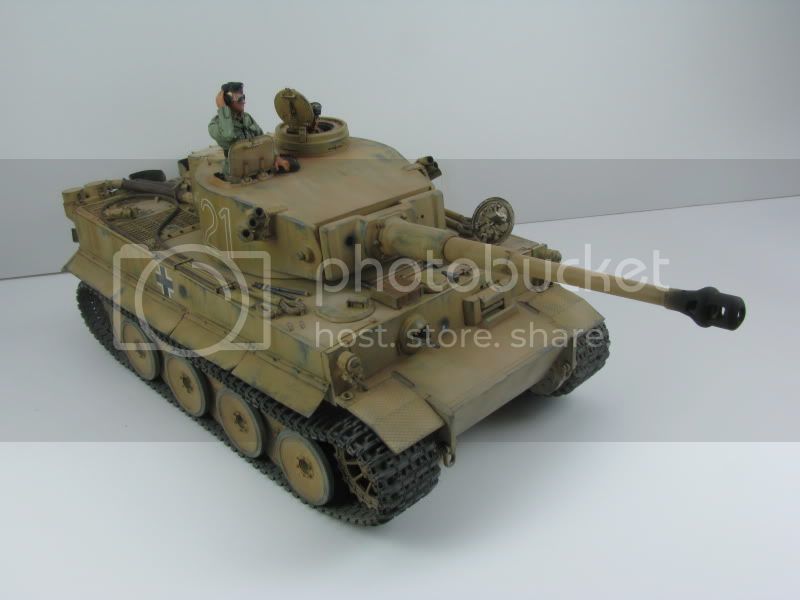
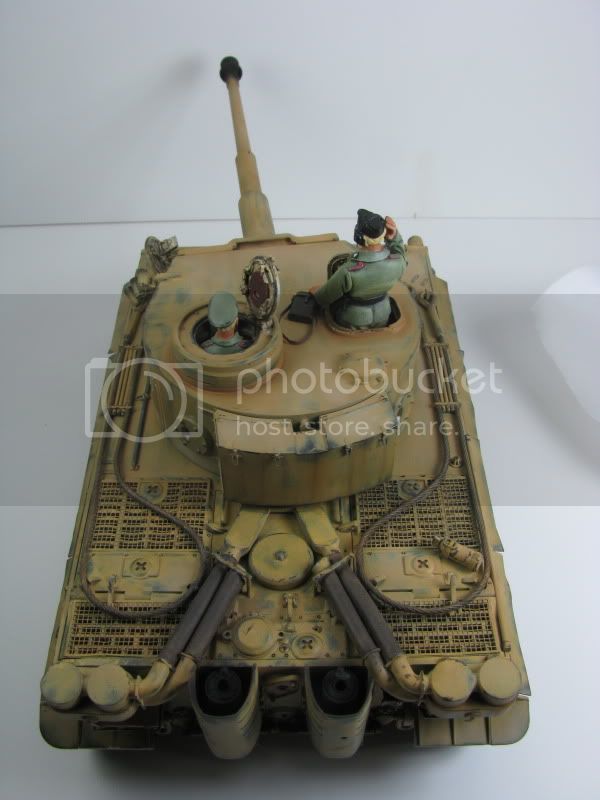
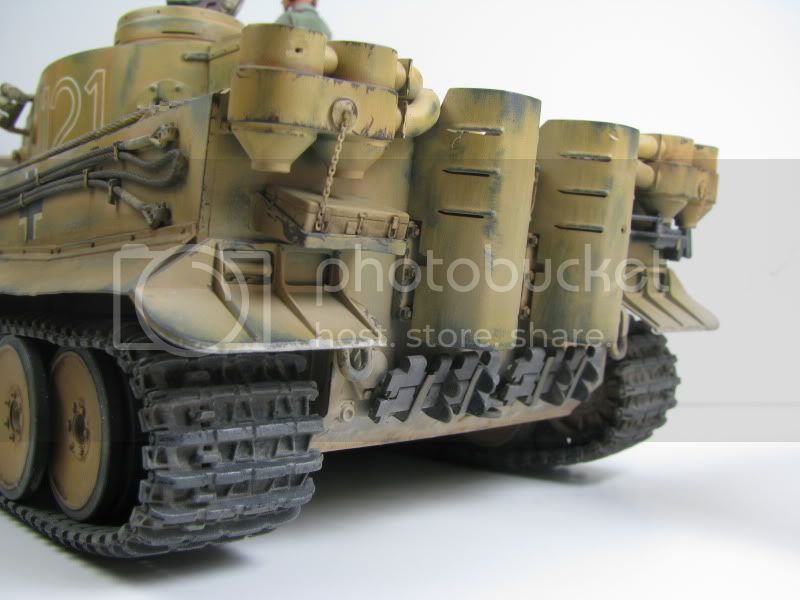
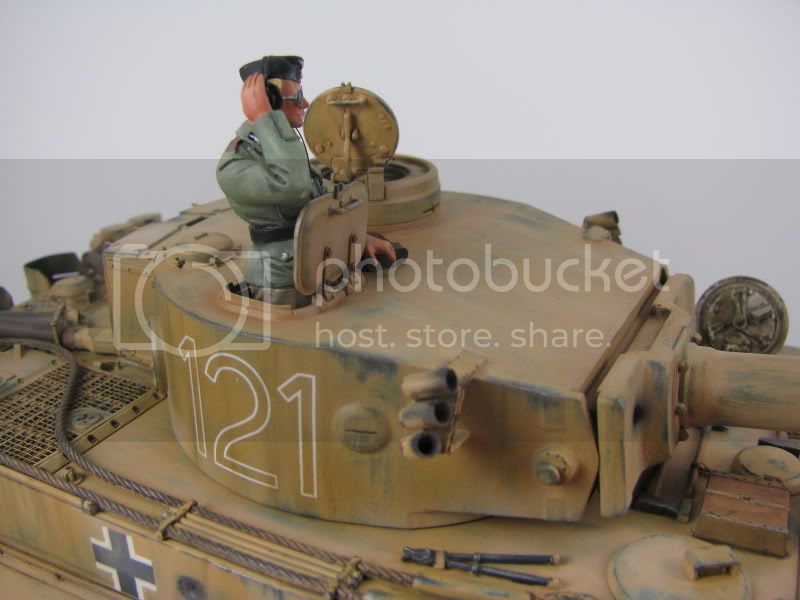
_GOTOBOTTOM
Constructive Feedback
For in-progress or completed build photos. Give and get contructive feedback!
Yet another Tiger I....
mimeda
Visit this Community
Wisconsin, United States
Joined: August 10, 2008
KitMaker: 204 posts
Armorama: 191 posts
Posted: Wednesday, August 31, 2011 - 05:17 AM UTC
Hello everybody, looking for some feedback on this 1/35 TAMIYA TIGER I Afrikakorps.
I know this is a very old kit with many alternatives nowadays but, still very enjoyable.

The kit was primmed with a dark gray primer, overall afrika yellow/sand from Tamiya, some oils on top and voila! Tracks got some pastel treatment as well as oils were needed.


Gun barrel is from RB models, decent but not the best I have seen. Grills are from Lionmarc, figures are Verlinden painted with Vallejo acrylics and suntanned with oils.


Wiring for smoke granade launchers, turret rain drain holes and sight were added too....


Any comments or reccomendations will be greatly appreciatted.

Mirko
retiredyank
Visit this Community
Arkansas, United States
Joined: June 29, 2009
KitMaker: 11,610 posts
Armorama: 7,843 posts
Posted: Wednesday, August 31, 2011 - 05:38 AM UTC
That weathering is awe inspiring and the paint excellent. How did you make the dents in the sides. That is just cool.
Tojo72
Visit this Community
North Carolina, United States
Joined: June 06, 2006
KitMaker: 4,691 posts
Armorama: 3,509 posts
Posted: Wednesday, August 31, 2011 - 06:48 AM UTC
Yes,but a very good one at that,always a pleasure to look at a well executed Tiger.weathering and the little details are great.
rdwing64
Visit this Community
Arizona, United States
Joined: June 24, 2007
KitMaker: 45 posts
Armorama: 42 posts
Posted: Wednesday, August 31, 2011 - 05:13 PM UTC
Very nice!
4-BO-Green
Visit this Community
Noord-Holland, Netherlands
Joined: March 30, 2011
KitMaker: 270 posts
Armorama: 230 posts
Posted: Wednesday, August 31, 2011 - 05:38 PM UTC
Good job Mirko!!

Love what you did with the oils. Looks nice and faded.
The shell impact on the side is a (tini) bit unusual... Let me explain;
The impact of a armor piercing shell is silver (like you made it)
The iimpact of a frag shell is black with a bit silver

I think if it was a armor piercing shell, it went through the side. The side of a tiger was 60mm thick, though but you could penetrade it with a armor piercing shell...

On the frontplate it would bounce off

A small thing, nevertheless nice job!
mimeda
Visit this Community
Wisconsin, United States
Joined: August 10, 2008
KitMaker: 204 posts
Armorama: 191 posts
Posted: Thursday, September 01, 2011 - 12:31 AM UTC

Quoted Text

That weathering is awe inspiring and the paint excellent. How did you make the dents in the sides. That is just cool.


Thanks! I used a round mandrel bit with a dremel at low revs. Then applied a bit of graphite from a #2 pencil with an old stiff bristle brush.
Mirko
mimeda
Visit this Community
Wisconsin, United States
Joined: August 10, 2008
KitMaker: 204 posts
Armorama: 191 posts
Posted: Thursday, September 01, 2011 - 12:34 AM UTC
Thanks Tojo, Rding and 4Bo. Good to know about the difference about the impacts! I will work on fixing that...Thanks again!
Rampenfest
Visit this Community
California, United States
Joined: April 28, 2011
KitMaker: 193 posts
Armorama: 188 posts
Posted: Thursday, September 01, 2011 - 11:41 AM UTC
Looks awesome. If you don't mind, I would really love to know how you made the faded look and the weathered off paint and what not. I love how your paint and weathering turned out. And the impact marks look super cool too. Nice job!

-Joe
4-BO-Green
Visit this Community
Noord-Holland, Netherlands
Joined: March 30, 2011
KitMaker: 270 posts
Armorama: 230 posts
Posted: Thursday, September 01, 2011 - 05:58 PM UTC

Quoted Text

Thanks Tojo, Rding and 4Bo. Good to know about the difference about the impacts! I will work on fixing that...Thanks again!


No problem Mirko,

We are here to help (i hope) each other. Also intresting is the way how a fragg shell explodes is the...eh, i call it the "spin" just like the clogg up in your airbrush and suddenly sprays and makes a ''dott'' on our beloved model .
There is a lot of surface damage, but no real penatration.

Regards,

Remco
panzerbob01
Visit this Community
Louisiana, United States
Joined: March 06, 2010
KitMaker: 3,128 posts
Armorama: 2,959 posts
Posted: Friday, September 02, 2011 - 03:02 AM UTC
Mirko;

NICE TIGER!

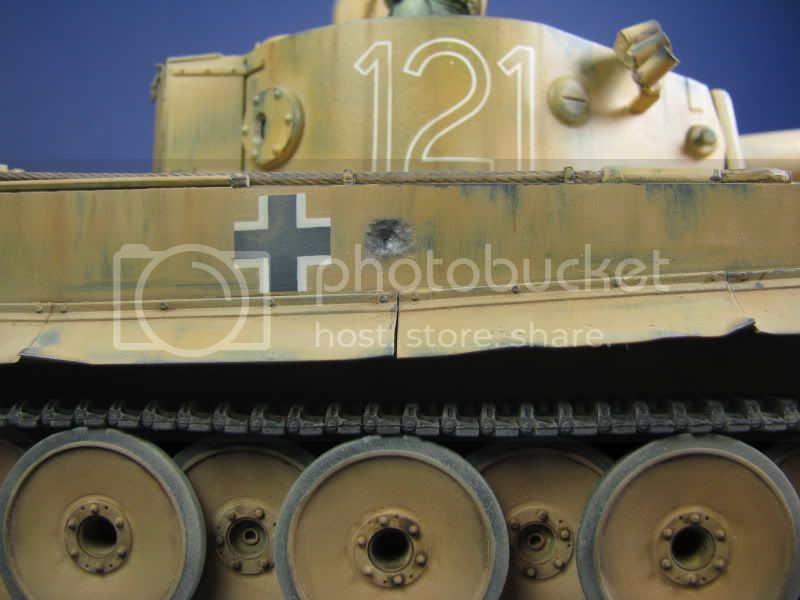
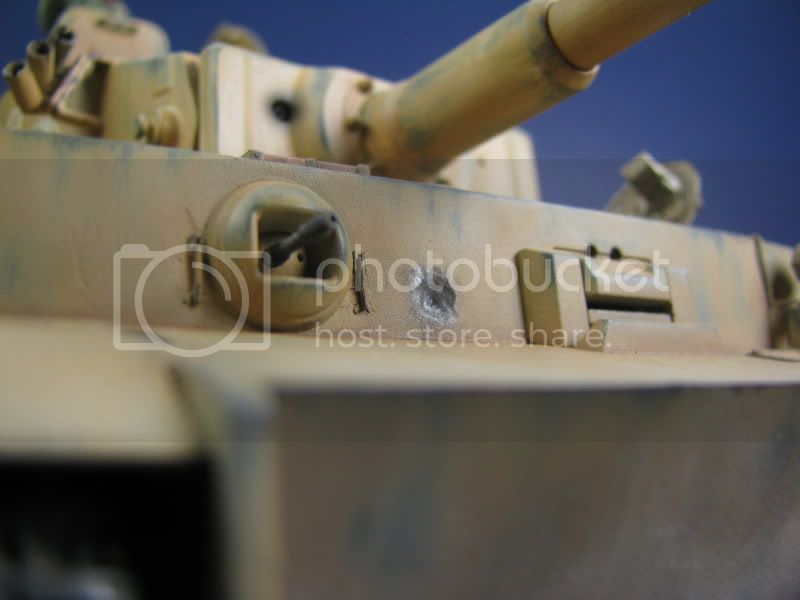
I liked your shell impact... I think you are pretty "good" with the silvered gouge. It looks pretty convincely like a non-penetrating solid shot strike, to me! I would maybe add on a slight blackening of the paint right around the edge of that gouge, and maybe darken the silver just a little to reflect it's newly-burnished steel. Otherwise than that, looks right, IMO. Maybe some Brit expressing his outrage with a 2lb gun as the big steel kitty lumbered on past!

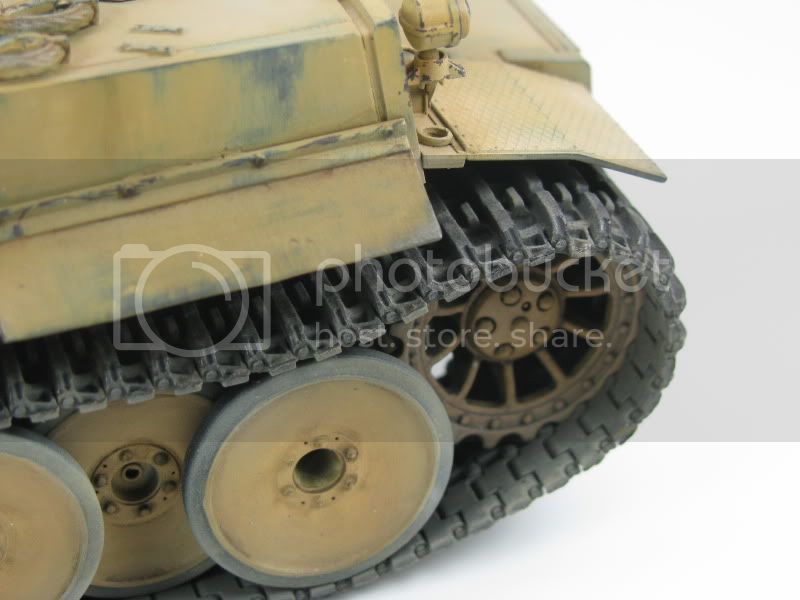
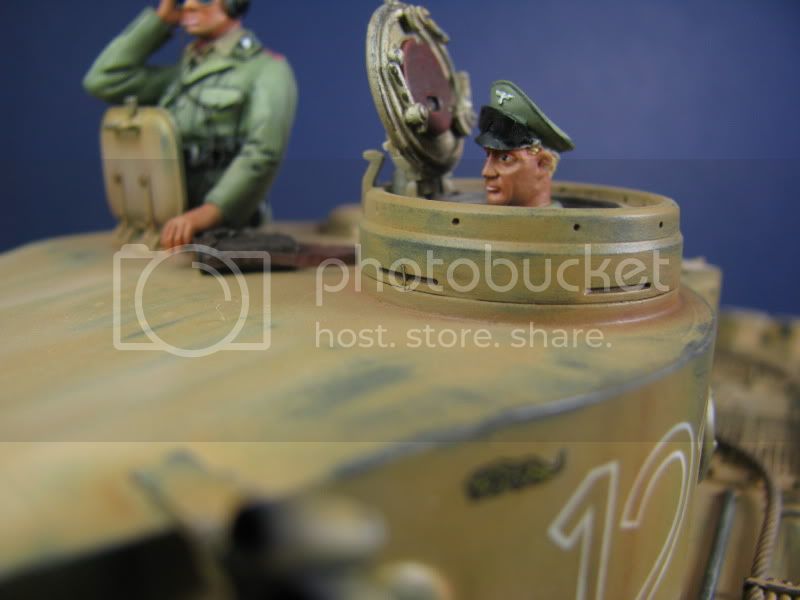
About AP impacts... Consider that 60mm sidewall armor was still very heavy-duty and mostly impervious to all but close-in direct impacts from most Allied guns in Africa. In most cases, the solid shot of the day would typically either deflect off (if impacting at some angle), or would gouge in and then fragment, if a direct-on strike. These impacts would produce a bare-metal gouge (silvery, but maybe darker to represent newly-burnished steel...) with a small melt birm thrown up by displaced melted armor and shot metal. There would be a small amount of super-heating damage to immediate-area paint (so a tiny amount of burning around the crater). The angled impact would "trough" the gouge, whereas the perpendicular strike would create a more-regular dimple. A larger-calibre shot could both gouge and dent-in / deform the plate.

Any non-penetrating explosive shell would of course leave less gouge and more blackening from the burst burn.

German tanks which have been holed by AP shot often show the penetrations to look like nearly-lipless holes punched thru the plate. Sometimes an irregular hole, and sometimes with one or more cracks radiating out. Such strikes often punched thru due to armor-plate brittleness and failure, and spalled-off a chunk inside the hull. Of course, if THAT had happened to your Tiger....

Nice Tiger! Someday I'll build one, too (Tiger, that is. But will it be "nice"? That is a different question! ) !

Bob
Hederstierna
#247
Visit this Community
Nordjylland, Denmark
Joined: January 03, 2008
KitMaker: 1,102 posts
Armorama: 1,018 posts
Posted: Friday, September 02, 2011 - 03:18 AM UTC
Very nice tiger indeed. You've done an awesome paintjob and the weathering is right on. Just a tiny thing though, it should be the commandor, who would be wearing the headphones, because the loader didn't have any at all. Oh well, maybe the commander got tired of the constant radionoise, and then ordered the loader to take over for a while
Jacob
Herr_Alvaro
Visit this Community
Cordoba, Argentina
Joined: September 02, 2011
KitMaker: 13 posts
Armorama: 9 posts
Posted: Monday, September 12, 2011 - 11:05 AM UTC
Excellent paint job. The details are wonderful.
Regards
Byrden
Visit this Community
Wien, Austria
Joined: July 12, 2005
KitMaker: 2,233 posts
Armorama: 2,221 posts
Posted: Sunday, October 16, 2011 - 10:53 PM UTC

Quoted Text


Oh well, maybe the commander got tired of the constant radionoise, and then ordered the loader to take over for a while
Jacob


I'm afraid the wire would not reach to the loader's position.

David
rholmstr
Visit this Community
Oregon, United States
Joined: September 30, 2010
KitMaker: 28 posts
Armorama: 18 posts
Posted: Monday, October 17, 2011 - 04:55 PM UTC
Outstanding all around. Weathering is perfect.

Well Done

Bob
PBR_Streetgang
Visit this Community
California, United States
Joined: February 10, 2008
KitMaker: 62 posts
Armorama: 48 posts
Posted: Monday, October 17, 2011 - 06:34 PM UTC
Mirko,

Excellent job! And it goes to show that even the older '70's Tamiya kits still are worth building!

I have tons of Dragon T-34's, but love to start a project using a Tamiya kit. What I really love with them is the rolling wheels. I just don't know why Dragon has the wheels static? I have a late model Tiger one with working hatches and a recoiling barrel. Why don't the wheels roll?

Your figures look great, too! The skin looks real. Look up a Calvin Tan, he was in one of the Osprey Books and has a great tutorial online. He used to paint for Alpine Miniatures. His figures are amazing!

Hope to have something this nice up soon...

Bill B.
tommy1drop
Visit this Community
England - East Midlands, United Kingdom
Joined: February 07, 2011
KitMaker: 131 posts
Armorama: 116 posts
Posted: Monday, October 17, 2011 - 11:47 PM UTC
Excellent paint job, the weathering is fantastic, i too like the shell impacts very convincing.

Fantastic job as i love big cats, this is a really nice kit........well done!

Tom
 _GOTOTOP