Armor/AFV: Axis - WWII
Armor and ground forces of the Axis forces during World War II.
Hosted by Darren Baker
DML #6370 Panther Ausf. G with AM-Works PE
SdAufKla
Visit this Community
South Carolina, United States
Joined: May 07, 2010
KitMaker: 2,238 posts
Armorama: 2,158 posts
Posted: Sunday, October 02, 2011 - 02:43 AM UTC

Quoted Text

Fantastic work!!


Thanks, Jan!

It's coming along well so far... We'll see how all the various bits and pieces will come together over the next few days as I glue up all the PE details to the hull!

Hopefully no problems!

jrutman
Visit this Community
Pennsylvania, United States
Joined: April 10, 2011
KitMaker: 7,941 posts
Armorama: 7,934 posts
Posted: Sunday, October 02, 2011 - 03:36 AM UTC
Excellent and very useful tips going on here on this thread. You can't beat PE for scale thickness and that soldering really makes it all come together. That is onr of the best battle damaged stowage boxes that I have seen.
J
SdAufKla
Visit this Community
South Carolina, United States
Joined: May 07, 2010
KitMaker: 2,238 posts
Armorama: 2,158 posts
Posted: Monday, October 03, 2011 - 01:42 AM UTC

Quoted Text

Excellent and very useful tips going on here on this thread. You can't beat PE for scale thickness and that soldering really makes it all come together. That is onr of the best battle damaged stowage boxes that I have seen.
J


Jerry:

Thanks old friend! That means a lot coming from you. I appreciate it!

Mike
SDavies
Visit this Community
England - South East, United Kingdom
Joined: January 09, 2010
KitMaker: 979 posts
Armorama: 959 posts
Posted: Monday, October 03, 2011 - 05:14 AM UTC
Wow, really great work, I love the Panther G and I have one in my collection waiting to be built. I really love PE too.

Will be following this one with interest
Bizarre
Visit this Community
Akershus, Norway
Joined: July 20, 2010
KitMaker: 1,709 posts
Armorama: 1,581 posts
Posted: Monday, October 03, 2011 - 05:30 AM UTC
Awesome work. These PE sets from AMW look sweet. I have one for Jadpanther, I will start building it sooner or later
PantherF
Visit this Community
Indiana, United States
Joined: June 10, 2005
KitMaker: 6,188 posts
Armorama: 5,960 posts
Posted: Monday, October 03, 2011 - 05:44 AM UTC
INTENSE work!!!! Nothing better than a Panther build. The Tiger I stole the spotlight for so long now it's time for the other kat.


~ Jeff
Braille
#135
Visit this Community
California, United States
Joined: August 05, 2007
KitMaker: 1,501 posts
Armorama: 1,485 posts
Posted: Monday, October 03, 2011 - 08:31 AM UTC
@SdAufKla - Mike,

Now this is a build log! very informative, super job on the photographs and build. This really helps all of us out there struggling with PE. Lots of techniques and options.

The Panther Campaign will be starting soon so your build log comes at just the right time for me. Sure would be nice to have you and some of your club members join in on the fun too!

Had gathered all of my materials for my contribution, so I thought . . . but now I've got to get some needed tools for the PE, thanks to you!

Keep it rolling, I'm enjoying this one!
-Eddy
SdAufKla
Visit this Community
South Carolina, United States
Joined: May 07, 2010
KitMaker: 2,238 posts
Armorama: 2,158 posts
Posted: Tuesday, October 04, 2011 - 03:05 AM UTC
@ Roman: Yes, the AM-Works PE sets are well designed and engineered. If you haven't already found this blog, one of our members is also building the Jagdpanther with the AM-Works PE -

Jagdpanther: Well I hope!

@Jeff: Oh yea, the Panther deserves some love, too! It's one of my favoritre build subjects. I have some plans for the cammo on this one that I think you'll like...

@Eddy: Just trying to pay a little back to all those guys who've shared their techniqes and methods before me.

Looking back over this thread, the "PE DVD" thread, and our club build notes, I can see that there's sufficient material to maybe justify the effort to consolidate into a single location for a PE-related "how-to" or SBS. Maybe after this build I'll try to put something together so the info is easier to find.

At any rate, I'm glad that you're finding some useful info here.

Cheers, guys, and happy modeling!
metooshelah
#011
Visit this Community
Jerusalem, Israel
Joined: February 06, 2009
KitMaker: 1,507 posts
Armorama: 1,304 posts
Posted: Tuesday, October 04, 2011 - 04:12 AM UTC
awesome. I find your PE skills something to be learned from! keep sharing
BLACKWATER
Visit this Community
Yunnan, China / 简体
Joined: August 05, 2010
KitMaker: 449 posts
Armorama: 441 posts
Posted: Tuesday, October 04, 2011 - 04:19 AM UTC
Such a convincing effect, thanks to share.
SdAufKla
Visit this Community
South Carolina, United States
Joined: May 07, 2010
KitMaker: 2,238 posts
Armorama: 2,158 posts
Posted: Tuesday, October 04, 2011 - 02:10 PM UTC
@ Matan and W.J.: Thanks guys. Here's some more on the build itself -

Over the last couple of days, I've managed to glue-up all the PE details and assemblies on the hull.

I started with the rear hull adding the tail light and starter crank support. I then added the jack mounts followed by the exhausts. This sequence allowed me to work with the least amount of worry about interference with each subsequent part added:


And with the exhaust heat shields dry-fitted:


Note that the upper jack clamp is open on one side so that I can slide the jack out for painting. Once I paint the cammo and weather the jack, I'll slip it into its mounts and close them up.

The right side:


Note again that all the tools and equipment can be removed for painting the vehicle's cammo and weathering the tools separately.

The left side:


Note here that the cleaning rods still need to be constructed. Here I just have the brass tube that I scrounged up for them sticking out of the holder to get an idea if how it will look. More work to do in this area!

And finally, here's the PE replacement for the main gun travel lock chain. The PE is pretty convincing once finished - not too bad!


Since a few days ago, I've had a lot of discussion with some of my club-mates about building the AM-Works tool clamps and ideas for working with the PE that don't require a design-purpose bending tool like the Small Shop "Hold 'n Fold."

I'm working up some more SBS photos of the process I use to build the clamps both with and without a bending tool. Hopefully I'll have those posted here in the next day or so. Every bending and folding task that's needed to make all of the PE sub-assemblies in this up-date set can be done without a dedicated bending tool! The work is slower in setting up the bends, etc, but it can be done!

So, stay-tuned...

Happy modeling,
panamadan
Visit this Community
Minnesota, United States
Joined: July 20, 2004
KitMaker: 1,513 posts
Armorama: 1,449 posts
Posted: Tuesday, October 04, 2011 - 04:19 PM UTC
Big work here Mike!
Great job, Dan
SdAufKla
Visit this Community
South Carolina, United States
Joined: May 07, 2010
KitMaker: 2,238 posts
Armorama: 2,158 posts
Posted: Wednesday, October 05, 2011 - 10:14 AM UTC
@ Dan: Thanks again!

Well, as mentioned in my last post, I've done up a small step-by-step / how-to on assembling the AM-Works working tool clamps. This information contains instructions for using both the Small Shop "Hold 'n Fold" and "old school" techniques to bend the tool clamp parts. So, for those of you who don't have a special PE bending tool, you've probably got what you need to build these clamps right on your work bench.

I had thought to add the photos and info here, but as I got going it was clear that it was too long to add in the middle of this build blog.

Here's the link to the article:
Special Edition PE Tool Clamp SBS "How To"

Here are a couple sample photos from the article. BTW: The full article runs 17 pages and has 30 photos.


So, if you're looking for some tips and directions to assemble these tool clamps, please visit our website and download the article. Hope someone finds the info useful.

Happy modeling,
pseudorealityx
Visit this Community
Georgia, United States
Joined: January 31, 2010
KitMaker: 2,191 posts
Armorama: 1,814 posts
Posted: Wednesday, October 05, 2011 - 12:38 PM UTC
Thanks for the effort Mike. I think ATL AMPS website needs to link to that on their how-to section. We already have a few of your older articles on there.
SdAufKla
Visit this Community
South Carolina, United States
Joined: May 07, 2010
KitMaker: 2,238 posts
Armorama: 2,158 posts
Posted: Thursday, October 06, 2011 - 12:28 AM UTC

Quoted Text

Thanks for the effort Mike. I think ATL AMPS website needs to link to that on their how-to section. We already have a few of your older articles on there.


@ Jesse: Hopefully Gregg G. knows that he's always welcome to use stuff from our newsletters and website!

AMPS Central SC appreciates the help and support that we've gotten from the Atlanta AMPS since we started up, so we're always happy to share and pay back a little on our debt of gratitude to you guys!

Happy modeling,
SdAufKla
Visit this Community
South Carolina, United States
Joined: May 07, 2010
KitMaker: 2,238 posts
Armorama: 2,158 posts
Posted: Thursday, October 06, 2011 - 02:42 PM UTC
A little up-date for today. I got some of the basic and initial work done on the major turret parts.

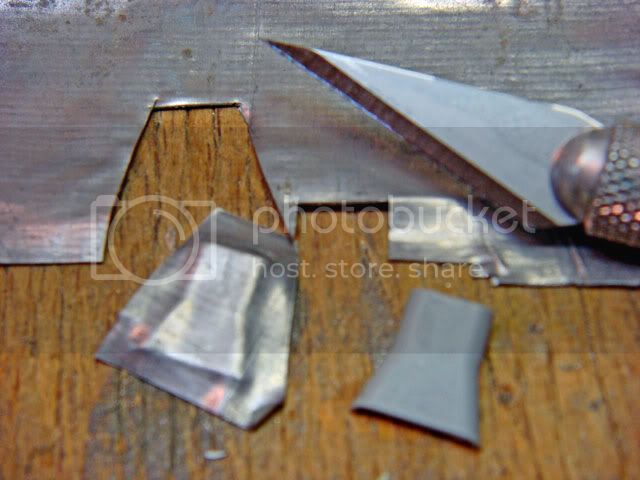
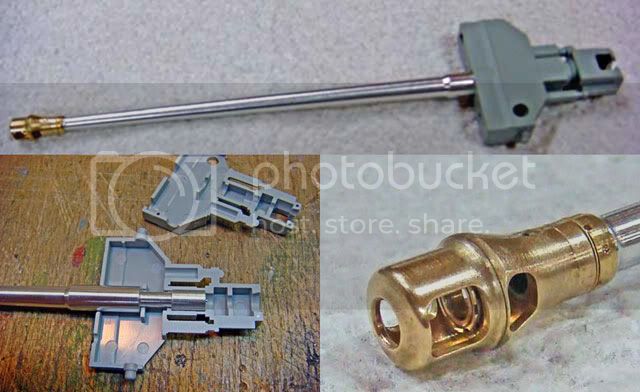
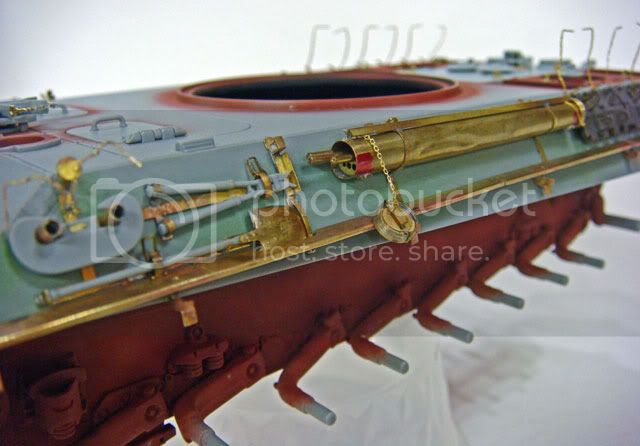
I'm using the Aber gun barrel. It's a perfect replacement and fit for the kit parts. The muzzle break parts break down is typical for Aber. The PE locking tab and bolt needed to be reduced in width to fit the milled slot in the rear part of the muzzle break. Also, the aluminum barrel needed to be sanded a bit to fit into the hole in the assembled muzzle break.

Appearently Aber is aware of this fit problem since the instructions show to use a file to open the muzzle brake hole to accept the barrel. I found it easier to slightly sand the barrel with a Flexi-File to get it to fit. I started with the file, but immediately saw that "bunging-up" the inside of the brass muzzle brake was the likely result.


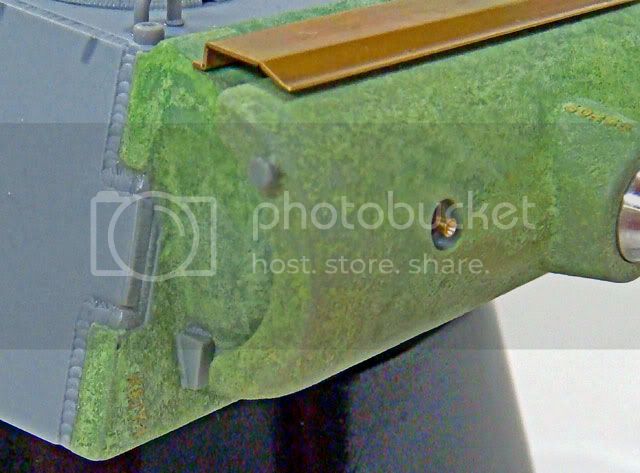
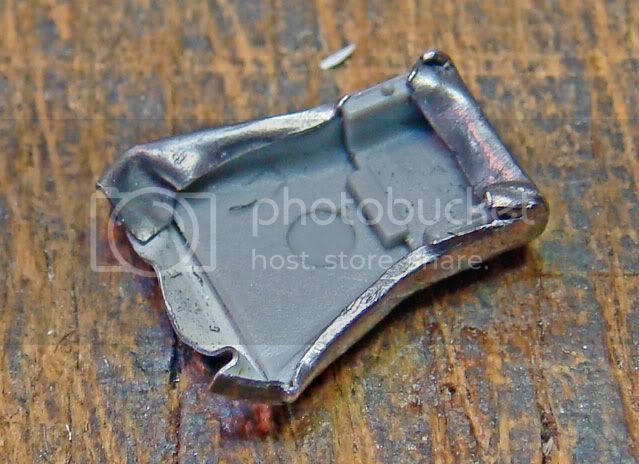
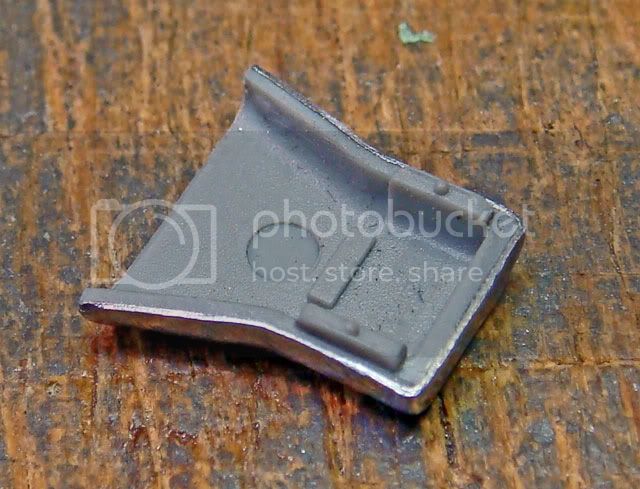
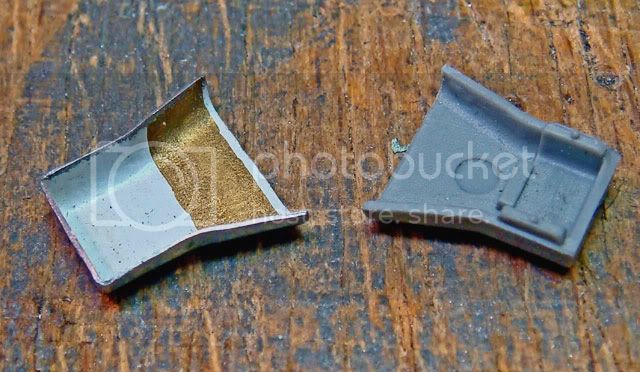
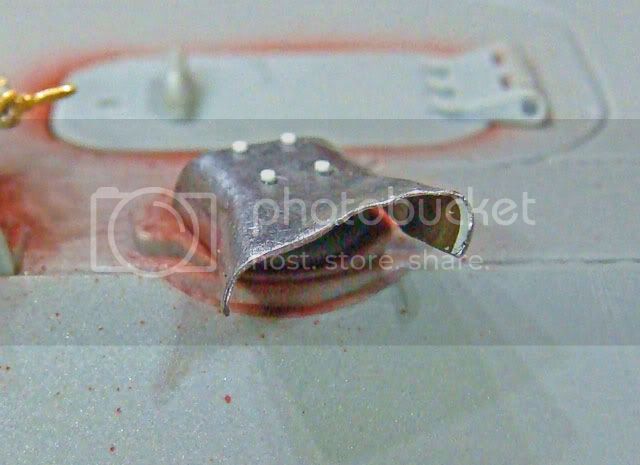
The gun mantlet needs a bit of detail work. I also decided to add the "thickening" that is seen on some examples of this mantlet. I used Milliput putty for this.

The casting numbers on the top of the gun barrel collar match the part number for the mantlet: 50255. I used thePE numbers and letters included with the AM-Works Panther up-date set for these. These are a very nice addition to the set. They're easy to attach using liquid plastic cement to soften the surface of te kit part. Then just press the PE numbers and letters into the softened surface and allow the plastic to dry.

I still need to add the cast texture to the mantlet and will do so after the putty sets and the glue on the lifting lugs and PE numbers dries.


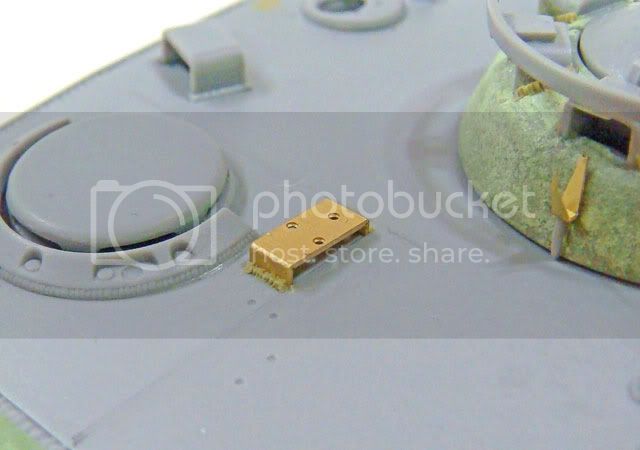
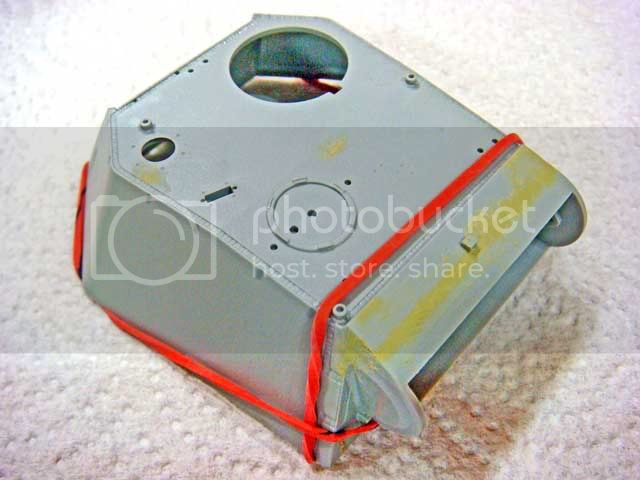
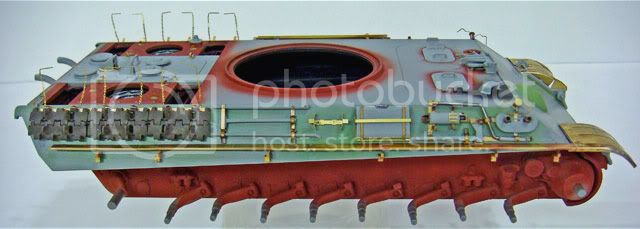
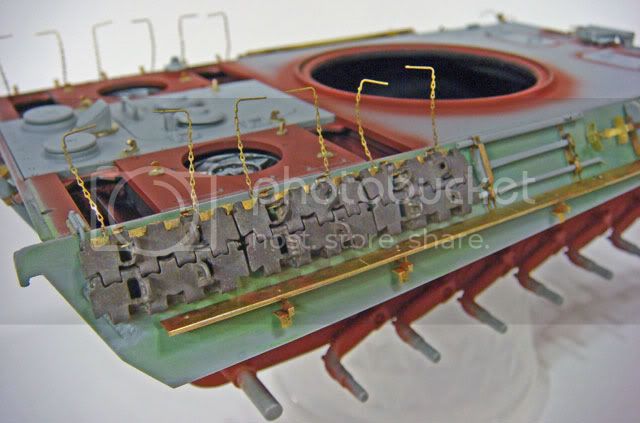
The turret itself assembles quite cleanly with some care. The entire front face of the Panther turret is a single large casting. DML does a very nice job of this, but there are still seams that need to be filled. The one across the top front edge is large enough that I used Milliput to avoid likely shrinkage. I also filled the three rectangular attachment holes on the turret roof for the poison gas detection panel holders. The tank I'm building was likely built a few weeks before these were installed. I filled the hole for the compass mounting plate, too. I'll use the AM-Works PE plate which mounts flush to the turret roof surface.

Here you can see the rubber bands holding the main turret parts together until they dry overnight.


Once the putty sets and glue dries, I'll sand and add the cast texture to the front plate.

I've added the three-letter manufacturer's code to the lower right front corner of the front plate casting. These letters, "KMY," were the code for the Eisenwerke Oberdonau GmbH, Linz an der Donau (accoriding to John Walter's book, "German Military Letter Codes"). The number "4" probably indicates manufacture in 1944.


Again, I used the AM-Works PE letters and numbers.

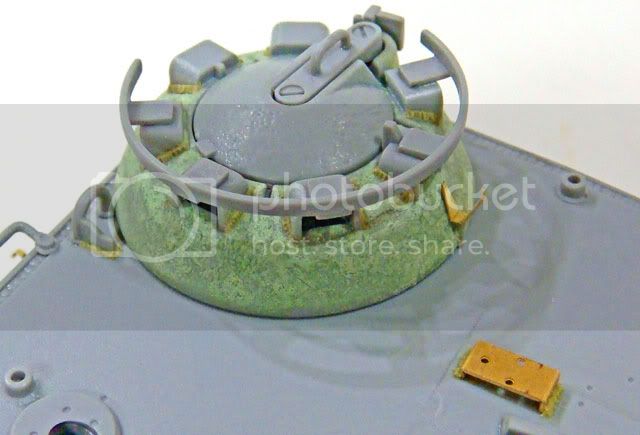
Finally, I've done the basic clean-up and gluing for the commander's cupola. DML has done an outstanding job on this sub-assembly. They've added the bumper, stop and hold-open for the hatch. The periscope openings are recessed under their armored "hoods." The interior structure is very accurately replicated. Cleaning up the periscope openings on the slide-molded outer cupola part takes a bit of time, but the results are worth the effort.

I've enhanced the cast texture a bit since I like the extra interests that comes from the contrasts in texture on the model. I'll also enhance the weld marks for the periscope hoods after the putty cast texture dries overnight.


So, that's all for now.
c5flies
Visit this Community
California, United States
Joined: October 21, 2007
KitMaker: 3,684 posts
Armorama: 2,938 posts
Posted: Friday, October 07, 2011 - 03:19 PM UTC
First off, excellent work Mike and thank you for a down to earth, easy to understand SBS on what you're doing. I picked up a lot of great tips here

Secondly, please compile this into a more permanent Feature for the site. I'd hate to see this get lost in the Forums. It's all too rare that someone can not only do a stunning job, but explain it as well as you do.
Spiderfrommars
Visit this Community
Milano, Italy
Joined: July 13, 2010
KitMaker: 3,845 posts
Armorama: 3,543 posts
Posted: Friday, October 07, 2011 - 07:34 PM UTC
That's really outstanding job, and thanks a million for sharing all that tips and tricks!
Lucky13
Visit this Community
Scotland, United Kingdom
Joined: June 01, 2006
KitMaker: 1,707 posts
Armorama: 46 posts
Posted: Saturday, October 08, 2011 - 12:25 AM UTC
Unbelievable work mate!
SdAufKla
Visit this Community
South Carolina, United States
Joined: May 07, 2010
KitMaker: 2,238 posts
Armorama: 2,158 posts
Posted: Saturday, October 08, 2011 - 03:21 AM UTC

Quoted Text

First off, excellent work Mike and thank you for a down to earth, easy to understand SBS on what you're doing. I picked up a lot of great tips here

Secondly, please compile this into a more permanent Feature for the site. I'd hate to see this get lost in the Forums. It's all too rare that someone can not only do a stunning job, but explain it as well as you do.


@ James: Thank you very much for the kind words and complements! (I think I'm blushing!)

I'll give some serious thought to your suggestion for a Feature article.

@ Mauro: You're very welcome for the tips and ideas. I'm just passing along what many others have taken the time to share with me, so I'm glad that you're finding the info useful.

@ Jan: Cheers, my friend!

Happy modeling all,
SdAufKla
Visit this Community
South Carolina, United States
Joined: May 07, 2010
KitMaker: 2,238 posts
Armorama: 2,158 posts
Posted: Sunday, October 09, 2011 - 02:16 PM UTC
Latest up-date here.

I'm just about ready for paint. I finished up construction on the turret and the last few outstanding details. First up, the turret...

An overview (slightly out of focus )


Here's the mantlet. You can see the green areas have all received a coating of thinned Squadron Green Stuff putty to enhance their cast texture:


You can easily see where the front plate was a single casting on the Panther. The rain guard over the gunner's sight apperture is made of wine bottle lead foil formed around a piece of metal tube and trimmed.

Here's the completed commander's cupola. I added the weld beads to the sides of the periscope armored hoods with Milliput epoxy putty. I also stippled the cupola hatch with Testor's liquid cement to enhance its cast texture and make that texture different that the cast effect on the cupola.


Interestingly enough (at least I found it interesting!), the cupola actually does sit proud a bit above the turret roof. I thought the DML assembly wasn't fitting properly, and when I tried to figure out why, I saw that the DML had deliberately molded a washer-like ring on the bottom of the cupola. So, it was obvious that that what I thought was a mis-fitting part was made like that. Sure enough, a check of Jentz's Panzer Tracts 5-3 showed HL Doyle's plans had this same gap (albeit not as great as the DML molded gap). I lowered the cupola slightly but did not remove the gap entirely as per the Doyle plans.


The Orterkompass mounting is the AM-Works PE part with Milliput weld beads:


With careful assembly, the DML Nahverteidigungs Waffe can be made to rotate per the prototype:


The rear hatch needs a couple of small details. I added the hasps for the lock with the tip ends of left-over PE parts A49. I also added the small finger loop for the rear hatch hold-open latch. For this I used a piece of one of the PE frets.


The DML kit is really very nice and the more I progressed, the more impressed I was. I had to dig hard to find details that either DML or AM-Works didn't include with their sets.

More to follow...
SdAufKla
Visit this Community
South Carolina, United States
Joined: May 07, 2010
KitMaker: 2,238 posts
Armorama: 2,158 posts
Posted: Sunday, October 09, 2011 - 03:58 PM UTC
One of the details that I wanted to improve was the rain guard over the driver's periscope. The rain guard is just too cool looking and is a "trade mark" feature of the Panther G's.

The kit parts are Ok, but I wanted to show a little damage on mine. So, I set out to replace the plastic rain guard with a metal part. I used a piece of wine bottle foil measured out with the kit part:


This was then pressed and formed around the plastic kit part:


The excess was trimmed and sanded away using the edges of the kit part as my guide:


Here's the completed formed guard compared to the kit part:


For the armored periscope guard on my replacement assembly I used the DML kit optional part C13 (an armored driver's periscope guard without the rain shield). This was quite convienent and another example of how nice the DML kit actually is.

And the completed replacement assembly:


And the completed and damaged assembly dry-fitted on the model:


I think it'll do...

A little more to follow...
panamadan
Visit this Community
Minnesota, United States
Joined: July 20, 2004
KitMaker: 1,513 posts
Armorama: 1,449 posts
Posted: Sunday, October 09, 2011 - 04:06 PM UTC
Looks like there needs to be a stencil there: Do not step!
Great work!
Dan
SdAufKla
Visit this Community
South Carolina, United States
Joined: May 07, 2010
KitMaker: 2,238 posts
Armorama: 2,158 posts
Posted: Sunday, October 09, 2011 - 04:40 PM UTC
Well, this brings me to the last few details before I get to painting.

I needed to add a couple of missing bolts on the crew compartment heater:


The connecting bolts are missing from the vertical flanges. I used Grant Line number 27 hex nuts for these.

I also wanted to show my headlight with the cover missing, so I modified the kit parts to show this. I used the night driving cover to make the bezel ring and used the excess clear part L7 for the headlight lens:


And lastly, sharp-eyed guys might have noticed that I forgot to add the reflector to the lower left rear hull. Well, I've caught that and add the PE replacement part.

So, that's all for now. Hopefully in my next up-date I'll be putting some paint on this beastie!

Have a great model-building kind of day!
SDavies
Visit this Community
England - South East, United Kingdom
Joined: January 09, 2010
KitMaker: 979 posts
Armorama: 959 posts
Posted: Sunday, October 09, 2011 - 08:34 PM UTC
Very impressive model and a great update. I love all that extra detail you are adding and the new techniques that you are showing off.

Cant wait for the Paint