_GOTOBOTTOM
Armor/AFV: Softskins
Softskins group discussions.
Hosted by Darren Baker
Dusting off the past projects
Grumpyoldman
Staff MemberConsigliere
KITMAKER NETWORK
Visit this Community
Florida, United States
Joined: October 17, 2003
KitMaker: 15,338 posts
Armorama: 7,297 posts
Posted: Sunday, October 23, 2011 - 03:50 AM UTC
I started this one back in 2007, a few years ago.

Well I discovered the Tamyia kit didn't give me the correct body, plus I wanted to do it as a US vehicle in use during WW2. Not a lend lease vehicle, so put it away frustrated. I recently decided to re-start the project using the Italeri kit, with the earlier steel body, and discovered a photo of the vehicle in US use during WW2.

More photos coming as I progress on this one.
Grumpyoldman
Staff MemberConsigliere
KITMAKER NETWORK
Visit this Community
Florida, United States
Joined: October 17, 2003
KitMaker: 15,338 posts
Armorama: 7,297 posts
Posted: Sunday, October 23, 2011 - 04:11 AM UTC

The island of Kodiak, where US Army have staioned men on alert to to block the Japanese occupying ATTU and Kiska. The trucks carrying crew and a .50 cal machine guns for protection from Japanese air attack, as crew set up heavier towed anti aircraft guns.
SC337853------ Jack Kludt collection via MVPA
HeavyArty
Visit this Community
Florida, United States
Joined: May 16, 2002
KitMaker: 17,694 posts
Armorama: 13,742 posts
Posted: Sunday, October 23, 2011 - 05:38 AM UTC
Looks pretty good. Can you give us some more info on what type of truck it is? It looks like a WWII Chevy 2 1/2 ton. Also, what kits did you use on it?
Big-John
Visit this Community
Ohio, United States
Joined: August 12, 2010
KitMaker: 731 posts
Armorama: 711 posts
Posted: Sunday, October 23, 2011 - 06:04 AM UTC
I'm very interested in this build, I will be keeping an eye on it for sure!
Frenchy
Visit this Community
Rhone, France
Joined: December 02, 2002
KitMaker: 12,719 posts
Armorama: 12,507 posts
Posted: Sunday, October 23, 2011 - 06:10 AM UTC
It's an GMC ACKWX 353. Here's another one :


Some had been ordered by the French Army.....in June 1940 ! They were delivered to the British instead. Most of them were sent to Russia through Lend-Lease.

HTH

Frenchy
Grumpyoldman
Staff MemberConsigliere
KITMAKER NETWORK
Visit this Community
Florida, United States
Joined: October 17, 2003
KitMaker: 15,338 posts
Armorama: 7,297 posts
Posted: Sunday, October 23, 2011 - 06:25 AM UTC
Thanks Frenchy.
I started the cab with the Real Models resin conversion. I got it assembled and primed, but when restarting the project, I managed to drop it and it shattered into several pieces, Unfortunately not along any glue joints, so I've been patching that up. I'm working on converting the tires to the much earlier tractor type tires, with the 8 holes instead of the six, and five lug nuts instead of the six.

Not great photos, but you get the idea.


Slow going, and I'm going blind and cross eyed doing this.
AlanL
Visit this Community
England - East Anglia, United Kingdom
Joined: August 12, 2005
KitMaker: 14,499 posts
Armorama: 11,675 posts
Posted: Sunday, October 23, 2011 - 08:04 AM UTC
Hi Dave,

Nice work so far, it's an interesting looking truck, I'll be following along.

Al
FAUST
#130
Visit this Community
Noord-Holland, Netherlands
Joined: June 07, 2002
KitMaker: 8,797 posts
Armorama: 4,190 posts
Posted: Sunday, October 23, 2011 - 08:33 AM UTC
Ola Dave

I'm not the only one with unfinisheds on the shelf. You have restored my faith in humanity. Great project. I love the subject. small adjustment and you have a not so much seen truck. me likey.
Looking forward to the rest.
redleg12
Visit this Community
New Jersey, United States
Joined: March 11, 2007
KitMaker: 872 posts
Armorama: 831 posts
Posted: Monday, October 24, 2011 - 12:03 AM UTC
Your Holiness....It is always a great thing to see you post some of your building adventures.

Rounds Complete!!
highway70
Visit this Community
California, United States
Joined: November 27, 2004
KitMaker: 322 posts
Armorama: 267 posts
Posted: Monday, October 24, 2011 - 05:46 AM UTC
One of my favorite trucks. Model looking good, but why are there 6 bows. Looks like there should only be 5.

Would like to see photos and a description of how you are doing the modifications to the tires/wheels.
Grumpyoldman
Staff MemberConsigliere
KITMAKER NETWORK
Visit this Community
Florida, United States
Joined: October 17, 2003
KitMaker: 15,338 posts
Armorama: 7,297 posts
Posted: Monday, October 24, 2011 - 10:26 AM UTC

Quoted Text

One of my favorite trucks. Model looking good, but why are there 6 bows. Looks like there should only be 5.

Would like to see photos and a description of how you are doing the modifications to the tires/wheels.


Scratch the old body----- using the metal body from the Italeri kit.
Don't worry, I'll post photos of the tires/wheels when I'm finished with them.
Grumpyoldman
Staff MemberConsigliere
KITMAKER NETWORK
Visit this Community
Florida, United States
Joined: October 17, 2003
KitMaker: 15,338 posts
Armorama: 7,297 posts
Posted: Friday, October 28, 2011 - 03:50 AM UTC
Well, been doing the tires, still have some sanity left, but it really does get me crossed eyed, so I can only do it in short sessions.

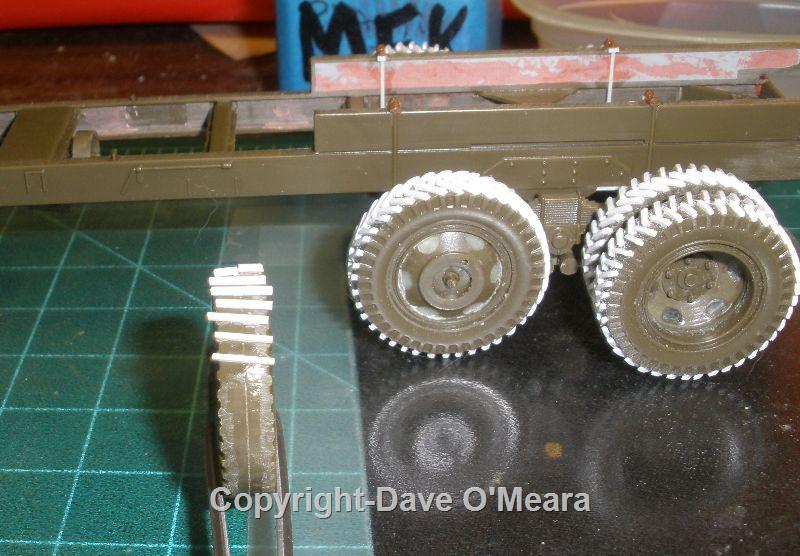
The first thing I did was glue the tires together, and then sand off the existing molded tread.

As you can see, I used .20x.30 plastic strip to lay out the new pattern, going from one side lug to the other side lug, but one lug lower. Trying to glue just half the strip in place. I then let everything dry.


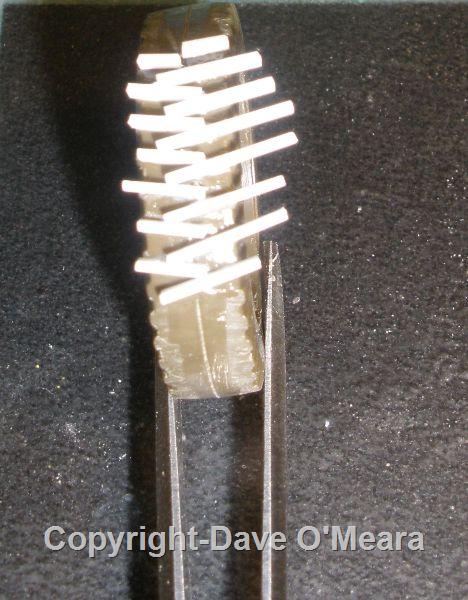
I then did the same thing for the other side, trying to run that side to an imaginary intersection of the other lug. Again trying to glue only one side, and again I let this dry.

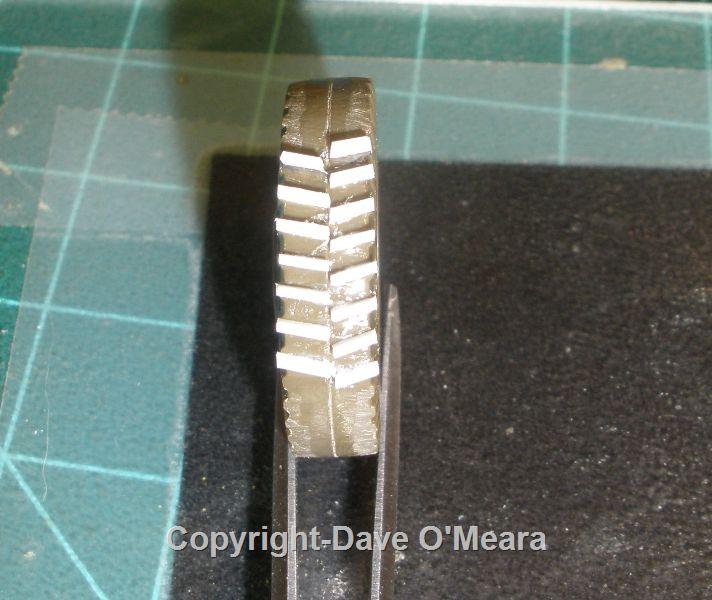
I then clipped off the excess ends, and ran my knife along the center line of the plastic tire then had to pick out some of the strips that had too much glue on them, The then ran some MEK into each section for a more permanent bond.
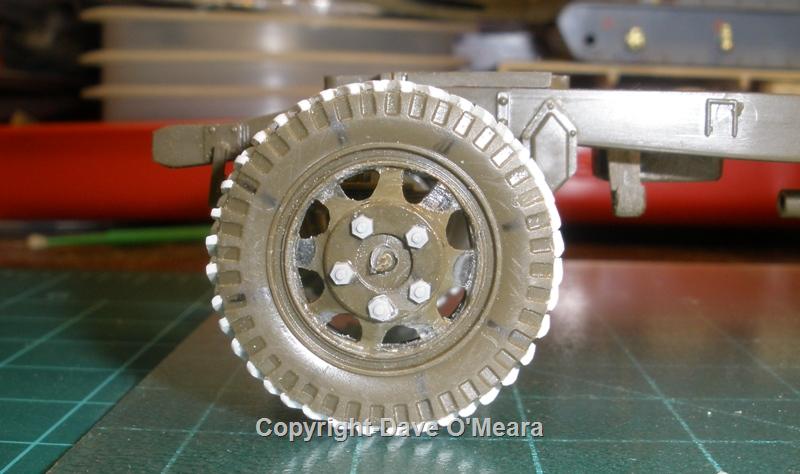
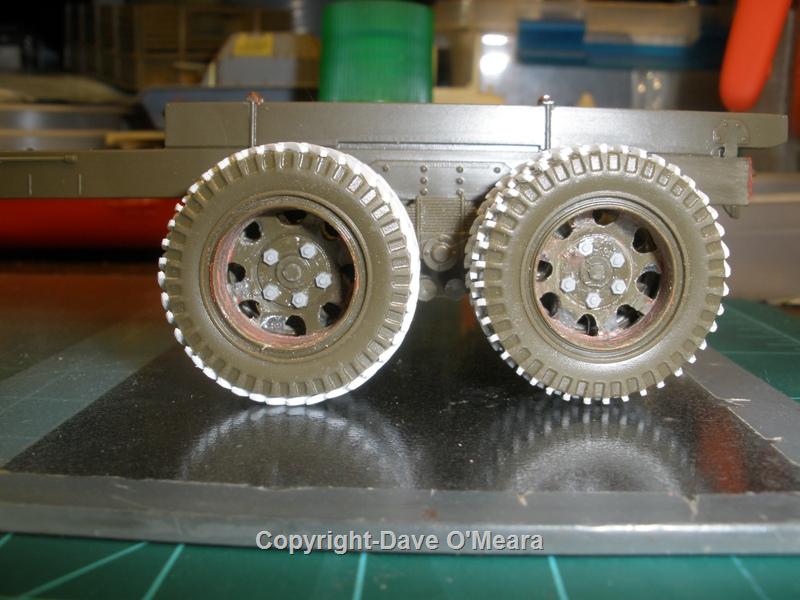
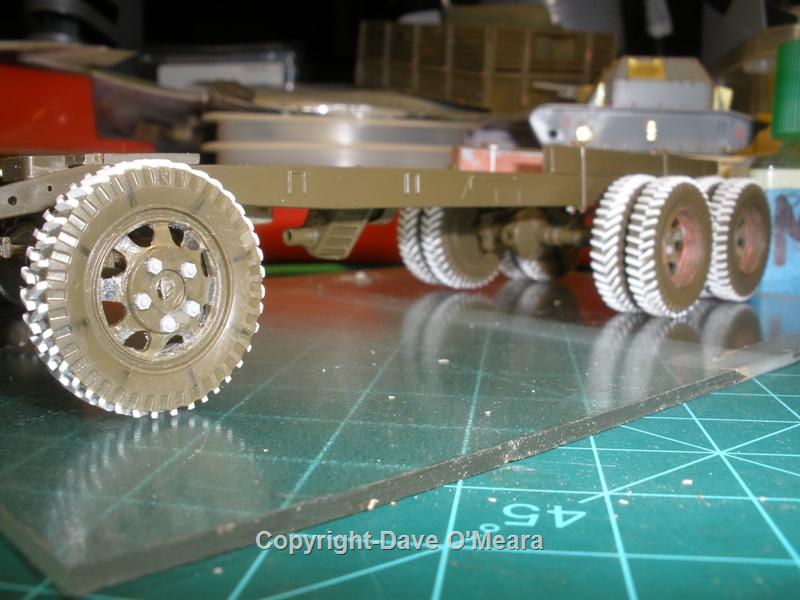
After letting them dry one more time I took my sanding strip, and smoothed and rounded the edges to the sidewall lugs, and sanded the tread so they were even.

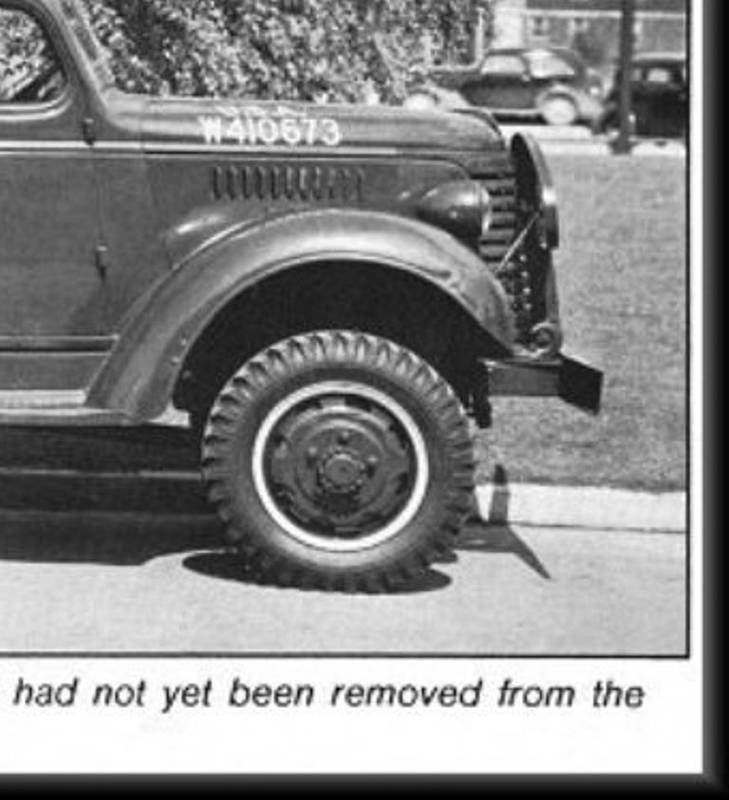
I still have to do the little rounded conection between the lugs, and I'm sure it will become another cross eye adventure. But that will be the next installment, along with changing the hole pattern.
SHarjacek
Visit this Community
Croatia Hrvatska
Joined: January 29, 2011
KitMaker: 977 posts
Armorama: 553 posts
Posted: Friday, October 28, 2011 - 04:17 AM UTC
Very nice work Mr.Dave!
yeahwiggie
Visit this Community
Dalarnas, Sweden
Joined: March 24, 2006
KitMaker: 2,093 posts
Armorama: 1,359 posts
Posted: Friday, October 28, 2011 - 05:44 AM UTC
Stunning work, Dave!

Those tirethreads must have driven you nuts....
Spiderfrommars
Visit this Community
Milano, Italy
Joined: July 13, 2010
KitMaker: 3,845 posts
Armorama: 3,543 posts
Posted: Friday, October 28, 2011 - 05:53 AM UTC
That's an incredibly useful "how to" for one who have to change the tread wheels

Thanks a million and congrats
Grumpyoldman
Staff MemberConsigliere
KITMAKER NETWORK
Visit this Community
Florida, United States
Joined: October 17, 2003
KitMaker: 15,338 posts
Armorama: 7,297 posts
Posted: Sunday, October 30, 2011 - 09:45 AM UTC
6 tires down, 5 tires to go.
Not perfect, but will serve my needs, a fun exercise and challenge to improve patience and skills.


FAUST
#130
Visit this Community
Noord-Holland, Netherlands
Joined: June 07, 2002
KitMaker: 8,797 posts
Armorama: 4,190 posts
Posted: Sunday, October 30, 2011 - 10:08 AM UTC
Ola Dave

Your work is really nice. It might not be perfect ... allthough the majority of the works looks pretty fine to me. But it makes the tires look 100% better. I like it a lot. looking forward to the next progress. And i hear you on small tedious work. I got pretty crosseyed doing the brass work in the drivers compartiment of my Kettenkrad. But in the end it really is worth it. Your work proves the point excellently
 _GOTOTOP