Croatia Hrvatska
Joined: June 28, 2006
KitMaker: 376 posts
Armorama: 303 posts
Posted: Tuesday, October 25, 2011 - 05:28 AM UTC
Anthony Sewards gives us an in-box review of the extensive resin conversion set for the Canadian Leopard 2A4M CAN from Perfect Scale Modellbau
Link to Item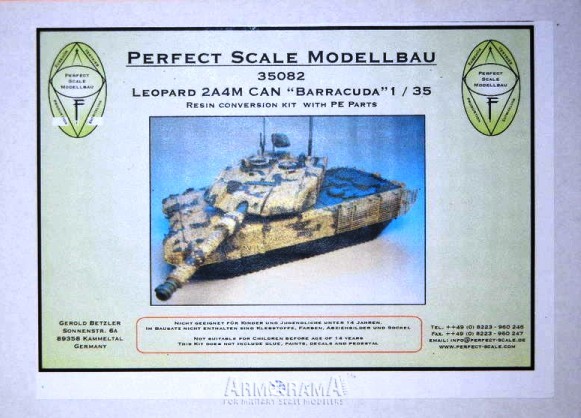
If you have comments or questions please post them here.
Thanks!
Ontario, Canada
Joined: September 28, 2006
KitMaker: 2,672 posts
Armorama: 2,475 posts
Posted: Tuesday, October 25, 2011 - 06:42 AM UTC
Thanks for the review Anthony.
That rear slat looks shall we say, fidly, to assemble LOL.
cheers
One of the serious problems in planning against Canadian doctrine is that the Canadians do not read their manuals, nor do they feel any obligations to follow their doctrine.
---From a Russian document
------------------------------------------------
Praha, Czech Republic
Joined: April 03, 2006
KitMaker: 2,450 posts
Armorama: 2,409 posts
Posted: Tuesday, October 25, 2011 - 08:33 AM UTC
Thanks. Nice review Anthony. Very nice model.
Please tell me if PSM extended hull or if they have used as a basis narrower hull of the HB model.
Miloslav

Hope you like it and "watch those negative waves"
Alberta, Canada
Joined: July 20, 2006
KitMaker: 706 posts
Armorama: 665 posts
Posted: Tuesday, October 25, 2011 - 02:53 PM UTC
Miloslav
There are some hull issues when placed onto the HB 2A4 hull section, they don't match up on my sample.The front hull section comes forward and hte rear section dosn't fit into the rear back plate , Photos posted here:
http://s87.photobucket.com/albums/k130/ldshrecceboy/REVIEWS/Anthony

AMPS # 2734 , IPMS EDMONTON
Win The Firefight, Protect Your Brothers, Leave No One Behind.
Survivor of 7 rotations, last 3 in the sandbox.
"Gone toe to toe with the Taliban, and won."
Ontario, Canada
Joined: September 28, 2006
KitMaker: 2,672 posts
Armorama: 2,475 posts
Posted: Tuesday, October 25, 2011 - 03:34 PM UTC
That's some rather large fit issues, you sure it's for the HB kit LOL?
cheers
One of the serious problems in planning against Canadian doctrine is that the Canadians do not read their manuals, nor do they feel any obligations to follow their doctrine.
---From a Russian document
------------------------------------------------
Ontario, Canada
Joined: August 05, 2003
KitMaker: 1,698 posts
Armorama: 1,563 posts
Posted: Tuesday, October 25, 2011 - 03:43 PM UTC
fark me.. "mind the gap" indeed!
Why plan when you can react?
Alberta, Canada
Joined: January 19, 2005
KitMaker: 4,085 posts
Armorama: 3,917 posts
Posted: Tuesday, October 25, 2011 - 03:59 PM UTC
With no disrespect to Anthony intended I think the review could be expanded upon for the scope of this conversion. I have had this kit for several weeks now and studied it a great deal as well as compared it with the Y-Modelle conversion and multiple images of the real tank.
With a price tag of $155.00 the conversion contains lots of high quality parts such as the resin Barracuda covered replacement parts but there are still basic details that are completely absent or inaccurate. The external housing for the driver's warning lights mounted on the top of the right headlight mount is not included. This is a clearly visible part on the 2A4M CAN. This will have to be scratch built by the modeller to make the conversion accurate.As a side note this part is also not included in the Y-Modelle conversion.
At this stage of the game and with the price tag of Leopard 2 resin conversions we are still not seeing a replacement upper hull from any producer that includes the correct modified engine air intake grills bolt details. This refers to the recessed bolts/dampeners inset into the sides of the engine air intake grill housings. These feature is evident on the 2A4M CAN....and other later version 2A4s, the 2A5, the 2A6, and the 2A7.
The PE slat armour is extensive and will not be for those not experienced with PE and aligning multiple parts. Lessons learned by Eduard and how they created the PE for the 2A6M with the "hinged" type slat assembly have not been learned or put to use with the PSM PE. Modellers will have to be very careful with lining up each individual slat section and attaching them to the frames. That being said the PE is very extensive and even includes the very unique Maple Leaf cut out in the foot holds on the side skirt...a very cool detail! The slat section retaining pins and wires and the bolt detail on the ladders are terrific but will need patience and planning. The hull and turret PE slat frames are very well detailed and will look great on the resin parts. Getting the mounts to properly line up with the slat sections properly will take prelanning and dry fitting.
The Hobby Boss kit lower hull does need to be modified and trimmed by 2 mm and then adjust to fit with the resin upper hull.
It would be interesting to know if the 2A4M CAN tool placement on the back deck has been modified like the 2A5 and 2A6....if so the back deck lifting device is incorrectly placed on the conversion.
The folded and open umbrellas appear to be the same as included in the PSM Leo 2A6M conversion. The six sided open umbrella is still lop-sided in dimensions and the folded umbrella still appears to be larger it should be compared to images of the real folded umbrellas.
The instructions are detailed but very crowded on the pages and some details showing the assembly are lost in the small B&W images provided. You will really need to study the instructions for both the resin parts and twice as much for the PE parts.
This will be an impressive build once completed. Overall I think it is a great accomplishment for PSM given the fact that the tank only went into action less than a year ago. It would be very nice if PSM would correct the missing and inaccurate details and re-release the conversion to make it worth every penny it costs.
Again, my intent is not to be critical of the review but to expand on it and provide additional information that I think is important for anyone considering this conversion and wanting to make it as accurate as possible.
To quote PSM on the bottom of the last page of the instructions..."Happy Modelling".
"We're not the public service of Canada, we're not just another department. We are the Canadian Forces, and our job is to be able to kill people."
July 2005- General R.J. Hillier (Retired), Former Chief of the Defence Staff
Alberta, Canada
Joined: January 19, 2005
KitMaker: 4,085 posts
Armorama: 3,917 posts
Posted: Tuesday, October 25, 2011 - 04:03 PM UTC
Quoted Text
That's some rather large fit issues, you sure it's for the HB kit LOL?
cheers
That's why the instructions clearly state and provide a diagram of where the HB lower hull needs to be trimmed and test fitted with the resin upper hull....about 2 mm and then test fit and adjust.....I think there will still be a gap but minimal if you test fit and trim several times.
"We're not the public service of Canada, we're not just another department. We are the Canadian Forces, and our job is to be able to kill people."
July 2005- General R.J. Hillier (Retired), Former Chief of the Defence Staff


