Got a side question for the diorama part of the project.
The idea is to have the two soldiers riding this combo having to work on the engine to get it working again. And I want one guy holding a manual on the page that shows the engine. If anybody has an original manual or a reprint, or knows somebody who has one, would it be possible to make a scan of those pages so I can use it in miniature?
Looking forward to hear from you guys
With friendly greetz
Robert Blokker
Hosted by Darren Baker
Kfz 2 Kettenkrad
Posted: Thursday, January 05, 2012 - 09:13 AM UTC
paratrooper

Joined: July 31, 2003
KitMaker: 995 posts
Armorama: 64 posts

Posted: Thursday, January 05, 2012 - 09:51 PM UTC
Hi blokker
i have only a few words to say: Amazing job! I hope to see it in color soon!
greets
Peter
i have only a few words to say: Amazing job! I hope to see it in color soon!
greets
Peter

Posted: Friday, January 06, 2012 - 01:33 AM UTC
Ola Peter
Bedankt voor de complimenten. Luckily the painting stage is not that far away anymore. A few minor things to do but then it is up for the Airbrush to work it's magic
Bedankt voor de complimenten. Luckily the painting stage is not that far away anymore. A few minor things to do but then it is up for the Airbrush to work it's magic
pdelsoglio

Joined: November 13, 2005
KitMaker: 561 posts
Armorama: 553 posts

Posted: Friday, January 06, 2012 - 03:19 AM UTC
Hi there!
Can't wait till you paint that little Kettenkrad!
Cheers!
Can't wait till you paint that little Kettenkrad!
Cheers!
Posted: Friday, January 06, 2012 - 05:12 AM UTC
hehehe Me neither.... I'm always afraid i screw months of work up with the painting... but it is something to look forward to
Posted: Saturday, January 07, 2012 - 01:29 PM UTC
Still Looking for some scans of an original Kettenkrad manual.
So if you know anybody who has one or have one yourself I would love to hear about it.
So if you know anybody who has one or have one yourself I would love to hear about it.
Posted: Monday, January 16, 2012 - 03:11 AM UTC
Aaaaand back with the monologue
Ola Guys
Time for another update. Started on the seatcushions of the backseat which were sculpted with Magic Sculp. And while I had the Magicsculp out I decided to start scratching two figures who will be starring alongside the vehicle. Since I put so much work in the engine I wanted to focus a lot of attention on that and I hope to achieve that affect with the figures.
Some of you will rememberthis topic and I learned a lot from that and most of the knowledge gathered in that project I tried on the new figure which is basically my second ever sculpt.
Enough talk. Here are the pics
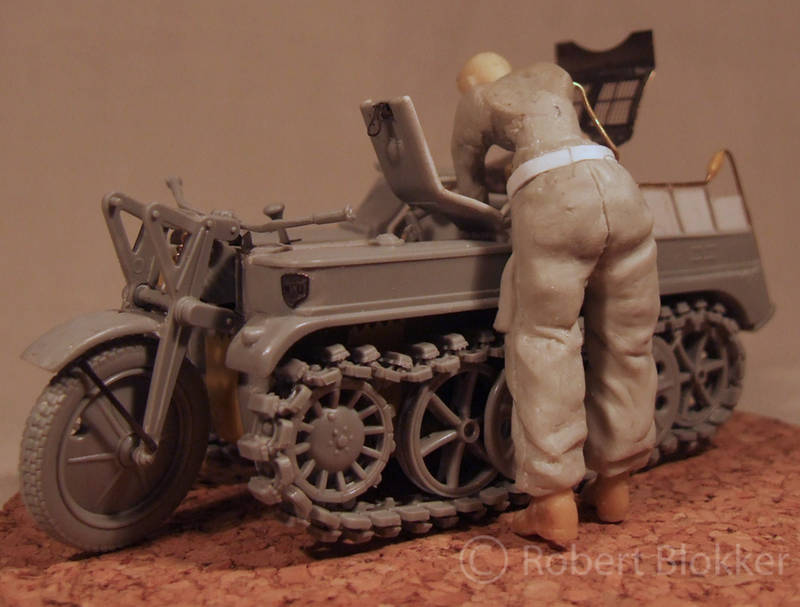
I have choice out of two stances when it comes to the head. In his left hand he will be holding a manual. In the left picture he is actually looking at what he is doing in the right picture he is looking if he is actually doing it right.
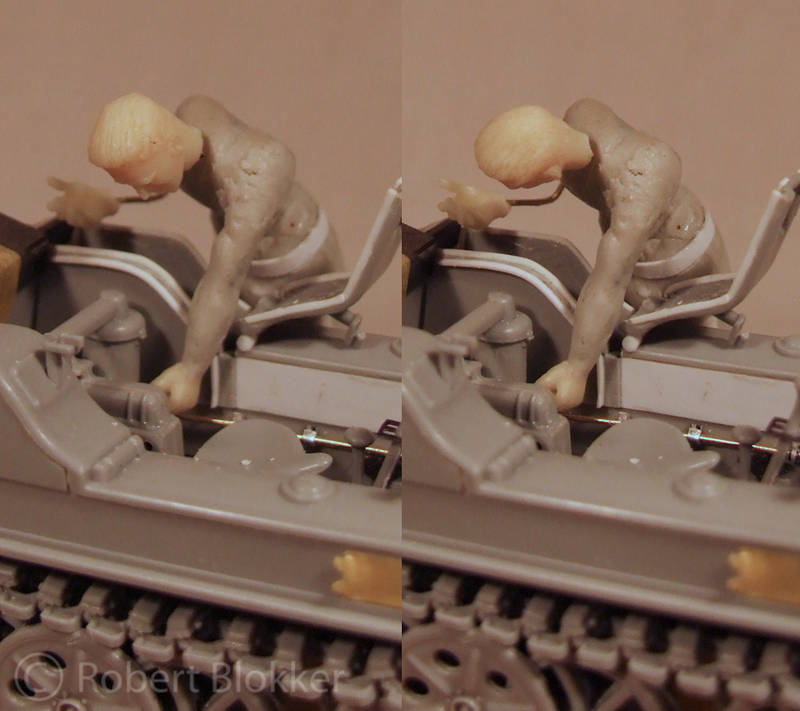
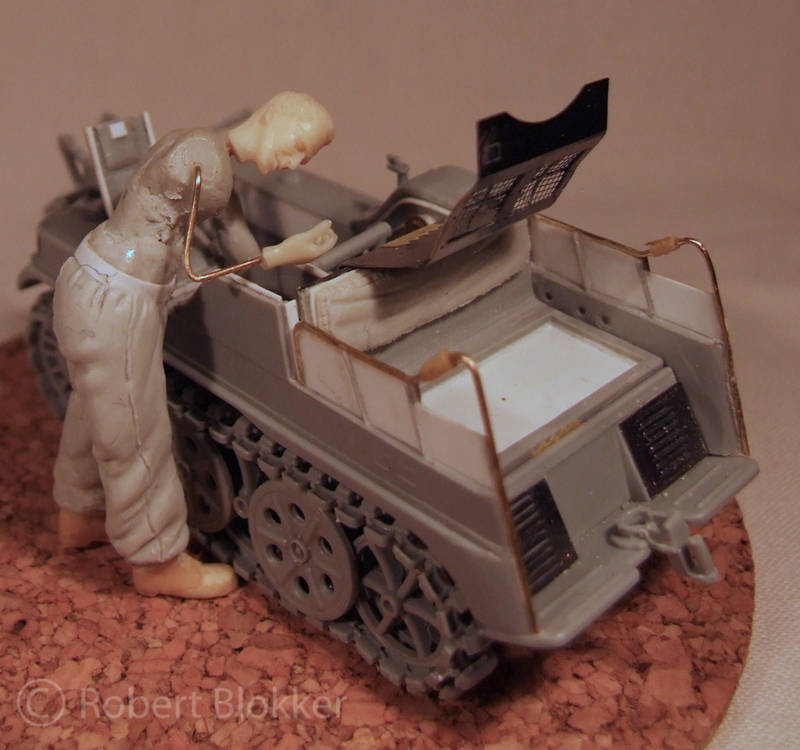
This figure will also be my first subject in my experiment to cast resin. I want to recreate some of my scratched stuff if I need more of them and I did a lot of reading and think I am confident enough that I can pull it off. And the best way to learn is to jump into the deep.
As usual very interested in your feedback.
With friendly greetz
Robert
Ola Guys
Time for another update. Started on the seatcushions of the backseat which were sculpted with Magic Sculp. And while I had the Magicsculp out I decided to start scratching two figures who will be starring alongside the vehicle. Since I put so much work in the engine I wanted to focus a lot of attention on that and I hope to achieve that affect with the figures.
Some of you will rememberthis topic and I learned a lot from that and most of the knowledge gathered in that project I tried on the new figure which is basically my second ever sculpt.
Enough talk. Here are the pics


I have choice out of two stances when it comes to the head. In his left hand he will be holding a manual. In the left picture he is actually looking at what he is doing in the right picture he is looking if he is actually doing it right.


This figure will also be my first subject in my experiment to cast resin. I want to recreate some of my scratched stuff if I need more of them and I did a lot of reading and think I am confident enough that I can pull it off. And the best way to learn is to jump into the deep.
As usual very interested in your feedback.
With friendly greetz
Robert
pdelsoglio

Joined: November 13, 2005
KitMaker: 561 posts
Armorama: 553 posts

Posted: Monday, January 16, 2012 - 06:29 AM UTC
Hi there!
Those figures seem very good so far.
I have only one remark to make: The springs in the front of the Kettenkrad seem a little crooked. But considering the level you have achieved with that little gem, it would be only a matter of nitckpicking.
As always, keep those updates pictures coming!
Cheers, mate!
Pablo
Posted: Monday, January 16, 2012 - 06:42 AM UTC
Ola Pablo
Thanks for the reply.
And thanks for the compliments on the figure. As for the springs well they might be a bit crooked but in the end most of it will be obscured by the very large frontlight and the notek light under it... So I'm not too bothered about it. At least it looks a gazzilion times better then the kitpart.
Posted: Wednesday, January 18, 2012 - 07:42 AM UTC
Little textual update. More will follow later this evening.
The search for a kettenkrad manual is over. Found a company that sells reproductions of German Manuals from several vehicles radios mines etc. And they have a kettenkrad manual as well. Pretty happy. order is going out this evening.
Also started work on a diorama for this project. and did some more sculpting pics of that will follow later
Posted: Friday, January 20, 2012 - 10:08 AM UTC
Ok Gallery had a nice moment so I was able to upload some more pics.
Started to sculpt the collar of the blouse. In the right picture it still needs a bit of cleaning but did that when I started to give the Torso some Blouse

Time for some Blouse. Also in the pictures are details like pocketflaps.
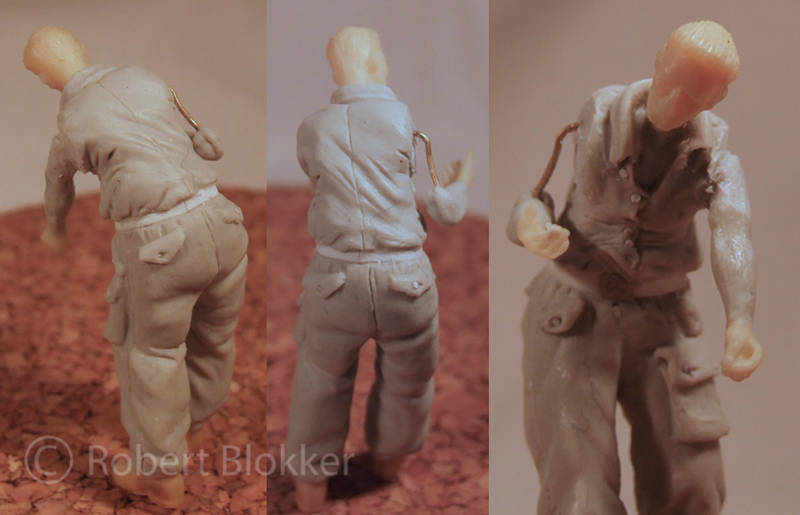
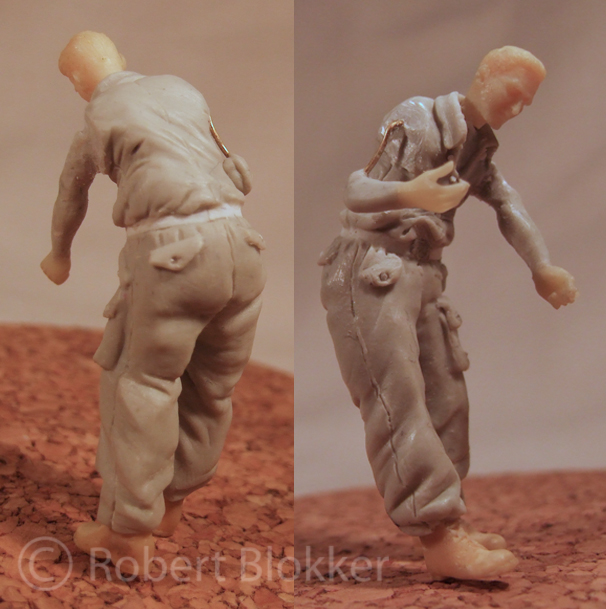
Next step (actually started to work on that already) Rolled up sleeves.
Any feedback is welcome. I kinda started to make the figure in such a way that it can be cast in my resin experiment. So that means having the arms as seperate parts from the body
Started to sculpt the collar of the blouse. In the right picture it still needs a bit of cleaning but did that when I started to give the Torso some Blouse

Time for some Blouse. Also in the pictures are details like pocketflaps.


Next step (actually started to work on that already) Rolled up sleeves.
Any feedback is welcome. I kinda started to make the figure in such a way that it can be cast in my resin experiment. So that means having the arms as seperate parts from the body
Posted: Monday, January 23, 2012 - 07:11 AM UTC
Ola Guys
Well time for another bit of muttering to myself
Got another update. Figure one in this project is finished bar some minor bits of sanding which I noticed after taking the pics. There will no doubt be other things I could have done better but I'll do that on the next figure. There is a bit of gap between the arms and the torso but that is because the arms are quick glued for the pictures They will come off soon when I'm going into my casting experiment.
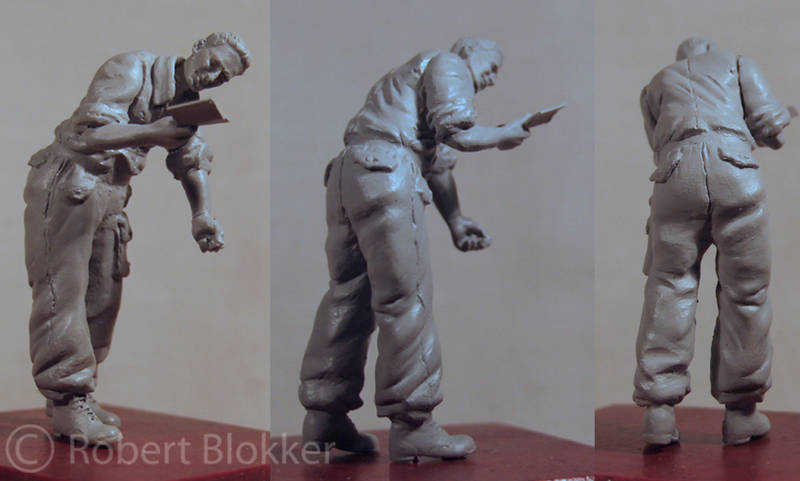
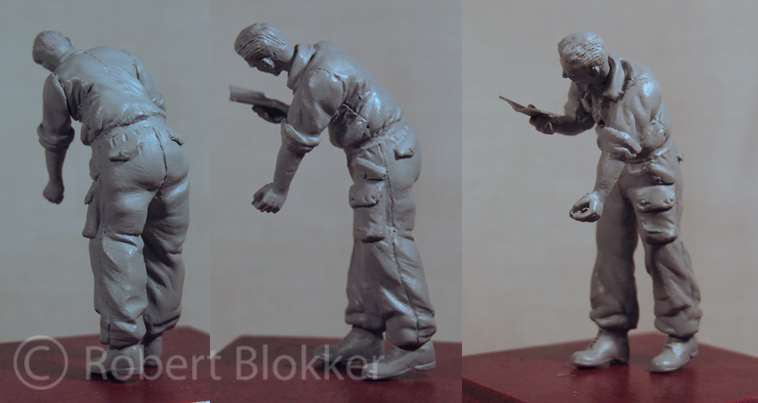
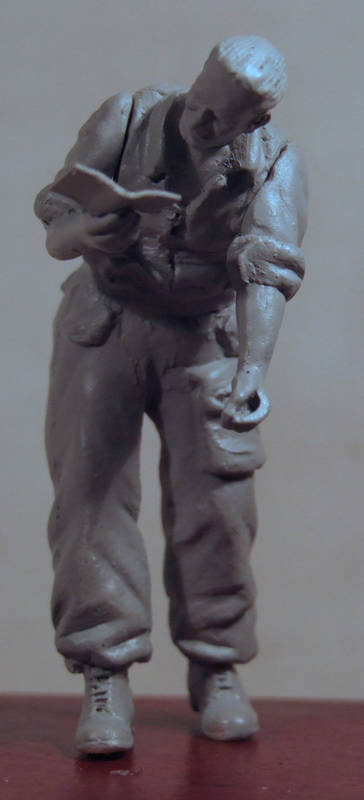
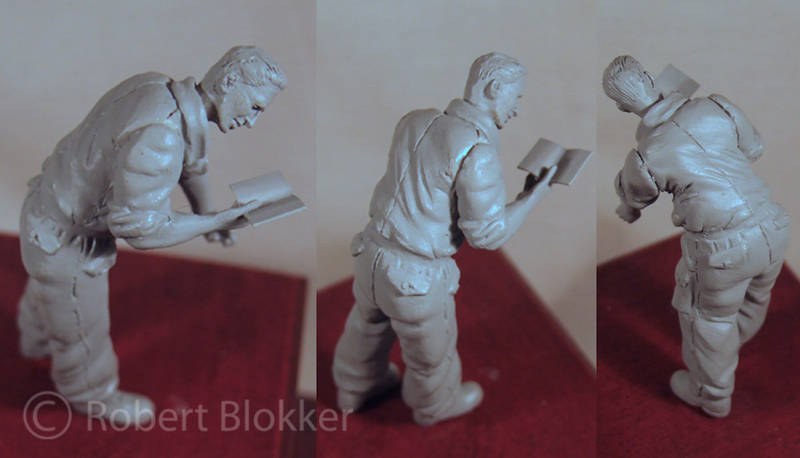
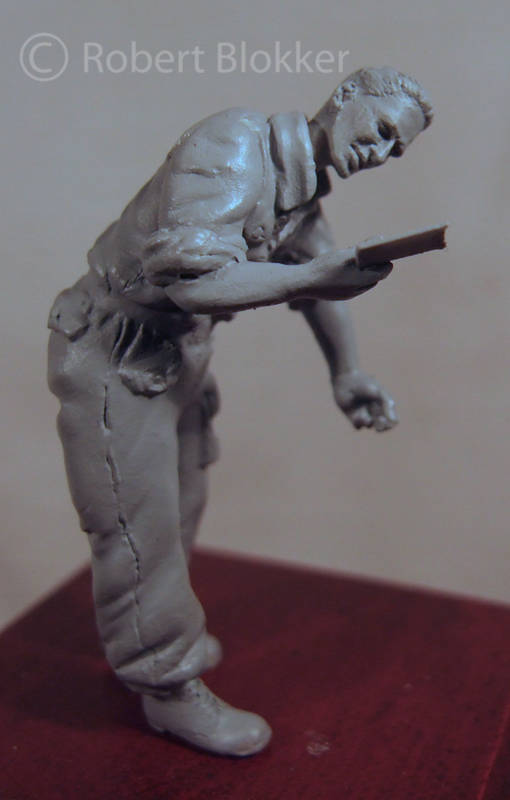
And to keep the momentum of sculpting meet the humble beginnings of Figure 2
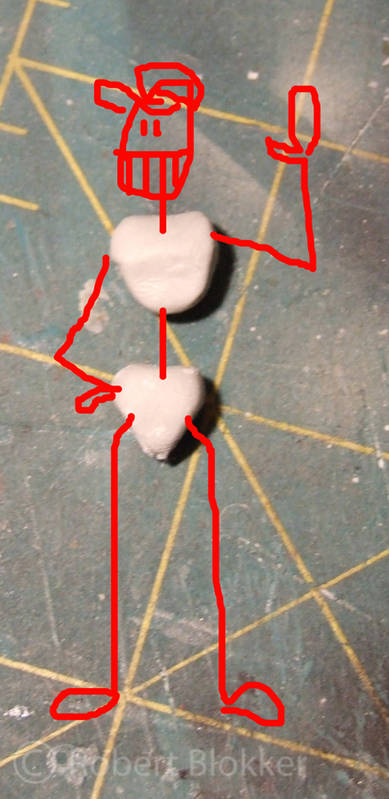
As usual very curious to your feedback.
With friendly greetz
Robert Blokker
Well time for another bit of muttering to myself
Got another update. Figure one in this project is finished bar some minor bits of sanding which I noticed after taking the pics. There will no doubt be other things I could have done better but I'll do that on the next figure. There is a bit of gap between the arms and the torso but that is because the arms are quick glued for the pictures They will come off soon when I'm going into my casting experiment.


And to keep the momentum of sculpting meet the humble beginnings of Figure 2

As usual very curious to your feedback.
With friendly greetz
Robert Blokker
pdelsoglio

Joined: November 13, 2005
KitMaker: 561 posts
Armorama: 553 posts

Posted: Monday, January 23, 2012 - 08:34 AM UTC
Hi there!
The guy reading the manual really caught my attention.
When you finish it, it will be a great figure indeed.
Cheers, mate.
Pablo
The guy reading the manual really caught my attention.
When you finish it, it will be a great figure indeed.
Cheers, mate.
Pablo
Posted: Monday, January 23, 2012 - 09:39 AM UTC
Ola Pablo
Thanks for following this topic and taking the time to reply. Looking over the pictures the last few days I have to say that I spotted a few more things that need my attention but aside from that I declare this figure finished and The things I think I can do better will happen on the next figure. I can say again that I learned a lot from this figure and that I even managed to get an (in my eyes at least) reasonable result in less time then the first. I like it if I don't have the excuse anymore that I can't find the figures I need for a diorama. I can make them myself.
Thanks for following this topic and taking the time to reply. Looking over the pictures the last few days I have to say that I spotted a few more things that need my attention but aside from that I declare this figure finished and The things I think I can do better will happen on the next figure. I can say again that I learned a lot from this figure and that I even managed to get an (in my eyes at least) reasonable result in less time then the first. I like it if I don't have the excuse anymore that I can't find the figures I need for a diorama. I can make them myself.
kaysersose

Joined: May 05, 2009
KitMaker: 86 posts
Armorama: 83 posts

Posted: Monday, January 23, 2012 - 11:52 AM UTC
beautiful figure building job on that manual reader!!
Posted: Wednesday, January 25, 2012 - 05:40 AM UTC
Ola Alex
Thanks for the compliment on this sculpt. I'm pretty pleased with how he came out. Hope figure number 2 for this project will also work out this good for me.
Thanks for the compliment on this sculpt. I'm pretty pleased with how he came out. Hope figure number 2 for this project will also work out this good for me.
Posted: Wednesday, January 25, 2012 - 10:45 AM UTC
Ola Guys
Update time
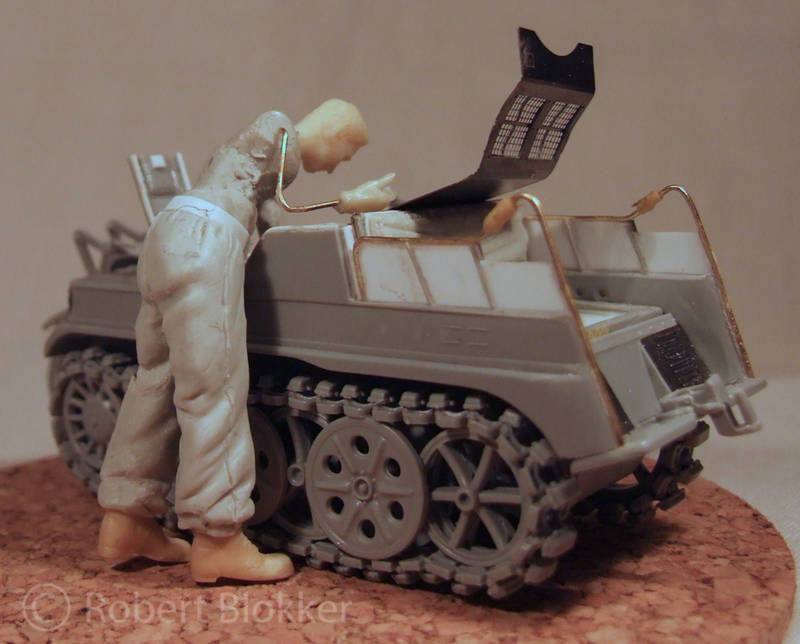
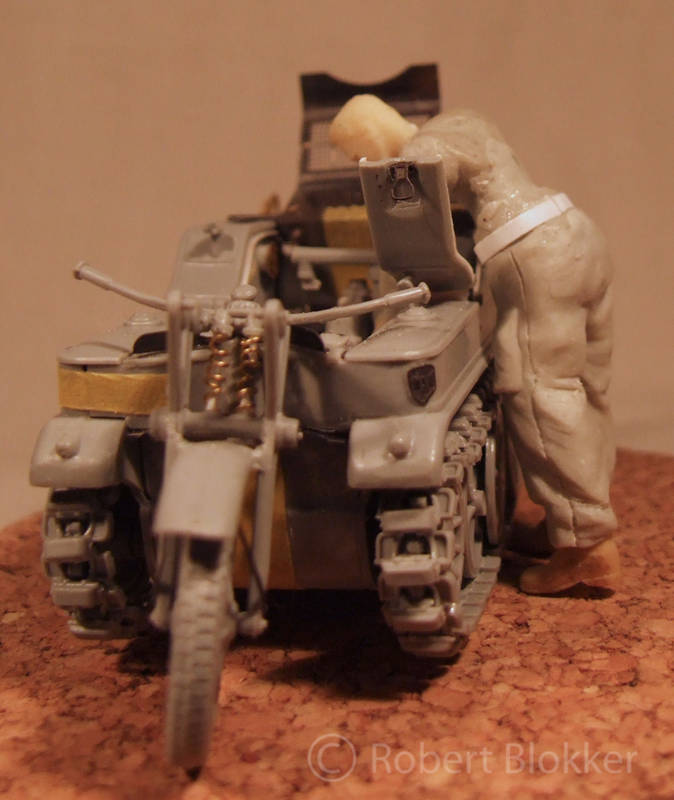
This evening I completed the armature with copperwire, some hands head and feet from the scrapbox and after an evening of wire bending and posing and looking at it from a Gazzillion angles I settled on this pose: Meet Heinz the Prancing German
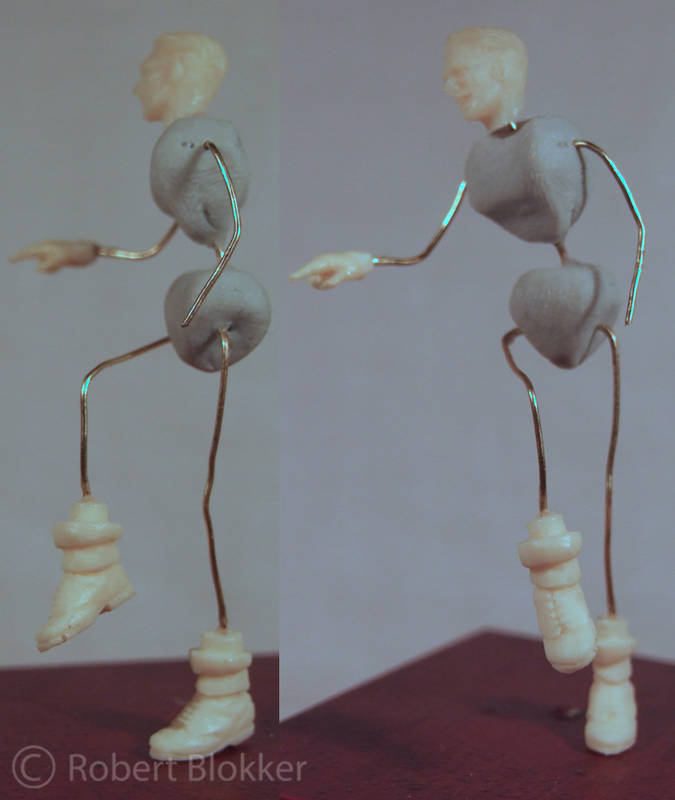
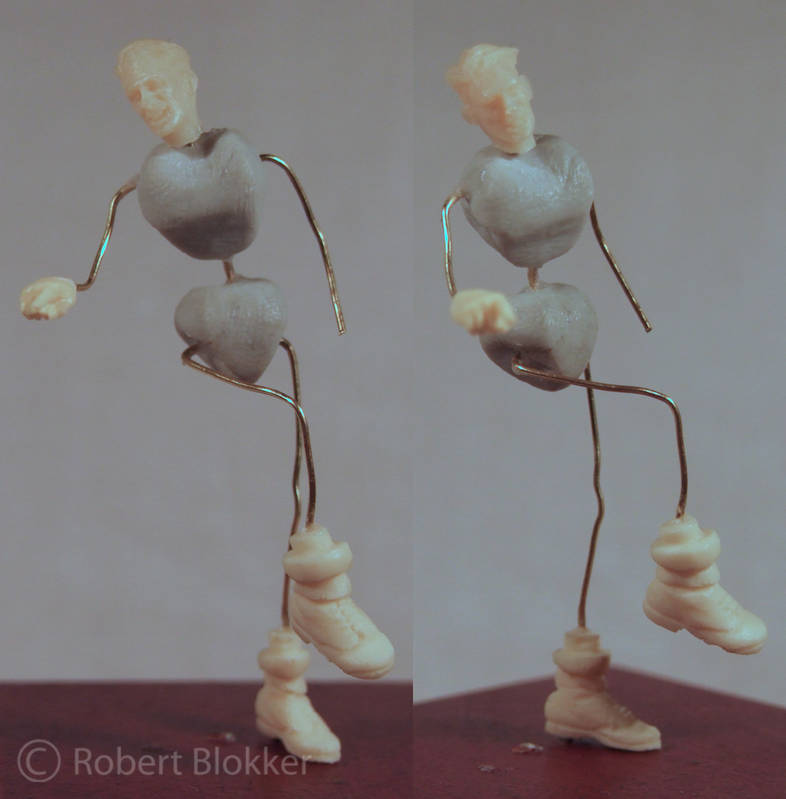
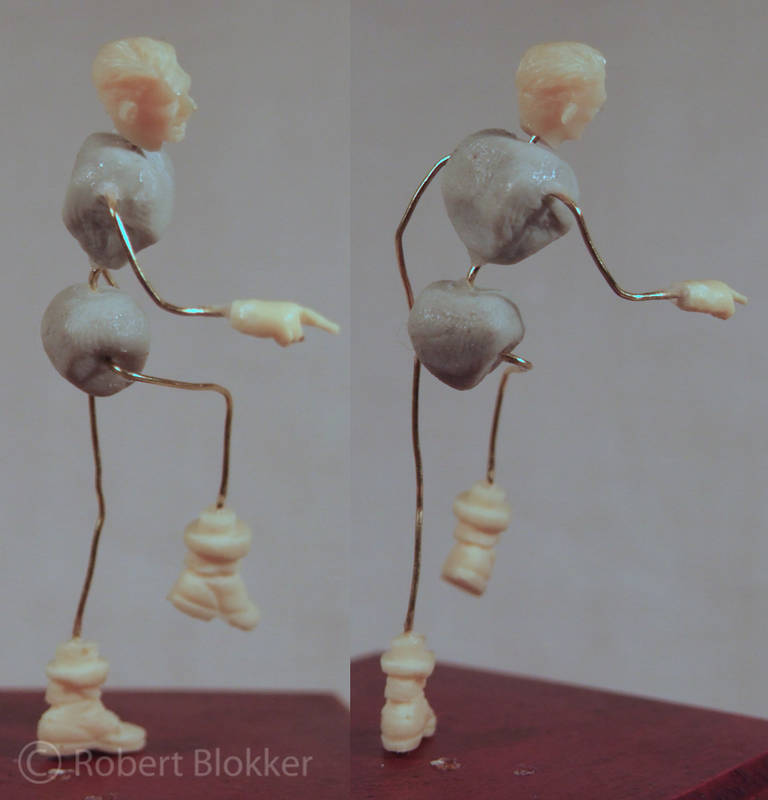
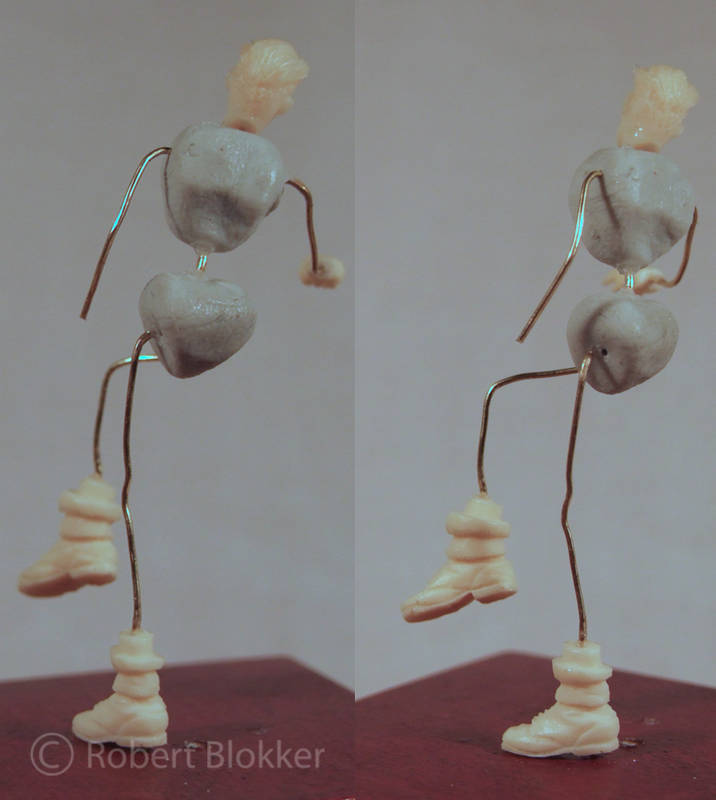
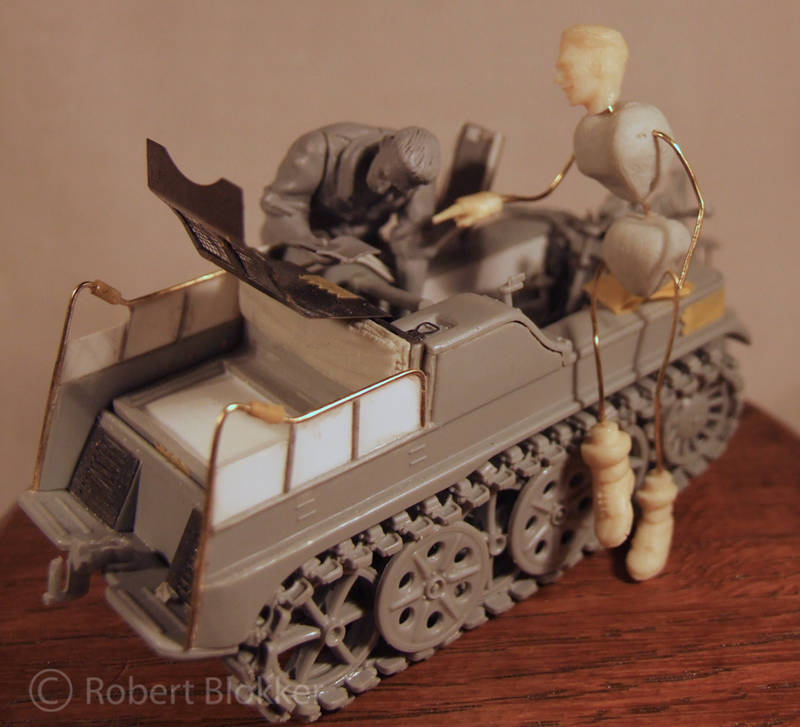
The idea is that for every mechanic there is a guy who generally means well, Points a bit, acting wise but in the end has the technic abilities of a patch of Broccoli... somebody like me in fact. Thought it to be a fun scene.
As usual very curious to any feedback.
With a friendly greet
Robert Blokker
Update time
This evening I completed the armature with copperwire, some hands head and feet from the scrapbox and after an evening of wire bending and posing and looking at it from a Gazzillion angles I settled on this pose: Meet Heinz the Prancing German


The idea is that for every mechanic there is a guy who generally means well, Points a bit, acting wise but in the end has the technic abilities of a patch of Broccoli... somebody like me in fact. Thought it to be a fun scene.

As usual very curious to any feedback.
With a friendly greet
Robert Blokker
Posted: Friday, January 27, 2012 - 11:43 AM UTC
Ola Guys
Another installment in this figure project.
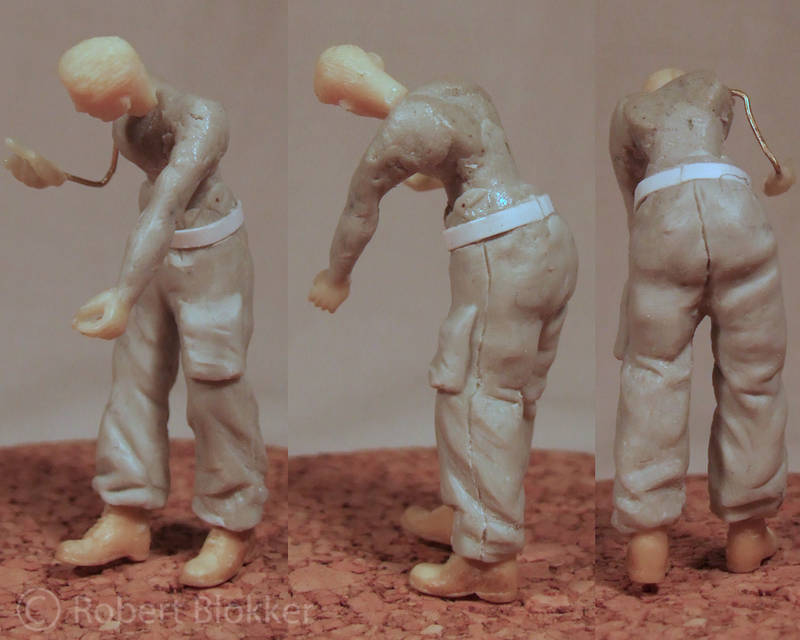
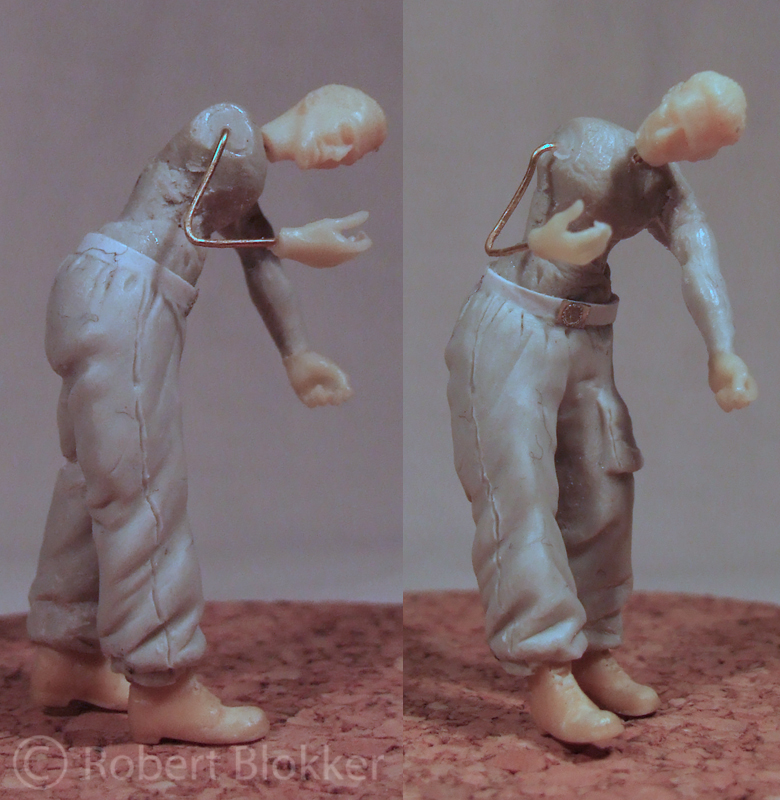
Started filling out the armature with some meat. I make this not too thick on purpose since above that comes the clothes layer in which I need depth to create the folds of the fabric. In the sculpting of the fabric the bodyparts get more body as well... ( I learned this in a workshop from Marijn van Gils)
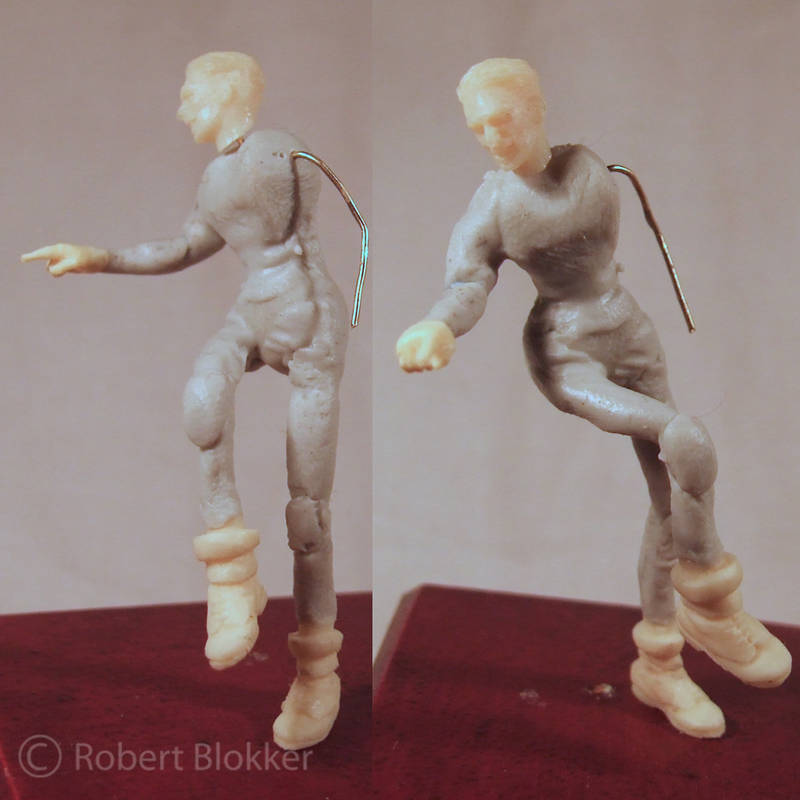
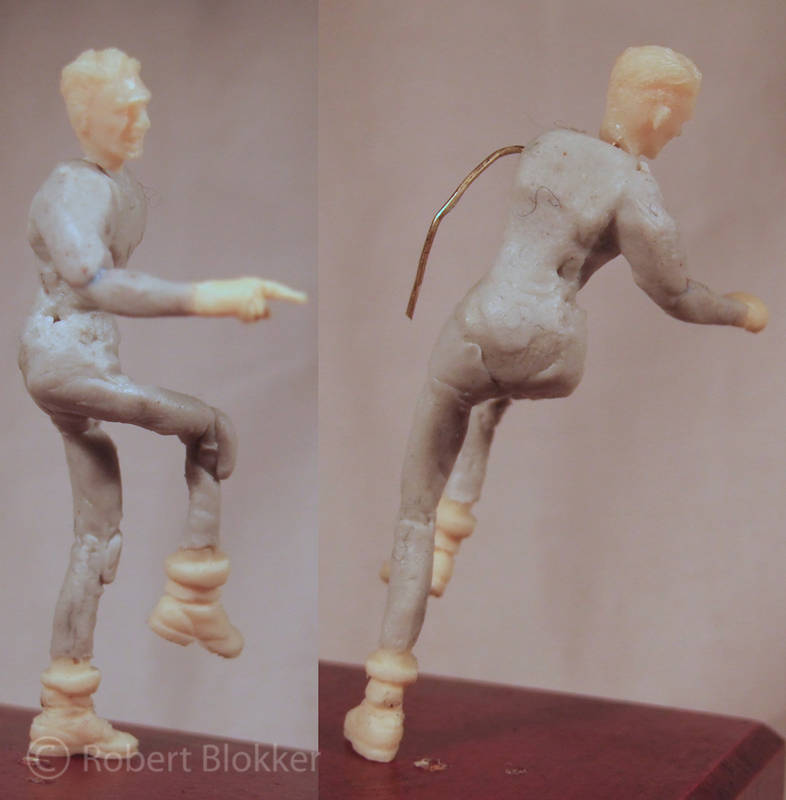
............. Speaking of which. Adding meat to the armature was already done yesterday so the magic sculp had cured. So I started on the trousers and the belt.
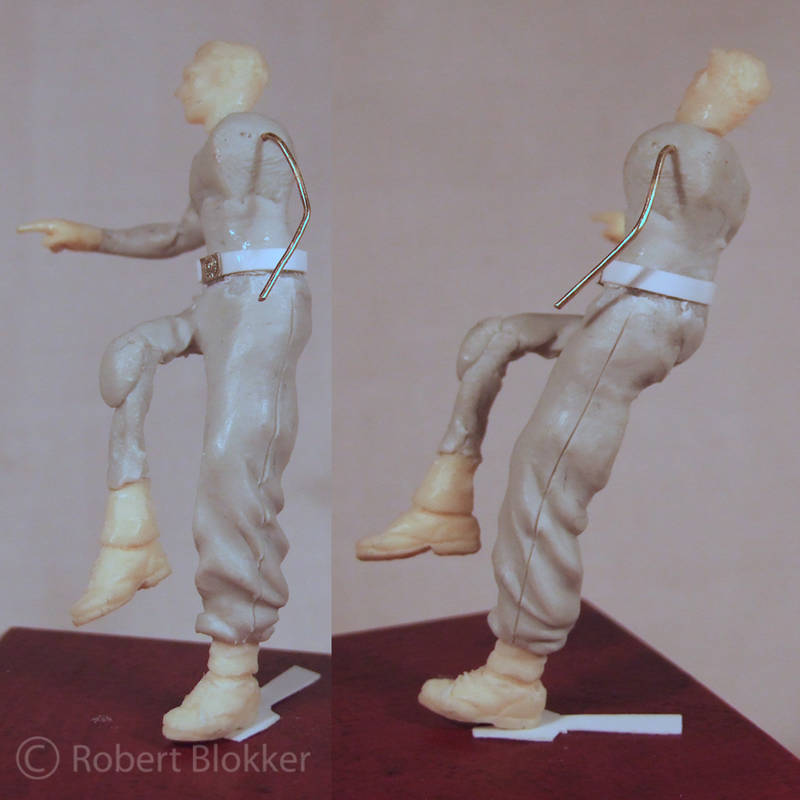
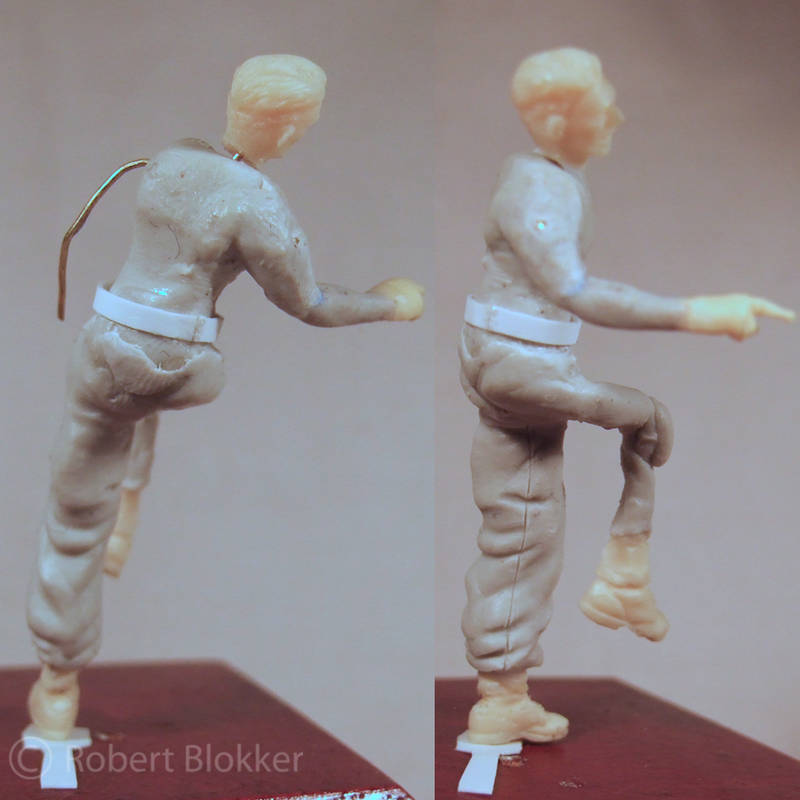
As usual I would love to hear any feedback.
With friendly greetz
RoberT Blokker
Another installment in this figure project.
Started filling out the armature with some meat. I make this not too thick on purpose since above that comes the clothes layer in which I need depth to create the folds of the fabric. In the sculpting of the fabric the bodyparts get more body as well... ( I learned this in a workshop from Marijn van Gils)


............. Speaking of which. Adding meat to the armature was already done yesterday so the magic sculp had cured. So I started on the trousers and the belt.


As usual I would love to hear any feedback.
With friendly greetz
RoberT Blokker
pdelsoglio

Joined: November 13, 2005
KitMaker: 561 posts
Armorama: 553 posts

Posted: Friday, January 27, 2012 - 12:00 PM UTC
Hi there!
Cool work indeed...
I see a title coming for this lovely vignette...
"Why don't you use the 1/2" wrench"


Cheers!
Pablo
Cool work indeed...
I see a title coming for this lovely vignette...
"Why don't you use the 1/2" wrench"


Cheers!
Pablo
Posted: Friday, January 27, 2012 - 03:10 PM UTC
@FAUST – Robert,
What do you mean this is not a super sized gazillion scaled tracked tricycle where you can easily stuff it full of scratch built parts! And you’re scratch making figures to go with it! Man, you’re not from this planet! What a totally AWESOME project! Casino night in Vegas, all in!
Keep it rolling, I’m waiting to see more.
~ Eddy

django70

Joined: January 26, 2012
KitMaker: 23 posts
Armorama: 13 posts

Posted: Friday, January 27, 2012 - 05:59 PM UTC
As much as I like the Kettenkrad, I gotta say that is some kick ass sculpting going on. Good stuff!
- Lee
- Lee
callmehobbes

Joined: April 17, 2005
KitMaker: 751 posts
Armorama: 740 posts

Posted: Friday, January 27, 2012 - 08:07 PM UTC
I've only just spotted this thread. I can't get over the level of detail you include. And the figures look perfectly posed. Can't wait to see this updated.
Posted: Saturday, January 28, 2012 - 03:39 AM UTC
Ola Guys Thanks for your replies
@ Pablo
Thanks for the compliments. And to tell you the truth I haven't though much about a title. I have a few ideas in the works but nothing definitive. You'r suggestion is noted though But I probably adjust it a bit to match the Metric system used on the European continent.
@ Eddy
Glad you are enjoying this project. And no it is not a 1:1 vehicle and I'm a pretty standard guy from Holland Nothing special at all. Just taking my time and plodding along. More will follow soon.
@ Lee
Thanks for the encouraging words. The figures is a practice I particularly like and I think I could have done worse with my third figure I have to study a bit more as currently I can only create one sort of trousers
 It probably will be much better when I actually work with reference for folds and such. currently I'm doing them out of my head and if it doesn't look too weird it is good enough for me.
@ CallmeHobbes
It is not that hard when you have the right reference materials to sort out the details. and further it is mostly a matter of taking your time. Hense I started working on the Kettenkrad somewhere at the beginning of October and slowly we are crawling into February of the next year. Building with the speed of continental drift
 And the figures worked out quite as I would like them to. I only really did two completed sculpts so far of which one is pretty mediocre but the learningcurve is visible and I enjoy it immensely so I do not plan to stop creating my own figures.
I am going to start on the right leg and closing of the trousers in the belt region today so more pics will follow soon.
@ Pablo
Thanks for the compliments. And to tell you the truth I haven't though much about a title. I have a few ideas in the works but nothing definitive. You'r suggestion is noted though But I probably adjust it a bit to match the Metric system used on the European continent.
@ Eddy
Glad you are enjoying this project. And no it is not a 1:1 vehicle and I'm a pretty standard guy from Holland
 Nothing special at all. Just taking my time and plodding along. More will follow soon.
 @ Lee
Thanks for the encouraging words. The figures is a practice I particularly like and I think I could have done worse with my third figure
 I have to study a bit more as currently I can only create one sort of trousers
 It probably will be much better when I actually work with reference for folds and such. currently I'm doing them out of my head and if it doesn't look too weird it is good enough for me.
@ CallmeHobbes
It is not that hard when you have the right reference materials to sort out the details. and further it is mostly a matter of taking your time. Hense I started working on the Kettenkrad somewhere at the beginning of October and slowly we are crawling into February of the next year. Building with the speed of continental drift

 And the figures worked out quite as I would like them to. I only really did two completed sculpts so far of which one is pretty mediocre but the learningcurve is visible and I enjoy it immensely so I do not plan to stop creating my own figures.
 I am going to start on the right leg and closing of the trousers in the belt region today so more pics will follow soon.
jrutman

Joined: April 10, 2011
KitMaker: 7,941 posts
Armorama: 7,934 posts

Posted: Saturday, January 28, 2012 - 03:50 AM UTC
Your figs are really coming along nicely. They are a nice compliment to the vehicle that you put so much work into.
J
J
Posted: Saturday, January 28, 2012 - 12:17 PM UTC
Ola Jerry
Thanks for your reply and glad you appreciate the work. Also thanks for the compliments on the figure work so far.
Thanks for your reply and glad you appreciate the work. Also thanks for the compliments on the figure work so far.
 |


