Illinois, United States
Joined: March 29, 2009
KitMaker: 1,135 posts
Armorama: 1,030 posts
Posted: Sunday, November 13, 2011 - 03:59 PM UTC
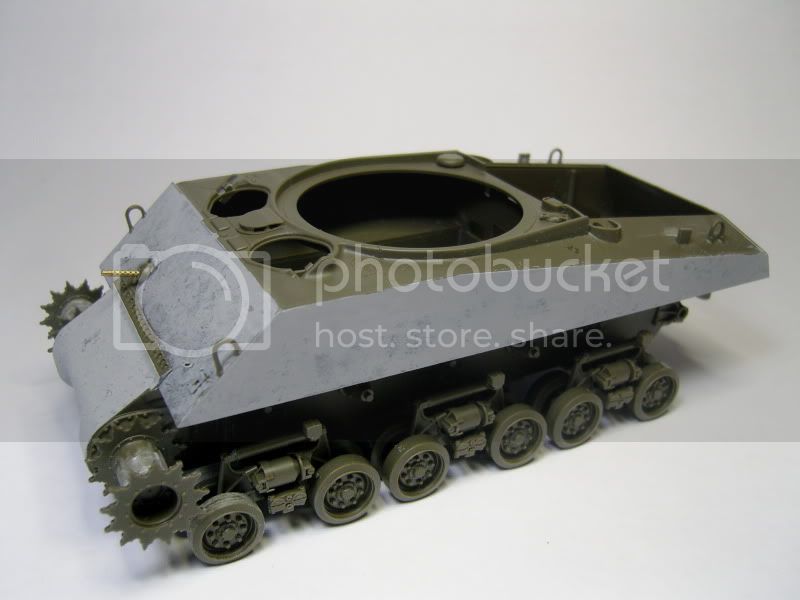
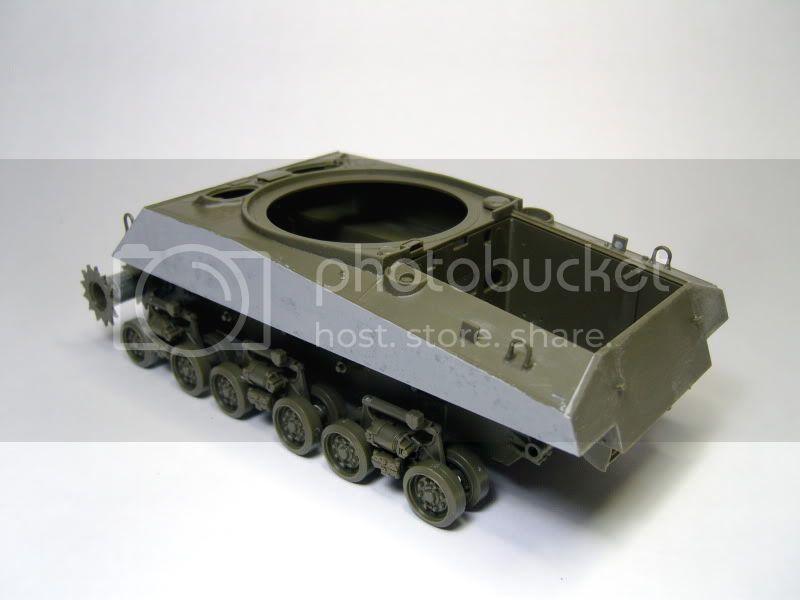
As everyone knows, Tasca Shermans are quite amazing. This one is no different and has pretty much assembled itself. After 4 days of progress a few hours here and there, this is how far I've gotten. I just received Archer's casting symbols and weld beads and this will appear on here as well. I am just waiting for the RB models barrel and this kit will be complete in the next week or two. In the mean time here are some progress shots:


Keep in mind that I am no Sherman expert but I am just building to get a kit done and get my groove back so to speak.
Just a word of frustration, I hate suspension of vehicle, but HVSS from Tasca is the devil. Although highly detailed, and probably accurate, it was a lady assembling 6 sets of these.
Until next time!

Sean
Currently taking back the fight to beat modeling ADD
Ontario, Canada
Joined: February 04, 2009
KitMaker: 743 posts
Armorama: 549 posts
Posted: Wednesday, November 16, 2011 - 12:55 AM UTC
Sean,
Looks great! good build so far. I am looking forward to seeing more of this one.
Have you decided as yet which unit the tank will be from?
Cheers,
Dave.
http://ghmicro.wix.com/twis-first-cut
Illinois, United States
Joined: March 29, 2009
KitMaker: 1,135 posts
Armorama: 1,030 posts
Posted: Wednesday, November 16, 2011 - 10:58 AM UTC
Unfortunately that's where I'm stuck. Most of the decals I've seen are applicable for different E8s so I'll get to in due time
Currently taking back the fight to beat modeling ADD
Georgia, United States
Joined: January 31, 2010
KitMaker: 2,191 posts
Armorama: 1,814 posts
Posted: Wednesday, November 16, 2011 - 03:56 PM UTC
Quoted Text
Just a word of frustration, I hate suspension of vehicle, but HVSS from Tasca is the devil. Although highly detailed, and probably accurate, it was a lady assembling 6 sets of these.
Until next time!

Sean
Have you built the Premium edition Dragon HVSS? It's no picnic either.
Join AMPS.
http://www.amps-armor.org/ampssite
Illinois, United States
Joined: March 29, 2009
KitMaker: 1,135 posts
Armorama: 1,030 posts
Posted: Wednesday, November 16, 2011 - 04:11 PM UTC
Quoted Text
Quoted Text
Just a word of frustration, I hate suspension of vehicle, but HVSS from Tasca is the devil. Although highly detailed, and probably accurate, it was a lady assembling 6 sets of these.
Until next time!

Sean
Have you built the Premium edition Dragon HVSS? It's no picnic either.
No I haven't and don't plan on it

I'll be doing a Tasca's Vc Firefly next so we'll see how that goes.
Currently taking back the fight to beat modeling ADD
Illinois, United States
Joined: March 29, 2009
KitMaker: 1,135 posts
Armorama: 1,030 posts
Posted: Friday, December 02, 2011 - 11:32 AM UTC
Unlike all my other builds, I am still working on this one

and progressing. There isnt much more to it but adding the parts slowly but surely. I replaced the kit barrel with an RB barrel, which is stunning in detail. I also added texture to the turret sides and mantlet using a combination of Mr. Surfacer 500 and 1000.
Anywho, here are the photos showing some progress. Now its starting to look like my first Sherman!


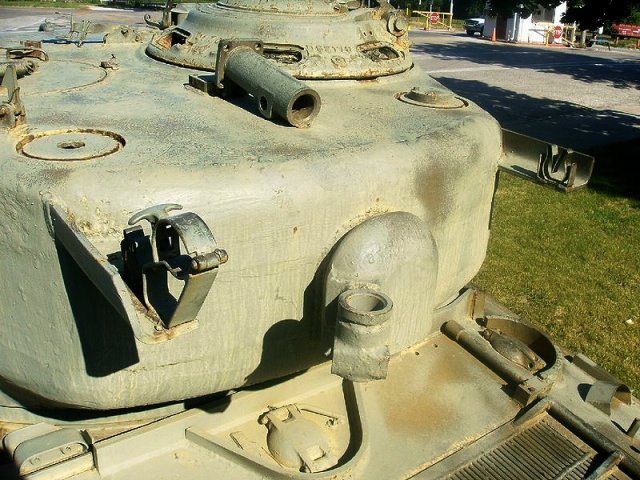
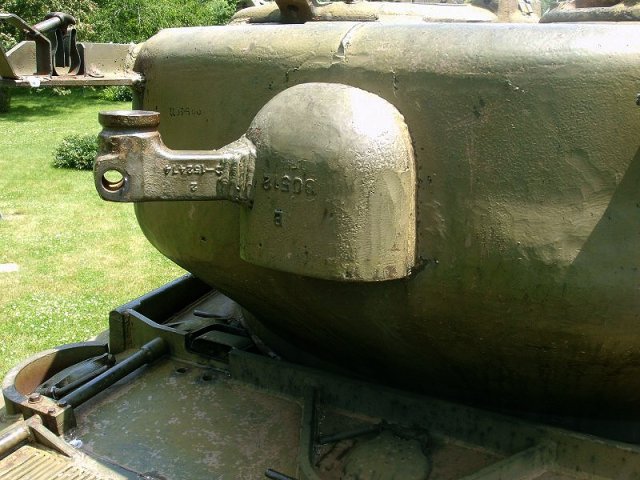
Lastly, I have a question for all Sherman experts. Can anyone explain the "bump" on the back of the turret? I assume it should be textured and have a weld bead around it.
Well until next time

Currently taking back the fight to beat modeling ADD

#045
South Carolina, United States
Joined: September 23, 2005
KitMaker: 362 posts
Armorama: 350 posts
Posted: Friday, December 02, 2011 - 01:17 PM UTC
Hey Sean,
That E8 is looking mighty sweet so keep at her and she’ll look awesome in the end!
The bump at the back of the turret is an armored venerator cover. Yes it is cast and welded to the turret. Double check your reference to make sure how it is attached to the turret, either flush or with a step at the attachment point.


Good luck and let us know if you have any other questions.
Eric Rains
Greenwood, SC, USA
Nevada, United States
Joined: December 21, 2008
KitMaker: 1,109 posts
Armorama: 1,095 posts
Posted: Friday, December 02, 2011 - 02:28 PM UTC
Looking good, I like the way this looks with that barrel.
I have a Tasca M4A1 waiting it's turn. I'm not looking forward to the suspension though....................
As far as the "bump" it is a solid cast piece welded to the turret. The MG travel mount was then welded to it. If I remember correctly it is actually a counter weight of some sort, but I cannot remember why it was added.
G
Lasci la pistola. Porti le cannoli.
Illinois, United States
Joined: March 29, 2009
KitMaker: 1,135 posts
Armorama: 1,030 posts
Posted: Friday, December 02, 2011 - 02:58 PM UTC
Thanks for the info Wayne!
Currently taking back the fight to beat modeling ADD
Illinois, United States
Joined: March 29, 2009
KitMaker: 1,135 posts
Armorama: 1,030 posts
Posted: Sunday, December 04, 2011 - 06:14 PM UTC
Thanks Eric. With all the site screw ups in the last few days I couldn't see your comment until now. I will apply some texture and a weld to that portion tonight as well. Right now I'm in the process of cleaning and building all the tracks which is a pain in the ass. Once I get that finished I can start applying the casting numbers and the other tiny parts I'm sure would have broken off during construction.
Currently taking back the fight to beat modeling ADD

#045
South Carolina, United States
Joined: September 23, 2005
KitMaker: 362 posts
Armorama: 350 posts
Posted: Monday, December 05, 2011 - 03:09 AM UTC
No Problem Sean, I'm just glad it post ok.
Yeah them tracks are oh so much fun! but man they look nice when done, so kind of worth it... barely.
Keep at it and Keep us posted looking forward to seen this come along.
Eric
Eric Rains
Greenwood, SC, USA
Illinois, United States
Joined: March 29, 2009
KitMaker: 1,135 posts
Armorama: 1,030 posts
Posted: Monday, December 05, 2011 - 03:25 AM UTC
Im in the final stages of the build so my motivation is at a peak because I rarely get this far on a kit. Esp since I've got a Maxxpro kit needing my attention haha. Hoping to finish cleaning the tracks and get the runs assembled tonight
Currently taking back the fight to beat modeling ADD
Illinois, United States
Joined: March 29, 2009
KitMaker: 1,135 posts
Armorama: 1,030 posts
Posted: Tuesday, December 06, 2011 - 09:45 AM UTC
A quick snapshot of my update. After cleaning track parts alllll last night I assembled one length today and it sucked to say the least. It's so tedious but the look is so worth it.
I will finish the other side tomorrow and apply Archer transfers and welds.
On a side note, can someone tell me how many tracks each side should have? I think I counted 80 but that seems a bit too even of a number

Here are the pictures!


Thanks for looking!
Currently taking back the fight to beat modeling ADD
Ontario, Canada
Joined: February 04, 2009
KitMaker: 743 posts
Armorama: 549 posts
Posted: Tuesday, December 06, 2011 - 05:41 PM UTC
Sean,
Your E8 is coming along beautifully. Nice clean build for sure.
Don't forget to add some weld seems around the ventilator on the rear of the turret.
For the tracks, I believe the instructions say to use 77 links per side. As I recall this is the number of links I used when I built this kit.
Cheers,
Dave.
http://ghmicro.wix.com/twis-first-cut
Illinois, United States
Joined: March 29, 2009
KitMaker: 1,135 posts
Armorama: 1,030 posts
Posted: Tuesday, December 06, 2011 - 06:00 PM UTC
Thank you very much! Im having trouble finding more ETO photos of the E8 that arent the one youre building so markings and stowage are a bit up in the air at the moment. As far as tracks go, for some reason I didnt see that in the instructions. Well I'll bust out 3 link and make sure I change the position of the idler.
Currently taking back the fight to beat modeling ADD
Illinois, United States
Joined: March 29, 2009
KitMaker: 1,135 posts
Armorama: 1,030 posts
Posted: Wednesday, December 07, 2011 - 10:27 AM UTC
Update 12/7/2011
I finally was able to get the other run of tracks assembled. For some reason it went soooo much faster this time around. So when I decide to tackle my Leclerc RT5 the Bronco tracks will hopefully be a breeze.
I also applied the Archer casting numbers according to the instructions but got a little bit creative as well and at this point historical accuracy doesn't matter too much to me; I'm just trying to complete a build and have fun with it.
All that's left is to add all the small parts and source some figures and stowage to dress the vehicle up. On that note, can anyone suggest some great figures for crew? I was thinking Miniart with replacement heads but I'm not too sure about that so I am open to ideas. If worst comes to worst I will be buying some alpine figures.
Anywho, here are some photos. For the record, all of these photos were taken with my iPhone 4S so they aren't the best quality.


Until the next time and thanks for looking

Currently taking back the fight to beat modeling ADD
Georgia, United States
Joined: January 31, 2010
KitMaker: 2,191 posts
Armorama: 1,814 posts
Posted: Wednesday, December 07, 2011 - 10:14 PM UTC
Remember to drill the drain holes in the fuel filler armor shields. Looking good. Keep moving forward!
Join AMPS.
http://www.amps-armor.org/ampssite
Illinois, United States
Joined: March 29, 2009
KitMaker: 1,135 posts
Armorama: 1,030 posts
Posted: Wednesday, December 07, 2011 - 10:25 PM UTC
Can you point out where that is? I believe its right where the archer transfers went around the turrent ring correct?
Currently taking back the fight to beat modeling ADD
Georgia, United States
Joined: January 31, 2010
KitMaker: 2,191 posts
Armorama: 1,814 posts
Posted: Wednesday, December 07, 2011 - 11:03 PM UTC
Join AMPS.
http://www.amps-armor.org/ampssite
Ontario, Canada
Joined: February 04, 2009
KitMaker: 743 posts
Armorama: 549 posts
Posted: Thursday, December 08, 2011 - 01:06 AM UTC

Dave.
http://ghmicro.wix.com/twis-first-cut

#045
South Carolina, United States
Joined: September 23, 2005
KitMaker: 362 posts
Armorama: 350 posts
Posted: Thursday, December 08, 2011 - 12:12 PM UTC
Hey Sean the E8 is looking really good!
Nice job with the tracks and the casting numbers. And for what its worth I wouldn't get to hung-up on the markings and stowage. Unless your trying for a particular Sherman. I'd throw on some national stars and serial numbers on the sides and maybe the top-o the turret and call it good, that way it can be any E8 in the ETO. As for the stowage don't look at just E8's but look at all Shermans. You'll notice that some are piled high with goodies and some just with a box and jerry can or two. The stowage is where you as a modeler can have a ton of fun, do as much or as little as you like...just have blast.
One last thing about stowage(mmm...maybe two things) remeber to tie it down to the tank and think about how you are going to paint and attach it, save yourself a headach later.
Bottomline---have FUN!!

and keep up the good work!!

Eric Rains
Greenwood, SC, USA
Illinois, United States
Joined: March 29, 2009
KitMaker: 1,135 posts
Armorama: 1,030 posts
Posted: Sunday, February 26, 2012 - 04:26 PM UTC
Currently taking back the fight to beat modeling ADD
Minnesota, United States
Joined: February 20, 2007
KitMaker: 339 posts
Armorama: 325 posts
Posted: Monday, February 27, 2012 - 04:15 AM UTC
This looks really good Sean. Glad to see that you have returned to this project and are getting closer to wrapping it up. How are you planning to display it?
By the way, there are a few good photo of ETO service E8s in the Squadron/Signal book "WWII U.S. Sherman Tank in Action" by Rob Ervin and David Doyle. It's only a couple pages worth but for what it's worth, I hadn't seen most of them in any other sources.
"Seems like a lot of work for only a small amount which will actually be visible...but hey, I'll know it's there!" -- Rallying cry of anal-retentive modelers everywhere!


