_GOTOBOTTOM
Constructive Feedback
For in-progress or completed build photos. Give and get contructive feedback!
1/35 Dragon (cyberhobby) Soviet Heavy Tank IS
math-x
Visit this Community
Poland
Joined: February 15, 2011
KitMaker: 7 posts
Armorama: 7 posts
Posted: Friday, December 16, 2011 - 12:24 PM UTC
I would like to shere with some photos of the 1/35 Dragon/CyberHobby Soviet Heavy Tank IS-2 which I was working on over last 3 months. Winter camouflage scheme is based on the undefined unit from Vitebsk (1944).
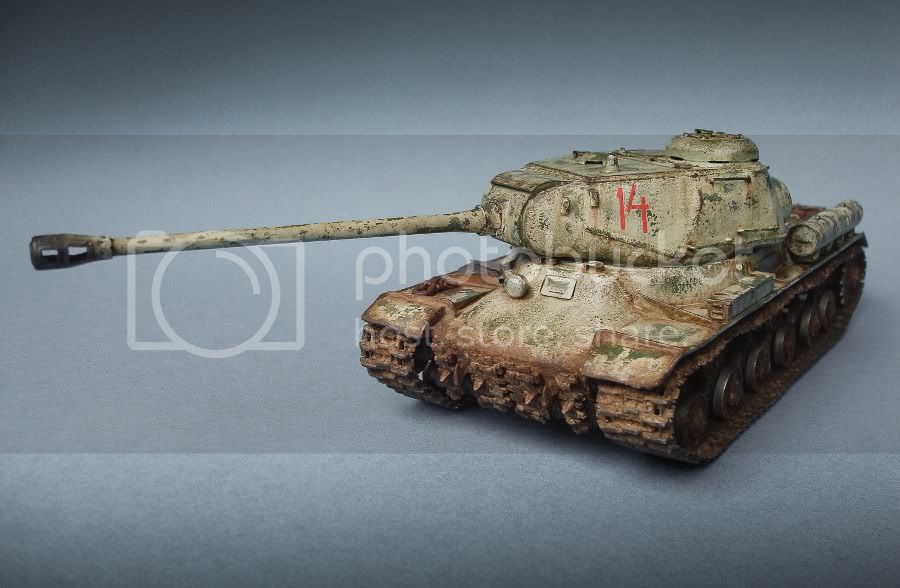
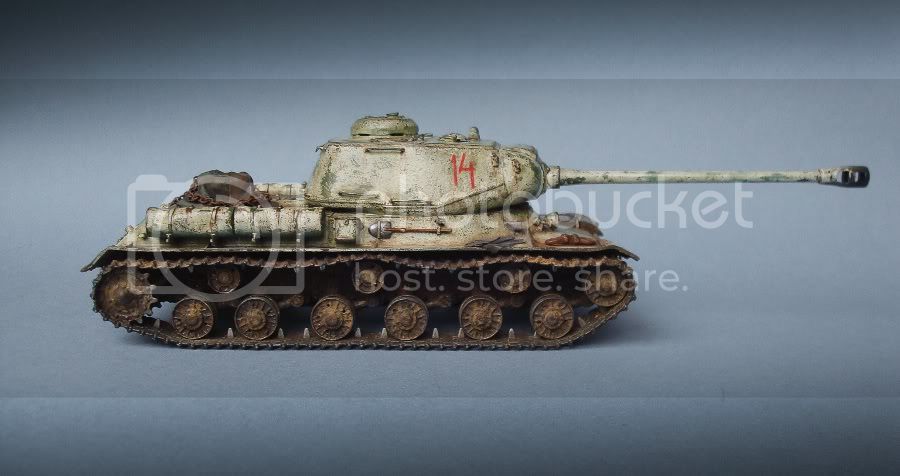
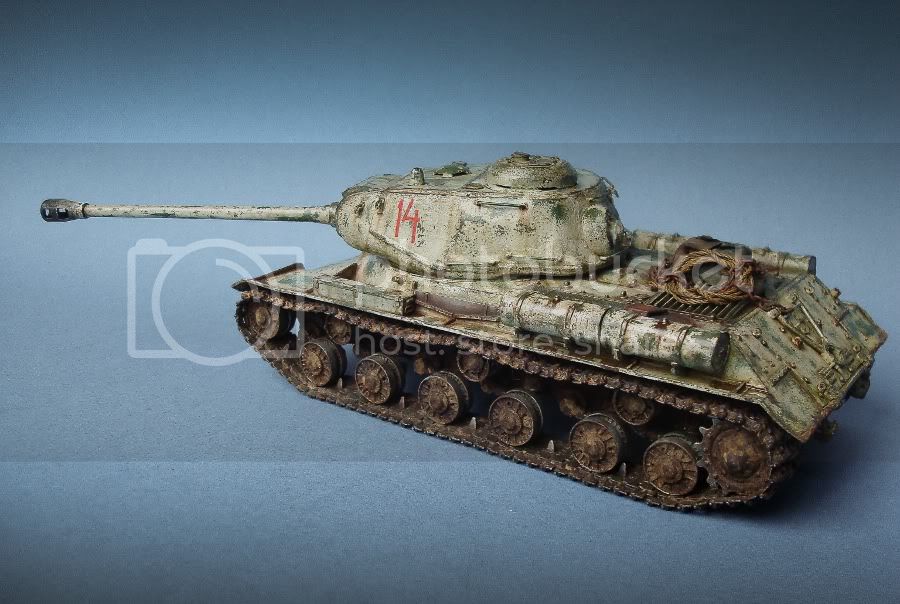
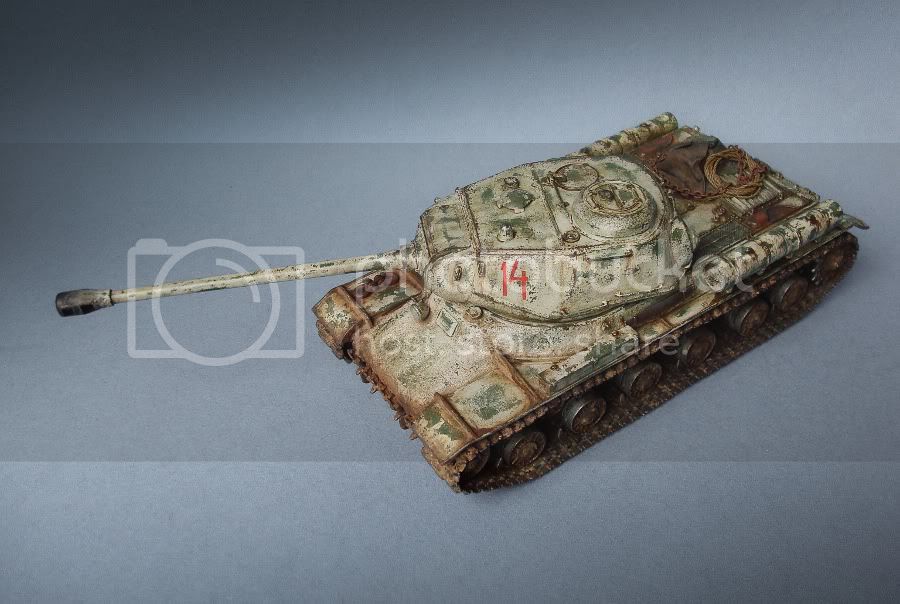
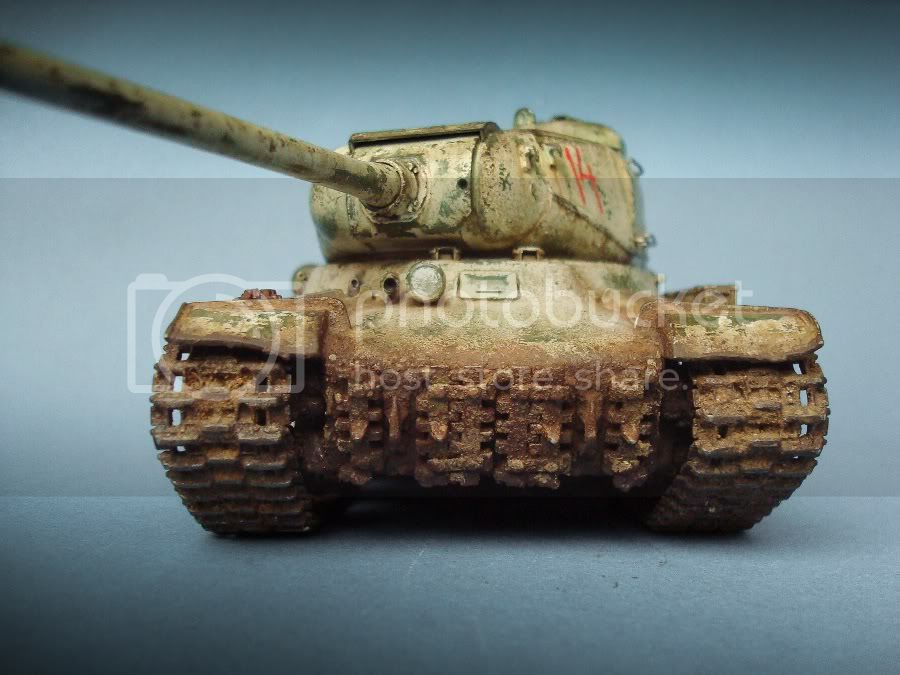
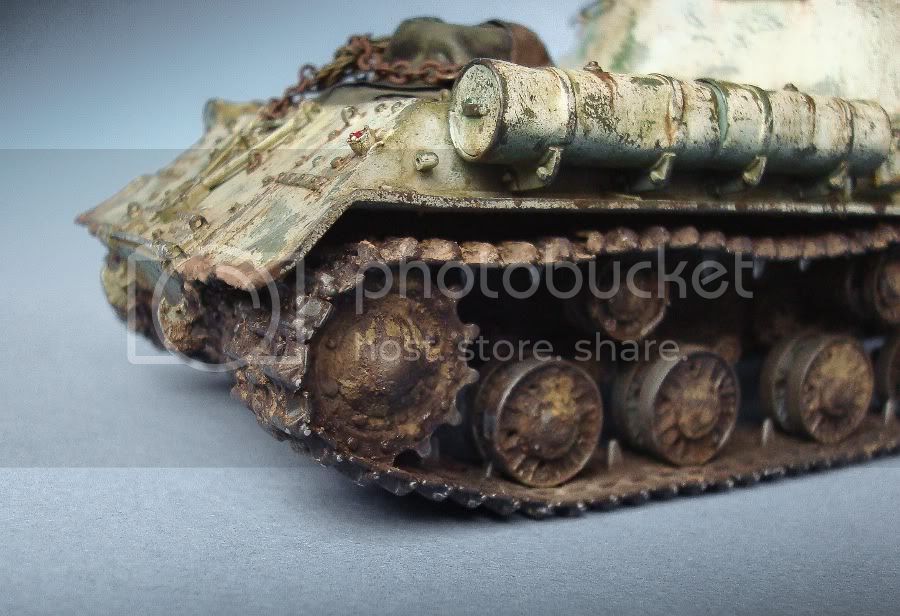
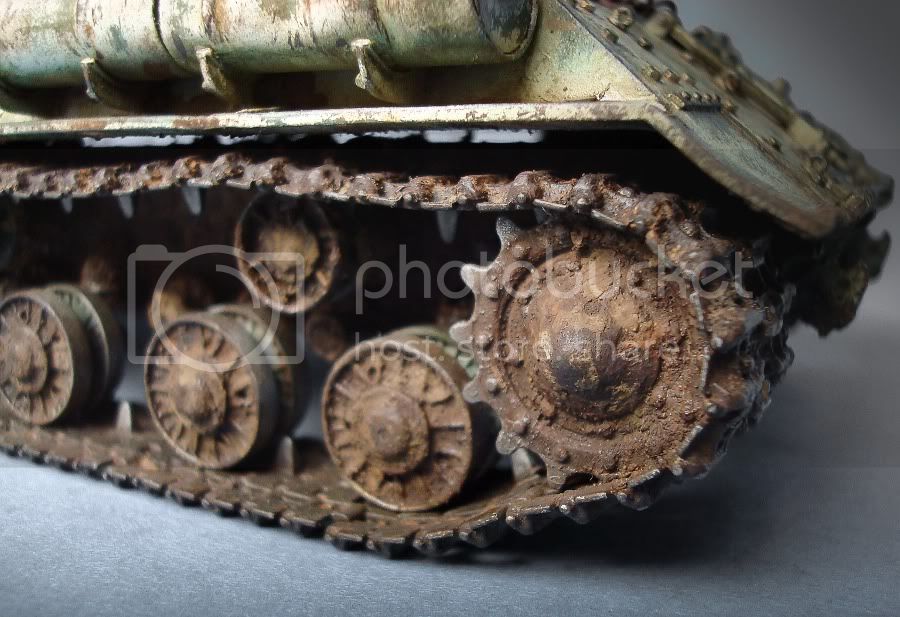
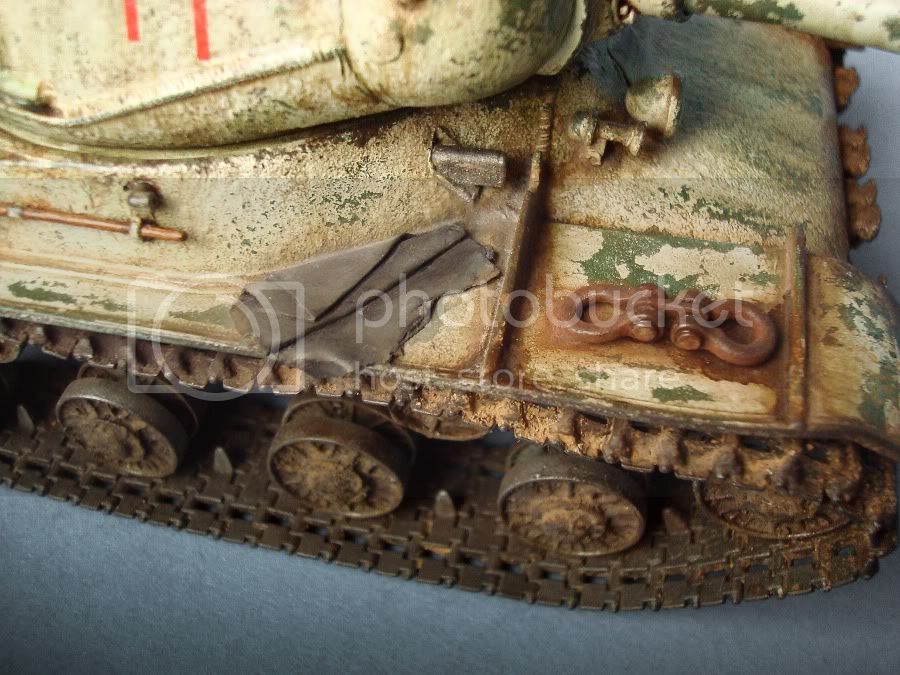
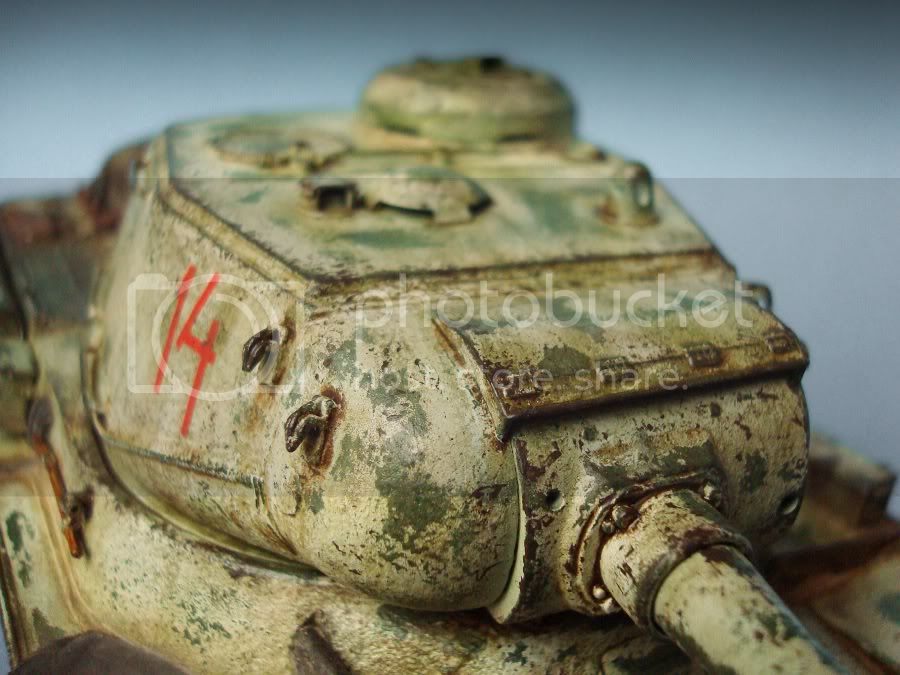
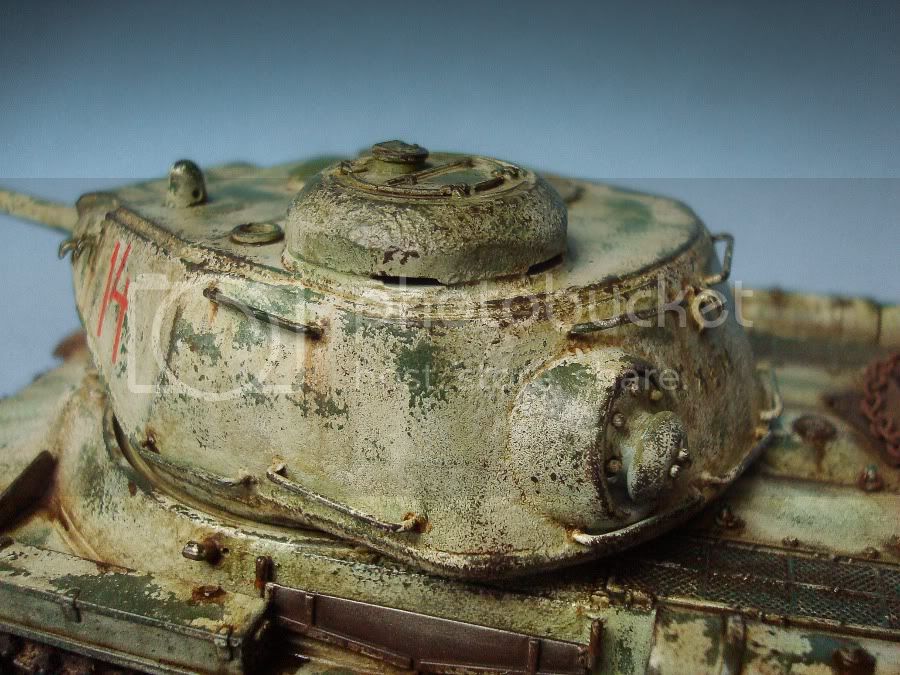
This was my first winter camouflage and the main idea was to make this tank dirty and wear with grime and rust flowing down the turet and hull. I used a 'hairspray' technique and then I did several layers of weathering mainly with AK and MIG stuff followed by oil paints.
The model is pretty much 'out of box' with some small modifications.

I hope you will like it. All comments, critique and questions are very welcome.

This is how it looks:


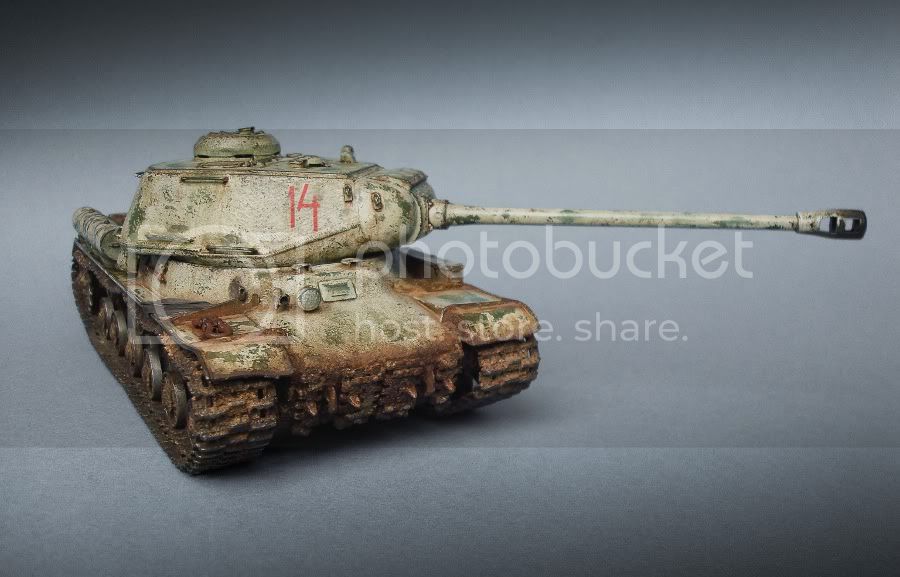
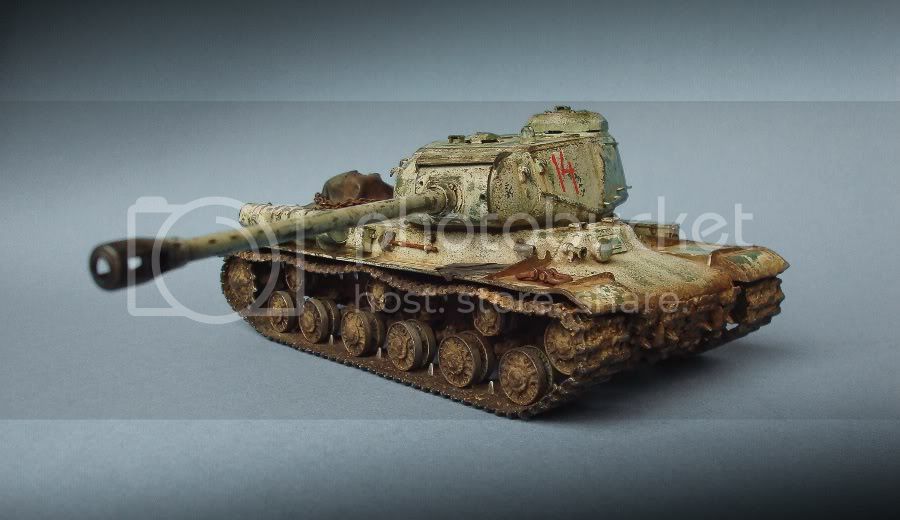
and some details as well:


Thank you for viewing it.
retiredyank
Visit this Community
Arkansas, United States
Joined: June 29, 2009
KitMaker: 11,610 posts
Armorama: 7,843 posts
Posted: Friday, December 16, 2011 - 12:31 PM UTC
Wow! This beast looks like it just drove out of a swamp! That is a lot of weathering for a operational tank. The only thing that really stands out is the turret number. I would think it would be a little more faded and worn.
Big-John
Visit this Community
Ohio, United States
Joined: August 12, 2010
KitMaker: 731 posts
Armorama: 711 posts
Posted: Sunday, December 18, 2011 - 06:16 AM UTC
Holy Cow!! Fantastic job!!!

Very nice weathering!
Tojo72
Visit this Community
North Carolina, United States
Joined: June 06, 2006
KitMaker: 4,691 posts
Armorama: 3,509 posts
Posted: Sunday, December 18, 2011 - 08:01 AM UTC
Fantastic whitewash technique and weathering.The trcks look great also,are they kit or AM,cant tell,they look like Friuls.
scratchmod
Visit this Community
Massachusetts, United States
Joined: November 07, 2008
KitMaker: 796 posts
Armorama: 763 posts
Posted: Monday, December 19, 2011 - 01:16 AM UTC
Very nice work on the W / W and weathering. I like the dirty hull, looks great
Rob
Battleship_Al
Visit this Community
Washington, United States
Joined: October 25, 2009
KitMaker: 133 posts
Armorama: 97 posts
Posted: Tuesday, December 20, 2011 - 05:28 AM UTC
That looks fantastic. The worn winter white is perfect but I really love the way you did the bare steel. The rust effect is very realistic. Can you share some of your techniques?
imatanker
Visit this Community
Maine, United States
Joined: February 11, 2011
KitMaker: 1,654 posts
Armorama: 1,565 posts
Posted: Wednesday, December 21, 2011 - 01:34 PM UTC
I would call that a"Seasoned Warrior" Great work,Jeff
math-x
Visit this Community
Poland
Joined: February 15, 2011
KitMaker: 7 posts
Armorama: 7 posts
Posted: Sunday, December 25, 2011 - 02:45 AM UTC

Quoted Text

That looks fantastic. The worn winter white is perfect but I really love the way you did the bare steel. The rust effect is very realistic. Can you share some of your techniques?


Thanks!!!

There is nothing realy special about my technique. Basically, I did winter camo using known 'hairspray' technique in which the white acrylic pain (Revell) was sprayed over the Taft hairspray coat and scrathed out gently (with warm water and Smirnoff Vodka:) using old hard brush before acrylic paint completly dried out (let say 20 min aprox). Then, I used AK winter grime streaks solution to create washed dirt effect, and because AK mixture is green it also served as a filter to blend white colour. Next, the whole model was coated with thin layer of Klear to protect previous layer. Then I have placed all decals and I did wash with diluted oil paints (mainly Van dyke brown) followed by another thin coat of Klear. To highlight some parts I blend colours with white and green oil paints as well. The rust effect was done with AK rust effect solution and burnt siena oils. Paint chips - sponge and black/brown acrylic paint. Mud is mainly done with MIG pigments and dry pastels along with othek AK stuff. For metallic edges worn effect I used drybrush and 'dry finger' technique using silver paint from ordinary permanent silver marker. This pretty much what I did I hope this helps.
Thanks again for watching.
 _GOTOTOP