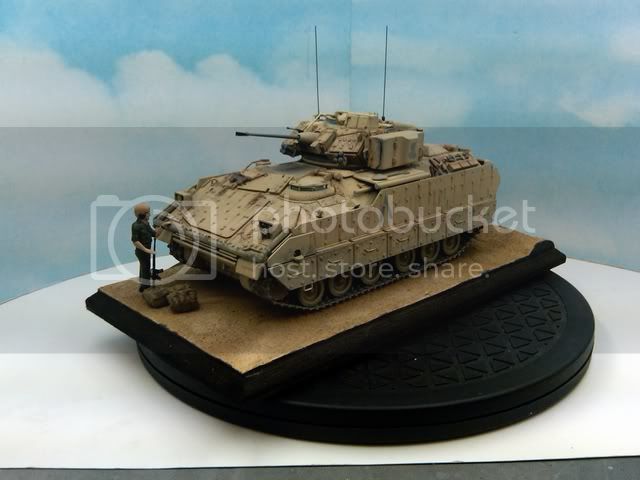
This was my last build completed in 2011, and it was done with a few hours to spare.
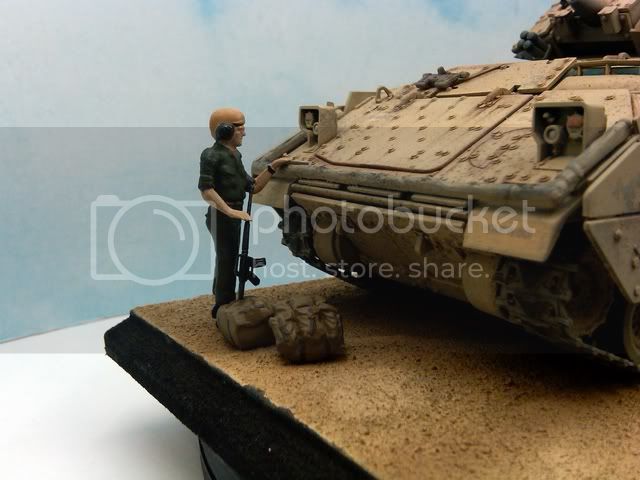
The scene is set after "Desert Storm" has finished and the Americans are heading back home. The Bradley has been parked up in a compound waiting to be shipped back to the States. The commander is patting the hull and saying to his ride "See you back at home!" before catching his flight back.
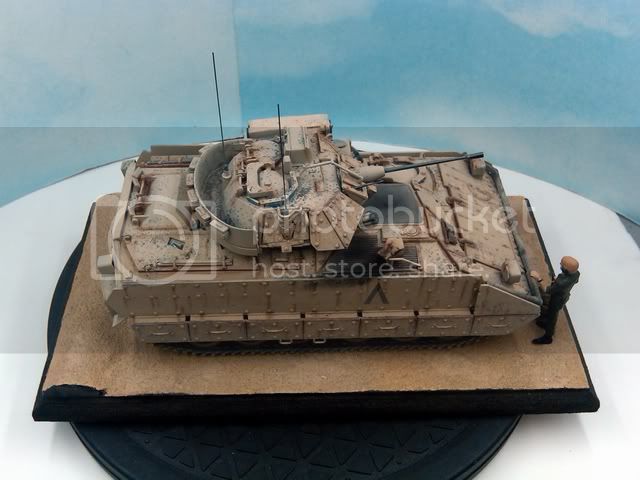
The kit is from Modelcraft in 1/35th, a basic kit that was previously motorised. I started this project to test out some new weathering techniques, salt weathering and oil paint weathering which I am pleased with the results for this first attempt. Unfortunately, there was not decals in the kit, so I had to find some decal sheet images on-line to download and edit them.
The base was scratch-built with MDF, Plasticine, granite ballast and paint, a first using Plasticine for me as I did not have any other modelling clay to use at the time. The figure came with the kit, it is not that good compared to other manufacturer's examples, but it would do for this. I did modify the arms a little to get the pose right, though when standing alone, he does stand a bit like Larry Grayson! The Alice Packs are from Tamiya and the M231 rifle also came from the Bradley kit.
I hope that you enjoy this one, it came out better then I thought.
Constructive Feedback
For in-progress or completed build photos. Give and get contructive feedback!
Hosted by Darren Baker, Dave O'Meara
"See you back at home!"
The-Mechanic
England - East Anglia, United Kingdom
Joined: June 11, 2010
KitMaker: 103 posts
Armorama: 35 posts
Joined: June 11, 2010
KitMaker: 103 posts
Armorama: 35 posts
Posted: Sunday, January 01, 2012 - 12:25 AM UTC
Magpie
Queensland, Australia
Joined: July 10, 2011
KitMaker: 653 posts
Armorama: 273 posts
Joined: July 10, 2011
KitMaker: 653 posts
Armorama: 273 posts
Posted: Sunday, January 01, 2012 - 12:39 AM UTC
The figure is a little fruity, but the wagon is a treat mate, well done.
Anirudharun
England - West Midlands, United Kingdom
Joined: February 16, 2008
KitMaker: 597 posts
Armorama: 530 posts
Joined: February 16, 2008
KitMaker: 597 posts
Armorama: 530 posts
Posted: Sunday, January 01, 2012 - 12:41 AM UTC
Good work Mick, the model/base look suitably dry and dusty. The soot especially looks great, How did you do that?
If you are experimenting with weathering techniques, I would suggest that you look into using pigments if you haven't already done so. They are very easy to apply, have a wide variety of colours and the the finish you get with them is very realistic.
Keep up the good work!
Anirudh
If you are experimenting with weathering techniques, I would suggest that you look into using pigments if you haven't already done so. They are very easy to apply, have a wide variety of colours and the the finish you get with them is very realistic.
Keep up the good work!
Anirudh
The-Mechanic
England - East Anglia, United Kingdom
Joined: June 11, 2010
KitMaker: 103 posts
Armorama: 35 posts
Joined: June 11, 2010
KitMaker: 103 posts
Armorama: 35 posts
Posted: Sunday, January 01, 2012 - 12:58 AM UTC
Thanks guys.
@ Scott.
I know the figure is crap, but I didn't want to use one set aside for my better kits, so the kit one was used. Anyhow, this is not a competition build, just a fun one to try out new things.
@ Anirudh.
I have really done much with pigments yet, but I do used other mediums including pastals and Carrs weathering powders. The soot is a mixture of paint finished off the Carrs powders.