_GOTOBOTTOM
Armor/AFV: Axis - WWII
Armor and ground forces of the Axis forces during World War II.
Hosted by Darren Baker
BMW R75 With Sidecar
SDavies
Visit this Community
England - South East, United Kingdom
Joined: January 09, 2010
KitMaker: 979 posts
Armorama: 959 posts
Posted: Friday, January 20, 2012 - 09:14 AM UTC
Dear All,

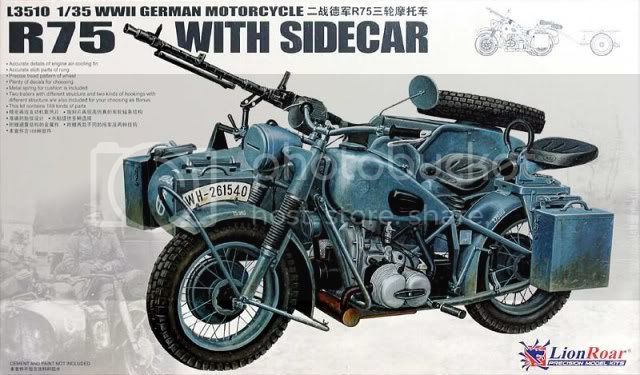
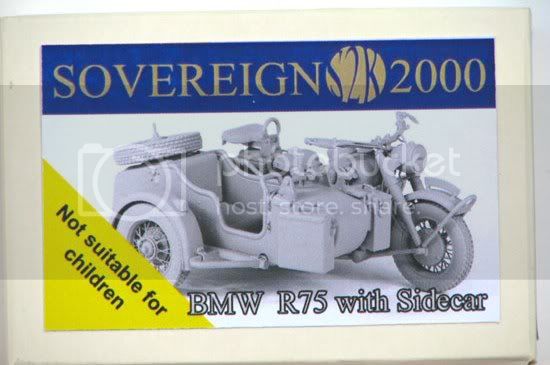
I am currently researching my 1/16th Kingtiger Projects and aim to begin them in late February / early March but I have decided to start another small project in the meantime a Lionroar BMW R75 Motorcycle with sidecar enhanced with a Sovereign 2000 resin upgrade set.

This should be a quick and straight forward build, after all what could possibly go wrong


Thanks for looking

Steven
SDavies
Visit this Community
England - South East, United Kingdom
Joined: January 09, 2010
KitMaker: 979 posts
Armorama: 959 posts
Posted: Monday, January 23, 2012 - 08:28 AM UTC
Hi Everyone,

I have been working to modify the R75 to accept the resin upgrade and it needs lots of modifications !

The R75 was in production from 1941 so I have lots of different potential theatres in which to base this motorcycle.

The first impressions of the Lionroar kit are largly positive, the kit is very detailed and the instructions clear and easy to read. One problem is that they leave out kit part numbers so that you are searching through the box trying to locate the damn things.

The Sovereign kit is also good, the instructions are rather less clear though and you are often left wondering how to place objects on the bike.

I have installed the OHV 700cc early in the build, this was necessary to allow the resin to be installed. The images below are rather raw and I need to clean up some of the milliput. I have heavily modified the riders/drivers seat and replaced some of the frame with brass. I will cover this up later on.

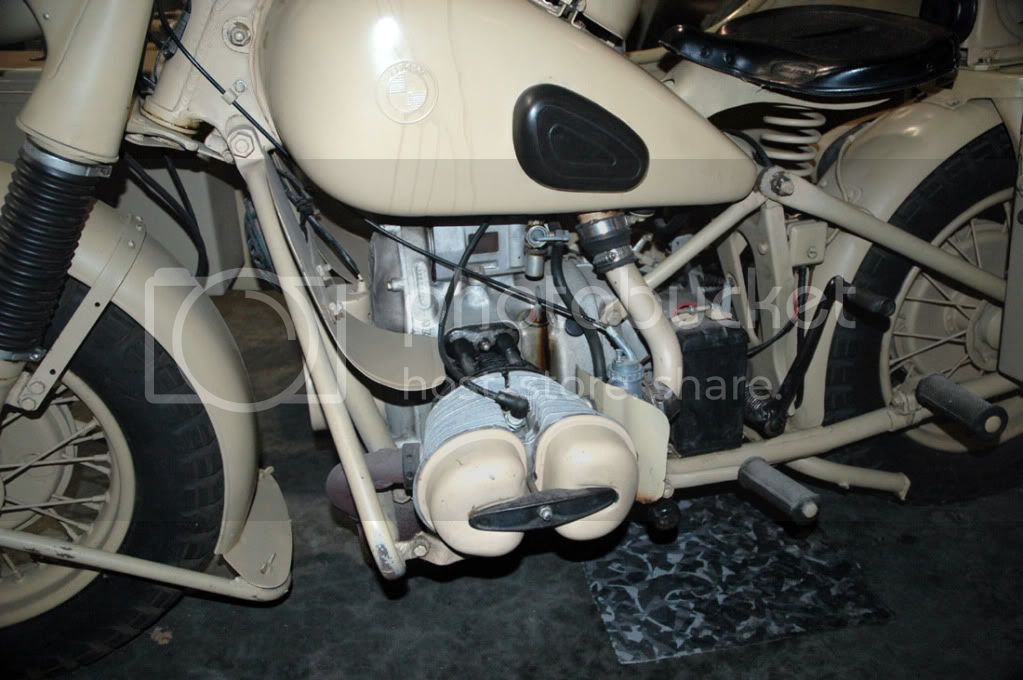
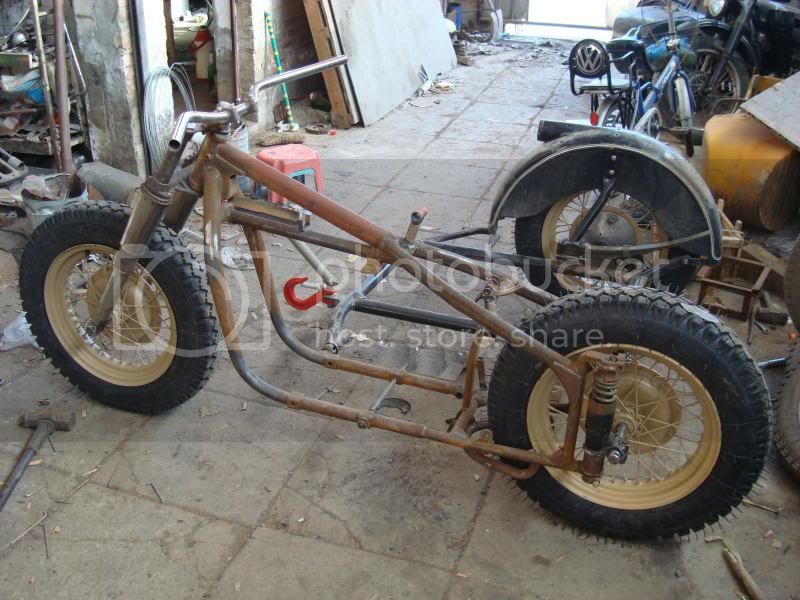
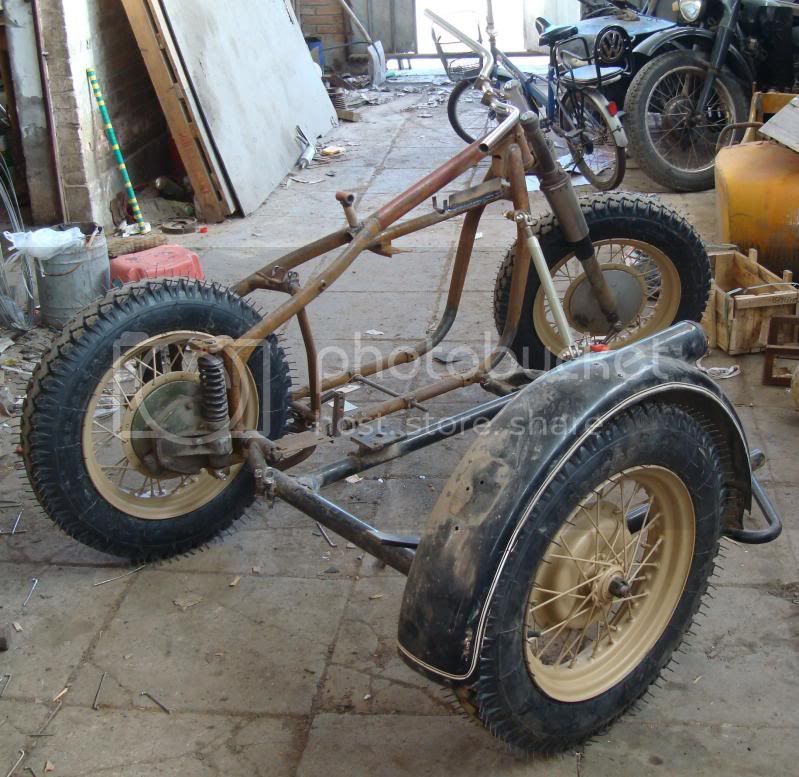
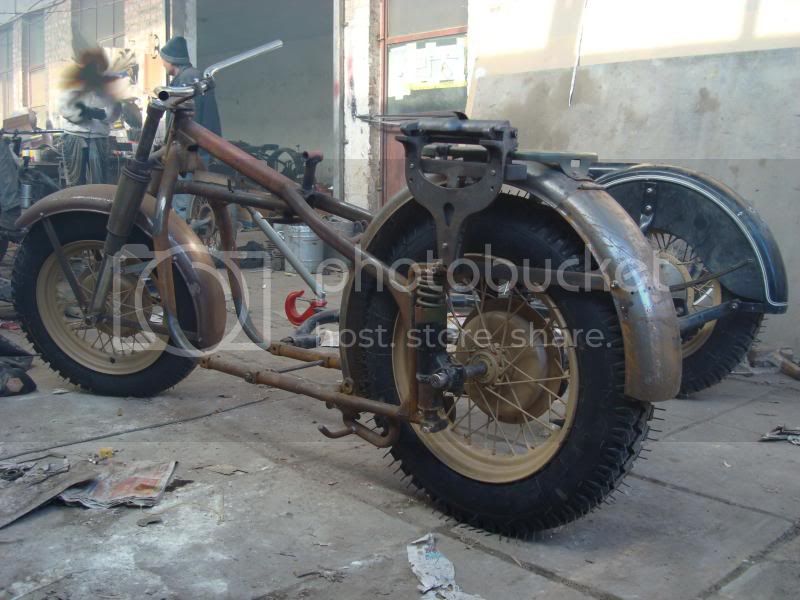
For reference I am using Toadmans excellent web gallery and have produced one of his images below for reference.


The spring is actually a kit part, you are instructed to cut off the molded on spring which is quite inaccurate and replace it. I have modified part of the frame around the engine and I still need to do a little clean up.

This is what it should and will look like


Photo copyright Toadman

Lots to do.

S
FAUST
#130
Visit this Community
Noord-Holland, Netherlands
Joined: June 07, 2002
KitMaker: 8,797 posts
Armorama: 4,190 posts
Posted: Monday, January 23, 2012 - 08:41 AM UTC
Ola Steven
Nice start on this kit. Does the Sovereign set add or enhance a lot of details lacking on the lion roar kit or is the latter already good to start with?
Tanksami
Visit this Community
Victoria, Australia
Joined: August 06, 2011
KitMaker: 1,314 posts
Armorama: 1,217 posts
Posted: Monday, January 23, 2012 - 08:44 AM UTC
Hi Steve,

I will follow with interest as have a couple of these stashed away, are their in links to the toad man site by chance??? And how does the kit stack up with & without the sovereign update??

Cheers Mike
SDavies
Visit this Community
England - South East, United Kingdom
Joined: January 09, 2010
KitMaker: 979 posts
Armorama: 959 posts
Posted: Monday, January 23, 2012 - 09:51 AM UTC
Dear Rob, Mike,

The Sovereign update set so far is proving to be better than the kit, this is as you would expect. For example the drivers/riders chair kit part lacks the fine rivet detail of the resin and the way lionroar have suggested that it is attached to the bikes frame is completely inaccurate. The resin update fixes this and adds "metal supports" to the back of the seat.

This is not to say that I could not have altered the kit parts to this standard, lots of the resin upgrades complement rather than replace the kit, the Lionroar detail is just fine and I love to super detail !

It was one hell of a job swaping the kit parts out, though and it will take some time to clean up the kit to get the resin accessories correctly installed.

Personally I dont know if I would have purchased the resin kit as the lionroar details look perfectly acceptable, but this was a present from the wife last Christmas and it came with the resin upgrades, so why not.

The fit of the kit is as good as Dragon or Trumpter, some filling required but not excessive so far. I have spent the weekend with the kit and I would recommend it.

Lionroar are a company to keep an eye on.

Links:

http://www.toadmanstankpictures.com/

http://www.sovereign2000.uk.com/plans/BMW%20Kit-upgrade%20Plans.pdf

Thanks for looking

S
SDavies
Visit this Community
England - South East, United Kingdom
Joined: January 09, 2010
KitMaker: 979 posts
Armorama: 959 posts
Posted: Monday, January 30, 2012 - 09:00 AM UTC
Hi Everyone,

I have been working on the BMW R75 and have got lots of images and comments to share with you all.


These are standard shots of the bike, I have installed the rear seat rest which is so much more detailed than the stock kit part and the rear mudguard. Of note here should be the bike's frame, I severerly weakened it drilling it to install the brsss wiring, you should not do this if you decide to build this bike, I have strengthened mine with CE and Milliput but it is still fragile.

The level of detail on this bike is seriously impressive, the details on the tires are crisp and clear. The tyres are made up of 7 parts including steel this is great !

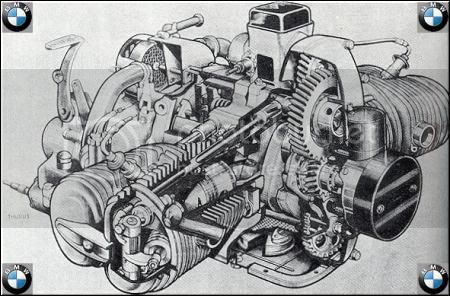
For those interested I managed to get this image from BMW's website illustrating the bikes engine to illustrate how it operated.


The detailing continues and I have added the passengers seat and handrest and the exhaust system and front mudguard.

Ok thinks get tricky here. The exhaust pipe was too short (about 4mm !) to I had to cut it off drill a hole in the exhaust box and replace the tube with solder.

Next was the front mudguard, well lionroar have got it wrong here and suggest that you mount it in the incorrect place on the bike, just over the exhausts. I studied Toadmans images and worked out where it was supposed to go and altered the part to fit. However the mudguards contain cut outs for the exhaust pipes and need to be filled ! Sovereign also noticed that they were in the wrong place but have left the holes intact on their example model in their instructions


So I glued some very thin lead to the underside of the cutout and filled it with miliput. It needs some more work but looks ok. Better than nothing.


Thanks for looking

S

FAUST
#130
Visit this Community
Noord-Holland, Netherlands
Joined: June 07, 2002
KitMaker: 8,797 posts
Armorama: 4,190 posts
Posted: Monday, January 30, 2012 - 09:11 AM UTC
Ola Steven

Nice work so far on the bike. I like it. Great additions to the kit.

I remembered I uploaded a Walkaround of BMW R75 a while ago. You probably know this and if not maybe it can help you in detailing the vehicle.
BMW R75 I have more... much more
Tanksami
Visit this Community
Victoria, Australia
Joined: August 06, 2011
KitMaker: 1,314 posts
Armorama: 1,217 posts
Posted: Tuesday, January 31, 2012 - 08:09 AM UTC
Hi Steven,

Great work coming along nicely & gives me inspiration to try & to something half as decent
HipKitty
Visit this Community
Pennsylvania, United States
Joined: February 14, 2011
KitMaker: 390 posts
Armorama: 387 posts
Posted: Tuesday, January 31, 2012 - 04:14 PM UTC
Nice work as always Steven!
SDavies
Visit this Community
England - South East, United Kingdom
Joined: January 09, 2010
KitMaker: 979 posts
Armorama: 959 posts
Posted: Saturday, February 04, 2012 - 06:42 AM UTC
Hi All

Thanks for the kind words and Robert thanks for the images, I really wish I knew they were there before I began my build !

Its hard to add alot of narrative other than being very matter of a fact with my progress, but this is a enjoyable build but not one without its problems

The first Images show the front wheel added to thge bike along with the associated fixtures and fittings. There is not a whole lot of resin here and the kit detail is generally excellent. Please note the brass wire added to the back of the bike, the kit part never fitted correctly to I went ahead and replaced it. I dont believe that I did anything wrong but the part was simply too small.


The next image shows a upper shot of the bike and look at the cutouts on the mudguard, they are again there. I studied Robert's images and noted that they were supposed to be there !


The next images show the handle bars of the bike along with the hand breaks, which were cut off the original kit handle bars. These resin replacements really are great but cutting off those break handles has to be done very precisly....they have the potential to fly acosss the room, if you cut them off without paying attention (yep that happened to me but I managed to locate them, with the help of my heavily pregnant wife lol)


One of the problems I have with this kit is the stowage box installed next to the rear wheel. The back of the box is hollow and clearly visable as hollow because the wheel has metal spokes. Come on lionroar ! I filled mine up with milliput. There was also a sink hole on the top of the stowage box which I have now filled. Thats not really acceptable on a modern kit.


Next step is all the electrical wiring !

Thanks for looking

S


Tanksami
Visit this Community
Victoria, Australia
Joined: August 06, 2011
KitMaker: 1,314 posts
Armorama: 1,217 posts
Posted: Saturday, February 04, 2012 - 09:15 AM UTC
Hi Steve,

Looking great so far as a rolling chassie,can't wait to see all the wiring done.

Plasticbattle
#003
Visit this Community
Donegal, Ireland
Joined: May 14, 2002
KitMaker: 9,763 posts
Armorama: 7,444 posts
Posted: Saturday, February 04, 2012 - 11:00 AM UTC

Quoted Text

The back of the box is hollow and clearly visable as hollow because the wheel has metal spokes. Come on lionroar ! I filled mine up with milliput. There was also a sink hole on the top of the stowage box which I have now filled. Thats not really acceptable on a modern kit.


Not acceptable on a kit at this price either!! Surprising how much detail you have swapped out. I have this as well, and I paid £23 plus postage to Sweden, so for a small bike, one would expect the bees knees??
Your build looks top notch again Steven. Saved some of your "update", for when I get around to mines, so I can make these same fixes.
SDavies
Visit this Community
England - South East, United Kingdom
Joined: January 09, 2010
KitMaker: 979 posts
Armorama: 959 posts
Posted: Sunday, February 05, 2012 - 01:21 AM UTC
Thanks for the comments Mike, Frank !

Frank Perhaps I have been a little too hard on Lionroar, the mistakes that I have found are minor in the grand scheme of things and easy to scratch build around. My Trumpter T-62 required alot more work than this and I have not been put off Trumpter models. Lionroar are a new company and perhaps deserve the benefit of the doubt. I would happily purchase another one of their kits.

The Soverign upgrades are not essential but do lift this kit from a 8/10 to a 9/10 in terms of accuracy.

S
SDavies
Visit this Community
England - South East, United Kingdom
Joined: January 09, 2010
KitMaker: 979 posts
Armorama: 959 posts
Posted: Wednesday, February 08, 2012 - 11:24 AM UTC
Hi All,

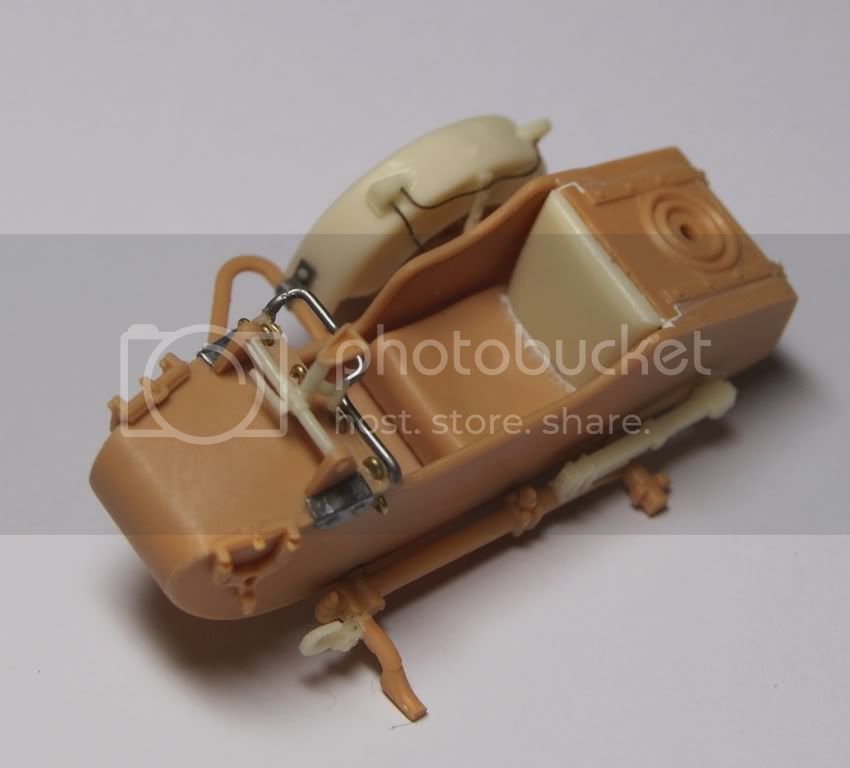
Well, in the last build post I stated that I would begin work on the bike's electrical wiring. Unfortunately, I got distracted by the sidecar and decided instead to build that.

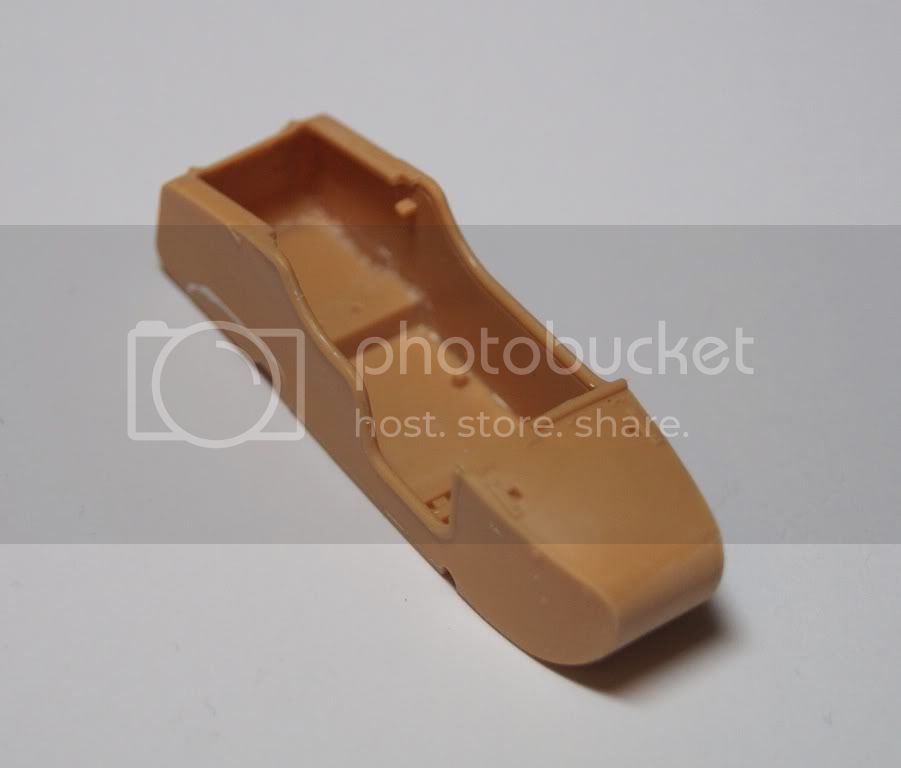
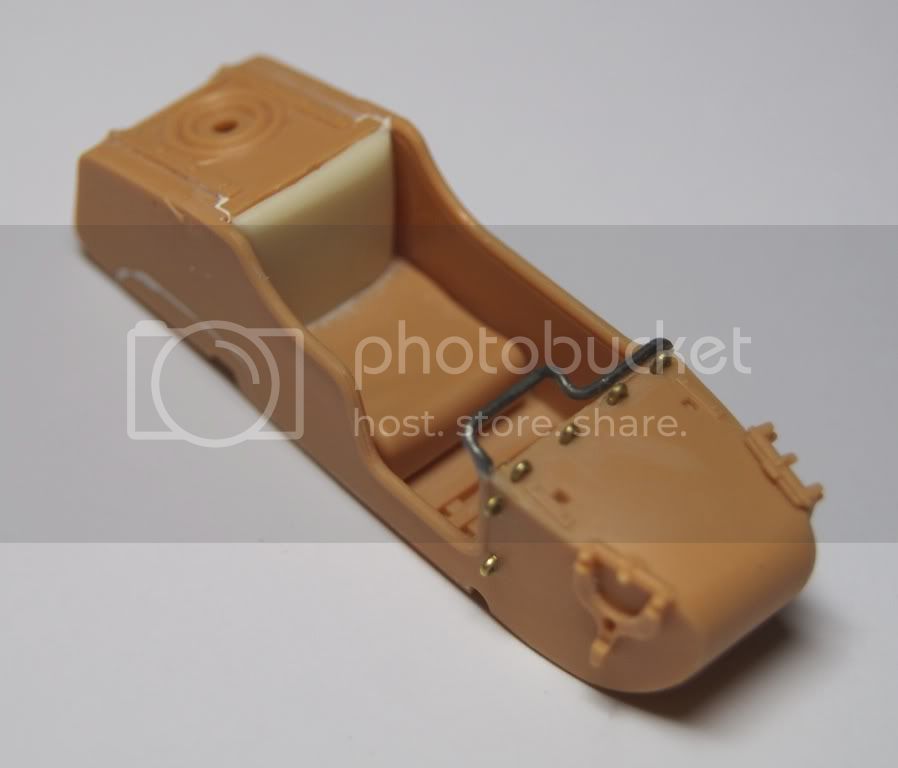
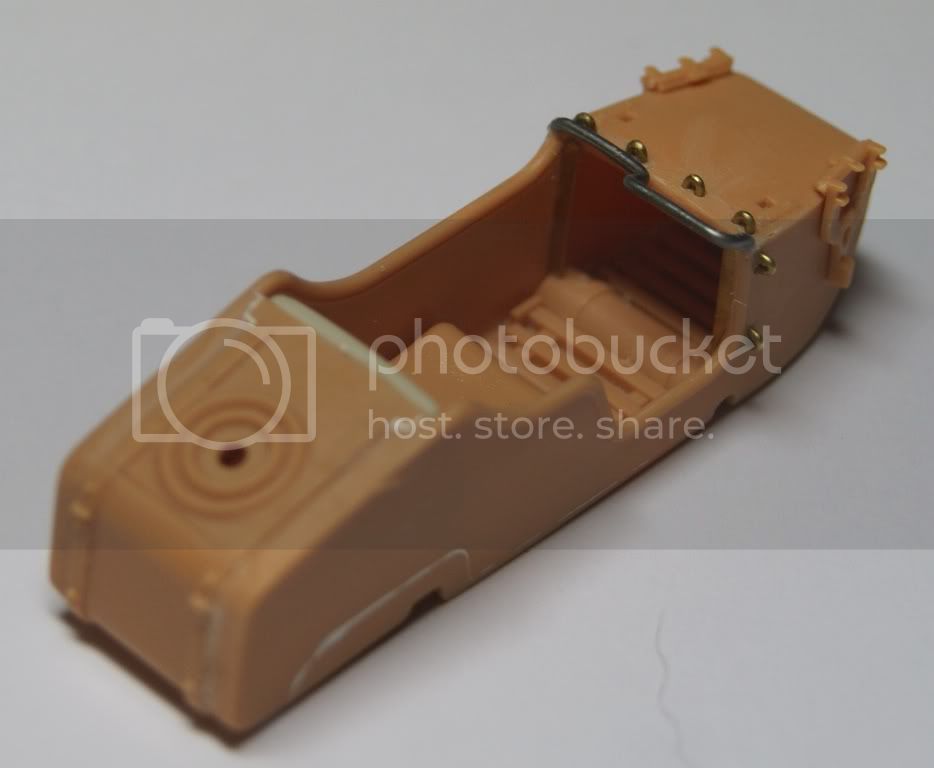
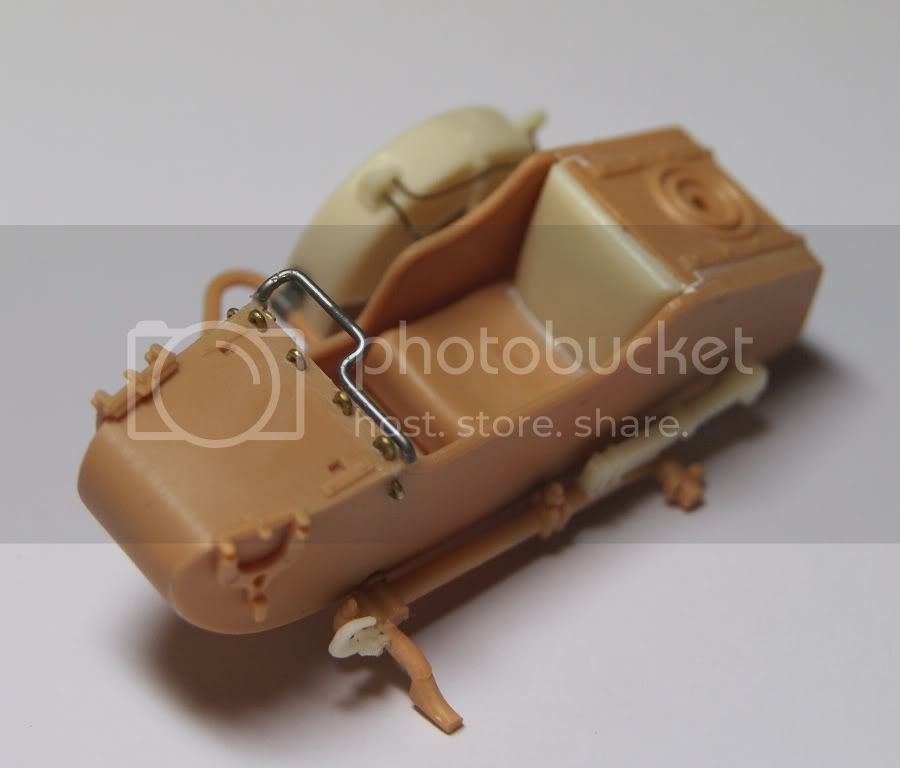
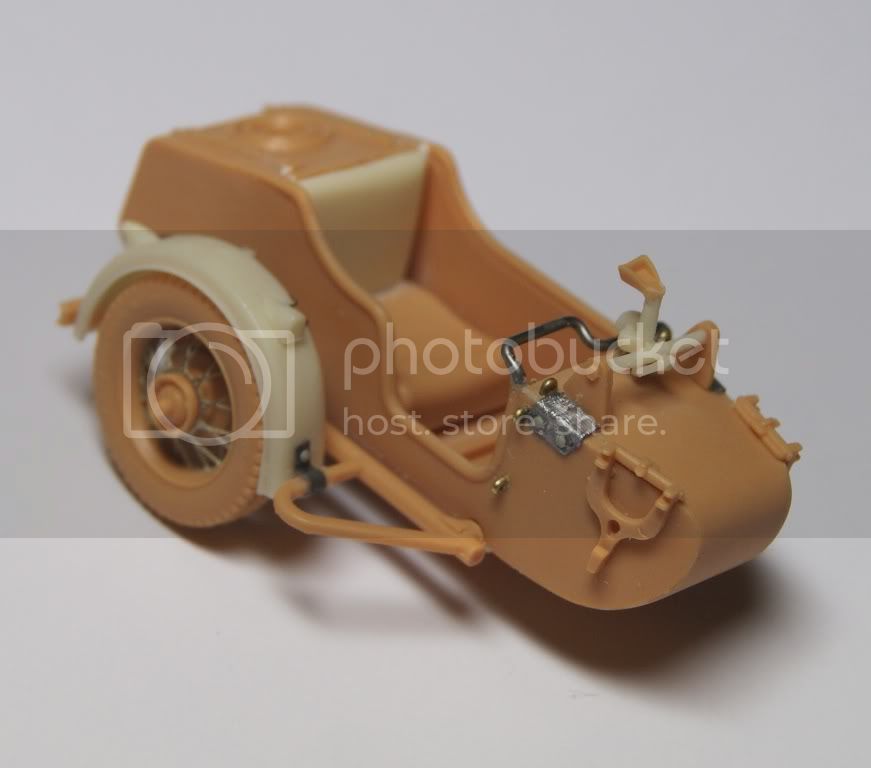
The images below will show you each step of the build from the tub to the almost finished sidecar.

The first image shows the tub without any modifications.


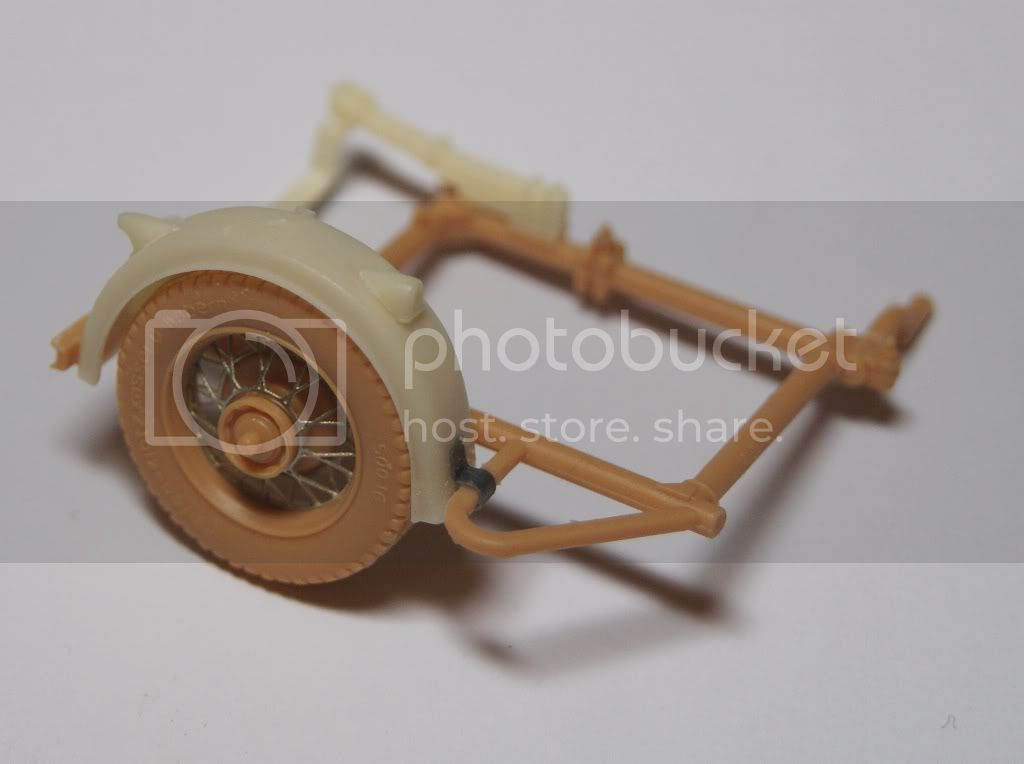
The next two images show the sidecar wheel and suspension. It's actually surprising how much of this I changed out.


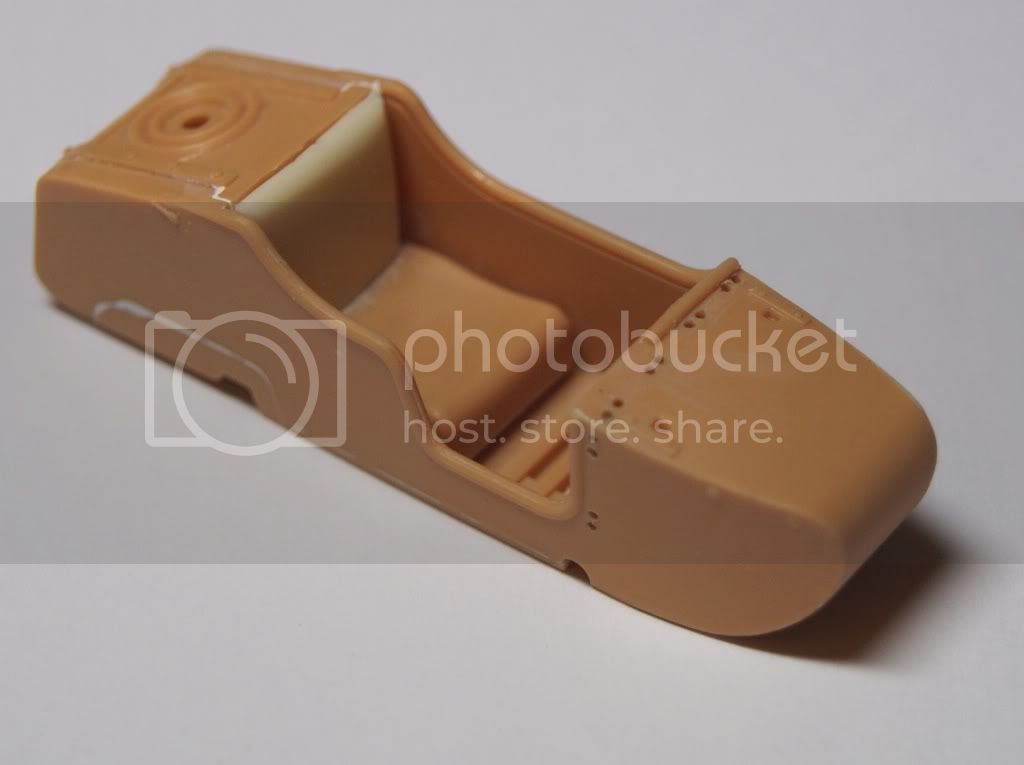
The net image shows the sidecar plus seat and the holes I have drilled in order to affix the metal brackets which were missing on the Lionroar kit but present on the real thing.


The next images show 2 main features. Firstly I added brass wire to represent the metal brackets.The Germans would have used these to attach pieces of equipment to the sidecar. The second feature includes a substantial kit modification to the support bar. When I added the Lionroar piece to the kit, it simply did not look right. In fact it looked very crude, so I cut back the plastic and added a support bar made of lead solder.


Please note in the last picture I have added 2 brass strips to the sidecar to represent the wall strengthening beams.

As you can see in the final pictures I have added the sidecar to the suspension along with electrical wiring for the lights and the MG34 mount.


Thanks for looking,

Steven
BBD468
Visit this Community
Texas, United States
Joined: March 08, 2010
KitMaker: 2,465 posts
Armorama: 2,383 posts
Posted: Wednesday, February 15, 2012 - 10:43 AM UTC
Hey Steven!

I just found this build. i wonderd where you were.

Steven, this build is Bad Ass!!! fantastic work as usuall from you man. ive subscribed. looking forward to see more of this.

Gary
FAUST
#130
Visit this Community
Noord-Holland, Netherlands
Joined: June 07, 2002
KitMaker: 8,797 posts
Armorama: 4,190 posts
Posted: Wednesday, February 15, 2012 - 10:59 AM UTC
Ola Steven

Mighty fine job you are doing on this set. I'm glad the walkaround came in handy for you. If you need more info on other parts of this type of bike let me know I have to check as I have some additional images that never were uploaded as there was some time between shooting the two walkarounds.

I actually like how Lion roar engineered the tub in those seperate sections with tub and bottom instead of the "gluethetwohalvesofthetubtogetherandnevergetridoftheseaminside" method that most manufacturers use. Also nice plumbing and wiring on that bike. I like it a lot.
4444Design
Visit this Community
Germany
Joined: April 18, 2010
KitMaker: 25 posts
Armorama: 24 posts
Posted: Thursday, February 16, 2012 - 12:21 AM UTC
you really get into the details!

building one for myself in 1:1 scale ...


hope to finish this project within the next few weeks ...
SDavies
Visit this Community
England - South East, United Kingdom
Joined: January 09, 2010
KitMaker: 979 posts
Armorama: 959 posts
Posted: Thursday, February 16, 2012 - 01:10 AM UTC
Hi Everyone,

Thanks for the comments, the BMW is really taking shape ! Thomas your build looks alot more complicated than mine.

Its been a while since the last post, I have a really bad chest infection which has closed up my throat and kept me off work since Monday. Simple things like breathing and swallowing really hurt unfortunately that means I cant spray until it gets better.

The build portion of the project is completed, and I have been working on other aspects of the build such as the MG34 and drum magazine case.

The drums and case are Griffon Model from their MG34/42 Ammo set.
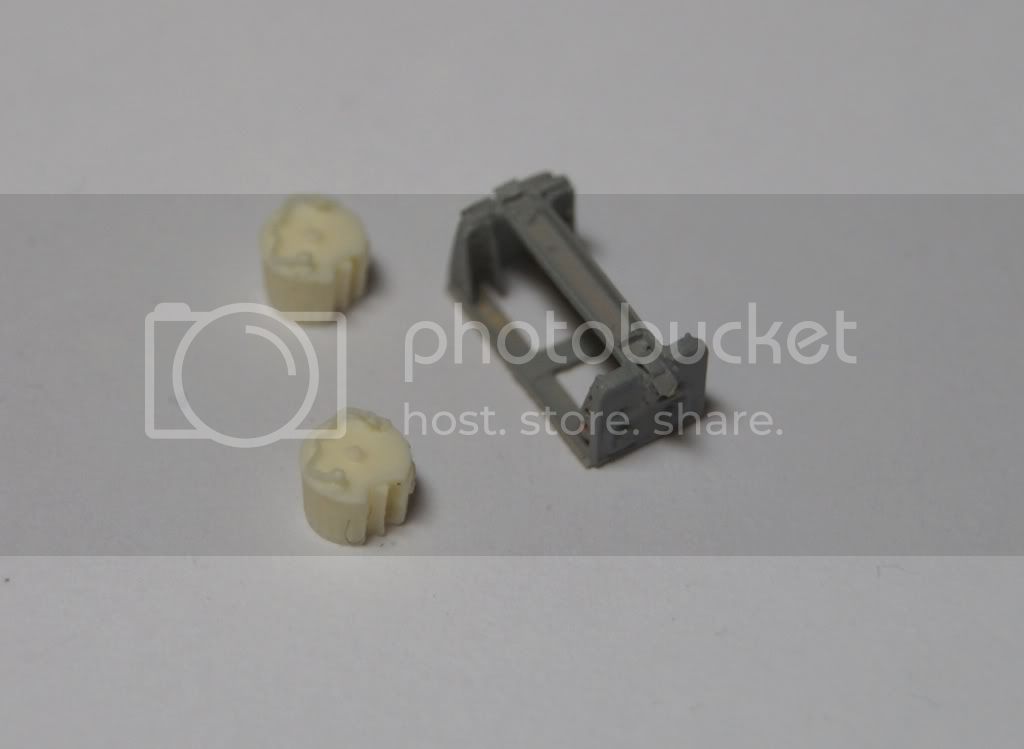


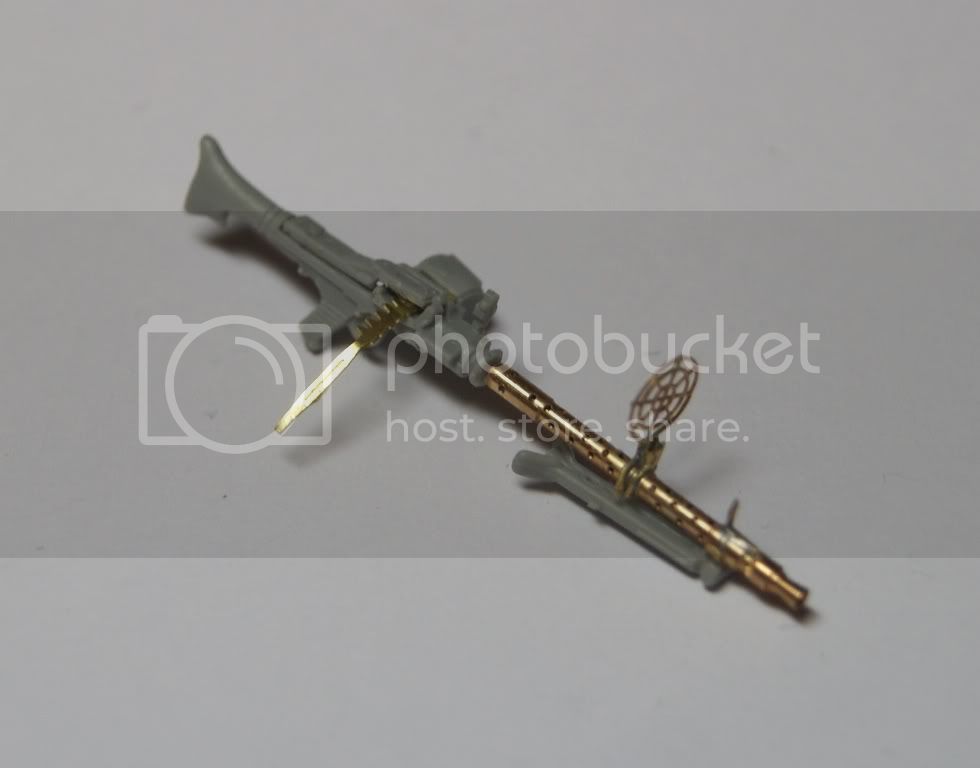
The MG34 is from Dragon (Gen 2) with a Aber replacement barrel. The ammo comes from the Griffon model set.

I replaced out the gear selectors as they were not realistic and replaced them with very thin wire, the round metal spheres on the selectors are made from lead solder which I heated and then drilled
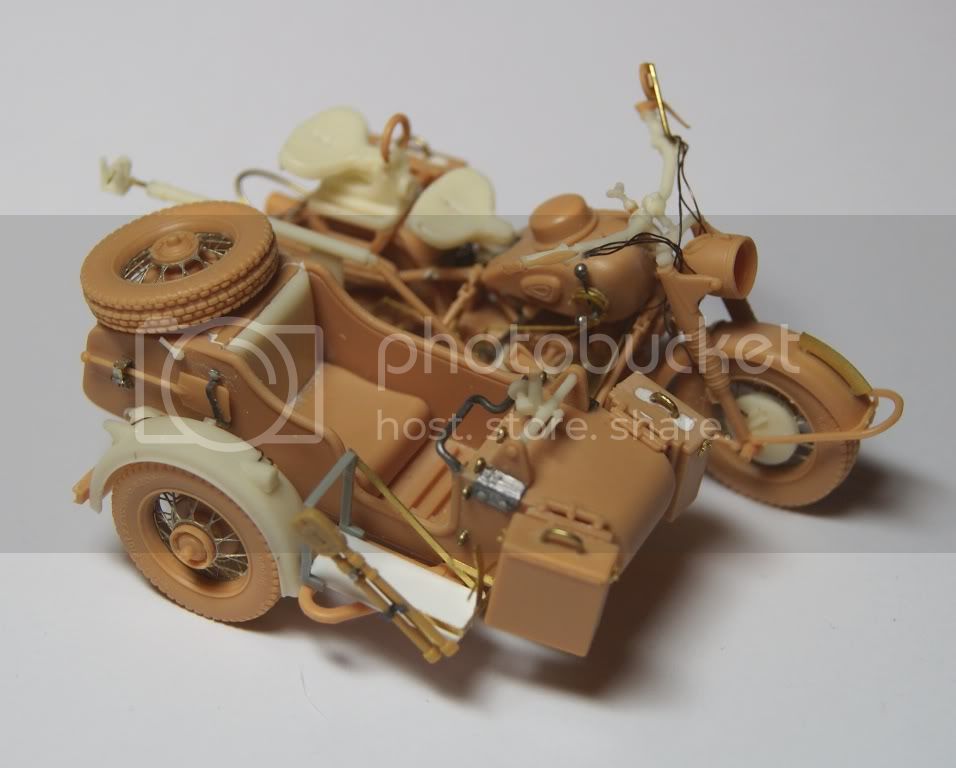


I scratched build the fuel can holder on the side car, it looks ok, I have also added all the wiring to the bike
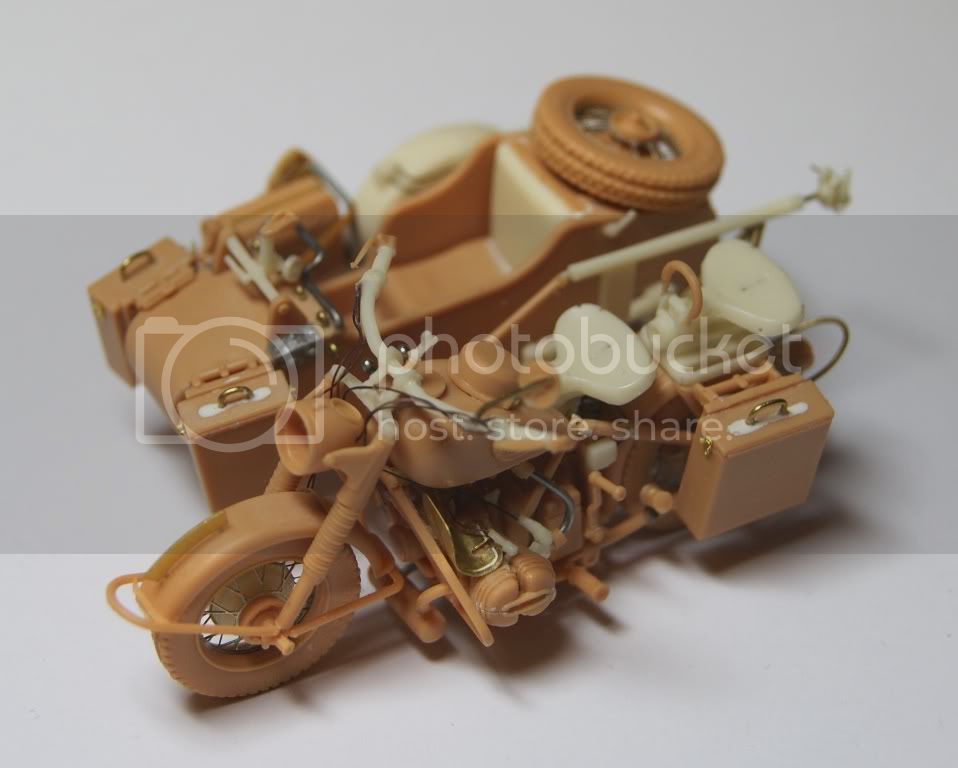
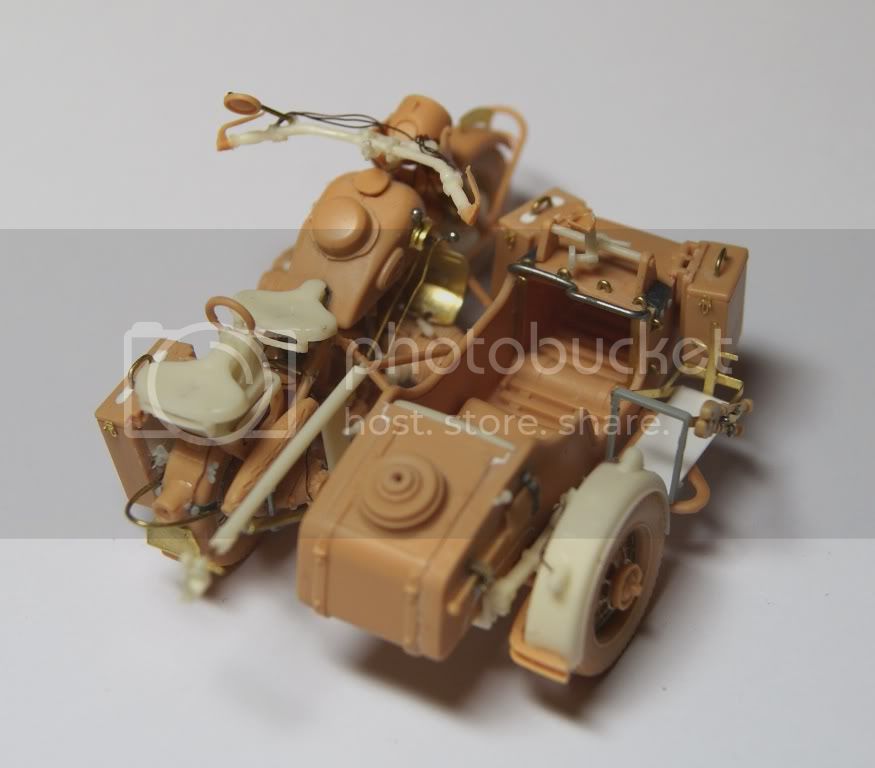
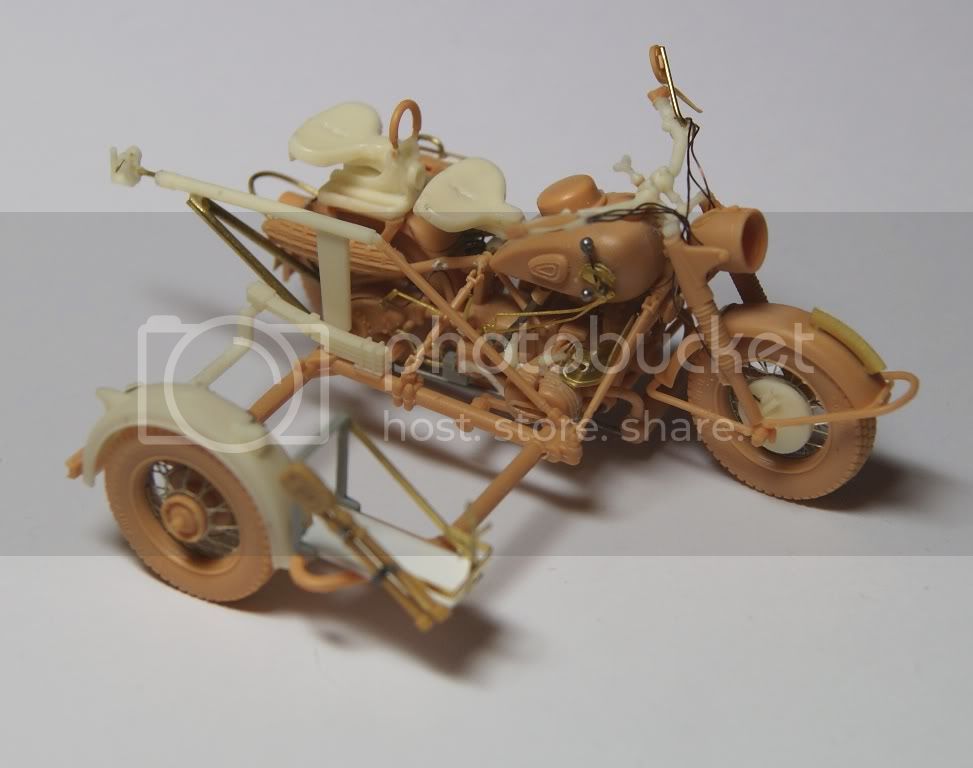
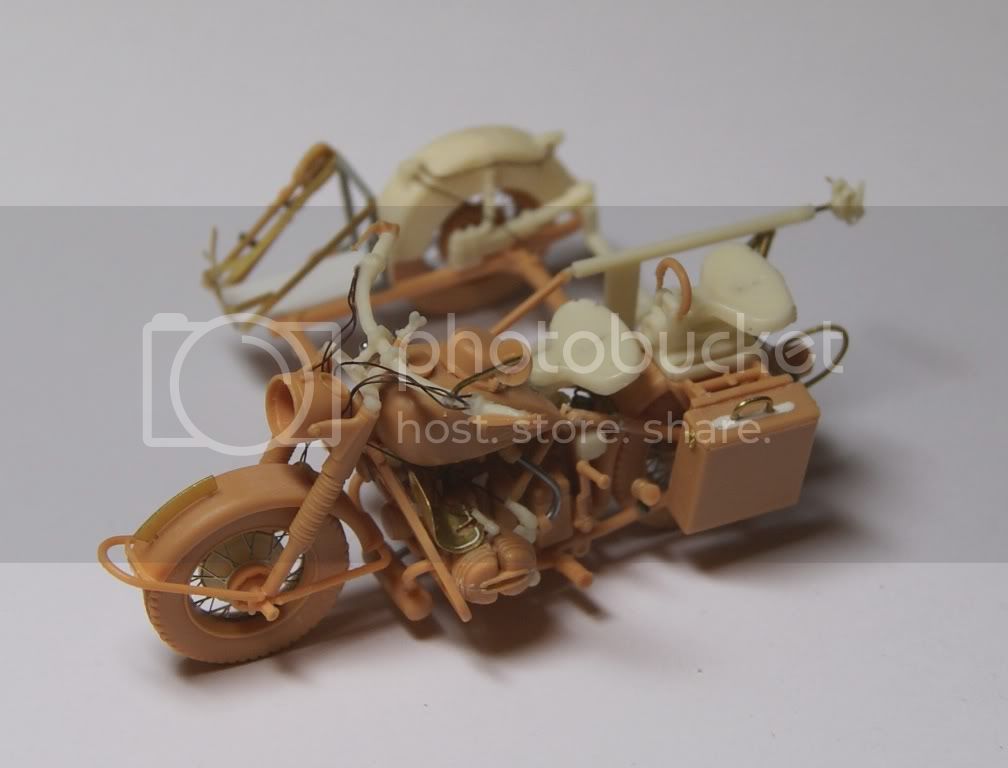
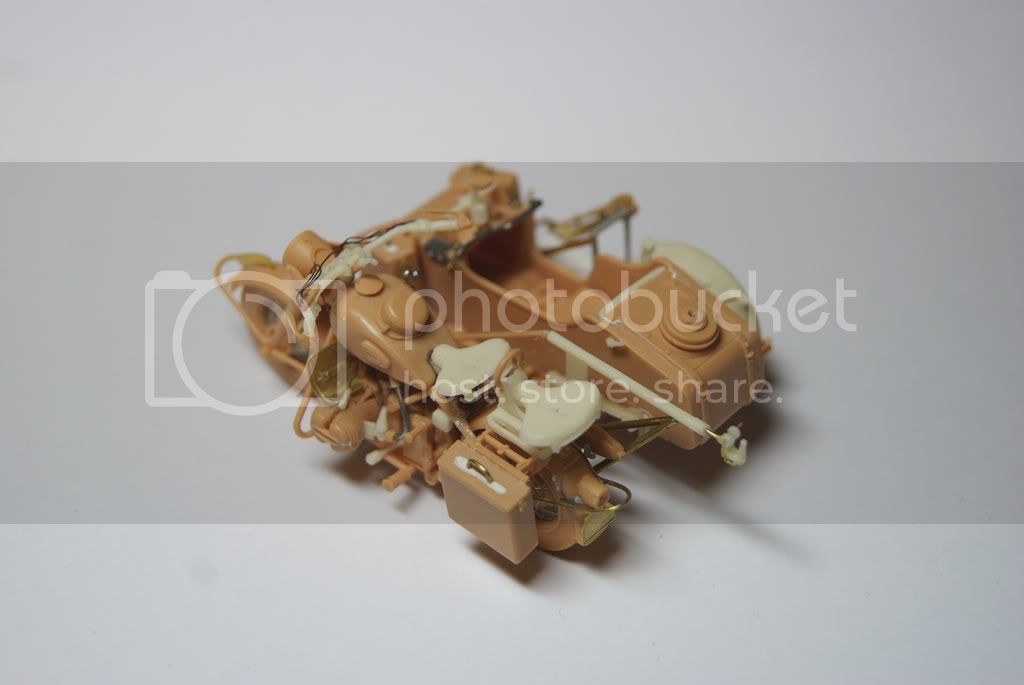
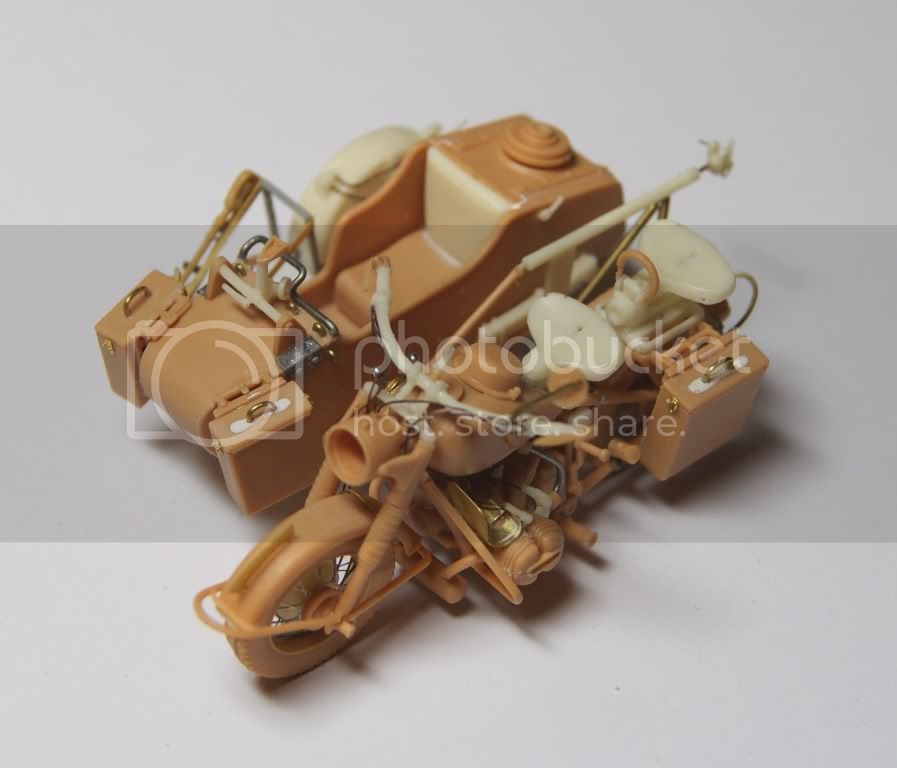


I have added the support strut for the two wheel container but do not plan to add it to the model
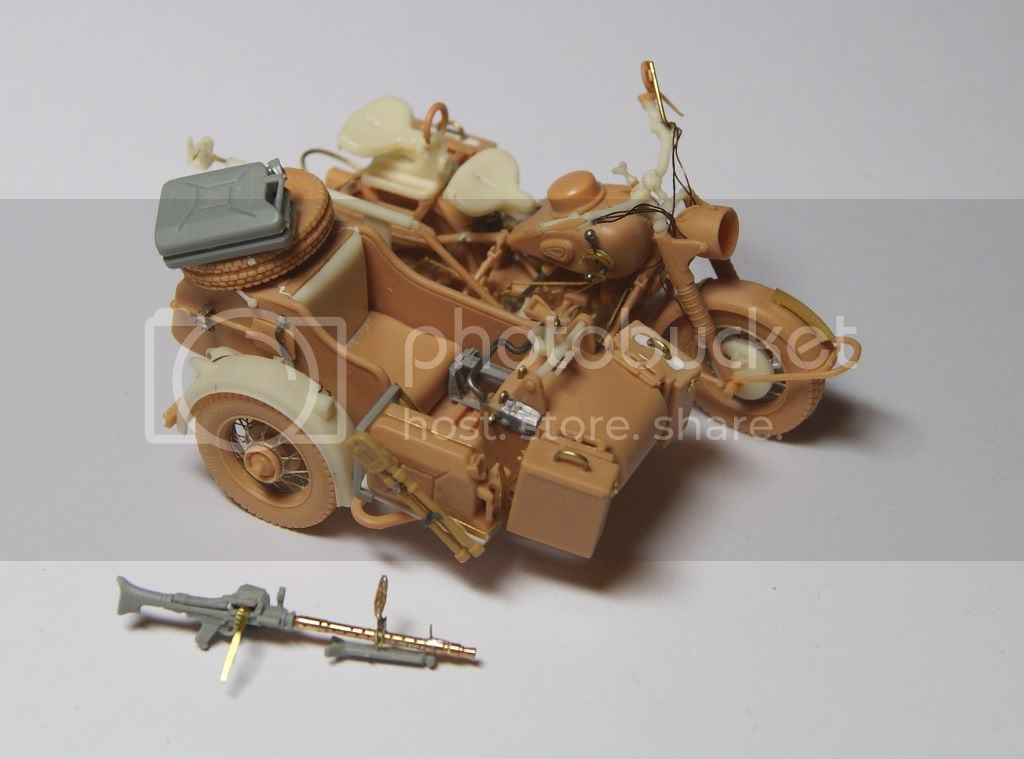


I plan to make this a DAK bike so I will attach a 20L water container to the spare wheel
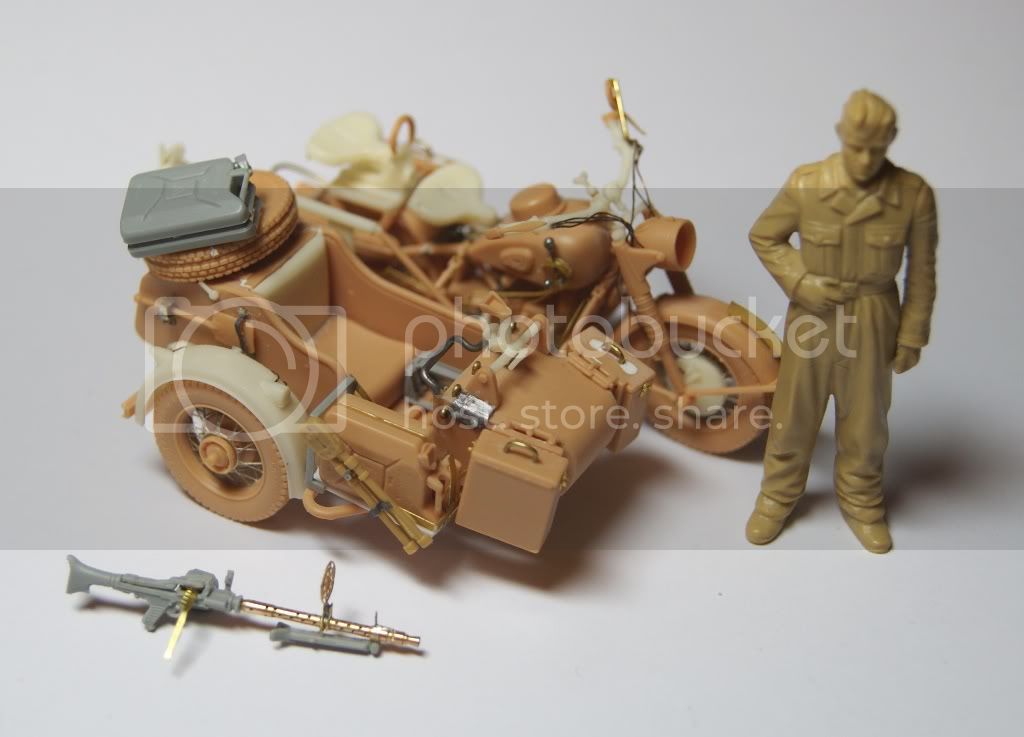


Last Image with a very old Tamyia figure for scale. (Think he came from a assault gun?)

Amazon have lost my Kingtiger book and have to re-order it so I will be starting another interim project soon a Tristar SD.Kfz 222 a DAK vehicle with Lionroar and Aber upgrades. I like to keep things simple

Tanksami
Visit this Community
Victoria, Australia
Joined: August 06, 2011
KitMaker: 1,314 posts
Armorama: 1,217 posts
Posted: Thursday, February 16, 2012 - 05:42 AM UTC
Hi Steven,

Fantastic, beautiful & master craftsman at work, it looks great unpainted so can't wait to she all decked out

Cheers Mike
BBD468
Visit this Community
Texas, United States
Joined: March 08, 2010
KitMaker: 2,465 posts
Armorama: 2,383 posts
Posted: Thursday, February 16, 2012 - 05:57 AM UTC
Steven my freind, you dont disappoint! what a fine piece of work.

Gary
4444Design
Visit this Community
Germany
Joined: April 18, 2010
KitMaker: 25 posts
Armorama: 24 posts
Posted: Friday, February 17, 2012 - 05:27 AM UTC
you added some amazing details to your model!

can't wait to see that rig painted ...
research1
Visit this Community
United States
Joined: November 23, 2008
KitMaker: 86 posts
Armorama: 78 posts
Posted: Monday, February 20, 2012 - 04:33 PM UTC
Years ago I put the large Ertl/Esci kit together of this motorcycle with sidecar. It won trophies at several contests with it. A modeling friend of mine offered me a price I could not refuse, so I sold it. I still have all the other Esci bikes in that large scale: Zundapp KSW-750 with side car, British Triumph, U.S. Harley. Also their Kubelwagen and Kettenkraftrad.

Beautiful job you are doing on this smaller scale one.

Ray
SDavies
Visit this Community
England - South East, United Kingdom
Joined: January 09, 2010
KitMaker: 979 posts
Armorama: 959 posts
Posted: Saturday, February 25, 2012 - 11:04 AM UTC
Hi Everyone and thanks for the comments, they really do act as a motivator to keep morale high

I promised with my Panzer 2 build to show more images of the painting unfortunately I kind of forgot with the chest infection and lots of pain killers I guess I was not really in the mood.

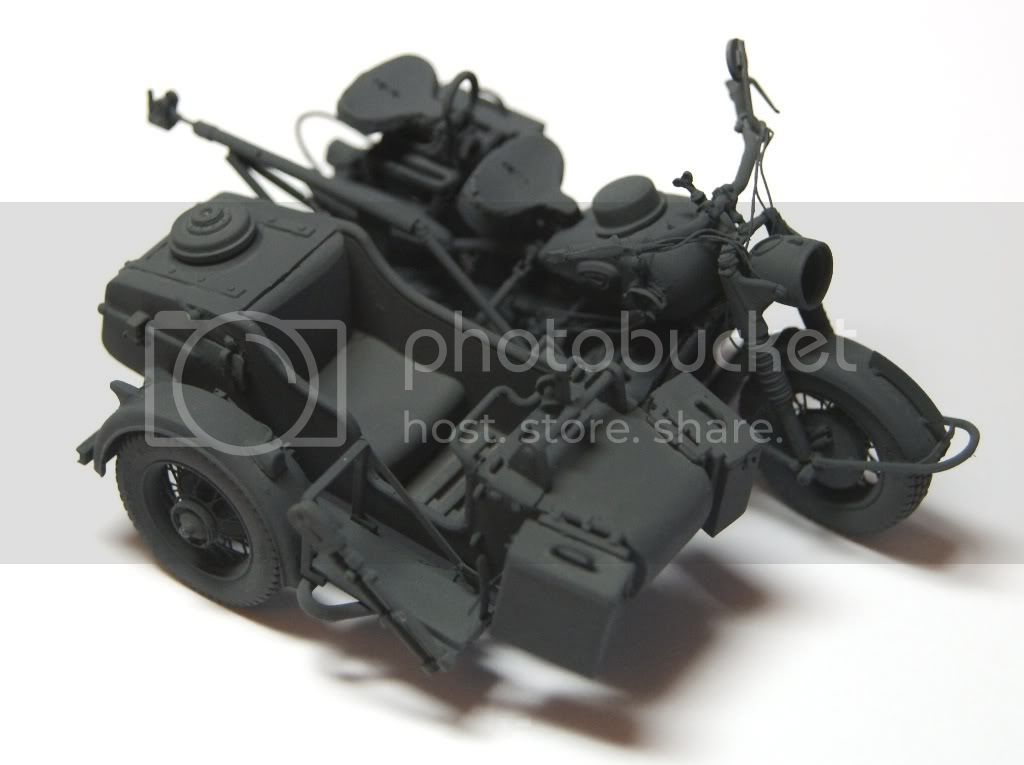
Apologies ! well I did take one image of the bike with a base coat of Tamyia German Gray:


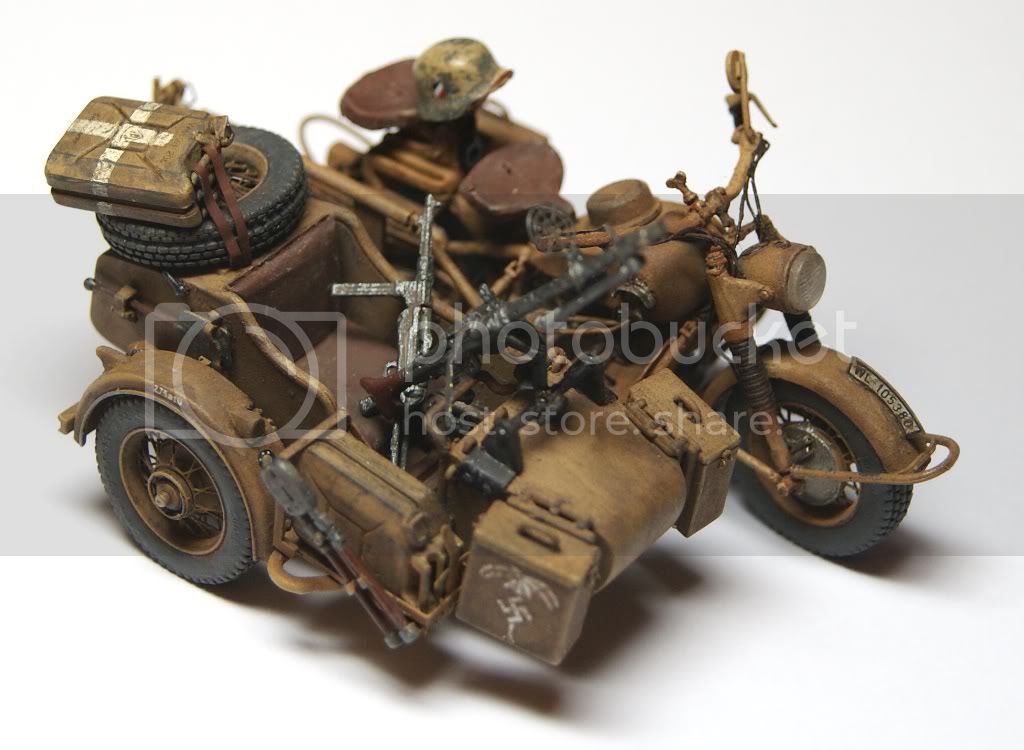
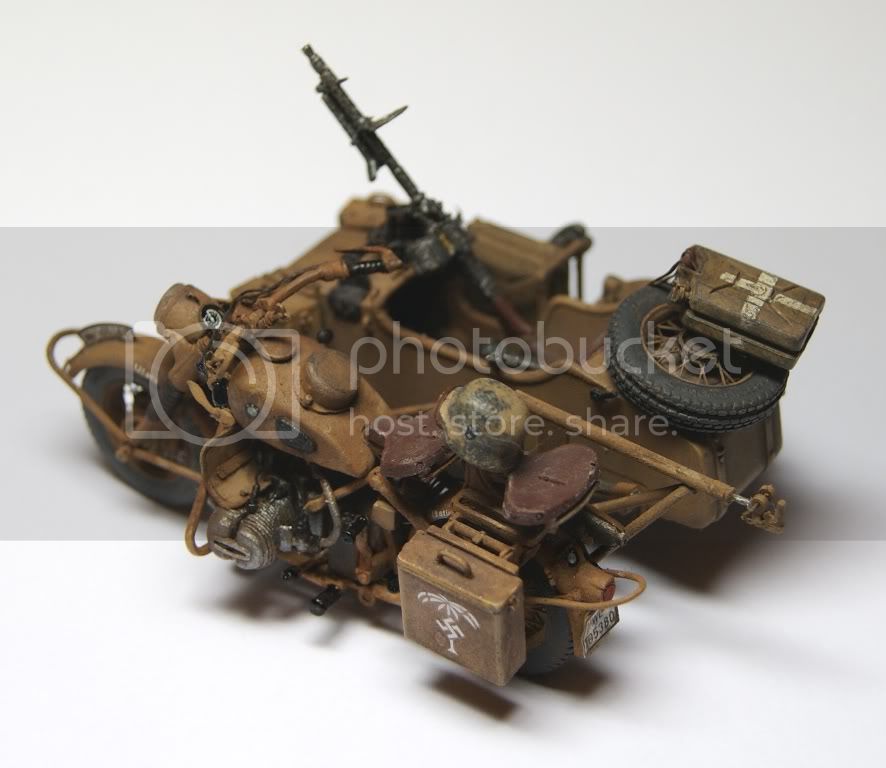
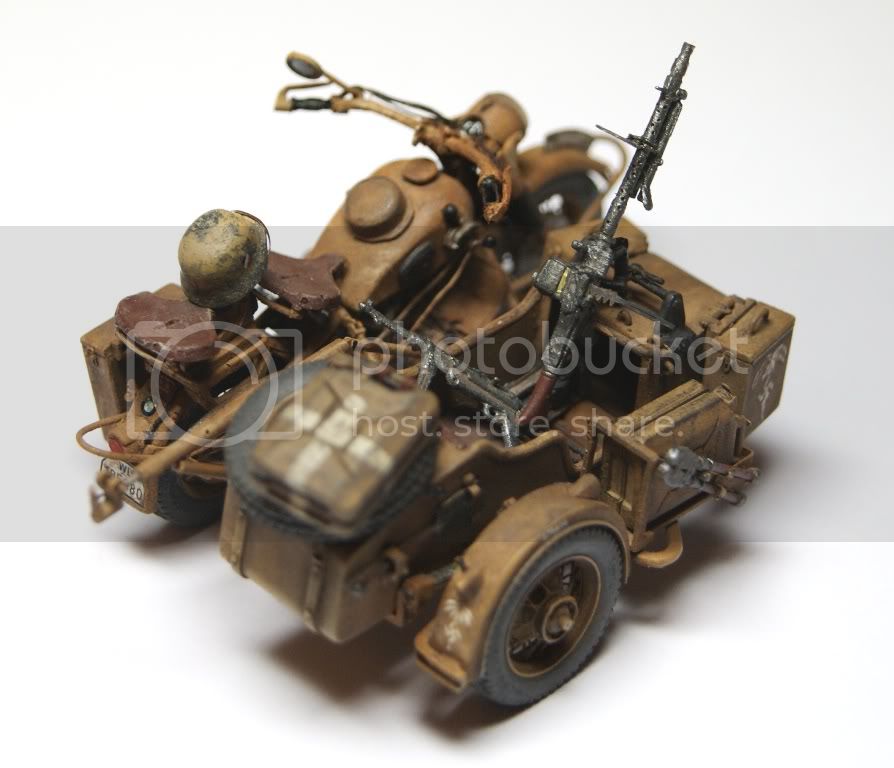
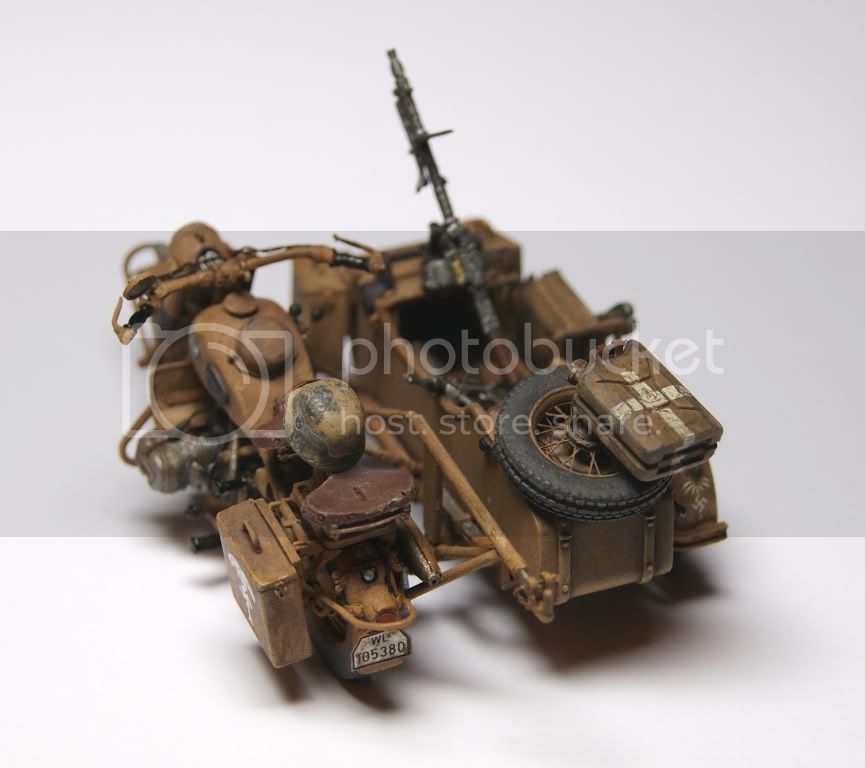
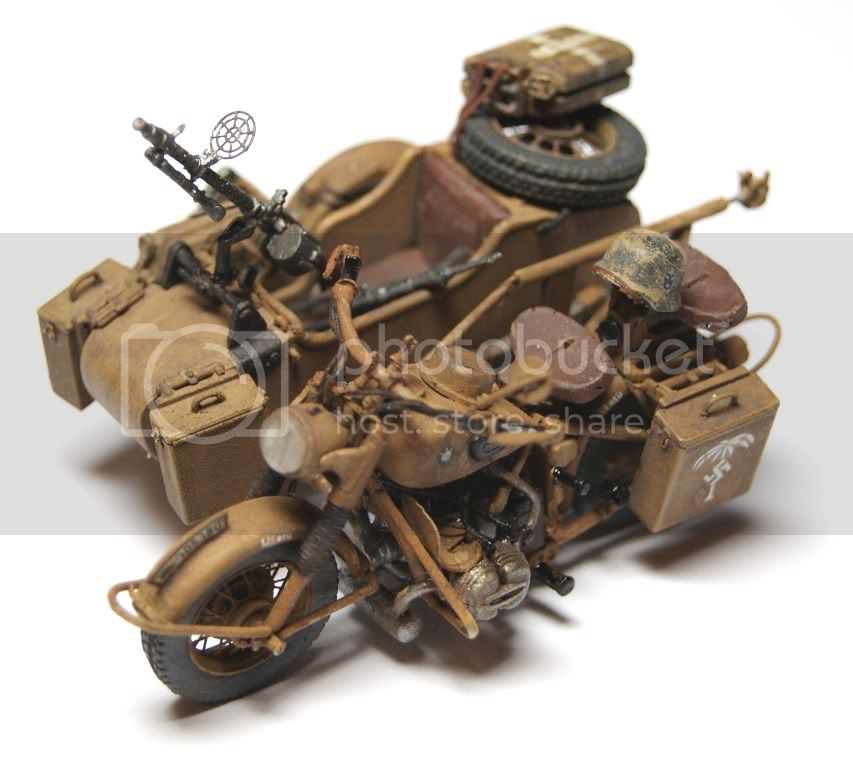
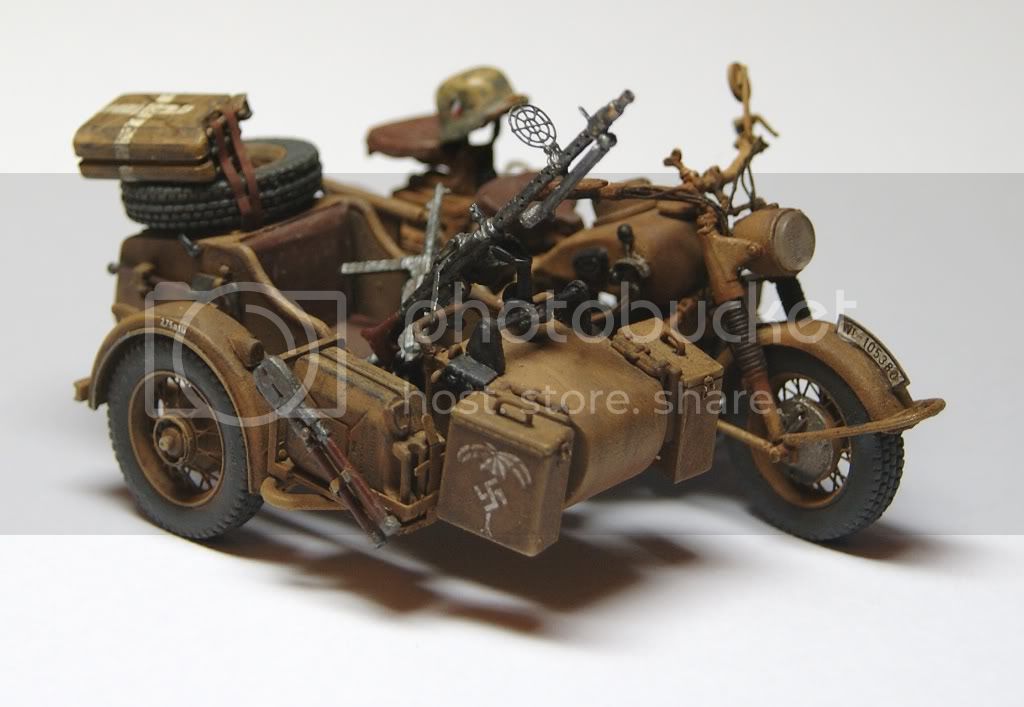
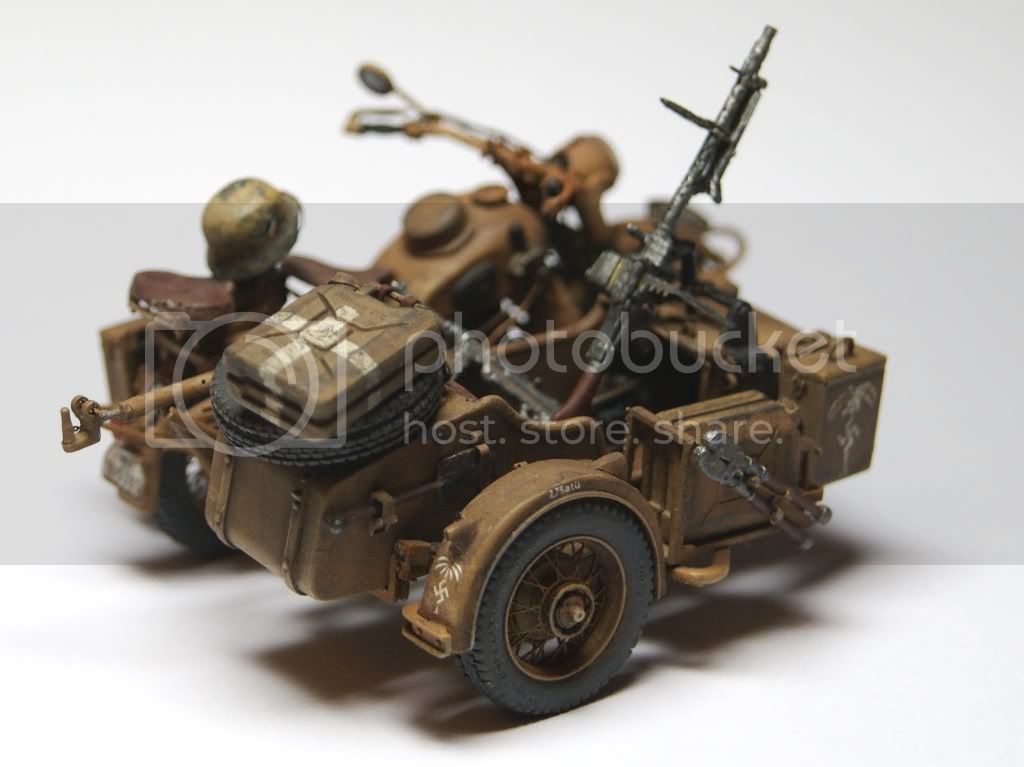
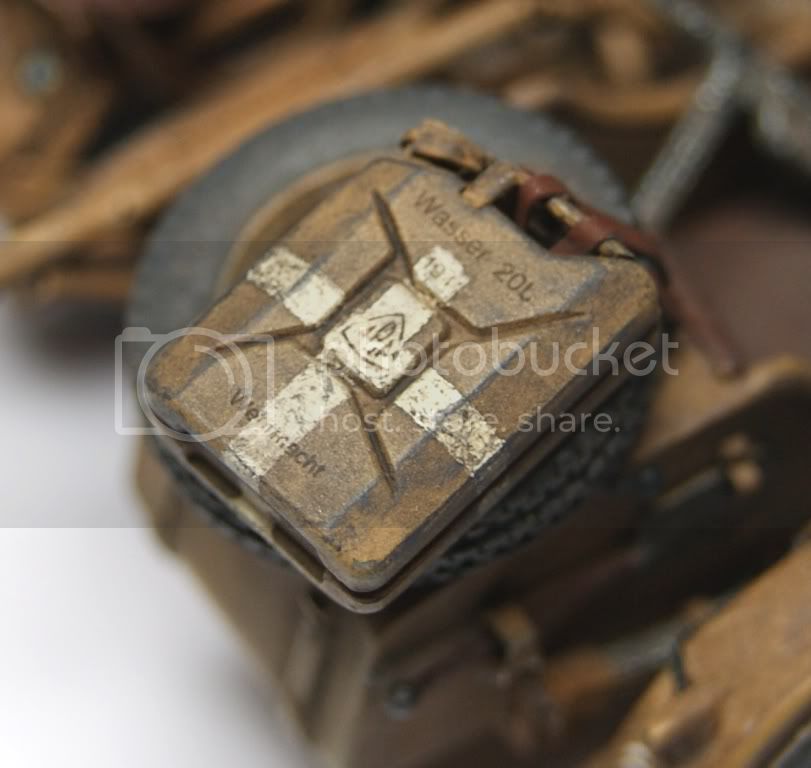
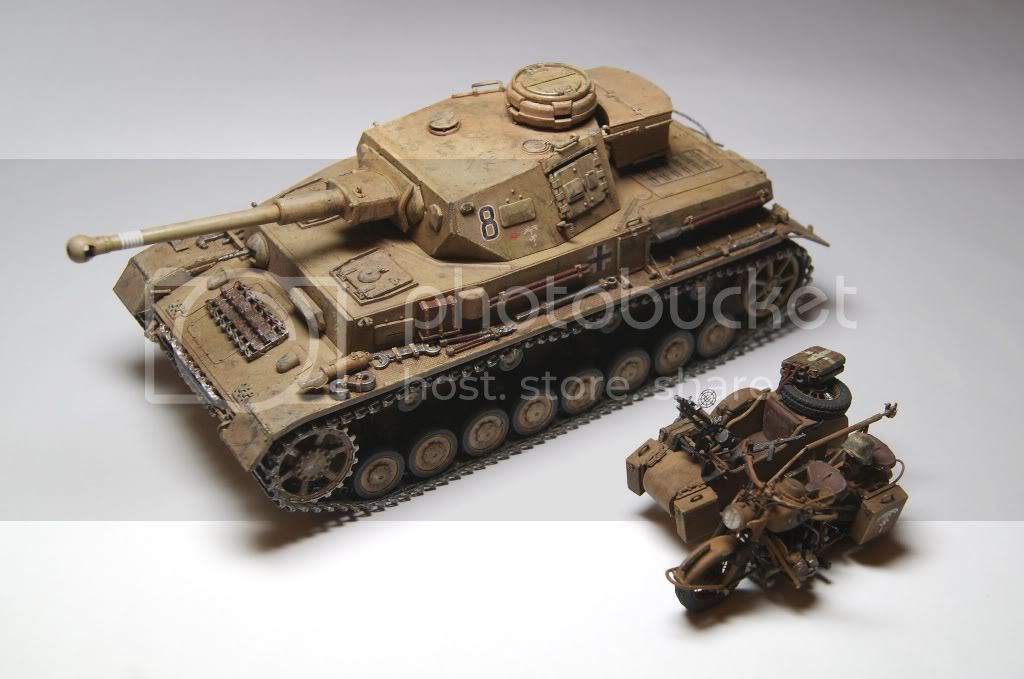
Onto the finished bike, based on the Africa Korps in Libya in 1942. I added a water container to the spare wheel and fixed it on with lead sheet cut into strips, meant to be some kind of leather thing to hold it on.

The water and petrol cans are the most beat up parts of the model, I wanted to keep the bike quite new looking.

The helmet is a Dragon Gen 2 with Aber liners and strap. I added decals and had a go at hairspray technique. Not at all bad overall and I plan to use it for my next project, the last one before the KingTigers (which will take up the next two - three years)


Close up of the 20L Watercan


The BMW R75 with a Dragon DAK Panzer 4 Ausf F2.


I hope that you have enjoyed the build.

Next Sd.Kfz 222 (Plus massive Lionroar upgrade set some Aber as usual)

After that 16th Kingtiger Trumpter vs Tamyia

Steven


BBD468
Visit this Community
Texas, United States
Joined: March 08, 2010
KitMaker: 2,465 posts
Armorama: 2,383 posts
Posted: Saturday, February 25, 2012 - 12:41 PM UTC
Hi Steven,

Great job Steven! Thats a sweet little scooter right there man.

Gary
Tanksami
Visit this Community
Victoria, Australia
Joined: August 06, 2011
KitMaker: 1,314 posts
Armorama: 1,217 posts
Posted: Saturday, February 25, 2012 - 12:47 PM UTC
Hi Steven,

Umm all I can say is the renaissance masters now have serious competition!!! If they was a way I could cut & paste that masterpiece & bring it to life I would. As they say immatation is the sincerest form of flattery, so i will endeavour to try & get something that may at least park in the shade under a camo net lol.

Like I said great work

Cheers Mike
 _GOTOTOP