Hi all,
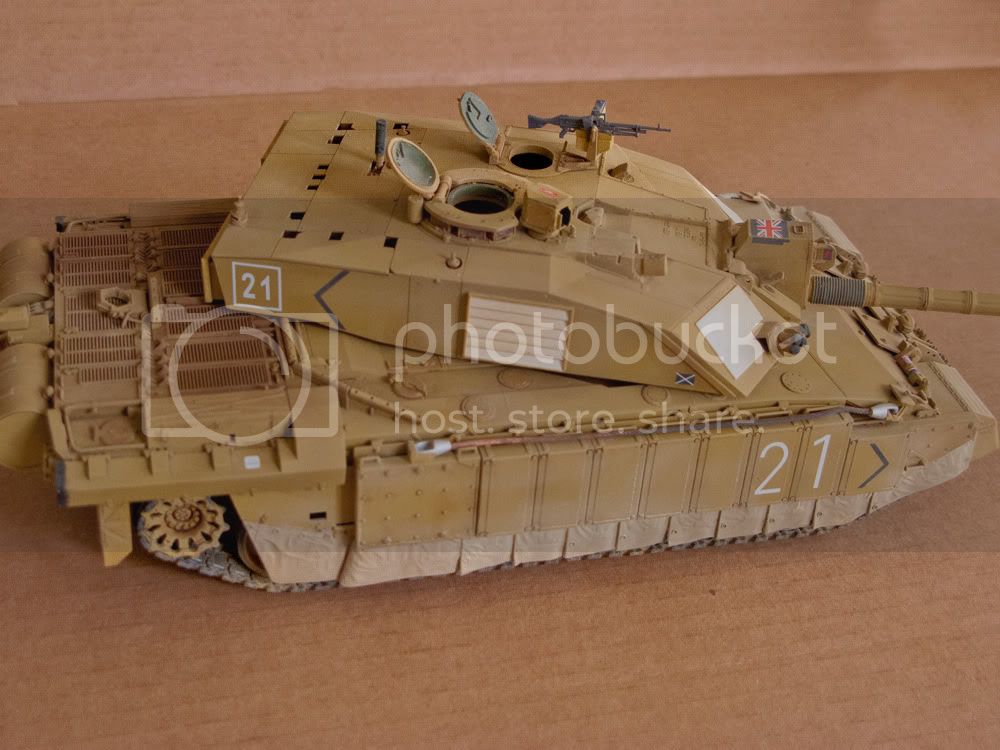
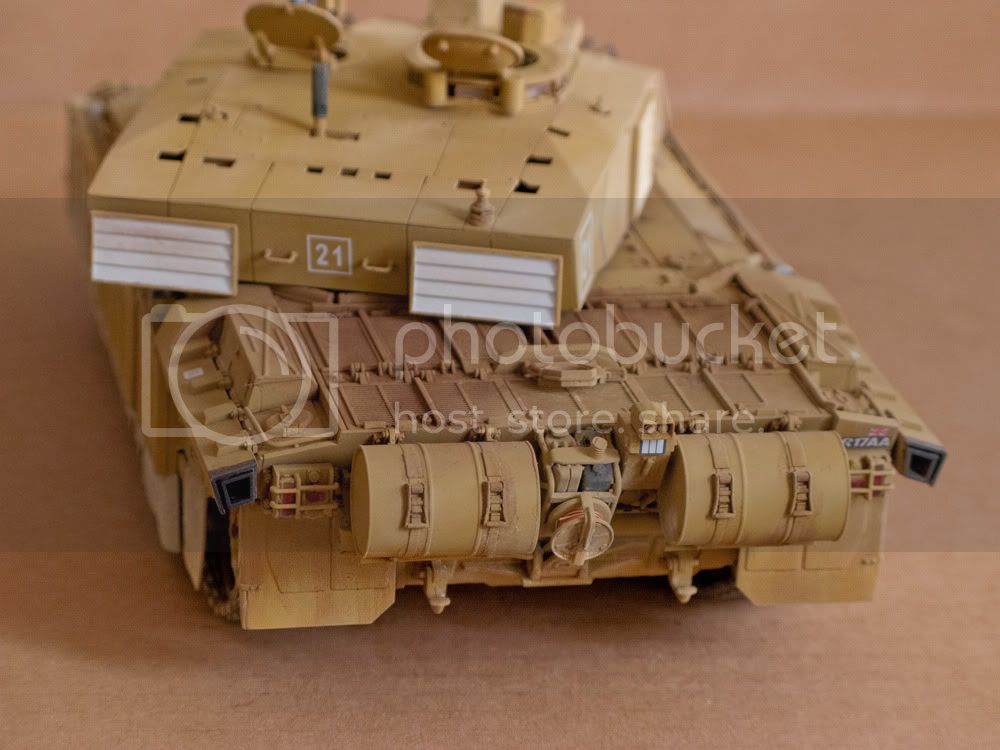
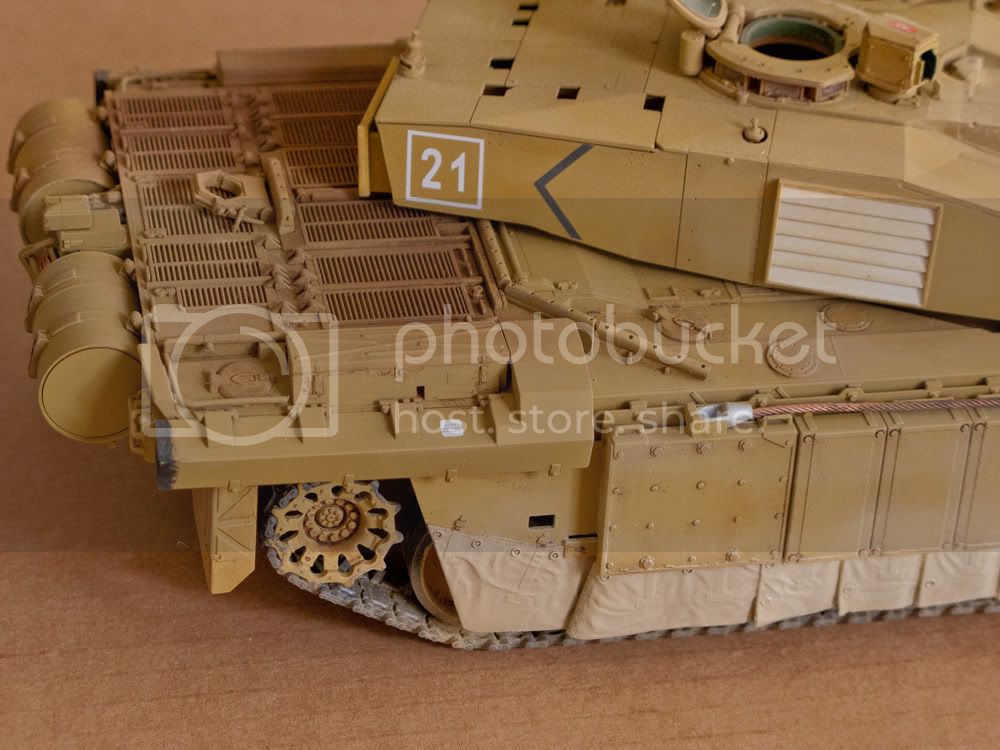
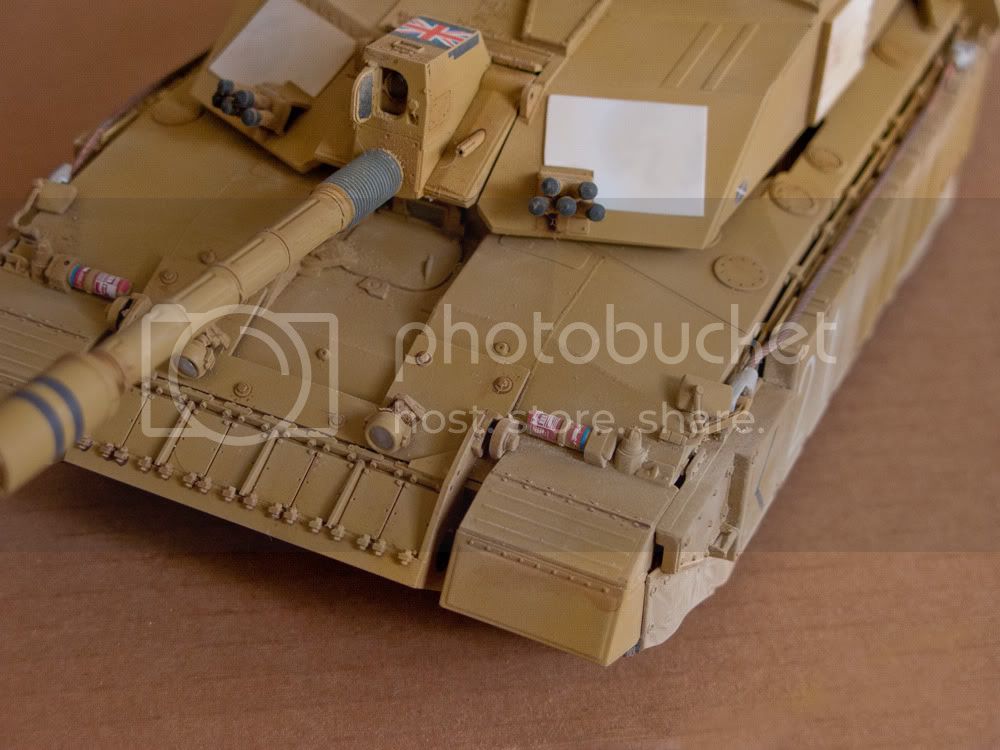
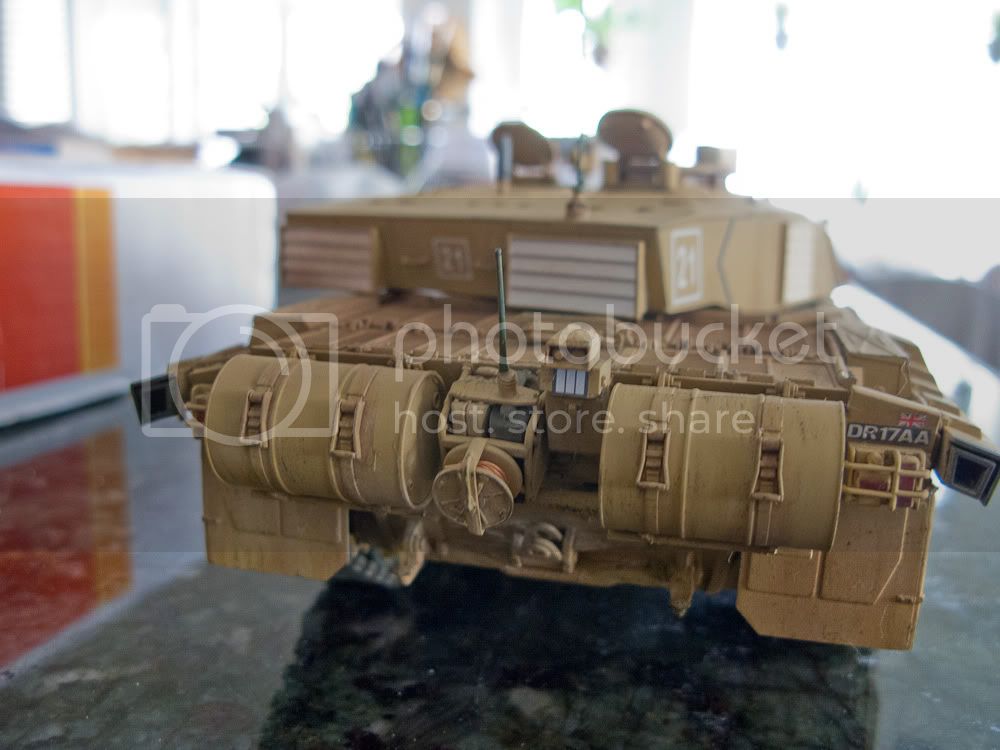
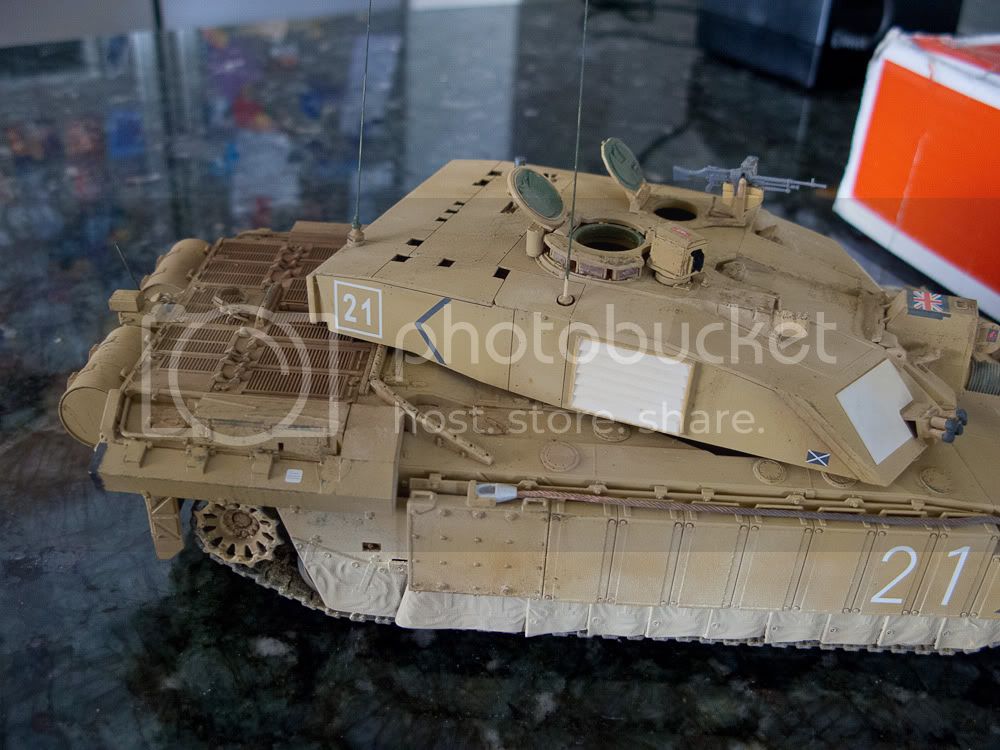
My first model in, oh, 40+ years, so I guess this qualifies as a 'first' model, huh? I KNOW this is not very good at all, and while I would appreciate any feedback, I know there is so much wrong that it's probably not worth anyone's time giving too much detailed criticism. I know a number of things that I need to do the next time, but I would love it if you want to give me your thoughts. Remember...it's my first. The first time with an airbrush, first use of Future and dull coat, first time using Micro-Set and Micro-Sol on the decals, first time with MIG pigments...and I did a custom mix of Tamiya paint for the color...too dark in my opinion, so I know what I need to do next time The last two pictures were taken after a little adjustment...some drybrushing, a bit more pigment for 'dust', and adding antennas.
Thanks for looking!
Constructive Feedback
For in-progress or completed build photos. Give and get contructive feedback!
Hosted by Darren Baker, Dave O'Meara
First Model - Challenger 2
cabasner
Nevada, United States
Joined: February 12, 2012
KitMaker: 1,083 posts
Armorama: 1,014 posts
Joined: February 12, 2012
KitMaker: 1,083 posts
Armorama: 1,014 posts
Posted: Saturday, March 24, 2012 - 02:38 PM UTC
Posted: Saturday, March 24, 2012 - 02:53 PM UTC
I am not sure I can find much wrong with it. For your "first" it is pretty impressive. I would think you have building for a while. The only thing for me, is the panels on the turret are a little too white for me. I would have mixed in a hint of yellow or even brown. I know white on armor is hard to do.
Must be like riding a bike, you just don't forget. Very nice job.
Kevin
Must be like riding a bike, you just don't forget. Very nice job.
Kevin
terminators
France
Joined: February 20, 2012
KitMaker: 1,932 posts
Armorama: 1,907 posts
Joined: February 20, 2012
KitMaker: 1,932 posts
Armorama: 1,907 posts
Posted: Saturday, March 24, 2012 - 02:54 PM UTC
Hello.
Your model is well made. I just think that the modern british sand color is clearer than the color you have used.
But this color is not easy to determine.
Your model is well made. I just think that the modern british sand color is clearer than the color you have used.
But this color is not easy to determine.
_Viper_
Roma, Italy
Joined: April 15, 2010
KitMaker: 163 posts
Armorama: 86 posts
Joined: April 15, 2010
KitMaker: 163 posts
Armorama: 86 posts
Posted: Saturday, March 24, 2012 - 11:50 PM UTC
Cabasner,
I am a noob myself but I think you should be very proud of the work you made. I think it came out very well.
But I guess you also would like some pointers for next time (this is supposed to be "constructive", isn't it?) or so I did when I made my first post.
So here wold be mine: the towing cables you have could use more paint (they generally are more steel color than copper) as well as the end eye shackles should look more metal/silverish. The engine grill deck could use more of a blackish/smokish hue rather than brown as it looks in the pictures. When I tried, I found it easy to do tis with the airbrush and a very very diluted black. One pass at a time - at first it won't look like anything is there, but once you build up the layers it will show.
Other than this, as the others have said, the sand yellow should be more yellow and I am not sure about the white also on the CIP panels.
Last thing: is it the trumpeter or the tamiya kit?
Ah, I love the details on the fire extinguishers! Are the decals from the kit?
Keep it up!
slodder
North Carolina, United States
Joined: February 22, 2002
KitMaker: 11,718 posts
Armorama: 7,138 posts
Joined: February 22, 2002
KitMaker: 11,718 posts
Armorama: 7,138 posts
Posted: Sunday, March 25, 2012 - 01:41 AM UTC
Construction wise you built it clean and well. As far as accuracy in construction, modern isn't my thing so I can't touch that.
Finish wise, look for a bit more uniformity. Your whites are very white and don't mirror the rest of the dusty/dirty look of the engine deck. The washes look a little thick on the outside edges. My technique is to use a darker shade of wash and do a very narrow area. Then go back in a second round with a thinner wash and let it taper out wider. The two coats blend and smooth out.
I would do a bit more dark wash in the tread links too, make them separate a bit more and not feel like the rubber bands they are.
Overall a nice job. Nothing to be ashamed of at all.
Keep it up.
cabasner
Nevada, United States
Joined: February 12, 2012
KitMaker: 1,083 posts
Armorama: 1,014 posts
Joined: February 12, 2012
KitMaker: 1,083 posts
Armorama: 1,014 posts
Posted: Sunday, March 25, 2012 - 02:08 AM UTC
Thanks very much to all who answered thus far. I'll still take any/all additional comments anyone has. In response to those already here, the kit was the Tamiya. In fact, I have 2 more on the way, and on the lookout for a third. I plan to build this same tank again, only with Eduard and Voyager improvements. Then, an Accurate Armour circa 2005 Chally with bar armor and upgraded panels, and lastly, a Chally ARRV from Accurate Armour. So, I'l have a bunch of opportunities to improve this very tank!! Regarding the extinguishers, I was really worried about those, as when I first glued the parts on the tank, I didn't know that's what they were LOL I didn't know if I had the nerve to try to paint them red after the main color coat. But I steeled myself, and got around as much of them as I could with a paint brush with Tamiya gloss red, and with the weathering and pigments, it looks good enough in the end. I used the kit decals, and they came out amazingly well, I think. In case you are interested, Accurate Armour makes a set (10, I believe) of pre-made/pre-painted/decal-ed 1/35 extinguishers.
I know the color is off, even though I used a suggested Tamiya Desert yellow/flat yellow in a 3:1 mix. I should have stopped painting right away, as it sure is too dark and not yellow enough. Thanks for the weathering tips, guys. I think that maybe once it got down to the end, I got too anxious to see it completed, and didn't give it enough attention. I'll take all of your advice thus far and see what I can do next time. I really appreciate the encouragement. Even with all the models I have planned, I got frustrated enough at one point to put all my model stuff away, ready to quit. My wife convinced me to continue. She's the best!
Working now on a German WWII Tiger 1 (an AMAZING thread on that specific kit build from 2009 is here on Armorama, by the way), then will be back to the modern stuff (the Challys mentioned above, the US Abrams, and the Merkava 4). And to think I wanted to start out by building airplanes!!! Thanks again, all
_Viper_
Roma, Italy
Joined: April 15, 2010
KitMaker: 163 posts
Armorama: 86 posts
Joined: April 15, 2010
KitMaker: 163 posts
Armorama: 86 posts
Posted: Sunday, March 25, 2012 - 03:07 AM UTC
Seems we fancy pretty much the same modern tanks!
As for the up-armored chally 2, you could also look into trumpeter latest release: it has all the parts in plastic and definately cheaper than AA offering. Do not expect the same quality of Tamiya, though!
As far as the "frustration" goes, been there and done that. But then I stumbled upon a great Russian saying: "remember that better is the enemy of good enough". So, although I like to challenge myself to try new things with each build, I have also learnt to be satisfied with a good enough result
And lastly, never enough credit shall be given to the people in this community that are always there to help and encourage.
Look forward to your next builds.