_GOTOBOTTOM
Constructive Feedback
For in-progress or completed build photos. Give and get contructive feedback!
Centurion Mk.11 WIP
centurionmkv
Visit this Community
California, United States
Joined: March 13, 2010
KitMaker: 67 posts
Armorama: 56 posts
Posted: Monday, April 23, 2012 - 06:36 AM UTC
Hello Armorama!

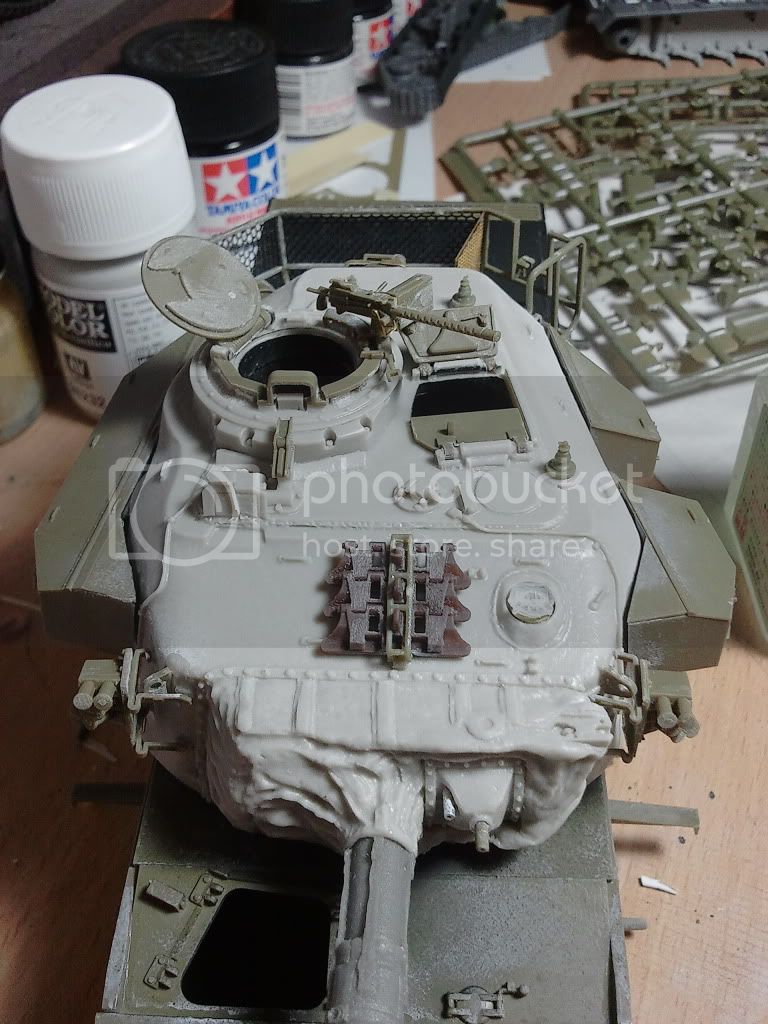
This is my WIP Centurion Mk.11 kitbash. Personally, I have always liked the later mark Centurion tanks as they represent how far one can push essentially WWII technology to (the A41 Centurion prototype was shipped to the ETO around the time Germany surrendered.)

I bought the Accurate Armour Centurion Mk.11 kit years ago and never got to building it (no room, no time, resin dust, etc...). I recently obtained the AFV Club Centurion Mk.5 kit and thought that I can make a Mk.11 out of it as it essentially have all the parts available. The only exceptions are (1) the mantlet cover and (2) the 105 mm main gun with thermal sleeves.

After much angst, I decided to use the barrel and main turret casting from my "virgin" Accurate Armour Centurion Mk.11 kit since it would help save some building time. I was worried that the AFV Club parts would not fit the Accurate Armour kit but everything falls in place perfectly. Much to my pleasant surprise, it is as if AFV Club designed their parts to work with the Accurate Armour kit!

The only things that didn't fit are the turret ring and the right hand side turret stowage bin (the big long one). I realized that the AFV Club turret is slightly longer than the Accurate Armour one and had to reshape the turret bin slightly.

Again, please excuse my poor quality (and large'ish) pictures:
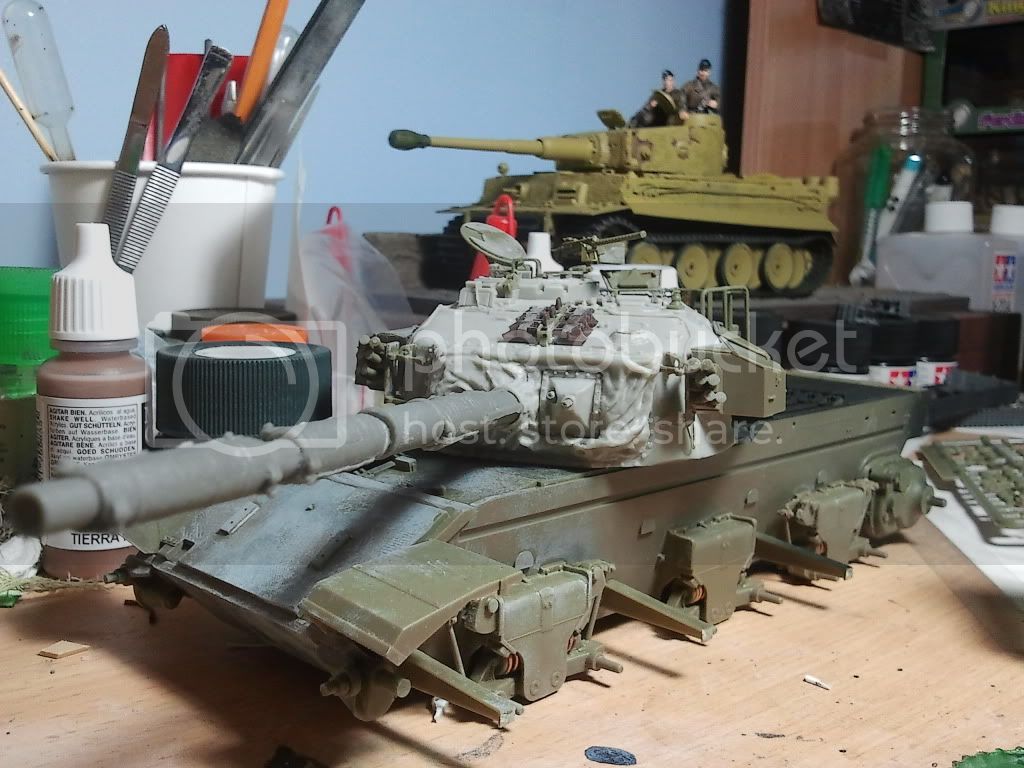


Anyway, I don't plan for this to be a 100% accurate Centurion Mk.11. I bet Centurion fans would be able to nitpick details on my model. On the other hand, I really enjoy building it and only want a good representation of the Centurion Mk.11 on my shelves.

Thanks for any feedback!

Cheers,
+Y.C.
centurionmkv
Visit this Community
California, United States
Joined: March 13, 2010
KitMaker: 67 posts
Armorama: 56 posts
Posted: Monday, April 23, 2012 - 08:27 AM UTC
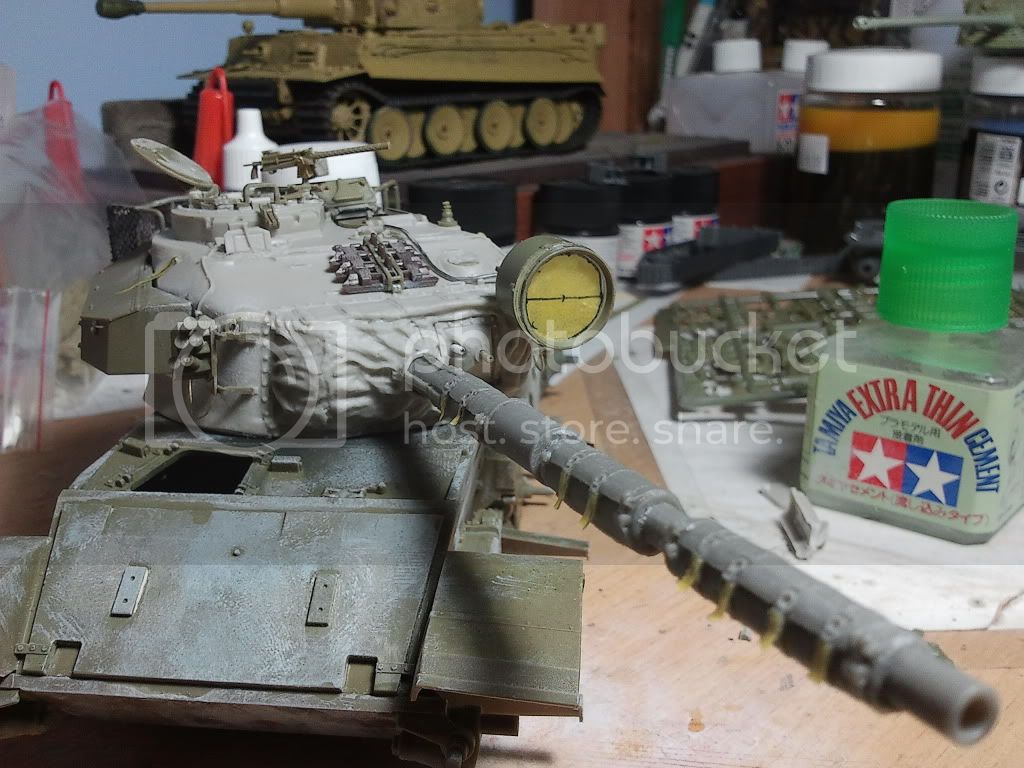
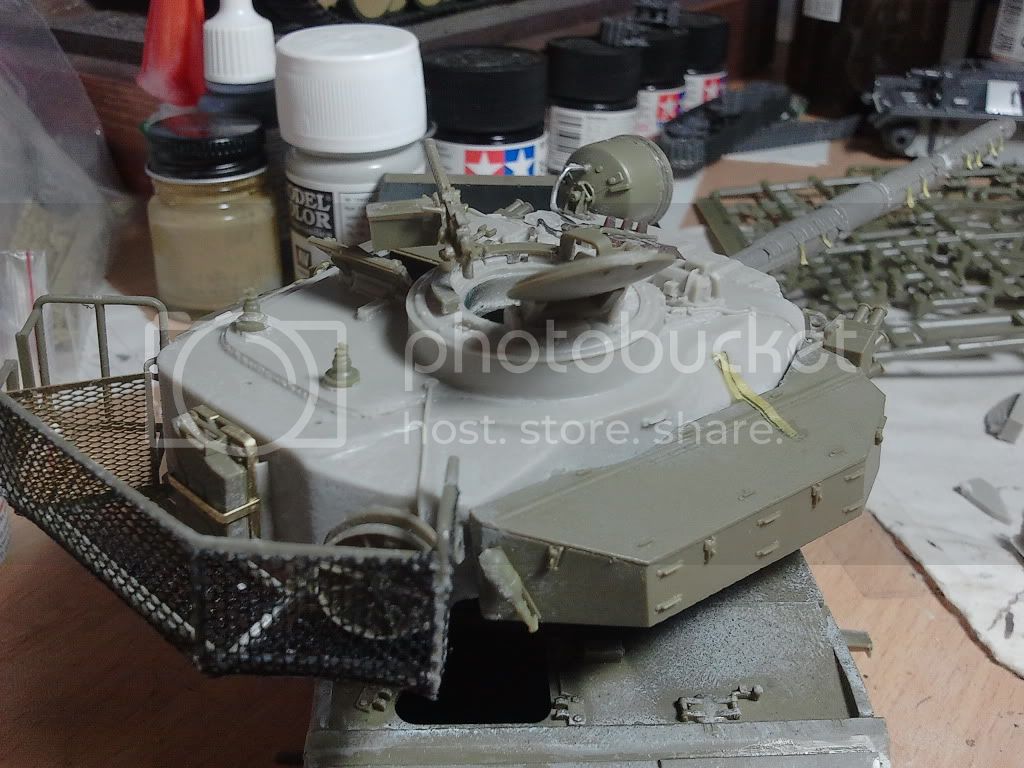
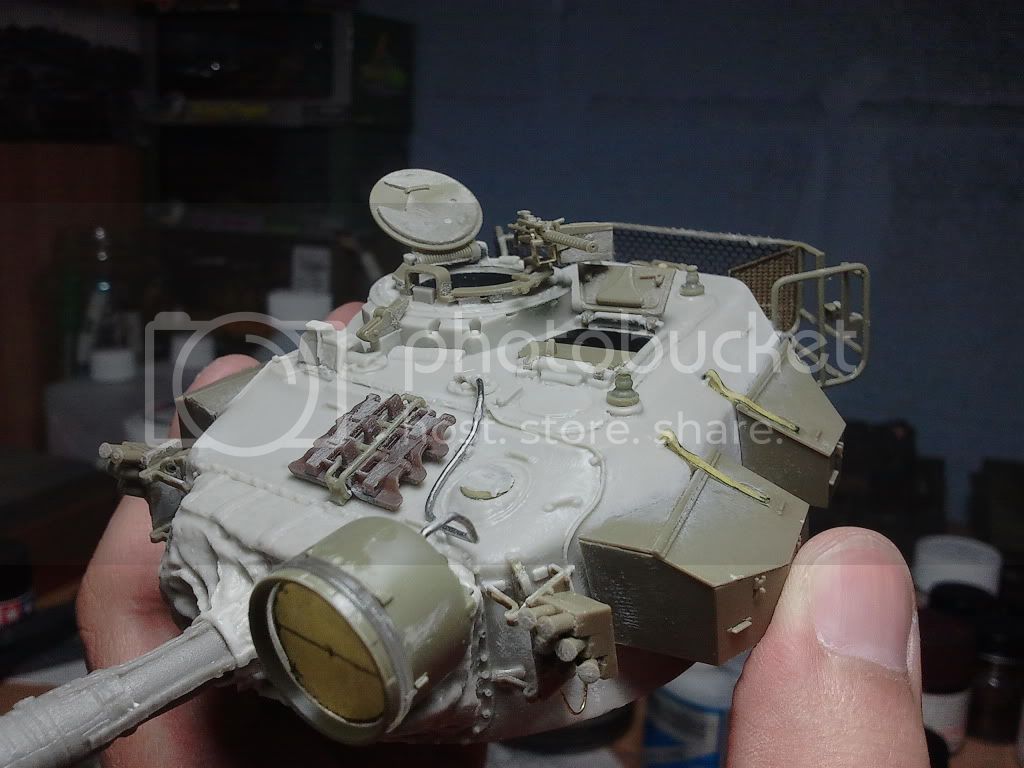
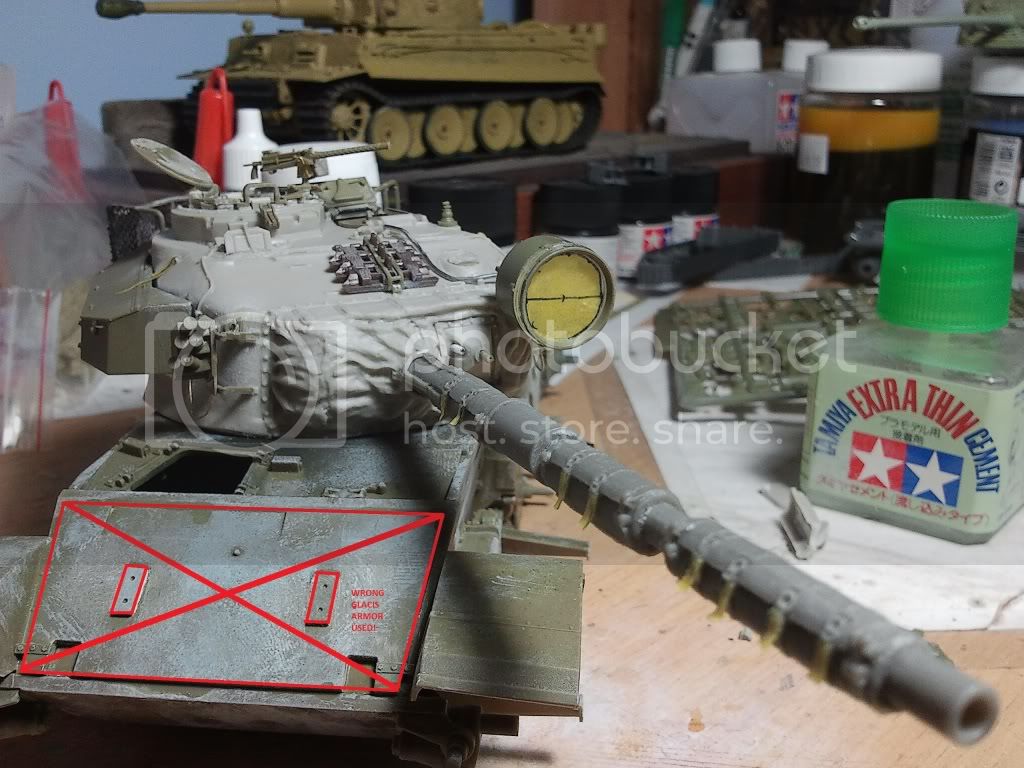
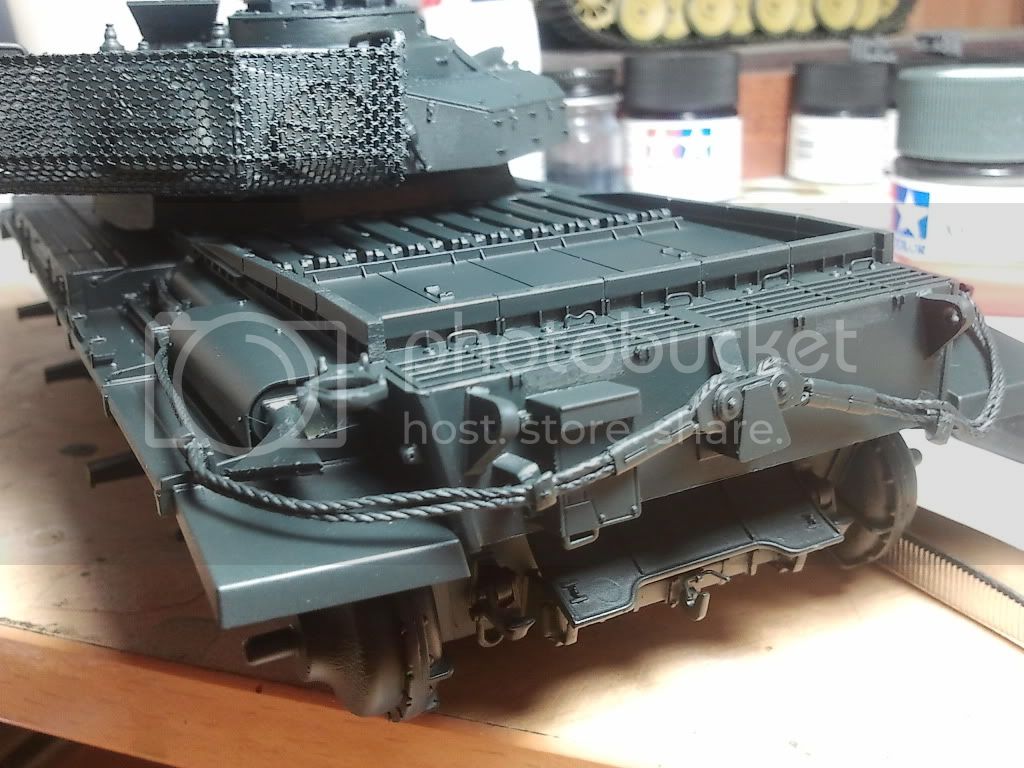
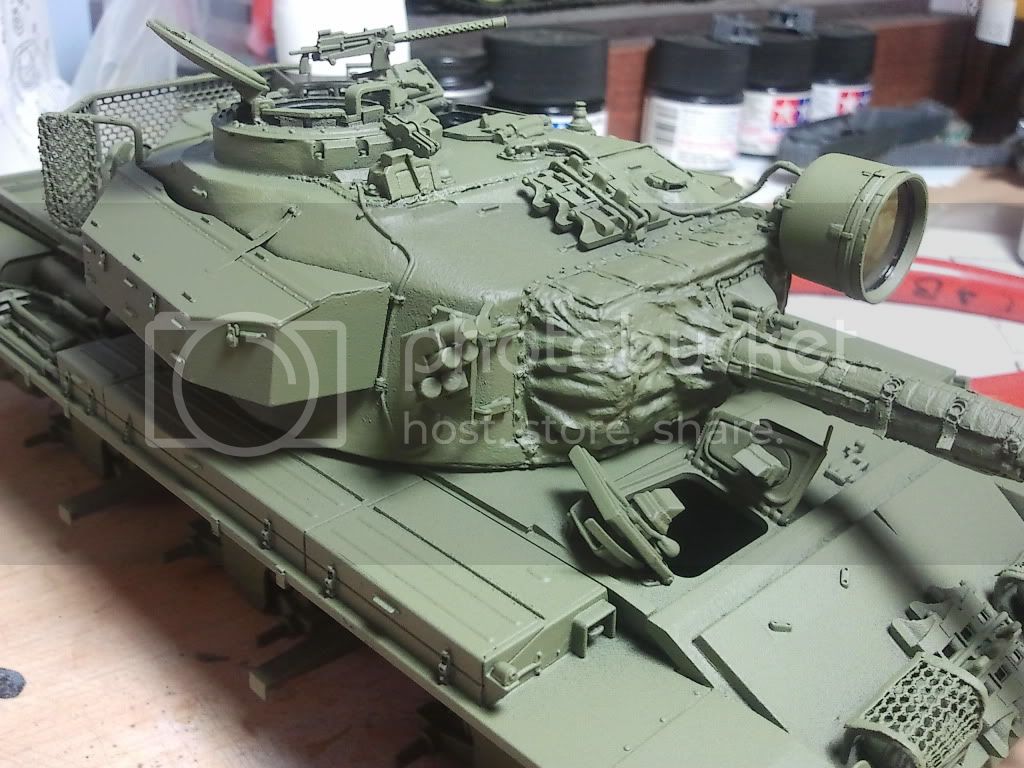
Here are some additional pictures from last evening's build session. I added the IR search light and cable. The IR search light lense was masked off in preparation for spraying.

Additionally, I have added dangling "straps" from the thermal sleeves on the gun barrel. Straps were also added to the tie downs next to the turret bins. The straps are made from Tamiya masking tape.


Thanks!
+Y.C.
LeoCmdr
Visit this Community
Alberta, Canada
Joined: January 19, 2005
KitMaker: 4,085 posts
Armorama: 3,917 posts
Posted: Monday, April 23, 2012 - 01:41 PM UTC
Nice work so far...nothing popping out as build issues.

When you get to the driver's hatches be careful how you pose the periscopes....they were postioned differently is the hatches were closed or open to allow the hatches to lock open properly.

centurionmkv
Visit this Community
California, United States
Joined: March 13, 2010
KitMaker: 67 posts
Armorama: 56 posts
Posted: Monday, April 23, 2012 - 04:18 PM UTC
Hi,

Thanks for the feedback. I am building this slowly to make sure I get the general details right. I will make note of the driver's hatch position as you mentioned.

Thanks again!

+Y.C.
centurionmkv
Visit this Community
California, United States
Joined: March 13, 2010
KitMaker: 67 posts
Armorama: 56 posts
Posted: Monday, April 23, 2012 - 04:25 PM UTC
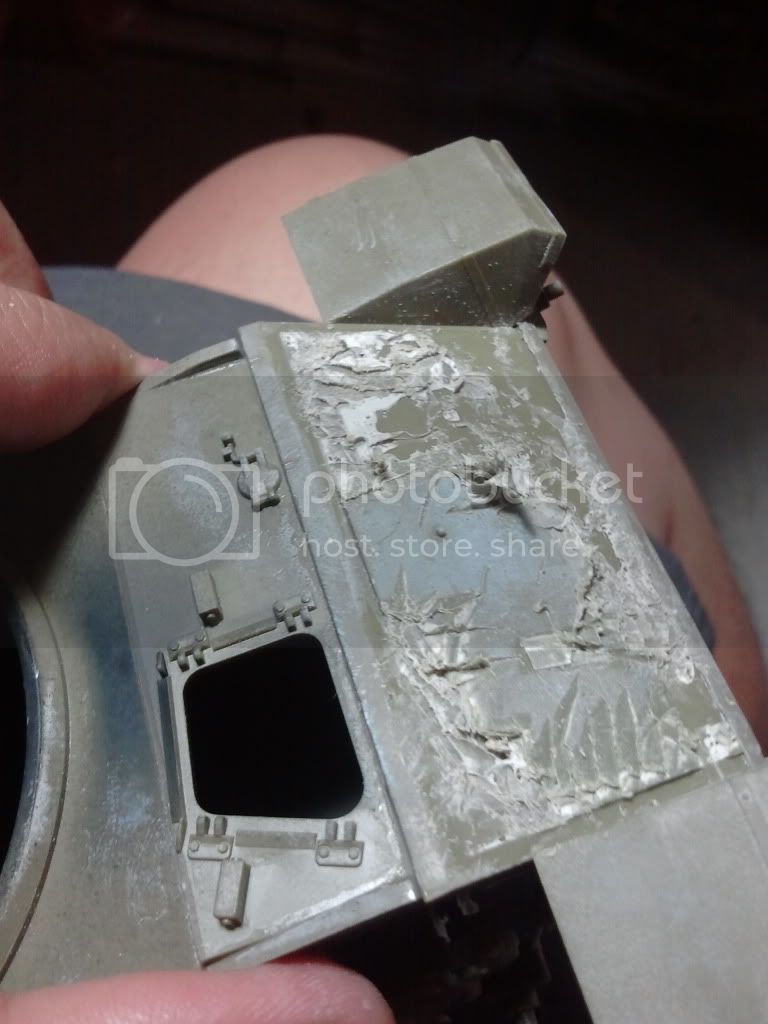
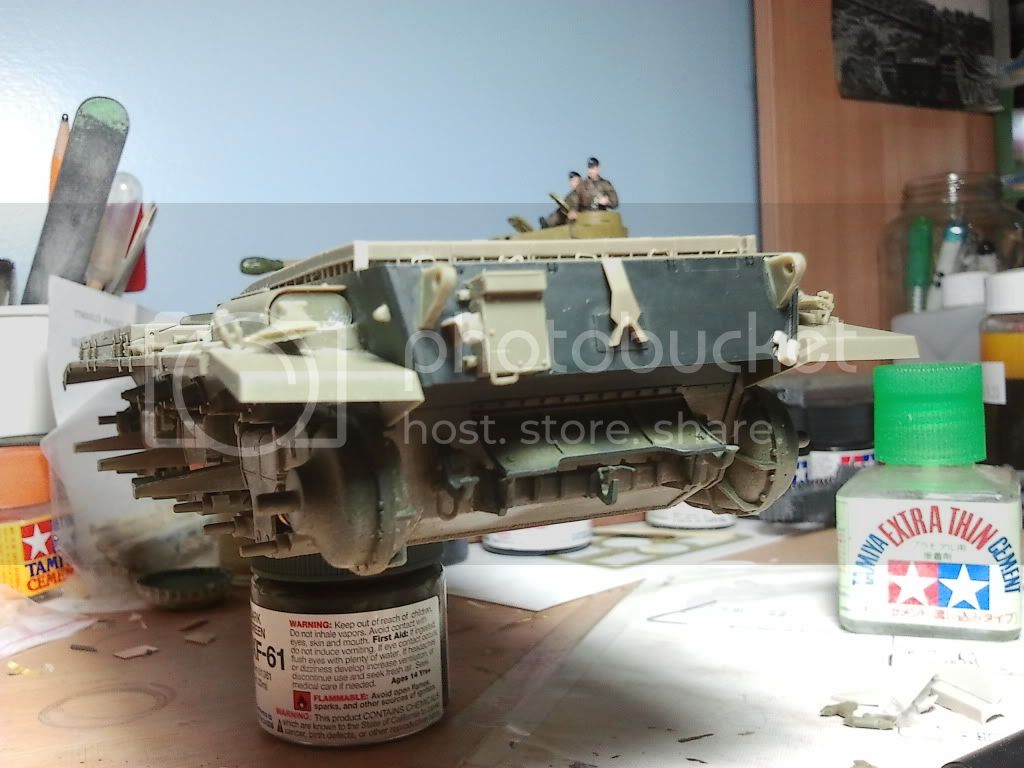
I originally intended to make some progress tonight on the hull but discovered a MAJOR mistake. Apparently, I used the wrong glacis up-armor plate.

You see, AFV Club kindly included two types of up-armor plate in their Centurion Mk.5 kit, one of which is specific to their Australian Centurion kit. I used the one intended for the Australian Centurion by mistake and only found out now, two weeks after gluing it to the hull.


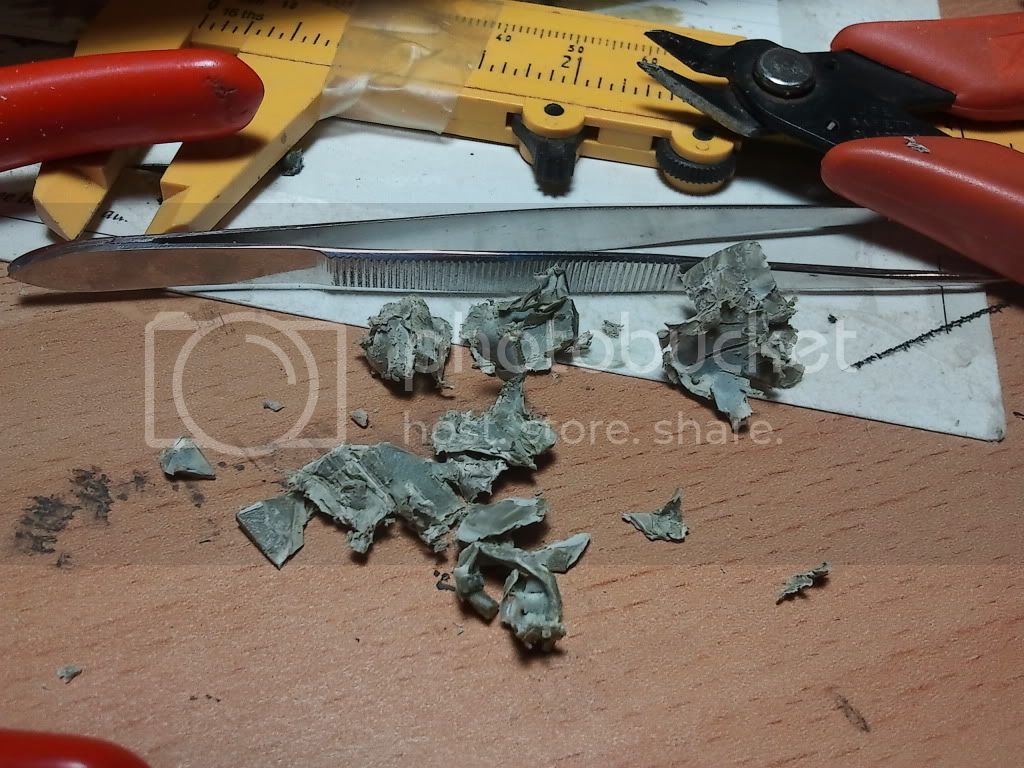
The plastic cement and gap filling super glue have fully cured by now. So in the spirit of perseverance, I took out my sprue cutter and did some major surgery by snipping the offending armor plate away, one bit at a time.


I had pangs of regret while doing that, thinking that I may be making an unrecoverable mistake. I left behind a huge pile of scrap plastic.


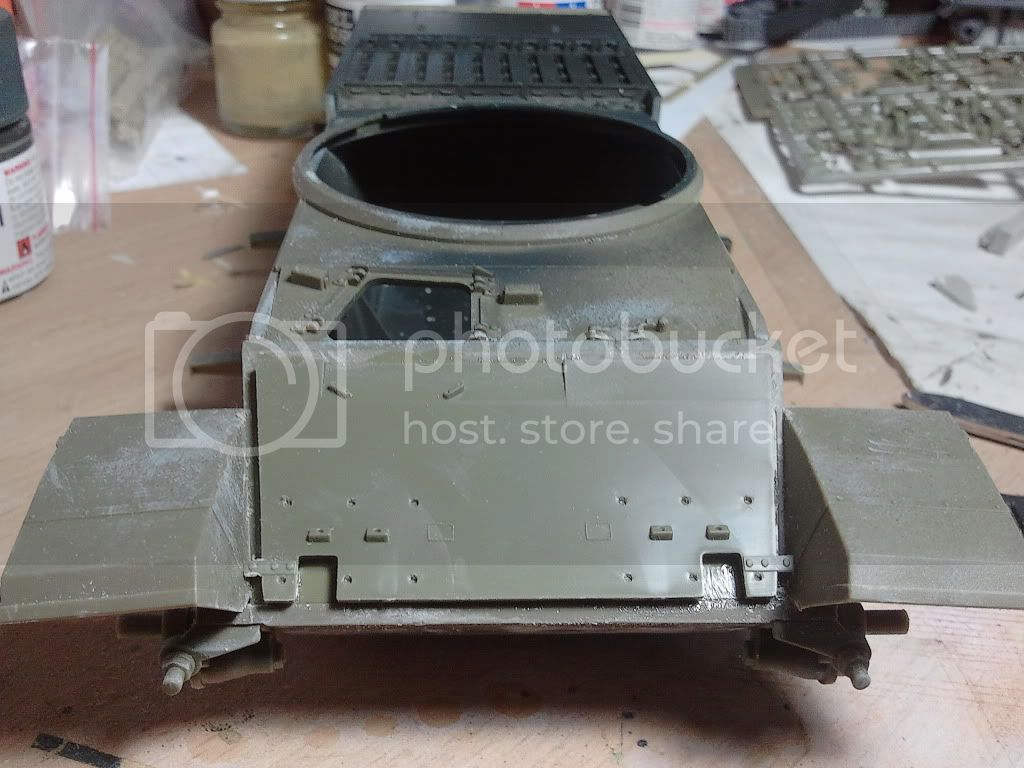
That is all that remains of the armor plate. But all is not lost, with copious amounts of liquid cement, I stuck the correct part to the hull (after a rigorous sanding session).


And whaddya know? It did not turn out badly at all!


Cheers!
+Y.C.
bigmal
Visit this Community
England - East Midlands, United Kingdom
Joined: February 21, 2011
KitMaker: 211 posts
Armorama: 176 posts
Posted: Monday, April 23, 2012 - 10:27 PM UTC
I am a big fan of the Centurion so will be watching your build.

You are doing a great job so far.

I have to agree that AA parts fit well with the AFV Club kits.
I was given an AA AVRE kit that had a few moulding problems, so i took all of the AVRE parts and added them to a modified AFV kit and had no problems with the fitting of AA parts to the AFV kit.

Malcolm
centurionmkv
Visit this Community
California, United States
Joined: March 13, 2010
KitMaker: 67 posts
Armorama: 56 posts
Posted: Wednesday, April 25, 2012 - 04:02 AM UTC
Malcom,

Thanks for the comments. I am using the Accurate Armour turret because I like the aggressive shape of their mantlet cover. I also have a Lionmarc turret and I do not like how they handled the IR search light mount. Just a personal preference though.

Cheers!
+Y.C.
mvaiano
Visit this Community
Sao Paulo, Brazil
Joined: January 24, 2012
KitMaker: 1,054 posts
Armorama: 1,050 posts
Posted: Wednesday, April 25, 2012 - 10:58 PM UTC
The turret looks beautiful. I have an Australian Centurion and needed to make some modifications to improved it. In your case I think you don´t need.

I like Centurions and I'll follow your WIP.

Marco
centurionmkv
Visit this Community
California, United States
Joined: March 13, 2010
KitMaker: 67 posts
Armorama: 56 posts
Posted: Sunday, April 29, 2012 - 06:42 PM UTC
Hi,

Thanks! I will do an Australian Centurion some day. Actually, I want to make a post-Vietnam war one, shortly before they were replaced by the Leopard 1A4.

Cheers!
+Y.C.
centurionmkv
Visit this Community
California, United States
Joined: March 13, 2010
KitMaker: 67 posts
Armorama: 56 posts
Posted: Sunday, April 29, 2012 - 06:50 PM UTC
Hi All!

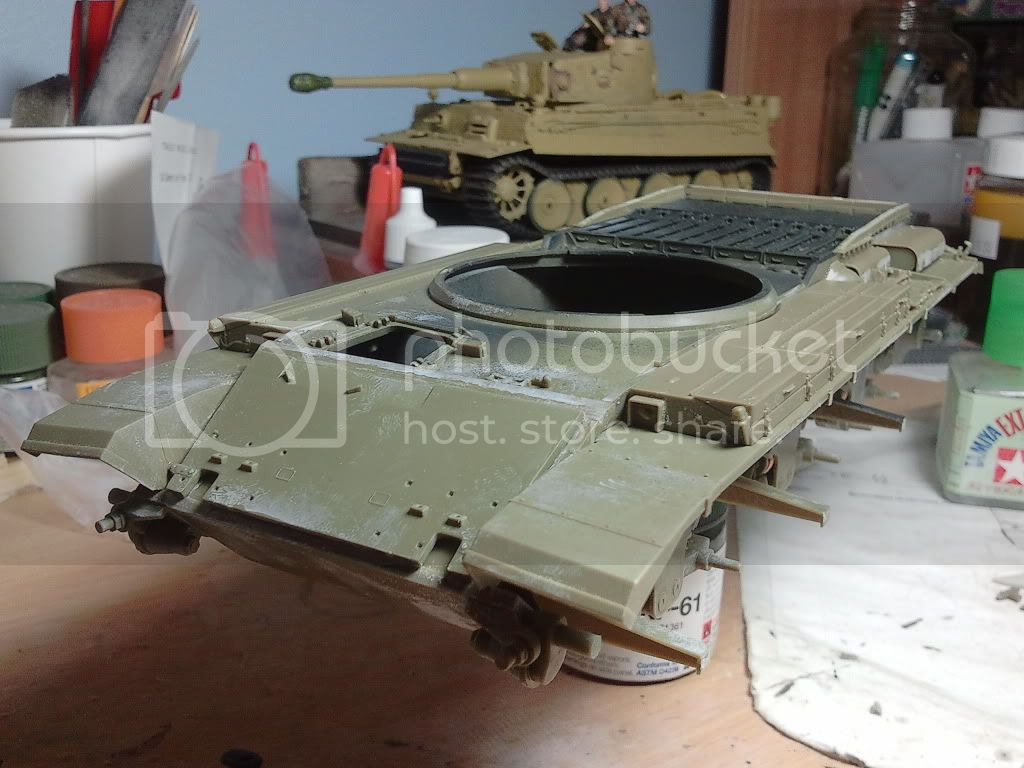
More updates today. I have been busy at work all week and only had a few hours to work on my Centurion today. Thankfully, I got some major fender / stowage box sub-assemblies completed:


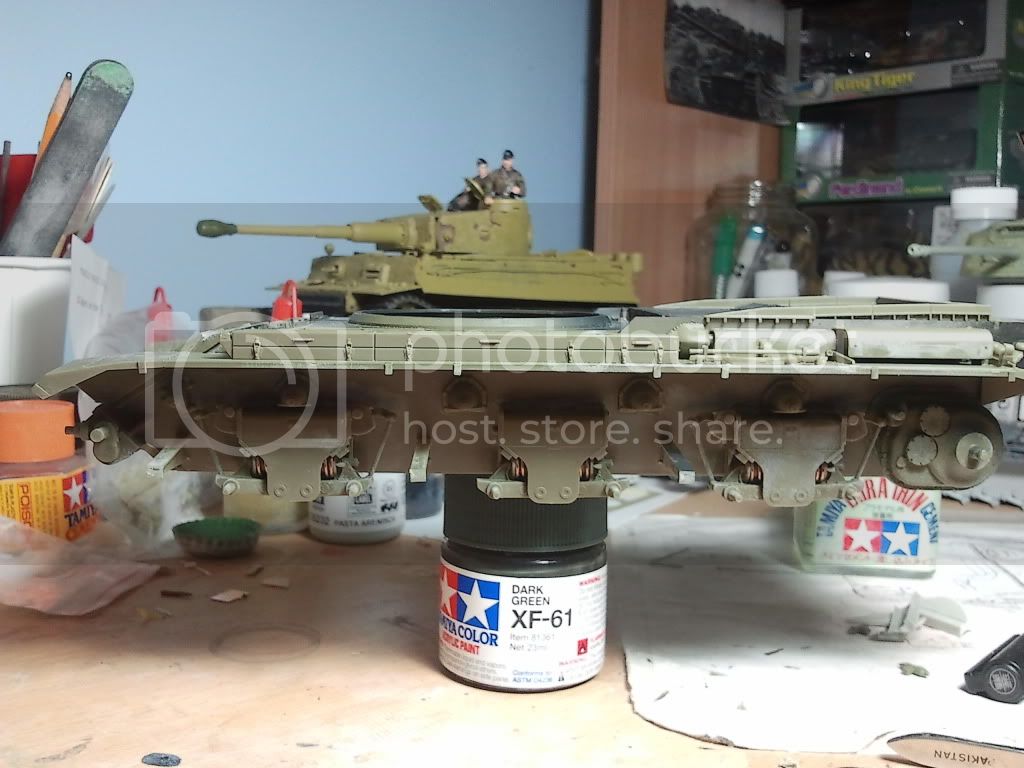
I have decided to leave the side skirts off. I love the complex look of the Centurion suspension system:


One thing about the AFV Club kit, I felt that AFV Club made the Centurion a bit too complex... for complexity's sake. I guess this was due to the fact that I just built Tamiya's King Tiger before this and assembly was a breeze. The AFV Club kit, while being nicely detailed, suffers from vague instructions regarding parts placement. This made assembly very slow and I have made mistakes during this build.


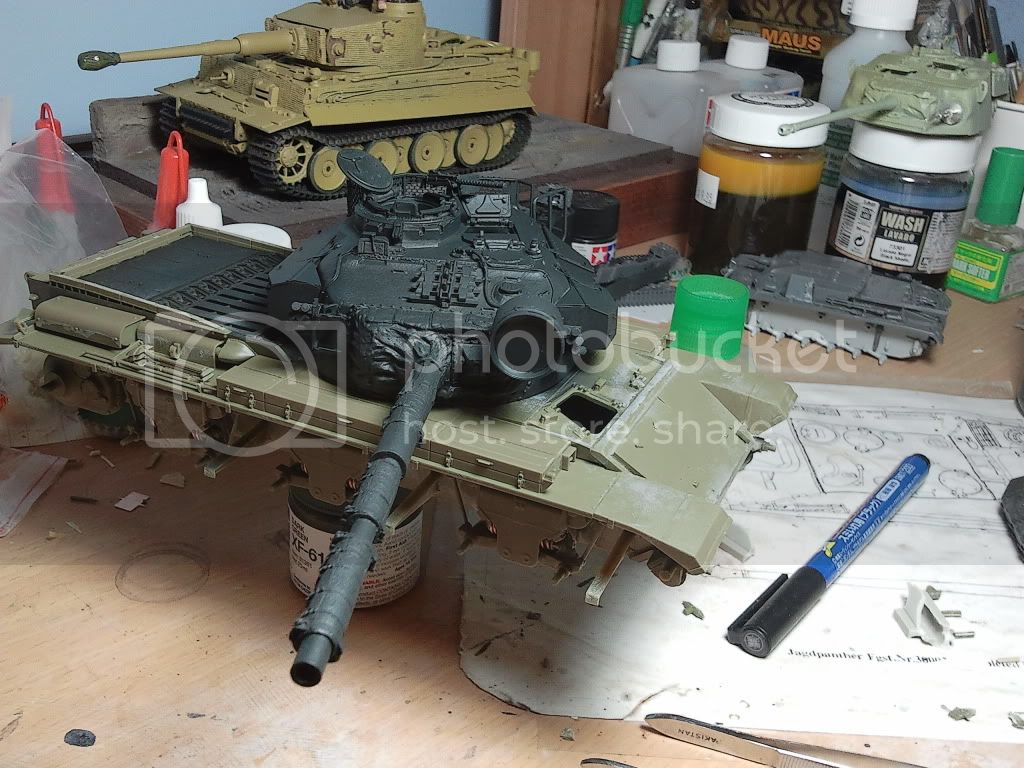
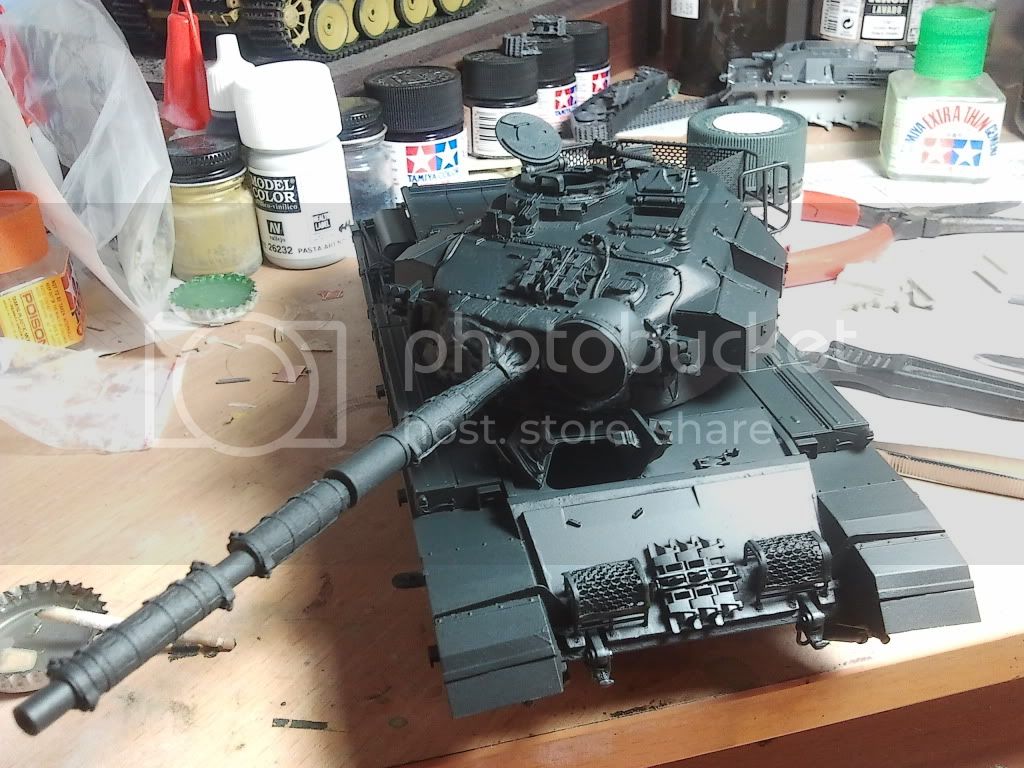
And here is the turret on a more complete hull. Notice I primed the turret sub-assembly with a coat of Tamiya flat black spray paint.

Also note my other project (turret) in the background.


That is all for now. I promise more frequent updates next week!

Cheers!
+Y.C.

centurionmkv
Visit this Community
California, United States
Joined: March 13, 2010
KitMaker: 67 posts
Armorama: 56 posts
Posted: Monday, April 30, 2012 - 07:16 PM UTC
Hi All,

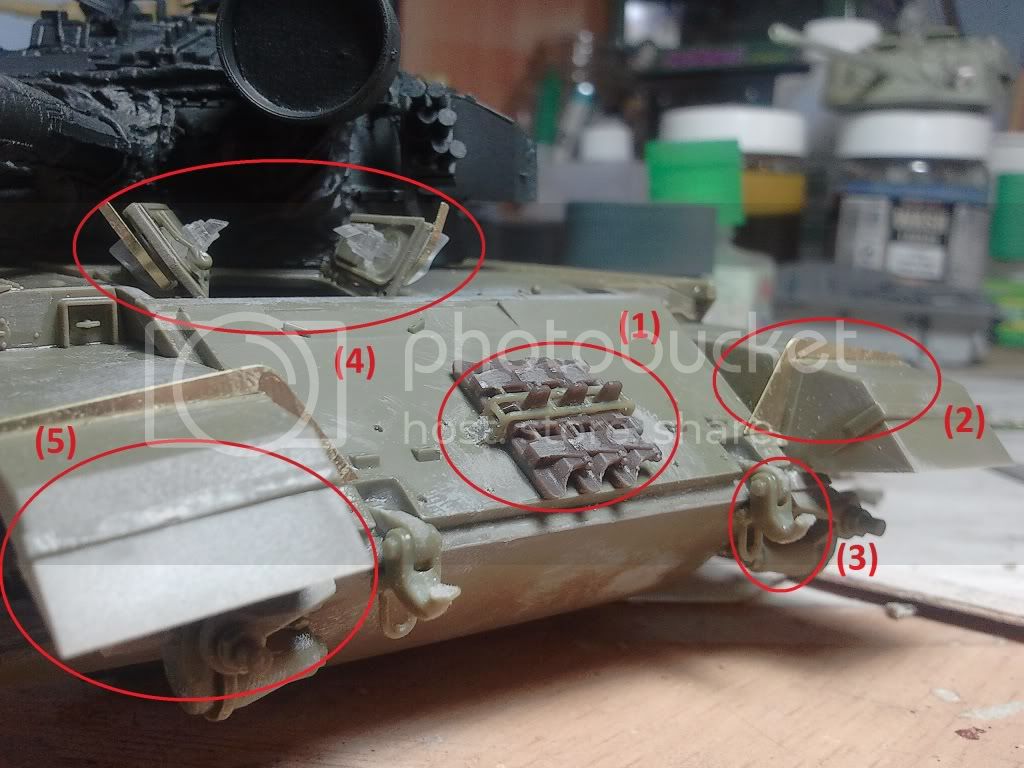
I had a couple of hours this evening to work on my Centurion Mk.11. Still, I only had time for a couple of things. Here is a picture showing today's progress. These are numbered 1 to 5.


(1) I installed the spare track bracket and track links on the front glacis plate.

(2) I cannot believe AFV Club made the fender bracing photo etch. This could have easily been molded in plastic. Not that I don't like PE parts, I just feel that manufacturers could minimize using PE in their models. Just my two cents though.

(3) I installed the tow hook at the front of the tank.

(4) This part actually took a while. Incredibly, it is not easy to find detailed pictures of Centurions with opened driver's hatches to determine the periscope positions. The periscopes face "downwards" into the hatch when open.

(5) I installed the fender tip. I would have missed this step if not for looking at real Centurion photos. The instructions actually called out for them, but they were easy to miss.

That is all for tonight, more to come tomorrow!


Cheers!
+Y.C.
centurionmkv
Visit this Community
California, United States
Joined: March 13, 2010
KitMaker: 67 posts
Armorama: 56 posts
Posted: Wednesday, May 02, 2012 - 07:34 PM UTC
Hello All!

Minor updates today. I added the two cables and head lights. After the super glue dried, I primed the entire hull assembly with a coat of Tamiya flat black spray.


They said paint doesn't hide blemishes and this couldn't be more true in my case. Some patch work has to be done using gap filling super glue.


Now I will let this sit for a few days while I tackle the roadwheels. I ordered a set of Firestorm resin replacement for AFV Club's vinyl tires. These may take a few days to arrive.

I guess I can take a breather for now.

Cheers!
+Y.C.
LeoCmdr
Visit this Community
Alberta, Canada
Joined: January 19, 2005
KitMaker: 4,085 posts
Armorama: 3,917 posts
Posted: Thursday, May 03, 2012 - 01:48 PM UTC
Nice update....good work on the driver's periscope position...you could have just PM'd for the placement.

I recently used the Firestorm road wheels on my most recent Canadian Centurion...they don't fit perfect but pretty close and they do look nice...any questions just ask.

centurionmkv
Visit this Community
California, United States
Joined: March 13, 2010
KitMaker: 67 posts
Armorama: 56 posts
Posted: Thursday, May 03, 2012 - 06:38 PM UTC
Hi,

I appreciate your offer and will PM you if I have any questions. I think it is part of the "fun" to research on the internet.

This is the first Centurion (of many) that I am hoping to build.

Thanks!
+Y.C.
centurionmkv
Visit this Community
California, United States
Joined: March 13, 2010
KitMaker: 67 posts
Armorama: 56 posts
Posted: Thursday, May 03, 2012 - 06:45 PM UTC
Hello All,

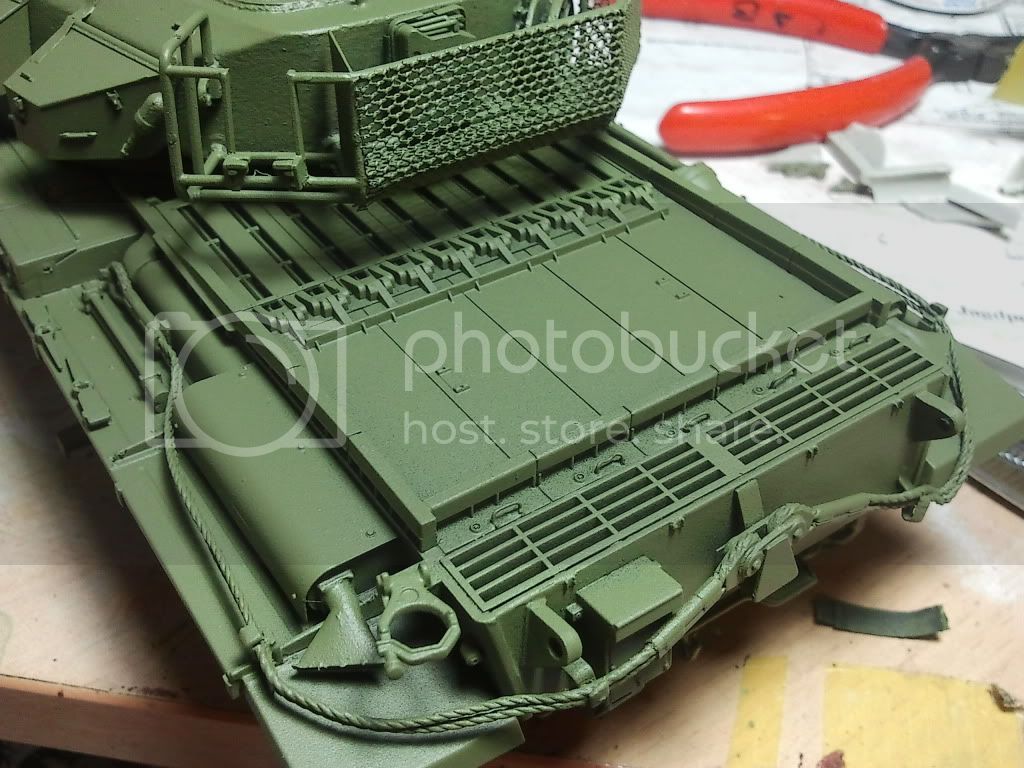
Some more updates tonight. I promised myself to not work on the Centurion tonight but couldn't help it. Since the flat black primer coat has fully dried, I decided to apply the next "base" layer of OD paint.

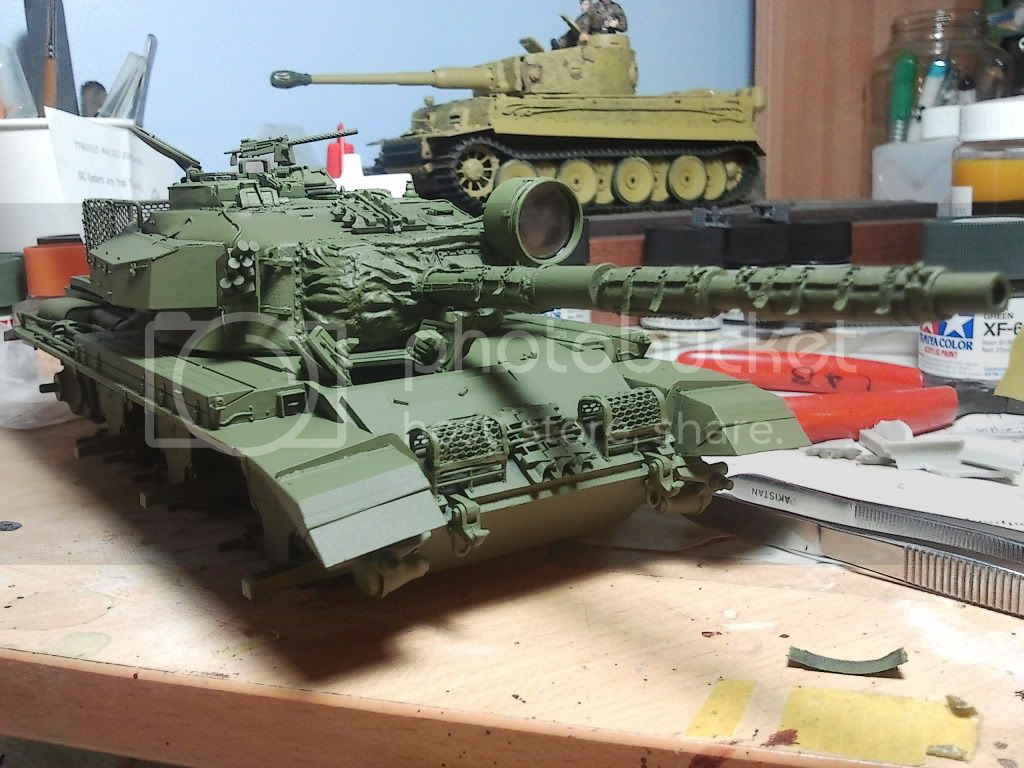
My crappy cell phone pictures make the base coat appear lighter than it really is. The paint should have a reddish/OD hue to it when viewed in person, I guess it is the white balance in my pictures that is off.


One thing I forgot to mention, all the headlight lenses on the Centurion have been base coated with bright silver and then sealed with a coat of Tamiya "Smoke".


Still, something is off with this build. I am not sure what but I am not too happy with the way something is turning out. Gotta go hit the reference pictures!

Cheers!
+Y.C.
LeoCmdr
Visit this Community
Alberta, Canada
Joined: January 19, 2005
KitMaker: 4,085 posts
Armorama: 3,917 posts
Posted: Friday, May 04, 2012 - 01:34 AM UTC
The things that stand out the most to me on your build is the mesh you used on the headlight guards and the turret basket.

How come you didn't use the PE parts from the Accurate Armour kit?

The mesh you used looks like chicken wire and a bit toy like compared to the rest of the details on your build. I totally understand if you are working with what you have at hand.

I think it will come together better once you get the camouflage fully painted.
centurionmkv
Visit this Community
California, United States
Joined: March 13, 2010
KitMaker: 67 posts
Armorama: 56 posts
Posted: Friday, May 04, 2012 - 03:17 AM UTC
Hi,

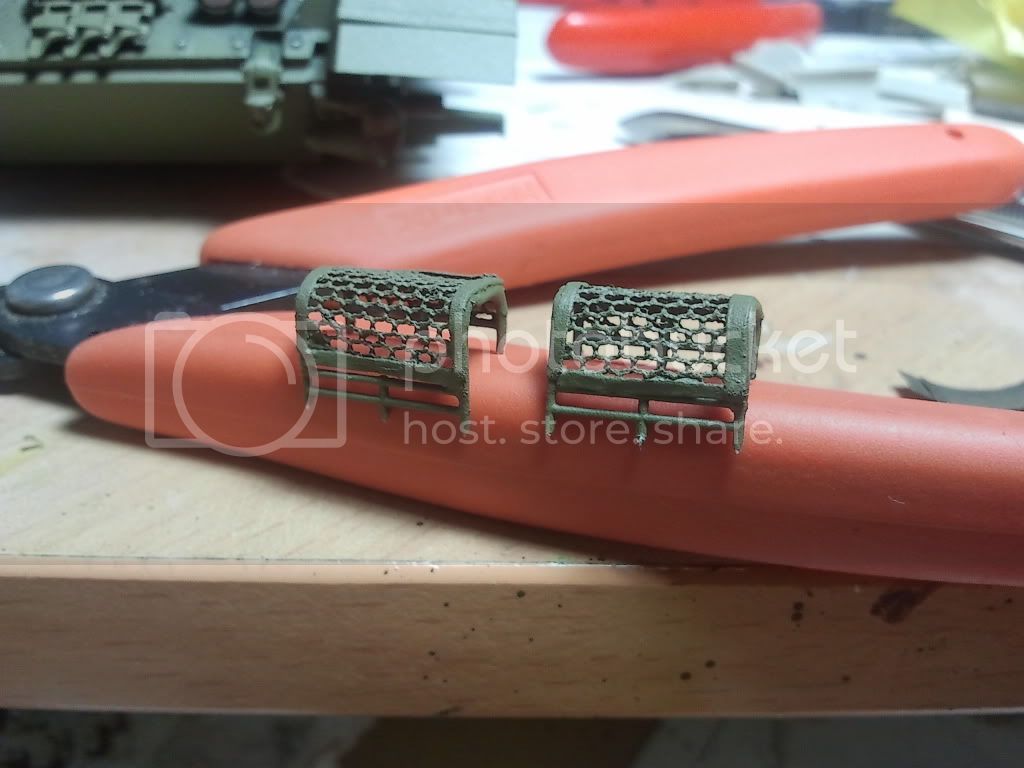
The mesh on the headlight guards are the problem. They are way too thick. I used the mesh that came from AFV Club and chose to leave the Accurate Armour mesh alone (for a future build perhaps.)

I guess the mesh looked OK when I primed the model with black paint. Now that it has a lighter shade of green on it, the clunkiness of it stood out like a sore thumb.

On the turret baskets, I will leave those alone since I may plan to fill them up with stowage.

Looks like I will have to fix the headlights. Nothing beats post painting surgery!

Thanks!
+Y.C.
frank01
Visit this Community
England - North West, United Kingdom
Joined: March 30, 2006
KitMaker: 195 posts
Armorama: 175 posts
Posted: Friday, May 04, 2012 - 07:17 AM UTC
I like the build so far,
not to rain on your parade but the rubber protection around the engine deck, needs the cut outs, for the fume extractor on the barrel on this mark of Cent, made the same mistake myself, the parts are in the kit easy to mix up as you have already stated.
Sorry
centurionmkv
Visit this Community
California, United States
Joined: March 13, 2010
KitMaker: 67 posts
Armorama: 56 posts
Posted: Friday, May 04, 2012 - 08:23 AM UTC
Hi,

Oh bummer! How did you fix it?

Checking on Prime Portal, now I notice it.


Do you sand the bumpers down?

It seems to be as simple as that.

Thanks!
+Y.C>
LeoCmdr
Visit this Community
Alberta, Canada
Joined: January 19, 2005
KitMaker: 4,085 posts
Armorama: 3,917 posts
Posted: Friday, May 04, 2012 - 01:15 PM UTC
The Accurate Armour kit actually got that modification correct....take a look at the parts.

That particular modification on the back deck depends on the Centurion user. The British Centurions may have had that modification when the 105 mm was mounted but the Canadian Mk. 6 and then the Mk.11LRs never had the modification when they were upgunned from the Mk.5 version.

I would recommend looking at the Accurate Armour parts as a guide and simply sanding or carving down the cut out if you want...a slight final sanding and some repainting should get you in shape.
centurionmkv
Visit this Community
California, United States
Joined: March 13, 2010
KitMaker: 67 posts
Armorama: 56 posts
Posted: Friday, May 04, 2012 - 01:44 PM UTC
Hi Jason,

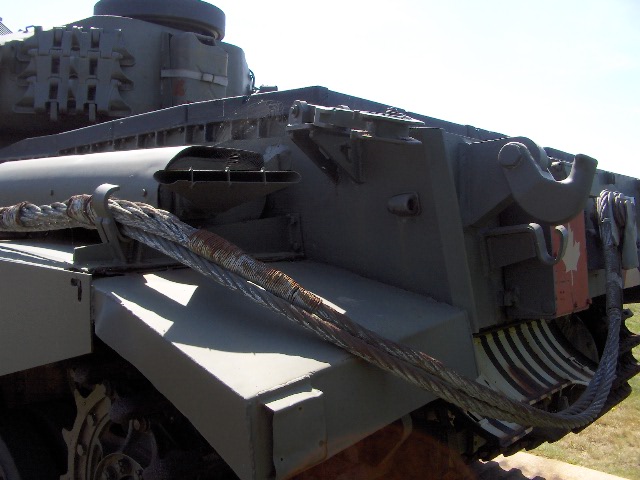
That explains this picture of a Centurion with the 105 mm but without the engine deck mod.


Ok, I think I know what to do now. Unless I want to do a Canadian vehicle, I have to sand the bumpers down.

Thanks!
+Y.C.
LeoCmdr
Visit this Community
Alberta, Canada
Joined: January 19, 2005
KitMaker: 4,085 posts
Armorama: 3,917 posts
Posted: Friday, May 04, 2012 - 04:01 PM UTC

Quoted Text

Hi Jason,

That explains this picture of a Centurion with the 105 mm but without the engine deck mod.

http://data3.primeportal.net/tanks/mark_minnis/centurion_mk5a/images/centurion_mk5a_13_of_19.jpg

Ok, I think I know what to do now. Unless I want to do a Canadian vehicle, I have to sand the bumpers down.

Thanks!
+Y.C.


That image is a Canadian Mk.6.

Unfortunetely you can't build a Canadian vehicle unless you remove the spare track links on the turret, the rear jerry can and stowage rack, the British fire extinguishers, modify the rear hull and attach the 100 gallon fuel tank, mount the driver's windscreen box to the left of the driver's hatch, modify the right turret stowage bin, and paint it in the Canadian four colour cam.....nothing is ever easy with Canadian tanks!
centurionmkv
Visit this Community
California, United States
Joined: March 13, 2010
KitMaker: 67 posts
Armorama: 56 posts
Posted: Saturday, May 05, 2012 - 06:55 AM UTC
Hi All!

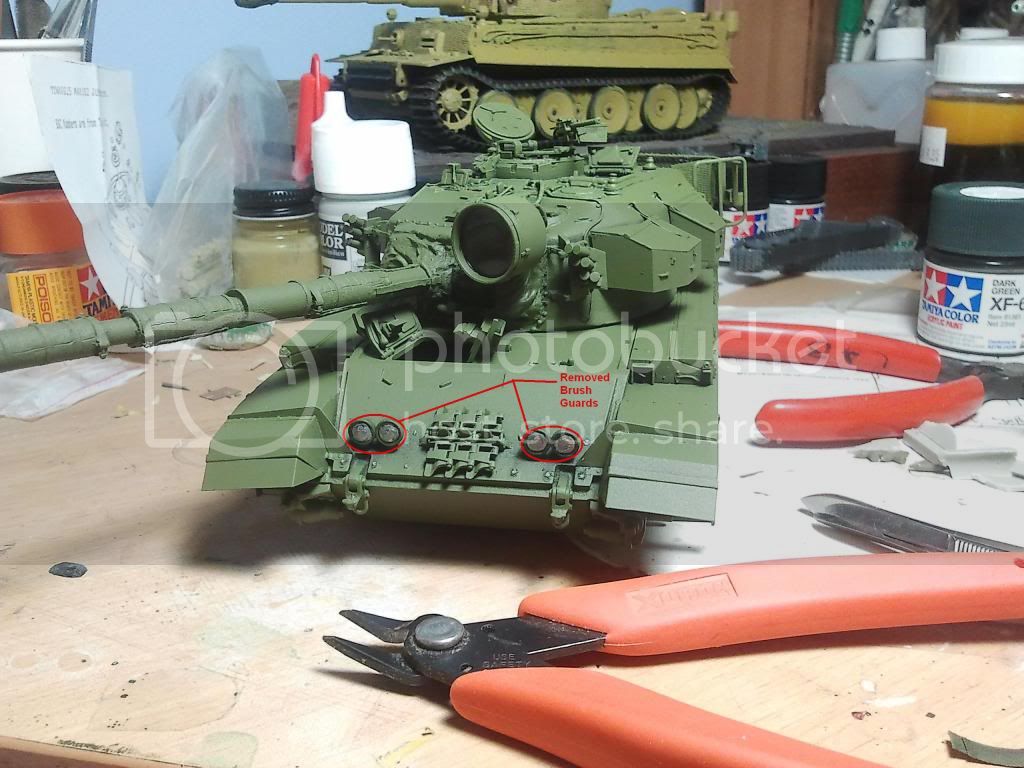
Ok, so I bit the bullet and decided to replace the oversized headlight brush guard mesh with my Accurate Armour PE set. I typically don't like scrounging too much from "virgin" kits since I'd like to keep them complete, so that I can build them in the future without having to scrounge from other kits. It is like a domino effect.

So, I snipped off the offending parts. I never thought I get to see my headlights up close again after installing the brush guards:


Here is how clunky the mesh looks close up:


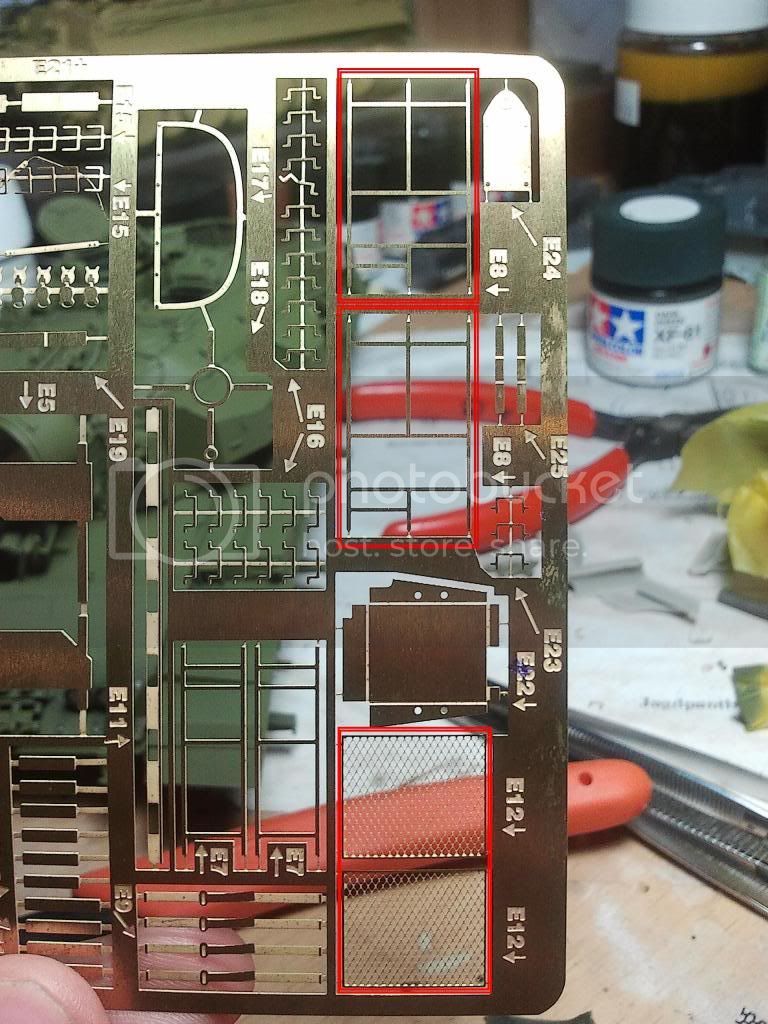
And here are the Accurate Armour replacement parts (highlighted with red boxes). Notice how fine the mesh looks:


I will post "After" pics once I am done. This may be in a few days though since I have to do my day job over the weekend (deadlines!)

Cheers,
+Y.C.

LeoCmdr
Visit this Community
Alberta, Canada
Joined: January 19, 2005
KitMaker: 4,085 posts
Armorama: 3,917 posts
Posted: Saturday, May 05, 2012 - 07:34 AM UTC
It will be worth the effort...for my latest Centurion I used the AFV Club headlight guards and simply ordered the PE parts from Accurate Armour....easy and it leaves plenty of PE parts for future Centurion builds.

It was not totally uncommon to see Centurions with the dual headlights and frame mounts simply without the mesh covers in place.
centurionmkv
Visit this Community
California, United States
Joined: March 13, 2010
KitMaker: 67 posts
Armorama: 56 posts
Posted: Saturday, May 05, 2012 - 12:46 PM UTC
Hello All!

Again, I couldn't help it and I made a wee bit of progress today. I decided it would be easier to just snip off the incorrect portion of the engine deck rubber bumper and append the correct part onto it.

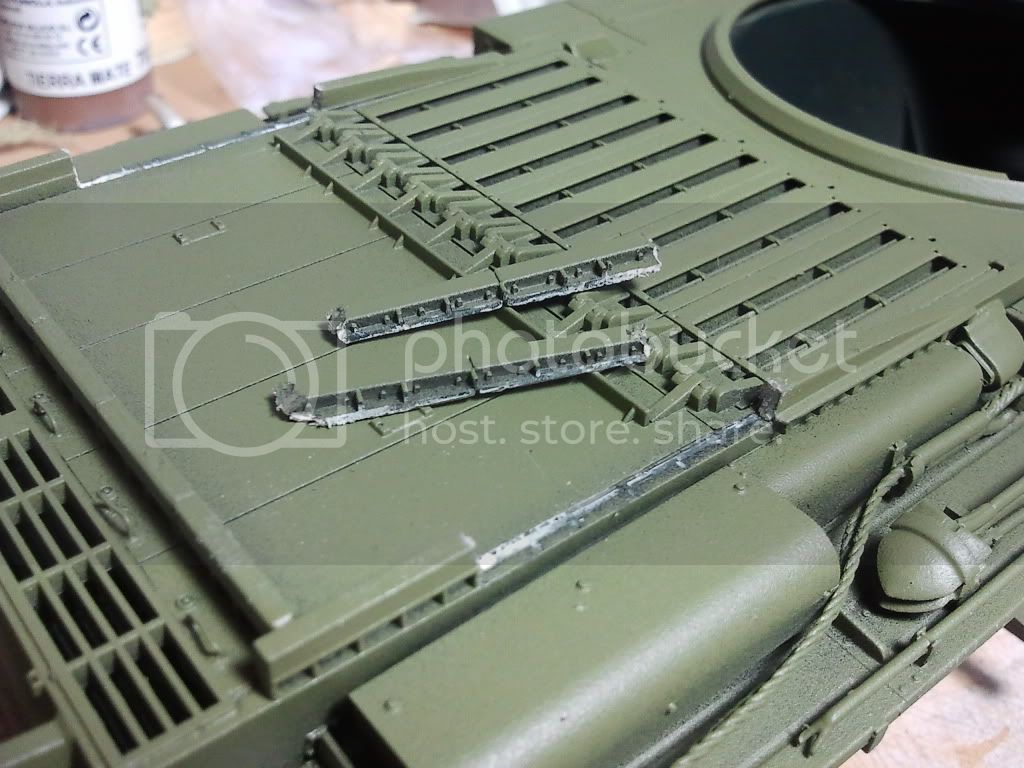
So with my ever faithful sprue cutter, I snipped away the offending part of the railings:


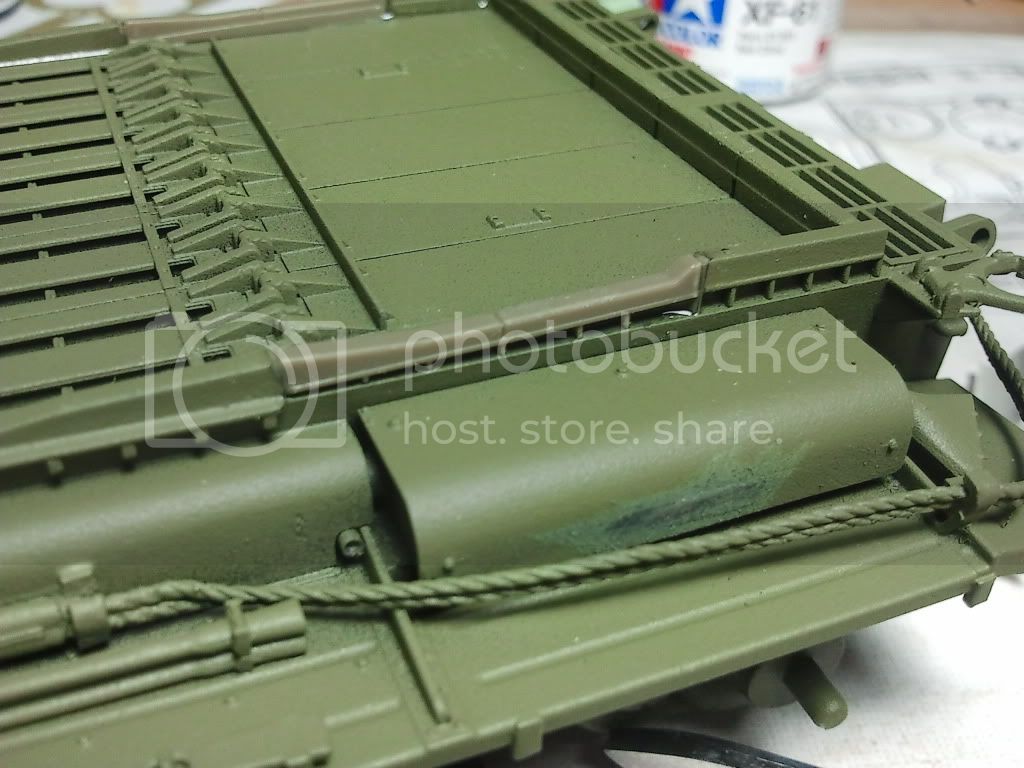
I then cut the correct rails from the AFV Club Centurion kit that were included as "spares" and cemented them back in place. All-in-all, this took less then 20 minutes.


Sure beats sanding and checking references repeatedly until everything looks right!


Cheers,
+Y.C.
 _GOTOTOP