_GOTOBOTTOM
Armor/AFV: Modern Armor
Modern armor in general.
Hosted by Darren Baker
Tamiya T-55 Enigma WIP
wing_nut
Visit this Community
New Jersey, United States
Joined: June 02, 2006
KitMaker: 1,212 posts
Armorama: 674 posts
Posted: Tuesday, April 24, 2012 - 11:30 PM UTC
Seems a dog's age since I've posted here. So after a hiatus of 4 or 5 months and the diversion to WWI bipes...time for a piece of armor.

While not a huge post war armor fan, the T-55A I did a while back was one of the best kits I have built so when I saw the Engima I just had to do one. Plus I don't have to go nuts trying to come up with a unique color and markings scheme... 1 color, no markings.


I am doing things out of order while I wait for the PE set that I ordered from Japan to be shipped from Poland. Huh?

The plan from the beginning was to cut the armor blocks apart to be able to "crap up" the welds at each edge... really bad, the Iraqis were way worse than the Russians...12 of 'em on each block. I didn't want the hollow side so I filled that piece with resin, glued on the back and cut them with a razor saw. The kerf was the perfect size.


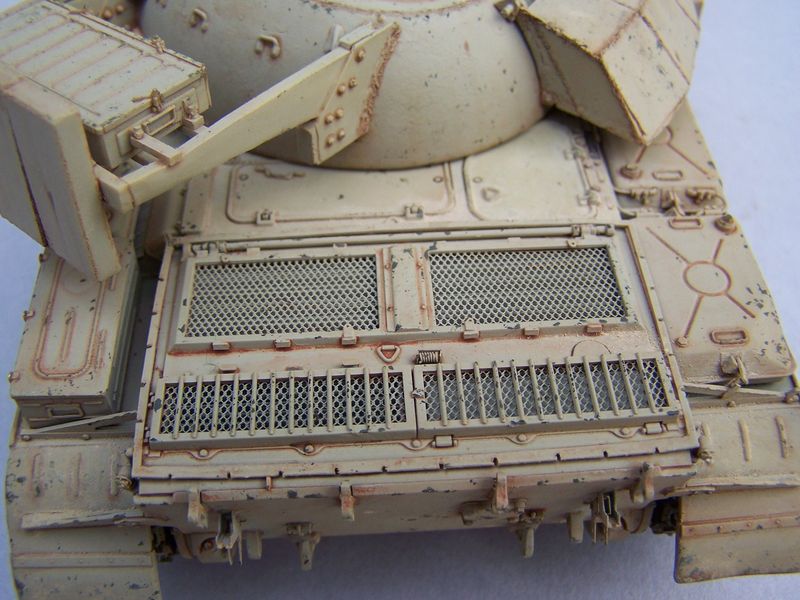
Added a few more bits and bobs to the turret. Scartched off and rpelaced to support rods for the gun sand cover. Added a couple of electrical conduits and a hand rail . The one in the front is .08mm brass tube since it wall have wires coming out of the open end for the search light.. The other end was bent wih a piece of wire inside to keep it from creasing.

The turret texture is Squadron putty thinned with acetone and stippled on. The surface was then rolled with a Micro chisel handle to flatten it then brushed with some acetone to softened a bit more. Did some "CU" work on the welds too.


wing_nut
Visit this Community
New Jersey, United States
Joined: June 02, 2006
KitMaker: 1,212 posts
Armorama: 674 posts
Posted: Friday, April 27, 2012 - 12:36 PM UTC
Spent some time working on the welds on the added armor. Got one side got into indy pieces and was experimenting with different methods of roughing up the edges and then coat with liquid glue to soften the look. Using a medium metal file seemed to be the best way to go making the work go a little quicker. But tedious none the less. Lots of edges. I’ll take a pic or 2 when I do the other side.

The edges of the washer that are welded to the front armor were done with a micro chisel then a 0.7mm resin nut was added.


chefchris
Visit this Community
North Carolina, United States
Joined: February 06, 2006
KitMaker: 1,544 posts
Armorama: 1,464 posts
Posted: Friday, April 27, 2012 - 01:16 PM UTC
Marc,
Your box welds look like the real deal! Great job. Got any references? Your last T-55 turned out great so Id expect this one will be a winner also.

Chris

Im surprised Mauro hasn't chimed in on this one yet......
Spiderfrommars
Visit this Community
Milano, Italy
Joined: July 13, 2010
KitMaker: 3,845 posts
Armorama: 3,543 posts
Posted: Friday, April 27, 2012 - 06:36 PM UTC
...Has anybody called me?... (Hi Chris!)

Great start Marc, your weld seems looks simply outstanding and I really like the way you modify the armour blocks !

I noticed that you have chosen the elliptical loophole and the Russian-made gun mantlet (what a nice seams you've added!), so you are going to represent an Enigma derived from a Czech T-55.

Only doubt which I have is that all the survived Enigma exemplars , seem to have the Polish made gun mantlet which is shorter, smoother and with any seams

Russian


Polish


However I haven't seen any pics of a Czech-derived Enigma, so I can't say what kind of mantlet actually they had.

As you probably know, engine deck provided by Tamiya kit is good to represent a Czech exemplar. Main engine hatches were wrong For a Polish exemplar because they would have to be rectangular with a different position of the hinges. Otherwise rear hatches would be incorrect to represent a Russian Enigma and you don't have the rail around the grilles.

I'll follow your build for sure

Cheers and congrats indeed!


Karl187
#284
Visit this Community
Northern Ireland, United Kingdom
Joined: October 04, 2006
KitMaker: 3,094 posts
Armorama: 2,942 posts
Posted: Friday, April 27, 2012 - 11:35 PM UTC
Those weld seems look like the real deal now- the texture on the turret also looks nice. I'm looking forward to seeing this build progress.
Tojo72
Visit this Community
North Carolina, United States
Joined: June 06, 2006
KitMaker: 4,691 posts
Armorama: 3,509 posts
Posted: Friday, April 27, 2012 - 11:46 PM UTC
Moving along nicely Marc
wing_nut
Visit this Community
New Jersey, United States
Joined: June 02, 2006
KitMaker: 1,212 posts
Armorama: 674 posts
Posted: Sunday, April 29, 2012 - 01:26 AM UTC
Chris, Mauro, Karl, Anthony... thanks so much for the encouraging words.

Mauro, I saw your name pop up a lot as I was search for old post about the tank. Glad to have you along for the ride. Feel free to tell me I am doing something wrong. I am jumping into this build in the true sense of its name as the vehicle is a complete enigma to me. I was so busy looking at weld photos (Chris...I have been using the bazillion pics on Prime Portal) that I didn’t notice the difference on the mantlet. And I just spend a long time making those little straps smaller for better scale Gotta think on that one for a bit.

I know that Tamiya used the Bovington example for their kit so I assume as I follow the instructions and use their part call outs I the vehicle is based on the Czech base vehicle. I’ll keep plodding along on that tack.
Spiderfrommars
Visit this Community
Milano, Italy
Joined: July 13, 2010
KitMaker: 3,845 posts
Armorama: 3,543 posts
Posted: Sunday, April 29, 2012 - 03:44 AM UTC

Quoted Text

I know that Tamiya used the Bovington example for their kit so I assume as I follow the instructions and use their part call outs I the vehicle is based on the Czech base vehicle. I’ll keep plodding along on that tack.


Actually the Enigma preserved at Bivington is a Polish exemplar as well as the Aberdeen one

http://www.primeportal.net/tanks/carl_dennis/t-55a_enigma/

http://www.primeportal.net/tanks/adam_vukich/t-55_enigma_walk.htm

The main problem is that Polish exemplars have different engine hatches which look the same of those belonged to the T-54s. Tamiya kit has the hatches good only for Russian or Czech exemplars ( The hatch on the left is larger and has a trapezoidal shape)

Bovington


Aberdeen


The Enigma preserved at Mourmelon museum is a Russian one

http://olivier.carneau.free.fr/gb_version/index.htm

Main hatches of Tamiya kit would be correct, rear grille would be wrong


I've also found a walkaround of the Patton museum exemplar but the tank is covered by a huge tarp, so I can't say exactly what version of Enigma could be

http://svsm.org/gallery/t-55_enigma


bison126
Visit this Community
Correze, France
Joined: June 10, 2004
KitMaker: 5,329 posts
Armorama: 5,204 posts
Posted: Sunday, April 29, 2012 - 04:22 AM UTC
Nice start on your Enigma Marc.
I tackled the Accurate Armour conversion myself with the Tamiya kit and did the same error with the mantlet.

Your job on the weld marks is very realistic.
As Mauro said, be sure of the origin of the model you want to depict before modifying anything on the engine deck.

Keep on the good work!
Olivier
wing_nut
Visit this Community
New Jersey, United States
Joined: June 02, 2006
KitMaker: 1,212 posts
Armorama: 674 posts
Posted: Tuesday, May 01, 2012 - 07:32 AM UTC
OK... totally confused about Russian, Polish and Czech variants. Seems it comes down to the combination of the MG ports, the hatches just behind the turret and the engine cover grates. But I am a ways off from that so I got time to figure it out.


Today I had what is hopefully my only Homer Simpson “DOH!” moment for awhile. I had an idea of how to redo the mantlet cover so I set about making a cast of the one in another T-55 kit from the stash. Pressed into some Silly Putty and then spent what seemed like forever sanding, filing and trimming to get it to fit the turret from that other T-55 kit. Then I realized that I really need to make it fit the cover I cut off the Enigma turret.


THEN I realized that what I planned to do to the resin cover I can just as easily do to the cover that is already glued in place. And that part was never going to come off anyway.


1st I sanded off the high spots of the folds. I masked off the turret with Bare Metal foil this because you can burnish down and see exactly where to cut out the part you don’t want. Then I brushed on some slightly thinned green putty which was then wiped wit a cotton pad wet with acetone. When this dries I will go over it with a micro mesh sheet to smooth it more. Doing this took maybe 15 minutes compared to trying to get the resin piece correct to do the same thing. Like I said… “DOH!”


wing_nut
Visit this Community
New Jersey, United States
Joined: June 02, 2006
KitMaker: 1,212 posts
Armorama: 674 posts
Posted: Wednesday, May 02, 2012 - 09:24 AM UTC
Can someone please tell me what is the basis for the Enigma photographed by Jean Thomas Rembert on the Prime Portal? And where they where taken?

http://www.primeportal.net/tanks/jean_thomas_rembert/t-55_enigma/
Spiderfrommars
Visit this Community
Milano, Italy
Joined: July 13, 2010
KitMaker: 3,845 posts
Armorama: 3,543 posts
Posted: Wednesday, May 02, 2012 - 10:31 AM UTC
I think that pics were taken at Mourmelon museum

Surely is an Enigma derived from a Russian t-55.
Looking at the details

Rail around the engine deck


Chamfered MG loophole


Trapezoidal engine hatch to the right of the deck which has the hinges near the board of the upper hull


Rectangular rear hatches covered by two grilles


Look here for a comparison with a Russian T-55
http://dishmodels.ru/wshow.htm?p=1511
wing_nut
Visit this Community
New Jersey, United States
Joined: June 02, 2006
KitMaker: 1,212 posts
Armorama: 674 posts
Posted: Wednesday, May 02, 2012 - 11:04 AM UTC
Thanks for the response. A midst my confusion I that's what I thought. Another question... or two.

When you say "Rail" is this what you mean?


On the Mourmelon example, the rows of bolts under the glacis are not there. They are prominent on the Bovington and the Tamiya kit. What was they purpose and could a Russian based Enigma have these?


Spiderfrommars
Visit this Community
Milano, Italy
Joined: July 13, 2010
KitMaker: 3,845 posts
Armorama: 3,543 posts
Posted: Wednesday, May 02, 2012 - 05:29 PM UTC

Quoted Text

When you say "Rail" is this what you mean?


Yes, I meant that detail, I'm sorry, probably I had to use another term to describe it...maybe "frame" would have been better


Quoted Text

On the Mourmelon example, the rows of bolts under the glacis are not there. They are prominent on the Bovington and the Tamiya kit. What was they purpose and could a Russian based Enigma have these?


Usually all the T-55s (Russian, Polish or Czech, it doesn't matter) have them, wheras early t-54-A wasn't provided

http://www.fotovalkirumodelism.com/page.php?page=207


http://dishmodels.ru/wshow.htm?mode=P&vmode=T&p=2004&id=83543&tp=w


http://dishmodels.ru/wshow.htm?np=1&p=1801&vmode=T#blockpre


The bolts are the supports for the dozer blade and KMT mine rollers (here an Eastern German exemplar)...


...as well as the bolts which usually are on the upper glancis


Mormelon exemplar doesn't have nor the upper nor the lower bolts, so it couldn't carry dozer blades and mine rollers. Maybe the bolts were removed by Iraqi engineers during the modification of the original T-55 exemplar

cheers

BBD468
Visit this Community
Texas, United States
Joined: March 08, 2010
KitMaker: 2,465 posts
Armorama: 2,383 posts
Posted: Wednesday, May 02, 2012 - 06:17 PM UTC
Hey Marc,

Just found this build. awesome! im subscribed. looks great so far. Will follow closely.

Ah! Mauro, you are the man with the goods. What would we all do without you bro!

Gary
Spiderfrommars
Visit this Community
Milano, Italy
Joined: July 13, 2010
KitMaker: 3,845 posts
Armorama: 3,543 posts
Posted: Wednesday, May 02, 2012 - 07:37 PM UTC

Quoted Text

Mormelon exemplar doesn't have nor the upper nor the lower bolts, so it couldn't carry dozer blades and mine rollers. Maybe the bolts were removed by Iraqi engineers during the modification of the original T-55 exemplar


I've checked my references and I must rectfy.
Some T-55 (especially the earlier ones) weren't designed to carry the KMT devices so they weren't provided with the bolts. Lots of T-54 and T-55 exemplars have been later retro-fitted to do it.

Here some of them


http://svsm.org/gallery/T-55_little

The original T-55 which was transformed to the Enigma tank now preserved at Mourmelon museum, must have been a tank belonged to this production batch

Here you can find a walkaround of a T-55AD with KMT-5M Mine Roller

http://dishmodels.ru/wshow.htm?p=1772


Quoted Text

Ah! Mauro, you are the man with the goods. What would we all do without you bro!


Thanks Gary, I'm only glad to help if I can
bison126
Visit this Community
Correze, France
Joined: June 10, 2004
KitMaker: 5,329 posts
Armorama: 5,204 posts
Posted: Wednesday, May 02, 2012 - 09:13 PM UTC

Quoted Text

Can someone please tell me what is the basis for the Enigma photographed by Jean Thomas Rembert on the Prime Portal? And where they where taken?

http://www.primeportal.net/tanks/jean_thomas_rembert/t-55_enigma/


As Mauro already told, this tank is preserved at Mourmelon military camp. This is not a museum per se so you can only access the vehicles displayed there during the annual open days.
This tank was a Russian model as proves the engine deck with the wading rail (frame).

Olivier
Spiderfrommars
Visit this Community
Milano, Italy
Joined: July 13, 2010
KitMaker: 3,845 posts
Armorama: 3,543 posts
Posted: Thursday, May 03, 2012 - 07:49 PM UTC
Another observation Marc

Maybe you've already noticed, but anyway. Although it must have been derived from a Polish T-55, Enigma preserved at Bovington has the OMSh track links

http://svsm.org/albums/T-55-Enigma/IMG_1543.jpg

Most of the Polish and Czech T-55 actually has the RMSh track links

https://lh5.googleusercontent.com/-JSDUiQjSpiU/RrrfhB4mlTI/AAAAAAAAJY0/z5lb8eQ6QoU/s800/P1240787.jpg

http://svsm.org/albums/T-55_little/IMG_0593.jpg

...and consequently a 14 teeth sprocket wheel

http://svsm.org/albums/T-55_little/IMGP1222.jpg

Also the exemplar preserved at Aberdeen museum is a "Polish derived Enigma" but it has the RMSh track links

http://data.primeportal.net/tanks/adam_vukich/t-55_enigma/T-55_Enigma_04.jpg

That it means that Bovington tank it must have been built starting from an EARLY Polish T-55.

https://picasaweb.google.com/111297738648320419265/T55A_MWP

https://picasaweb.google.com/111297738648320419265/T55_Poznan_Cytadela

cheers

vonMarshall
Visit this Community
United Kingdom
Joined: July 30, 2010
KitMaker: 192 posts
Armorama: 165 posts
Posted: Thursday, May 03, 2012 - 08:28 PM UTC
Love the T-55 and just ordered my Enigma. Really impressed with the results you have got on your weld seams and will be trying some of your techniques.
wing_nut
Visit this Community
New Jersey, United States
Joined: June 02, 2006
KitMaker: 1,212 posts
Armorama: 674 posts
Posted: Friday, May 04, 2012 - 12:20 AM UTC
Thanks for the feed back, compliments and all the additional info. The great thing is all the great links that are being posted. No lack of good refs for sure. Again I thank you.

Noticing things like what tracks on are what vehicles is way beyond my knowledge.

Seems to me the easiest basis to portray with this kit is the Russian chassis. I can change the ports on the front of the turret to the straighter ones easy enough. Adding the rail on the engine deck looks to be easier than changing a trapezoid to a rectangular hatch. I'll get what I can right but there will likely be "inaccuracies". I put that in quotes because with these kinds of things there may well be one buried in the sand out there somewhere that had parts swapped and changed and who knows, I may be making an exact copy.

I ordered a copy of the April Military Illustrated Modeller with the Enigma built by Marcus Nicholls. It arrived yesterday and wow, what a beauty of a model that is. We had the same idea about the file for the welds... but I like his file much better than mine. Off to the store... again.
Spiderfrommars
Visit this Community
Milano, Italy
Joined: July 13, 2010
KitMaker: 3,845 posts
Armorama: 3,543 posts
Posted: Friday, May 04, 2012 - 02:34 AM UTC

Quoted Text


Seems to me the easiest basis to portray with this kit is the Russian chassis. I can change the ports on the front of the turret to the straighter ones easy enough. Adding the rail on the engine deck looks to be easier than changing a trapezoid to a rectangular hatch. I'll get what I can right but there will likely be "inaccuracies". I put that in quotes because with these kinds of things there may well be one buried in the sand out there somewhere that had parts swapped and changed and who knows, I may be making an exact copy.


It seemed to me a far easier scratchbuilding only the D-41 kit part to depict the Polish engine deck


It's just a matter of taste

However, adding the wading rail (frame) on the Tamiya kit is quite difficult...there are a very little room beetween hatches and main grills...
Cheers
bison126
Visit this Community
Correze, France
Joined: June 10, 2004
KitMaker: 5,329 posts
Armorama: 5,204 posts
Posted: Friday, May 04, 2012 - 03:23 AM UTC

Quoted Text


Adding the rail on the engine deck looks to be easier than changing a trapezoid to a rectangular hatch.


Marc, this won't be that easy in fact. I did it myself for my own Engima and had to build two frames as the part is very fragile and breaks easily when you handle it.


Another difficulty is that the frame is not laying horizontally. It is a bit angled so check your reference.

Olivier
wing_nut
Visit this Community
New Jersey, United States
Joined: June 02, 2006
KitMaker: 1,212 posts
Armorama: 674 posts
Posted: Tuesday, May 15, 2012 - 09:25 AM UTC
Finally some progress worth taking a few pics. Been kind of bouncing around in the build order. I know everything needs to get done but I am not usually so all over the place.

I cut off the end of the Voyager barrel, added a small section of brass tube and glued on the end of the barrel from the kit. It was then drilled out with a #34 bit to get it too a scale 100mm. The bore was just shy of 90mm. May not be perfect but I think it’s much better than the stock Voyager barrel


The bits and bobs that I’ve been getting to are new fuel tank and hatch handles, welds, welds and more welds, and making a new lower front glacis since it was easier then cutting of the molded on bolts and filling the holes.


And A question (gee what a surprise)… The side pieces that fill in under the turret sides… The seam was ugly so I filled and sanded it but what should be there? There are welds under the sides on the curved part so I am assuming a weld, where the green line is, that is ground flush. Is that correct?


wing_nut
Visit this Community
New Jersey, United States
Joined: June 02, 2006
KitMaker: 1,212 posts
Armorama: 674 posts
Posted: Saturday, June 02, 2012 - 04:04 AM UTC
When my current modeling apathy isn’t strong enough to keep me from the bench, I have been able to make a bit of progress. It's tough to stay interested when the going is slow. But I am plugging away.

Added conduits and wiring for the formation lights. Fuel lines with scratched band clamps.


I used some Plastruc angle strips to make the rail on the rear deck. The support bar for the rear armor is molded to the back piece and had to be cut off to separate the bocks so the welds could be “uglified”. A new crossbar was scratched and Tichy bolts added.


wing_nut
Visit this Community
New Jersey, United States
Joined: June 02, 2006
KitMaker: 1,212 posts
Armorama: 674 posts
Posted: Monday, June 11, 2012 - 08:20 AM UTC
Slowly but surely I get closer to one of those big landmarks in a build…a coat of paint. And only 9 days between updates instead of 18 last time.

Some tedious work getting the searchlights done with some real micro PE pieces. They don’t show well in the photos but I used a lot of Scale Hardware brass hew bolts and hex nuts. Gotta remember to do the wiring


Made a new cage for the headlight out of wire. Brass tune for the conduit and wire from a cheap pair is ear bud headphones.


The exhaust guard was made by burnishing lead foil over the kit part and used the PE mounting brackets.


I started the turret armor by cut off the tab on the back, since it is centered on the cut line for separating the blocks, and made new ones for when they get attached to the brackets. . Once cut some .005 plastic card was glued on the open sides top makes sure they were solid if looking into the gap. After these were taken I did some of the obligatory weld “crapping up”

 _GOTOTOP