_GOTOBOTTOM
Constructive Feedback
For in-progress or completed build photos. Give and get contructive feedback!
"Civilized" Opel Blitz (Tamiya, 35th)
emroglan
Visit this Community
Istanbul, Turkey / Türkçe
Joined: December 16, 2004
KitMaker: 1,163 posts
Armorama: 842 posts
Posted: Thursday, April 26, 2012 - 09:06 PM UTC
Hello all,

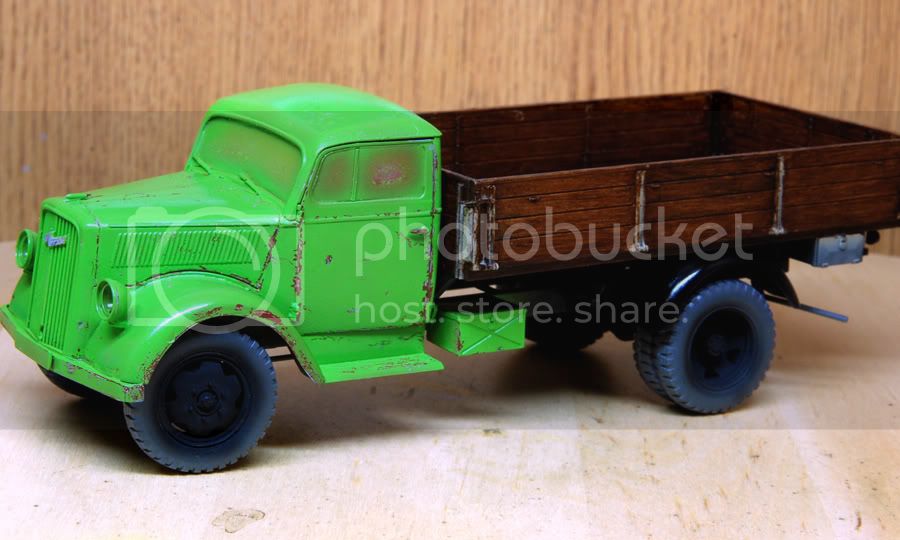
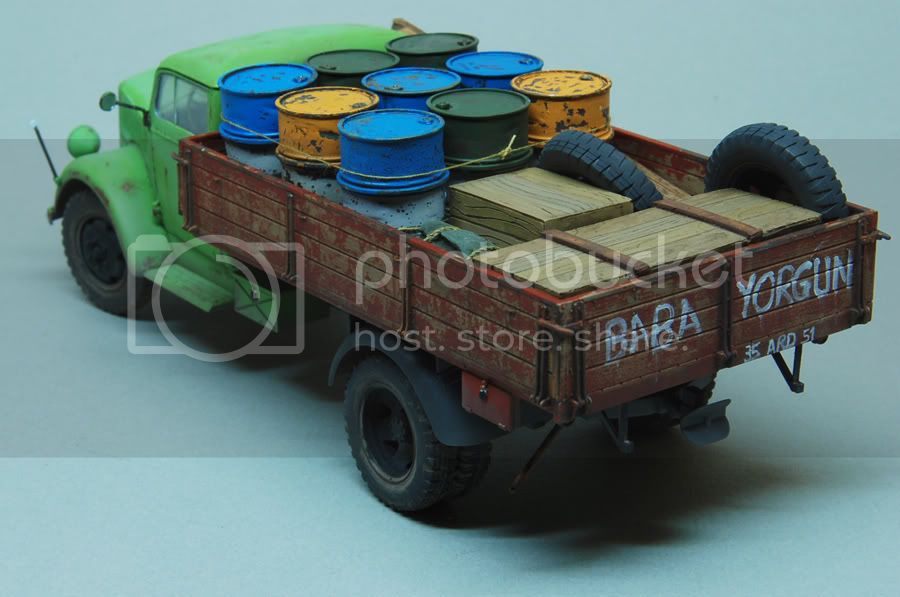
I wanted to build a civilian truck just for fun. In 1950s and 1960s, lots of foreign trucks were imported to Turkey and they had to serve for very long periods since imports were restricted and the demand was never fully satisfied.

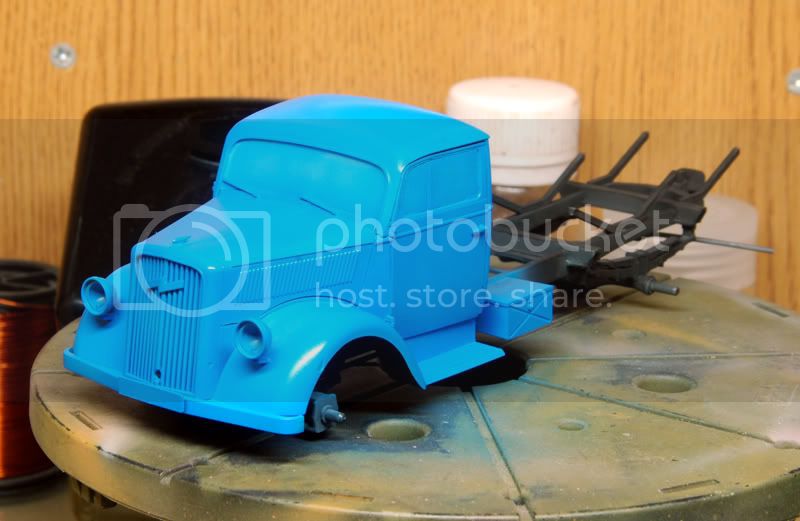
Since I liked working in a familiar scale, I chose Tamiya's Opel Blitz. At the time I was also curious about the kit was well. Blitz trucks were a familiar sight in Turkey in the past, some can even be seen in old movies.

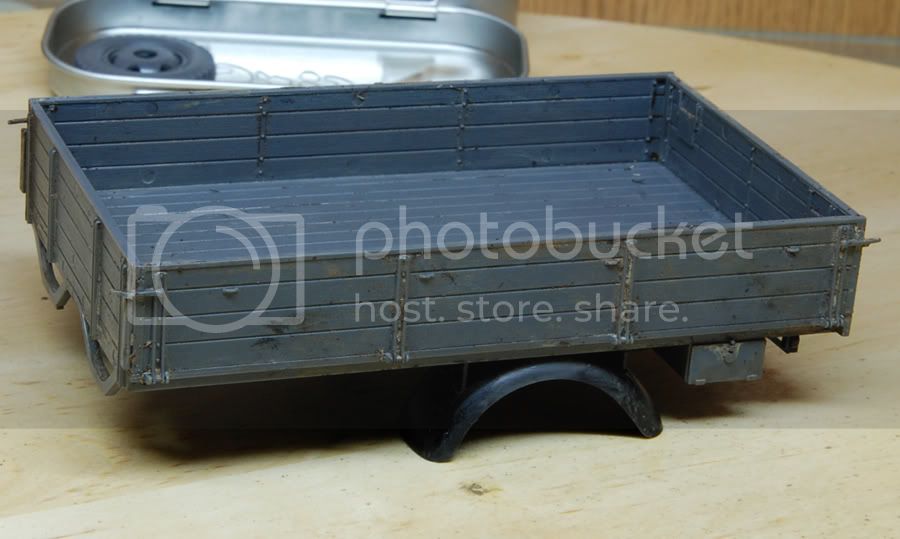
My initial project began in 2010. This was how it was going to be before I ruined everything.


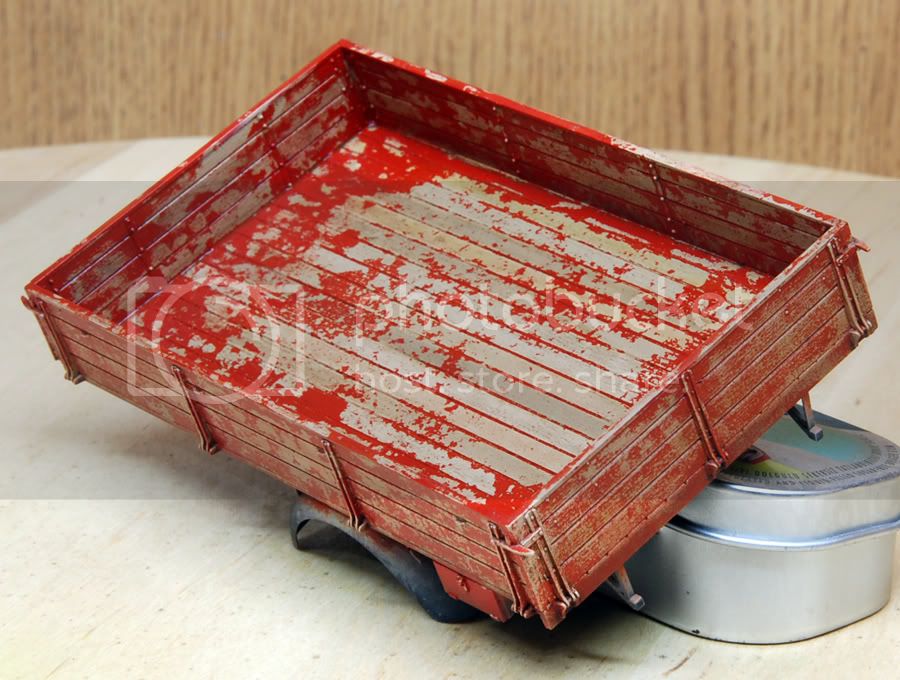
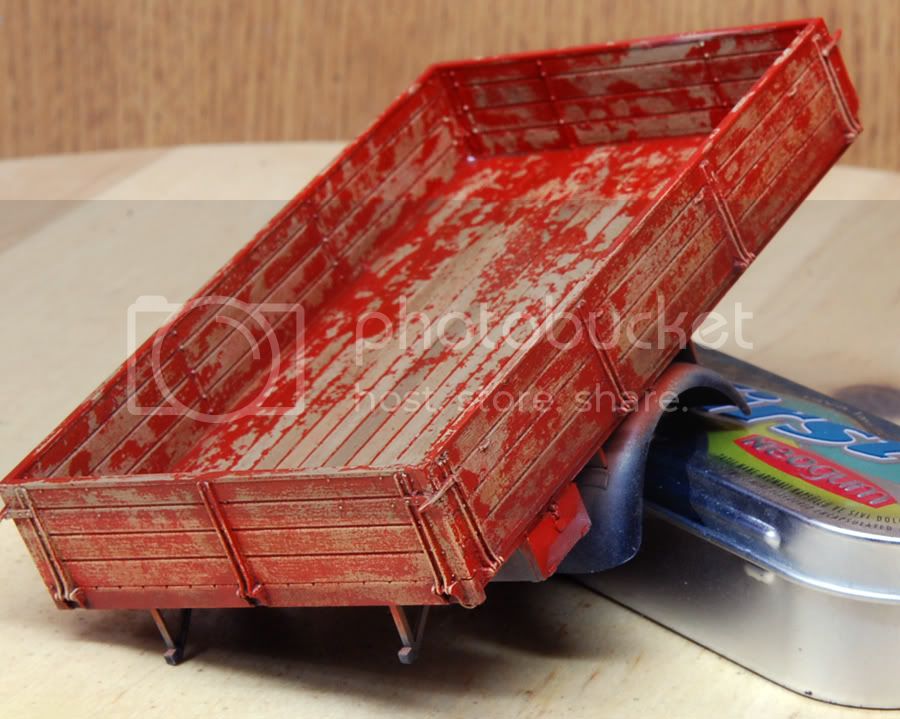
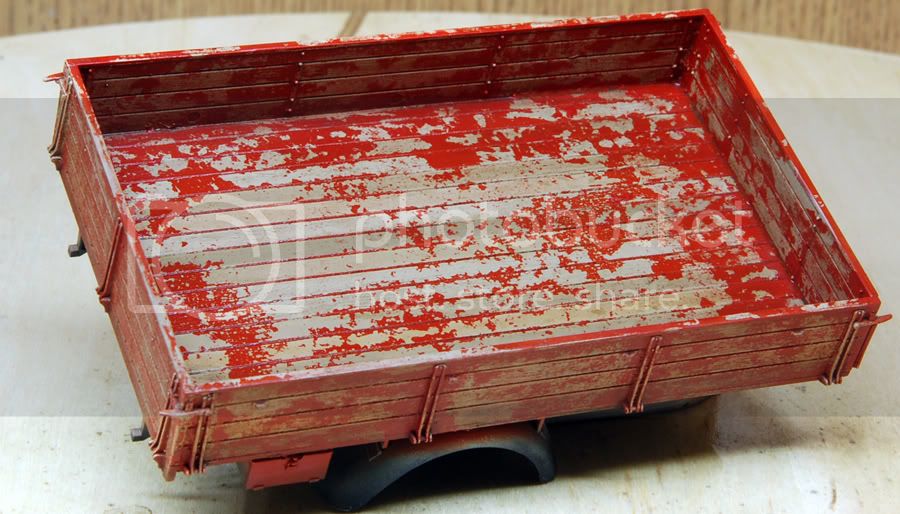
I then tried to try hairspray method... but I held the spray too close to the model and the spray had alcohol in it. The entire blue paint suddenly bubbled, cracked and melted in several places, ruining the surfaces of the entire truck. The project was abandoned and the truck was forgotten somewhere deep in my shelves.

I was cleaning my shelves and trying to complete my half-build models when I found the ruined truck.
emroglan
Visit this Community
Istanbul, Turkey / Türkçe
Joined: December 16, 2004
KitMaker: 1,163 posts
Armorama: 842 posts
Posted: Thursday, April 26, 2012 - 10:09 PM UTC
Upon inspection, I realized that the model's surface really looked beaten. There were cracks everywhere, the surface was uneven and rough as the paint bubbled and melted. I wanted to build a very beaten truck, so I decided to keep the surface as it was. It would actually form a very good base for weathering.

To protect everything and act as primer, I sprayed Mr Surfacer 1200 over the entire truck cab and the project was restarted.


I wanted to attempt to use the hairspray method again. As a result, to make the base rust color that would show through I mixed Tamiya's XF-64 Red Brown with some flat black and red, then sprayed this on the truck cab. When dry, it was also sprayed with hair spray.


I actually planned to repaint the truck in blue... but my wife intervened and asked if she could pick the color for luck this time. I said okay and of course she picked her favorite color: green. I decided to use X-15 Light Green from Tamiya. Well, I think they should have called it "Ninja Turtles Green" instead of light green!


After chipping the green color away, this is how the truck looked. Hmmm, I'm not happy with that wood color, it's too dark and reddish. I want to paint the cargo bed red and it won't look good.


emroglan
Visit this Community
Istanbul, Turkey / Türkçe
Joined: December 16, 2004
KitMaker: 1,163 posts
Armorama: 842 posts
Posted: Thursday, April 26, 2012 - 10:14 PM UTC
The paint on the cargo bed was removed with rubbing it with lots of alcohol. I think I got high at some point because of the alcohol fumes.

Back to the beginning:


For the wood color, I chose Tamiya's XF-78 Wooden Deck Tan. The cargo bed was painted:


Then, I added yellow and brown tones to my base color and colored the planks to enrich the wooden look. It was then washed with dark brown and black oil colors.


emroglan
Visit this Community
Istanbul, Turkey / Türkçe
Joined: December 16, 2004
KitMaker: 1,163 posts
Armorama: 842 posts
Posted: Thursday, April 26, 2012 - 10:17 PM UTC
Well, it looks better now...

Previous:


Current:


It's now time to add some weathered color to that cargo bed. To achieve maximum contrast with the green, I decided to go for red. I sprayed hair spray on my cargo bed, waited for it to dry and then painted it with Tamiya's XF-7 Flat Red.

Yes, I think I went berserk while chipping the red!


Nito74
Visit this Community
Lisboa, Portugal
Joined: March 04, 2008
KitMaker: 5,386 posts
Armorama: 4,727 posts
Posted: Thursday, April 26, 2012 - 10:54 PM UTC
Looks great.
Maybe chipping the cabin some more would make things even.
emroglan
Visit this Community
Istanbul, Turkey / Türkçe
Joined: December 16, 2004
KitMaker: 1,163 posts
Armorama: 842 posts
Posted: Thursday, April 26, 2012 - 11:49 PM UTC
Hello John,

I actually didn't want to chip the cabin too much. I do have a large warehouse near my house and I see lots of old trucks that transport agricultural products from villages every day. From what I can see, the wooden parts are weathered more than the metal truck cabs. That's why I went overboard with the cargo bed.

I also wanted to build a busy looking truck, so decided to fill up the cargo bed with lots of barrels. It seemed 15 of them were required to fill the back completely. I also decided to weather the barrels by using the hairspray method. Since the barrels would be in two colors, the chipping was also done in two stages.

Lots of barrel parts to assemble!


The truck also received some more filters to make the cracks and rust spots more visible.


First stage of barrel painting: barrels painted in rust color, hairspray applied to middle, painted white and chipped away.

emroglan
Visit this Community
Istanbul, Turkey / Türkçe
Joined: December 16, 2004
KitMaker: 1,163 posts
Armorama: 842 posts
Posted: Thursday, April 26, 2012 - 11:54 PM UTC
At this stage some of my fellow modeler friends interfered. Some said filling the cargo bed only with barrels would make it look too boring and ordinary. Others said that I should not load up barrels at all and that I should find something interesting.

Well, I had to work for an hour for those 15 barrels, so I wasn't going to dump them all away. As a result, I chose to use 9 barrels which fills the track half-way. The barrels were painted in different colors and weathered.


I went through my stash to find a suitable load for my truck. I think these did the trick.


The resin items come from Plusmodel. The wooden boxes are from a box set, while the packaged tarp comes from a vehicle accessory set.


The wooden boxes were painted...


As well as the wheels, the packed tarp and the metallic parts of the cargo bed. I'm getting there...


emroglan
Visit this Community
Istanbul, Turkey / Türkçe
Joined: December 16, 2004
KitMaker: 1,163 posts
Armorama: 842 posts
Posted: Thursday, April 26, 2012 - 11:57 PM UTC
I turned my attention to the Opel to complete the project. The wheels were smeared with dust and some mud. The wheel wells and the lower parts of the truck were also sprayed with dust color and weathered with pigments. The metallic parts of the cargo bed were rusted, as well as the exhaust pipe.


emroglan
Visit this Community
Istanbul, Turkey / Türkçe
Joined: December 16, 2004
KitMaker: 1,163 posts
Armorama: 842 posts
Posted: Friday, April 27, 2012 - 12:11 AM UTC
The load was secured on the truck. I put some wooden planks at the back that would help them unload the barrels. I also added a license plate and added a writing at the back of the truck using white oil color. Truck writings are very famous in Turkey, we even have something called "Truckers' philosophy". This one says Baba Yorgun, which literally means "Papa (is) Tired".

Well, I think I had fun with this project and I'm glad I was able to complete a model after a 2 year abandonement.


ironwork
Visit this Community
Viana do Castelo, Portugal
Joined: January 12, 2012
KitMaker: 216 posts
Armorama: 194 posts
Posted: Friday, April 27, 2012 - 01:06 AM UTC
Cool !
Nito74
Visit this Community
Lisboa, Portugal
Joined: March 04, 2008
KitMaker: 5,386 posts
Armorama: 4,727 posts
Posted: Friday, April 27, 2012 - 01:42 AM UTC
It turned out a great project, ressurecting an old damaged kit into a great build !
Tanksami
Visit this Community
Victoria, Australia
Joined: August 06, 2011
KitMaker: 1,314 posts
Armorama: 1,217 posts
Posted: Saturday, April 28, 2012 - 12:16 PM UTC
Hi Emroglan,

Great idea & lovely paint job as much as I love what you have done with the truck bed I thought it looked fantastic "unpainted" lol how did you get such great wood colours??

Cheers mike
bossman
Visit this Community
Maine, United States
Joined: May 05, 2002
KitMaker: 30 posts
Armorama: 28 posts
Posted: Saturday, April 28, 2012 - 01:12 PM UTC
Great looking model and kudos to you for not trashing it and bringing it back to life.
emroglan
Visit this Community
Istanbul, Turkey / Türkçe
Joined: December 16, 2004
KitMaker: 1,163 posts
Armorama: 842 posts
Posted: Saturday, April 28, 2012 - 11:59 PM UTC
Thanks Jon and Bossman!

Mike, for the wood colors... I began painting with XF-78 Wooden Deck Tan. Then I added colors to this base color, for example I mixed Midstone with Deck tan for a yellow tone or Earth with Deck Tan to get a reddish brown tone. If there was too much contrast between planks, I sprayed a very thin XF-78 Deck Tan over it to blend in the colors. If you want polished wood, you can sprey clear Yellow or Clear Orange over the wooden parts.

For more information, I would recommend looking for WW1 era aircraft builds. Those guys need serios wood-work for their aircraft and really do know how to achieve good results! All of the methods I used were taught to me by one such WW1 enthusiast friend.
Grumpyoldman
Staff MemberConsigliere
KITMAKER NETWORK
Visit this Community
Florida, United States
Joined: October 17, 2003
KitMaker: 15,338 posts
Armorama: 7,297 posts
Posted: Sunday, April 29, 2012 - 03:32 AM UTC
Emre, turned out, Nice to see the Blitz in something besides yellow or gray.
jimz66
Visit this Community
Connecticut, United States
Joined: December 15, 2006
KitMaker: 1,165 posts
Armorama: 1,105 posts
Posted: Monday, April 30, 2012 - 02:55 PM UTC
Very nicely done Erme... Great idea and a great project... Well executed.
Spiderfrommars
Visit this Community
Milano, Italy
Joined: July 13, 2010
KitMaker: 3,845 posts
Armorama: 3,543 posts
Posted: Monday, April 30, 2012 - 06:54 PM UTC
I've seen something similar here

http://dishmodels.ru/gshow.htm?p=5085

That's a stunning job Emre, very indpiring and well executed

Congrats indeed!
daffyduck
Visit this Community
United States
Joined: September 07, 2006
KitMaker: 164 posts
Armorama: 155 posts
Posted: Friday, May 04, 2012 - 02:12 PM UTC
Great idea for resurrecting a kiT!

I'm trying to resurrect an old Tamiya T-34, so you've inspired me!

Paul
Spiderfrommars
Visit this Community
Milano, Italy
Joined: July 13, 2010
KitMaker: 3,845 posts
Armorama: 3,543 posts
Posted: Friday, May 04, 2012 - 05:19 PM UTC

Quoted Text

Great idea for resurrecting a kiT!

I'm trying to resurrect an old Tamiya T-34, so you've inspired me!

Paul


...Do you mean that you are going to reproduce a T-34 transformed in a groceries van?
emroglan
Visit this Community
Istanbul, Turkey / Türkçe
Joined: December 16, 2004
KitMaker: 1,163 posts
Armorama: 842 posts
Posted: Friday, May 04, 2012 - 06:14 PM UTC

Quoted Text


Quoted Text

Great idea for resurrecting a kiT!

I'm trying to resurrect an old Tamiya T-34, so you've inspired me!

Paul


...Do you mean that you are going to reproduce a T-34 transformed in a groceries van?


Maybe not a groceries van, but something like this? Got me an award a few years back


Spiderfrommars
Visit this Community
Milano, Italy
Joined: July 13, 2010
KitMaker: 3,845 posts
Armorama: 3,543 posts
Posted: Friday, May 04, 2012 - 06:26 PM UTC
There are quite a lot of inspirations about


Great idea Emre, well done!
emroglan
Visit this Community
Istanbul, Turkey / Türkçe
Joined: December 16, 2004
KitMaker: 1,163 posts
Armorama: 842 posts
Posted: Friday, May 04, 2012 - 11:52 PM UTC
The first two are the same tank in England. As far as I know, it was first painted in pink camouflage (you can still the the pink in the first picture on the roadwheels). The owner made a deal with some graffiti groups and each year they repainted the tank with different graffiti.

Well, if you like pink... there's also this one. My wife banished any more pink models after this one!

Spiderfrommars
Visit this Community
Milano, Italy
Joined: July 13, 2010
KitMaker: 3,845 posts
Armorama: 3,543 posts
Posted: Saturday, May 05, 2012 - 12:59 AM UTC

Quoted Text

The first two are the same tank in England. As far as I know, it was first painted in pink camouflage (you can still the the pink in the first picture on the roadwheels). The owner made a deal with some graffiti groups and each year they repainted the tank with different graffiti.

Well, if you like pink... there's also this one. My wife banished any more pink models after this one!


Yes, I've already seen the Hello Kitty AFV

Anyway there are lots other exemples


http://dishmodels.ru/wshow.htm?p=919

http://onlyhdwallpapers.com/wallpaper/beach_graffiti_tank_desktop_1600x1200_wallpaper-238070.jpg

http://i.istockimg.com/file_thumbview_approve/9834674/2/stock-photo-9834674-graffiti-tank.jpg

http://wallpapersgraffiti.com/wp-content/uploads/2011/07/Tank-covered-with-graffiti.jpg

http://1.bp.blogspot.com/_VgSSznn0VD0/Sly4GPoCXsI/AAAAAAAAD4Y/BjXDovF3PJA/s1600/graffiti+tank.jpg

It would be a great idea for a campaing
KKaaNa
Visit this Community
Denizli, Turkey / Türkçe
Joined: October 18, 2014
KitMaker: 1 posts
Armorama: 1 posts
Posted: Saturday, October 18, 2014 - 12:20 AM UTC
Gerçekten inanılmazsın, tebrik ederim. Çok hoşuma gitti bu çalışman.
 _GOTOTOP