Campaigns
Where Armorama group builds can be discussed, organized, and updates posted.
Tank Destroyer/SPG Campaign
ltb073
Visit this Community
New York, United States
Joined: March 08, 2010
KitMaker: 3,662 posts
Armorama: 3,078 posts
Posted: Thursday, September 06, 2012 - 03:34 AM UTC
@ Tony great job on your finish the weathering and tracks look great, are they Magic Tracks also what kit is that I think I have 1 in my stash
@ matt your what if camo looks pretty cool i say what the hell go with it
Great work guys
Tojo72
Visit this Community
North Carolina, United States
Joined: June 06, 2006
KitMaker: 4,691 posts
Armorama: 3,509 posts
Posted: Thursday, September 06, 2012 - 03:52 AM UTC
Thanks guys,great campaign

Yes Sal,they are magic tracks.It is DML #6415 a 2 in 1 kit
1721Lancers
Visit this Community
England - East Anglia, United Kingdom
Joined: March 21, 2012
KitMaker: 1,673 posts
Armorama: 1,640 posts
Posted: Thursday, September 06, 2012 - 06:26 AM UTC
Hi all, some real cool stuff going here, keep it up

@Matt S. nice build and a good tip with the "Future" as glue.

@Matt N: lovely looking kit that Italeri, I did one years ago. Crazy camo you got there, can´t wait to see it finished

@Anthony: Fantastic Su 100, I´ve never realised how long the barrel was till now

@Lap: nice mate, I see your having more fun than I with Ardelt version of this. What tracks are you going to use?

Paul
Cam
#275
Visit this Community
Alberta, Canada
Joined: March 01, 2006
KitMaker: 174 posts
Armorama: 141 posts
Posted: Thursday, September 06, 2012 - 03:03 PM UTC
The front and rear of this vehicle are mirror images of each other and must be kept strait as there are some different fittings on each end. The plastic is softer than Dragon or Tamiya plastic and this makes it relatively easy to clean the mold lines off the springs.
Pictures show 4 nuts on the top and bottom of the steering knuckle holder and what looks like 2 drain plugs in the outer and 3 plugs in the inner faces. The brake lines run through this area but I can't find a pic of where they enter the hull. I don't like the rubber tires, they are hard to clean up and fit very loosely. Azimut makes a resin wheel set that I have ordered.
The next step is to put 26 very small photoetched fasteners on the front glacis, and another 26 on the rear.
BigSmitty
Visit this Community
Minnesota, United States
Joined: October 01, 2008
KitMaker: 597 posts
Armorama: 439 posts
Posted: Thursday, September 06, 2012 - 03:27 PM UTC
Update time on the StuG III...Tonight building was focused on the interior (or lack thereof), the gun assembly, the mantlet, and associated odds and ends. By the end of the night, all I am left with are the Magic Tracks. I have some Model Kasten tracks, but after looking at them I don't think they are the right ones for this kit. The tracks are 40cm SK-22, but the guidehorns aren't open like the kit tracks are, and I think the open guidehorns are right for an early G (1943 time frame). Maybe a late G, who knows. Anyways, on with the photos!

Breech, mantlet and barrel test fit to see if everything lines up. It did...


I think I got the MG shield right, using the front half of the loader hatch to prop the shield up, using a tab that conveniently mated up to a notch in the gun shield.


Some assorted sub assembly shots:


That's all for tonight, tomorrow it's a night with the M2A2 ODS for the APC/AFV campaign.
jkb_sprint
Visit this Community
Thessaloniki, Greece / Ελλάδα
Joined: April 23, 2012
KitMaker: 402 posts
Armorama: 394 posts
Posted: Friday, September 07, 2012 - 02:35 AM UTC
@ Cam, i really like that vehicle. That's a lot of PE you have to deal with. Good luck! How is the kit in terms of fit?
@ Matt very nice clean and detailed work! Waiting to see more.
Cam
#275
Visit this Community
Alberta, Canada
Joined: March 01, 2006
KitMaker: 174 posts
Armorama: 141 posts
Posted: Friday, September 07, 2012 - 03:21 AM UTC
So far the fit has been fairly good. I don't like the loose fit of the tires on the rims but the hull to chassis fit is perfect. I glued the top and bottom of the turret together and it will need a bit of filler.
Bluestab
Visit this Community
South Carolina, United States
Joined: December 03, 2009
KitMaker: 2,160 posts
Armorama: 1,906 posts
Posted: Friday, September 07, 2012 - 04:52 AM UTC
Update.

At this point she's assembled as much as possible and ready for paint. I masked the tracks with plastic wrap. And off to paint.


And back from paint. Let it sit overnight to dry. Finished assembly. And decals added. I went with a Soviet vehicle that is on display at Kublinka.


Decals And then the drybrushing and dark wash to bring out the details. And the little detail painting and touch-ups.


At this point I am declaring my ASU-85 done. I'll wait a few days before putting any pictures in the Gallery. That'll give me time to catch anything I have missed.
1721Lancers
Visit this Community
England - East Anglia, United Kingdom
Joined: March 21, 2012
KitMaker: 1,673 posts
Armorama: 1,640 posts
Posted: Friday, September 07, 2012 - 05:11 AM UTC
Hi Alex,
lovely mate , I´ve gotta get one.
Paul
SHAKY962
Visit this Community
Buenos Aires, Argentina
Joined: May 21, 2012
KitMaker: 765 posts
Armorama: 438 posts
Posted: Friday, September 07, 2012 - 05:13 AM UTC
Cam: I will follow your progress with interest, the Panhard is an ugly AFV.....

Matt: The work in your Stug is wonderful!!!!

Alex: FIrst time wich I see an ASU-85.... I like it
BigSmitty
Visit this Community
Minnesota, United States
Joined: October 01, 2008
KitMaker: 597 posts
Armorama: 439 posts
Posted: Friday, September 07, 2012 - 07:53 AM UTC
@Alex,

I'm doing mine the same way, parade vehicle. Only way to display that awesome VVS decal on the front of the ASU. Once the StuG is done, I may break it out, or wait until the next "Get 'er Done" campaign starts...
PantherF
Visit this Community
Indiana, United States
Joined: June 10, 2005
KitMaker: 6,188 posts
Armorama: 5,960 posts
Posted: Friday, September 07, 2012 - 08:04 AM UTC
Man, your ASU-85 looks great Alex. Makes me want one even more now.


~ Jeff
Tojo72
Visit this Community
North Carolina, United States
Joined: June 06, 2006
KitMaker: 4,691 posts
Armorama: 3,509 posts
Posted: Friday, September 07, 2012 - 09:34 AM UTC
Very cool vehicle Alex,and a great job.
Bluestab
Visit this Community
South Carolina, United States
Joined: December 03, 2009
KitMaker: 2,160 posts
Armorama: 1,906 posts
Posted: Friday, September 07, 2012 - 11:03 AM UTC
Thanks all. I noticed I messed up the fenders. I'll take care of those for the gallery pictures.

The kit was fun little build and it's a neat looking little vehicle. The actual vehicle had a limited client list...basically the Soviet and Polish paratroopers. This could be a good subject for the Civil War/Proxy Super Powers Wars Campaign.
kruppw
Visit this Community
Texas, United States
Joined: March 17, 2006
KitMaker: 1,117 posts
Armorama: 1,115 posts
Posted: Friday, September 07, 2012 - 03:05 PM UTC
Well I’m finally back to working on my IT-1. Decided to ditch the engine and build it straight from the box. The basic painting is complete with decals from the spare box since the kit comes with none. I’m trying to keep the weathering to a minimum since these tanks saw very limited services. The figures are from Tank. More to follow soon.


jkb_sprint
Visit this Community
Thessaloniki, Greece / Ελλάδα
Joined: April 23, 2012
KitMaker: 402 posts
Armorama: 394 posts
Posted: Friday, September 07, 2012 - 11:18 PM UTC
@ Alex,that tank looks very nice. Very nice work!
@ Christopher, very nice painting at the tank and the figures. Waiting to see it finished.
Tojo72
Visit this Community
North Carolina, United States
Joined: June 06, 2006
KitMaker: 4,691 posts
Armorama: 3,509 posts
Posted: Saturday, September 08, 2012 - 12:38 AM UTC
Chris,beautiful work on the figures as well as the diffrent shades of green on the tank.
PantherF
Visit this Community
Indiana, United States
Joined: June 10, 2005
KitMaker: 6,188 posts
Armorama: 5,960 posts
Posted: Saturday, September 08, 2012 - 01:15 AM UTC
You can paint all my figures Chris!


~ Jeff
SHAKY962
Visit this Community
Buenos Aires, Argentina
Joined: May 21, 2012
KitMaker: 765 posts
Armorama: 438 posts
Posted: Saturday, September 08, 2012 - 04:09 AM UTC
@Christopher,
excelent work. This version of the T-55 are amazing.
I don´t have words for your figures....... I allways kill my figures when I painting.......
anti-hero
Visit this Community
Tennessee, United States
Joined: March 20, 2005
KitMaker: 420 posts
Armorama: 307 posts
Posted: Saturday, September 08, 2012 - 06:48 AM UTC
Hey there guys! I haven't posted a thing since I signed up, so I thought it might be a good idea to show that I have in fact been making some progress. On much progress, mind you, but some.

But first:
to Alex- That was quick! You did a good job. I really like the finish and the weathering.
to Christopher - Nice Build. The tank and figures look good. I like really like the finish on your kit too.
to John - Really nice build. I acquired an Emil a while back and was thinking of selling it because I didn't think I would build it. But after watching your build, I might have to give it a try.
to Anthony - I like the Su. Good job.
to Sal - Congrats on getting through the 'zwisch! Those mesh screens are a pain!!!
to Matt - Future for the PE ... I'll have to try that as well. PE and I don't get along very well. That might be a good solution for some of my issues.
to Paul - Too bad that kit was such a dog. It looks great though. I really like the cammo!

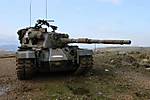
OK. My build. Just showing some progress, that's all. Nothing really exciting here.

What I've got so far.

Those wonderful Trumpeter tracks. Very tedious for me, so this has been going s l o w ly.

I'm going to have this going over some RR tracks so I'm modifying the suspension so it articulates.

That's it really. Until next time.
Later.

Help! Why are my pictures small this time?
Bluestab
Visit this Community
South Carolina, United States
Joined: December 03, 2009
KitMaker: 2,160 posts
Armorama: 1,906 posts
Posted: Saturday, September 08, 2012 - 07:58 AM UTC
Christopher, Nice. Nice vehicle and very nicely done figures. I might be adding that kit to must "must-have" list.

Bill K., Thanks. The build was pretty simple. I don't think it's a weekend build....maybe a long weekend. I built mine over about a 2 or 3 week period. I used it as a jump off for the StuG builds.
BigSmitty
Visit this Community
Minnesota, United States
Joined: October 01, 2008
KitMaker: 597 posts
Armorama: 439 posts
Posted: Saturday, September 08, 2012 - 08:54 AM UTC

Quoted Text


Help! Why are my pictures small this time?


Your photos are linked to the thumbnail images over on photobucket, as referenced by the "th" in the file name.
BigSmitty
Visit this Community
Minnesota, United States
Joined: October 01, 2008
KitMaker: 597 posts
Armorama: 439 posts
Posted: Saturday, September 08, 2012 - 08:56 AM UTC
@Bill K
Here are the full size images from your build. I like 'em!


What I've got so far.

Those wonderful Trumpeter tracks. Very tedious for me, so this has been going s l o w ly.

Nito74
Visit this Community
Lisboa, Portugal
Joined: March 04, 2008
KitMaker: 5,386 posts
Armorama: 4,727 posts
Posted: Saturday, September 08, 2012 - 10:35 AM UTC
@Bill K

Thanks ! It was a fun build. I think you should give it a try !
anti-hero
Visit this Community
Tennessee, United States
Joined: March 20, 2005
KitMaker: 420 posts
Armorama: 307 posts
Posted: Saturday, September 08, 2012 - 03:47 PM UTC

Quoted Text


Quoted Text


Help! Why are my pictures small this time?


Your photos are linked to the thumbnail images over on photobucket, as referenced by the "th" in the file name.


Ahhhhh... it's the "th"!!! Thanks Matt!!!

Is the Stug a pretty pain free build? Seems fairly straight forward. And I agree with the others, good clean work you did. I'm looking forward to the paint.