Armor/AFV: Braille Scale
1/72 and 1/76 Scale Armor and AFVs.
Hosted by Darren Baker
Dragon Panther D (#7494)
firstcircle
Visit this Community
England - South East, United Kingdom
Joined: November 19, 2008
KitMaker: 2,249 posts
Armorama: 2,007 posts
Posted: Monday, September 17, 2012 - 10:55 AM UTC

Quoted Text

One time I finished a minute item and exhaled, and it was gone.


Ahahaha.. that made me laugh. Fortunately there were no small components in front of me. My theory is that sometimes these things either don't hit the floor but disappear into your clothes, or else they stick to your shoe and get crushed to nothing immediately you stand up to look for them.

I was in a craft shop recently looking at beading stuff and noticed that they do these special sticky mats, so that stuff doesn't get lost. They also did these amazingly thin bent pointy pliers as well as what are essentially sprue cutters. I managed to put them all down and then got distracted and forgot to take them to the till...

Anyway, I was wondering about what you're using to thin the part down with. I've kind of noticed sometimes that metal files can have too much of an abrasive effect and seem to pull the plastic apart once you get down to this size - the styrene has a kind of grain that starts to get kicked up and can tear. I've probably bored you with it before, but have you tried a glass nail file? Unlike small metal files they don't flex at all and are super-flat, and the etched-in abrasive texture is very fine, yet being glass is still very effective. Due to the size it is very suitable for keeping flat on the bench, with the component moved against the file using one finger. I have just found it easier to control and more effective and accurate than metal files or emery paper.

If you don't get on with it you could always wash it off and give to someone else...
tread_geek
Visit this Community
Ontario, Canada
Joined: March 23, 2008
KitMaker: 2,847 posts
Armorama: 2,667 posts
Posted: Tuesday, September 18, 2012 - 07:01 AM UTC

Quoted Text

Jan,

Your Panther D is coming along nicely!

I agree that DML seems to be taking a step backward or something with this kit. I have the earlier Panther G in my stash, and its much more complete with the engine detail piece and the PE fret.


@majjanelson Thanks Jeff, I'm glad that you like how it's turning out. I don't know if it was the G model or not but a friend from the local small scale club showed me a Dragon Panther and I was astounded by what this current kit was missing. As I believe I noted earlier in this thread, I checked all Dragon's earlier Panther releases and even their Jagdpanthers and they all came with PE and the engine compartment detail pieces.


Quoted Text

I feel your pain about repeatedly making the Driver's Viewport Bracket over and over. I've made numerous parts for my tiny tigers in 1:144, and it seems they just "disappear". One time I finished a minute item and exhaled, and it was gone.

Keep up the great work!


I think that in this case the descriptive word is definitely either "disappear" or perhaps even vanish.;-) While the part is small, I have dropped and managed to find much smaller parts such as tow hooks without too much difficulty. More on the viewport support further down.

@firstcircle - Matthew,

Pertaining to your first point, I have had small parts lodge in clothing, on a slipper and even stay attached to exposed parts of my arms but I feel that over time I have developed a search procedure that takes most, if not all, eventualities into account. I am sure that it also helps that my work area floor is covered in linoleum and cleaned quite regularly. When one works in this scale, one becomes an expert in analysing or projecting possible trajectories.


Quoted Text

I was in a craft shop recently looking at beading stuff and noticed that they do these special sticky mats, so that stuff doesn't get lost. They also did these amazingly thin bent pointy pliers as well as what are essentially sprue cutters. I managed to put them all down and then got distracted and forgot to take them to the till...


Thanks for this information and I will make a note to check out one of the large craft stores to see about these pliers and possible "sprue cutters." I can see the "sticky mat" causing its own set of difficulties. I currently have my cutting mat lying in a cookie sheet that has raised edges and a high backstop. Very little escapes its capture and that that does is usually launched into the air.

My worst ever circumstance was where I launched a small return roller from my tweezers. I actually heard it fall close by but had the dickens of a time finding it. My SWMBO assisted in the search and after about fifteen minutes it was found. Being a wheel shape it had actually rolled about six feet away and hid under a partly open door.


Quoted Text

Anyway, I was wondering about what you're using to thin the part down with. I've kind of noticed sometimes that metal files can have too much of an abrasive effect and seem to pull the plastic apart once you get down to this size - the styrene has a kind of grain that starts to get kicked up and can tear. I've probably bored you with it before, but have you tried a glass nail file?


I use a full set of jewellers files in various shapes for most shaping and they create quite a smooth finish when used. When more material needs removing I have a small set of Pattern Maker's needle files (in varying shapes) that cut plastic like the proverbial hot knife through butter (and can do a number on your skin too!). In this case I used a mat of extra fine wet/dry sanding film. Unfortunately the part is so small that it is very difficult to manipulate or even hold.

Both my wife and I have checked out manicure sections of various shops looking for potential tools (files, tweezers etc) but most are too large for some of the work I do. As far as sanding/filing goes I do use emery sticks (have a good supply of them) but have never seen any glass files available. I did once buy a file made of some sort of composite ceramic material but found it wears down with use. Especially when the SWMBO finds it particularly convenient for her manicures.

Cheers,
Jan
tread_geek
Visit this Community
Ontario, Canada
Joined: March 23, 2008
KitMaker: 2,847 posts
Armorama: 2,667 posts
Posted: Wednesday, December 12, 2012 - 07:03 AM UTC
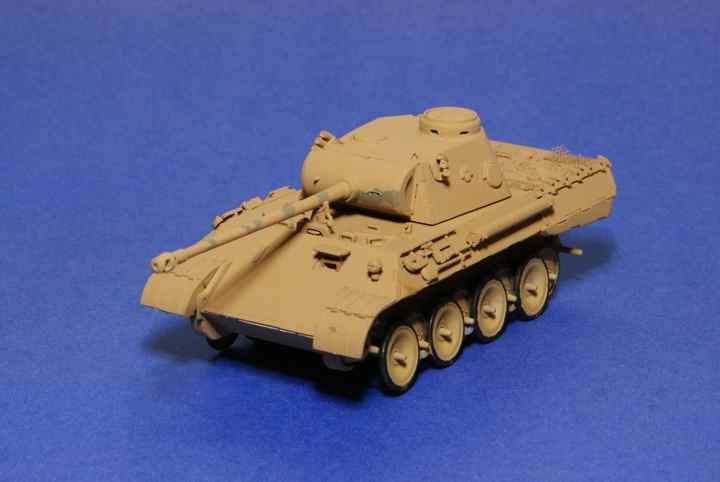
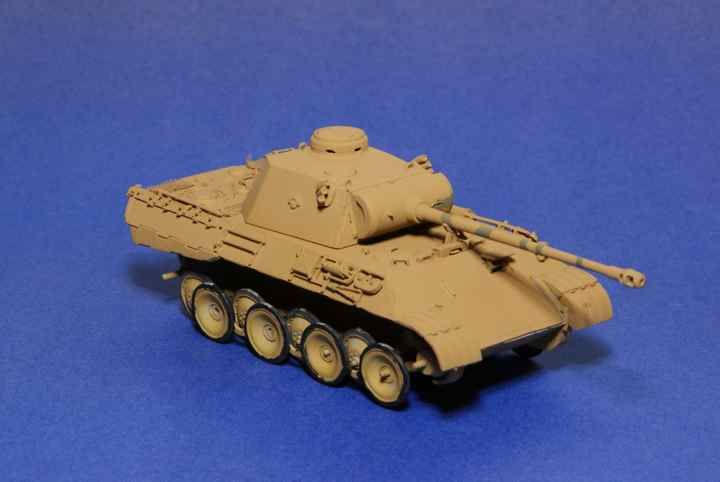
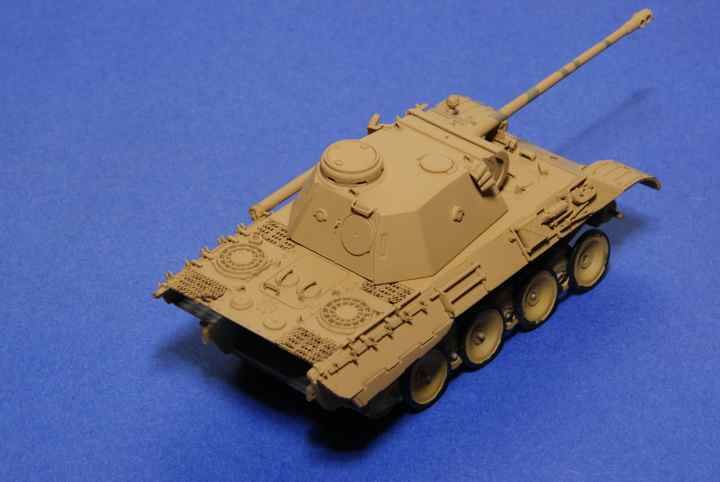
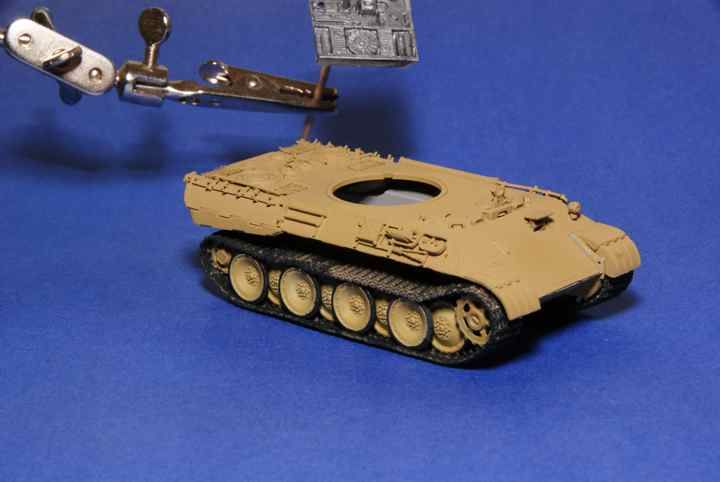
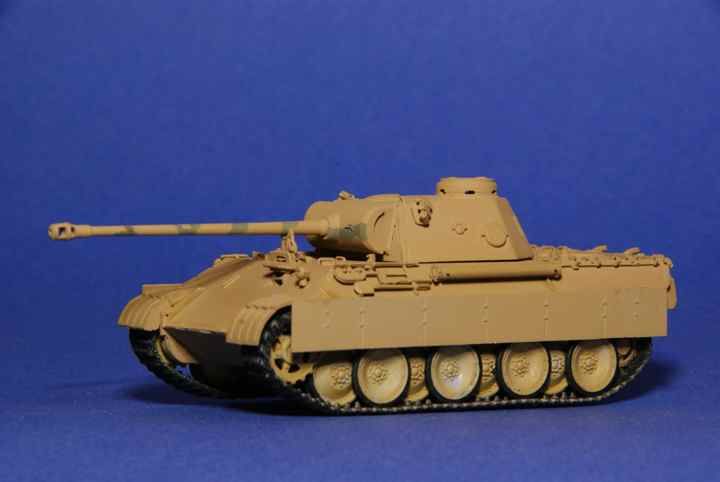
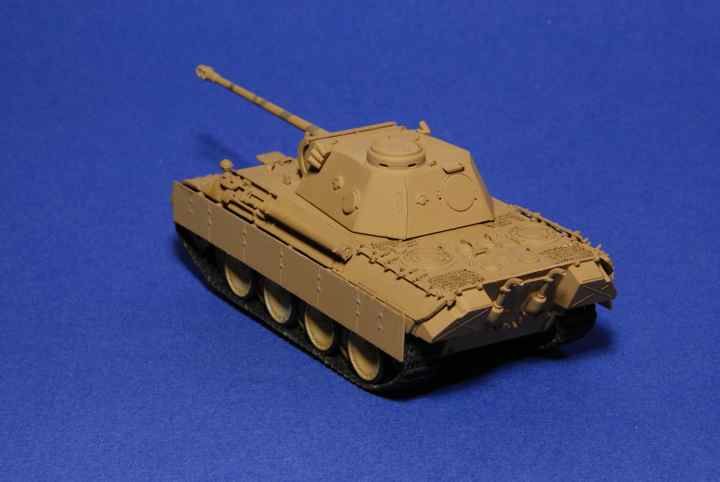
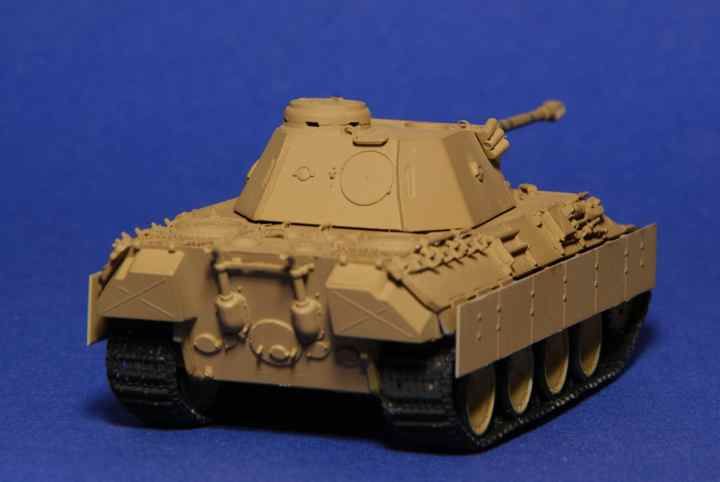
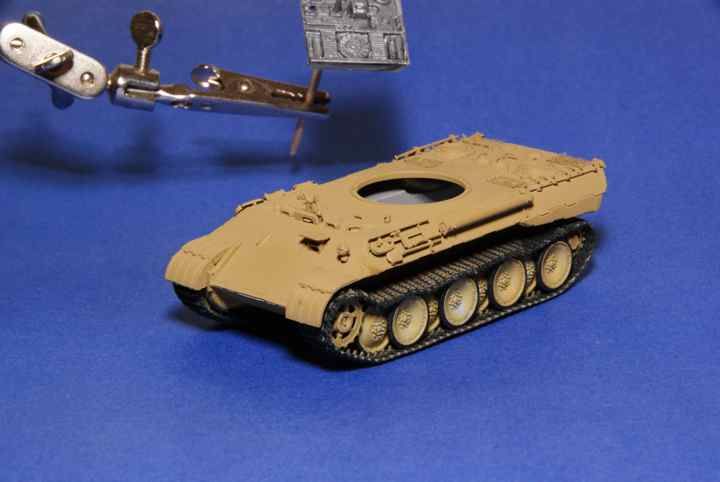
My how time flies! Other projects have kept my Panther on the sidelines but with time running out in the campaign it's entered in, I found some time to work on this beast. There are only about three parts left to attach to the body and then the completion of the running gear. I also finally managed to get the drivers vision port support made after about seven tries at scratch building it. After much research, thought and experimentation I decided to use the wire mesh I had to cover the radiator areas. I found more than enough references that show the circular fan area not covered by mesh so I will leave it that way.

I like to try to paint several items of the same colour at once when I pull out the airbrush. As there was a need for Dark Yellow, the Panther joined the queue and got a base coating. Here's where it stands at the moment (all the sparate major components are just dry fit for the images.


You'll also note that I tried spraying some camo green on the gun barrel and part of the mantlet. The bent screening on the one radiator area was accidental and I've already repaired it.

Cheers,
Jan
woltersk
Visit this Community
Utah, United States
Joined: May 27, 2003
KitMaker: 1,026 posts
Armorama: 654 posts
Posted: Wednesday, December 12, 2012 - 05:25 PM UTC
@Jan--she's coming along well. But you repaired the battle damage to the engine screen?! Some of us work hard to create that effect! It looked so natural.

Is the whole kit going to get more green, and possibly an ambush paint scheme?

Looking forward to seeing more,

Keith
tread_geek
Visit this Community
Ontario, Canada
Joined: March 23, 2008
KitMaker: 2,847 posts
Armorama: 2,667 posts
Posted: Thursday, December 13, 2012 - 05:11 AM UTC
@woltersk - Keith,

Thanks for dropping by and having a look. The damaged screening was unintentional but it could be easily replicated. However, it was my original intention to have this vehicle represent a recent arrival at the front so it might look out of place with "battle damage."

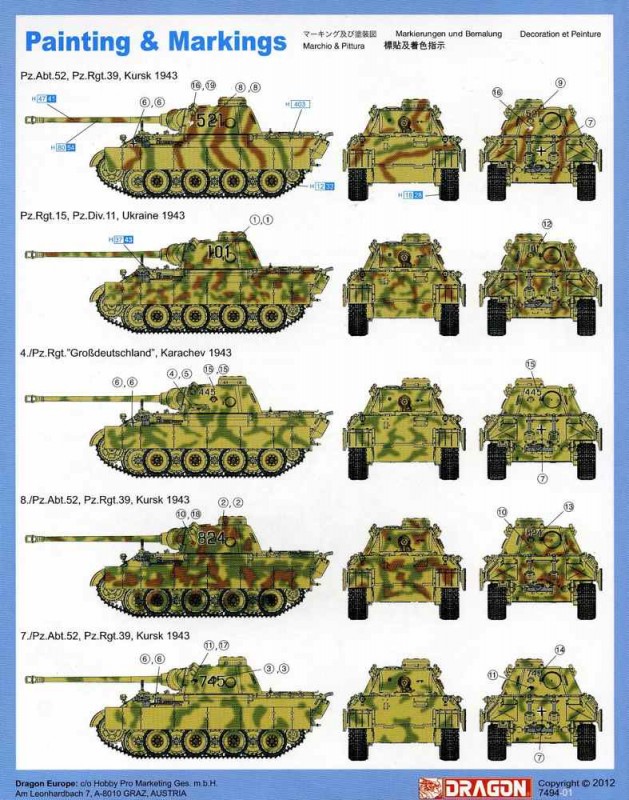
As for the camouflage scheme, I haven't quite decided on which one to replicate. There are five options:


As you can see, all have the green to one degree or another. I was originally going for the third scheme from the top (green sprayed blotches) but that scheme has already been done by another fellow in the campaign. As for an "ambush scheme," that would be totally inappropriate as it wasn't introduced until very late 1944, early 1945. Also, this is an early Panther 'D' that was rushed to the front for the Battle of Kursk in 1943. Whichever scheme I finally choose, I intend to try to airbrush it but first I need to finish the suspension and get the side skirts on.

Cheers,
Jan
Braille
#135
Visit this Community
California, United States
Joined: August 05, 2007
KitMaker: 1,501 posts
Armorama: 1,485 posts
Posted: Thursday, December 13, 2012 - 12:57 PM UTC
@tread_geek – Jan,

I’ve finally managed to get this kit into the stash. I had noticed the painting options but I was thinking of leaving mine in just the base color. I still have some research to do to see if the possibility existed for any of these vehicles being left in just the base color (Kursk). But I’m looking forward to seeing your airbrushed camouflaged rendition.

~ Eddy
woltersk
Visit this Community
Utah, United States
Joined: May 27, 2003
KitMaker: 1,026 posts
Armorama: 654 posts
Posted: Thursday, December 13, 2012 - 01:12 PM UTC
@Jan--I vote for the paint scheme second from the bottom. As if I have a say.

Keith
Biggles2
Visit this Community
Quebec, Canada
Joined: January 01, 2004
KitMaker: 7,600 posts
Armorama: 6,110 posts
Posted: Friday, December 14, 2012 - 03:07 AM UTC
A nice job on a good kit so far. I might make one mention; the lift rings that you drilled out on the engine deck are not actually rings. They are hooks, so if you just cut through the ring on the outboard side you will have a properly shaped lift hook. There were also 3 smaller hooks arranged around the fan vents, but these are probably too small to model accurately in 1/72.
tread_geek
Visit this Community
Ontario, Canada
Joined: March 23, 2008
KitMaker: 2,847 posts
Armorama: 2,667 posts
Posted: Saturday, December 15, 2012 - 05:14 AM UTC
@Braille - Eddy,

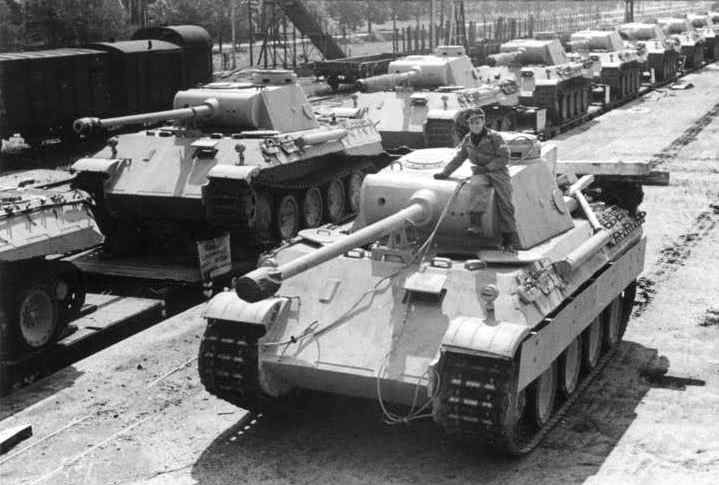
As I'm sure you've read earlier in this thread, this kit has a few glitches and oddities that you'll have to work around. That being said, the details are still very nice and crisp. As for your finishing desire, there are quite a few pictures on the 'Net showing Panthers being shipped and/or moving in the Kursk area in just the factory applied base coat. Here's one of my favourites from the Panzer Colors book.


We can conjecture from this image that the vehicles arrived quite plain (no unit, national or turret markings). One can also assume that the camouflage and any markings were applied once the vehicle was assigned to a unit. In your desired case, perhaps the tank arrived at the unit at a time when the only important thing was to get it into action. If it survived and there was a lull in the action, the crew could then do a hasty paint job.

@woltersk - Keith,

As you can see from the colour choices there was quite a variety of schemes. In some cases a unit commander would "dictate" a uniform pattern for all his tanks while in others the order was "just slop some paint on the thing". Your choice is obviously one of the latter. As for the option you find most interesting, "beauty is in the eyes of the beer holder" and it certainly looks like the crew that painted that one had a few too many.

@Biggles2 - Leo,

Thanks for the kind words and I was aware that the rings on the engine hatch were actually hook like but there are limitations to working in this scale. The drill I used to "open up" these items is a #76 (.020"/.5 mm) and it was a lengthy process just to do the holes (hard to keep it level with all the obstructions on the engine deck). I actually did manage to create a proper hook with the right forward one but that was mostly by accident (the drill was improperly centred due to interfering protrusions). I tried to carve off a portion of another one but even with an Excel super sharp blade the pressure started to collapse the feature. The "blob" that was moulded on to represent this feature was barely .030" wide. As for any hooks around the fan housings, I haven't seen any images of a Panther D with this feature. But as you mention, it might be near impossible to replicate it in this scale.

==========================================================================

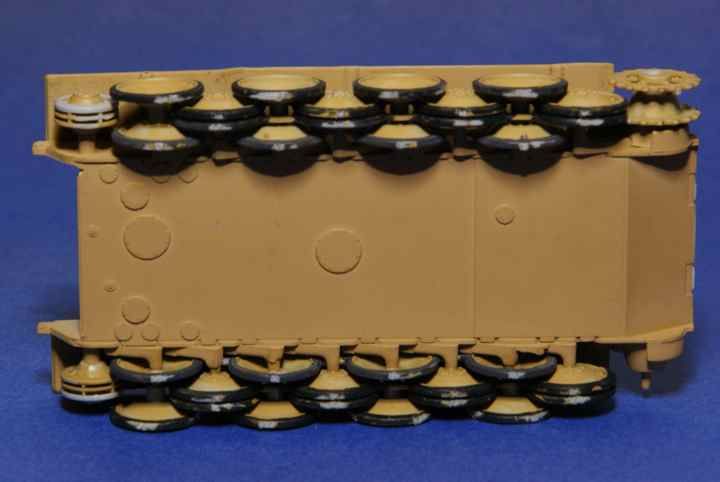
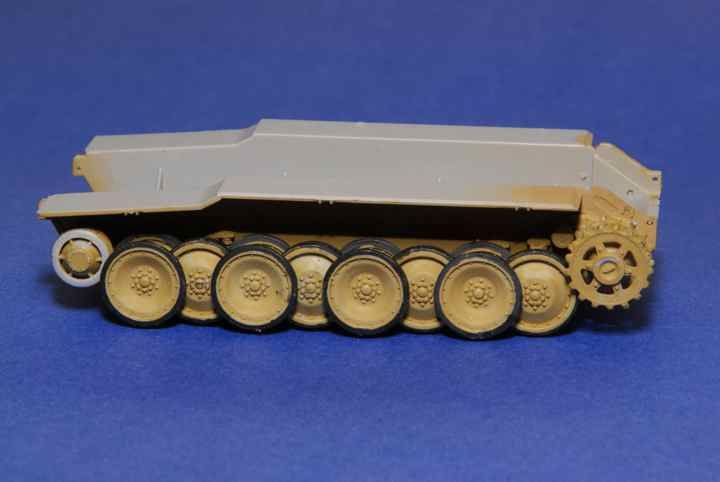
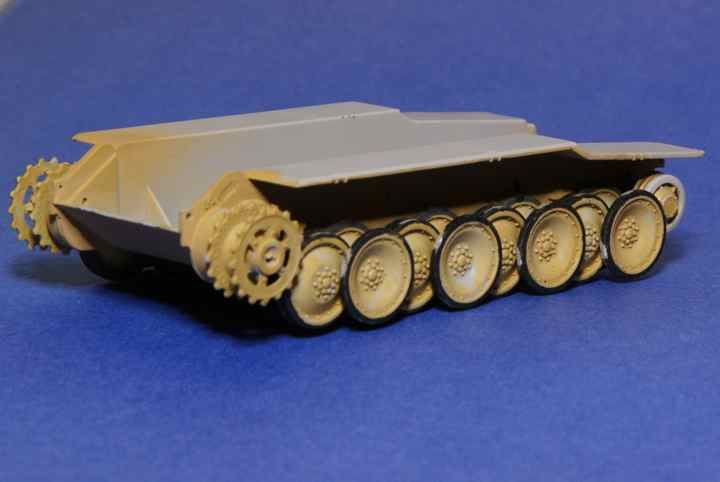
Some major progress with this update. The two sides of the suspension (minus tracks) are pretty much done. Both the idlers and sprockets had to be attached with gap filling CA glue as their fit on their respective pins was very sloppy (loose). You'll notice some areas that need a small touch up but that should be a snap compared to trying to paint the rubber portion on all 32 road wheels! Did I mention I love Braille Scale!


After the touch ups I'll get the tracks on and the bulk can be assembled and the camo can begin.

Cheers,
Jan
erhntly
Visit this Community
Izmir, Turkey / Türkçe
Joined: June 11, 2004
KitMaker: 1,426 posts
Armorama: 464 posts
Posted: Tuesday, December 18, 2012 - 08:06 AM UTC
Hi Jan,
nice and detailed study, will be very nice.

Cheers...
tread_geek
Visit this Community
Ontario, Canada
Joined: March 23, 2008
KitMaker: 2,847 posts
Armorama: 2,667 posts
Posted: Tuesday, December 18, 2012 - 10:27 AM UTC
@Erhan,

Nice to see you back and thanks for dropping in and having a look. Don't be a stranger in the Braille Forum.
===========================================================================

I finally got the tracks on the Panther but as normal it took longer than anticipated. The track length measured out about the same as the instructions but at that length they barely fit and there was no sag, they were tight, and it didn't look right. Stretch, test fit, stretch, test...

Once they were on and loose enough they had to be fixed in place. I glued the bottom run first and then bit by bit worked my way around the sprockets. The idlers were another story as they appeared to be a bit too wide to fit between the guide horns. A bit more sideways stretching this time. To glue the top run I used several pairs of small standard tweezers as sort of "reverse clamps" to push the track on top of the road wheels until the glue dried.

The upper hull is just dry fit, the rubber areas are touched up but the track needs further painting.


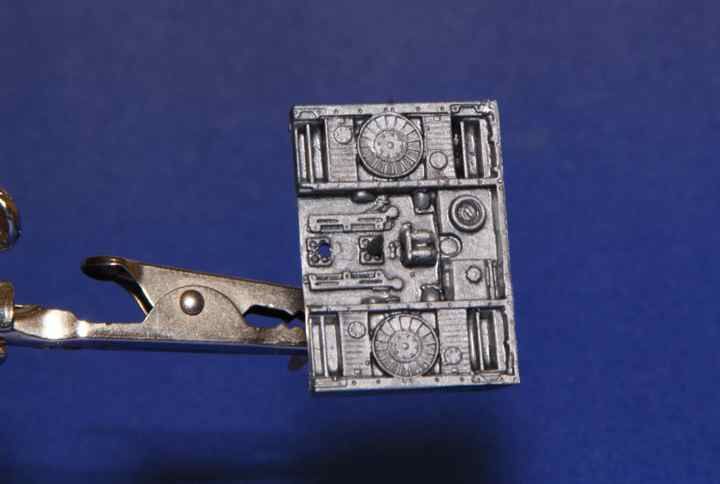
A friend of mine was gracious enough to part with an engine compartment interior from his spares box so I got a base coat on that.


Once the engine area is finish painted and installed the hull halves and rear plate can be attached. Camo should begin shortly after that.

Cheers,
Jan
Braille
#135
Visit this Community
California, United States
Joined: August 05, 2007
KitMaker: 1,501 posts
Armorama: 1,485 posts
Posted: Tuesday, December 18, 2012 - 01:38 PM UTC
@tread_geek – Jan,

Glad you mentioned the fit issue on both the drive and idler wheels, I will have my work cut out for me when I attempt my rendition of this tank. The tracks look fantastic in this scale giving the effect of looking at a 35th scale build unlike the crude made ones found on many older model tank kits.

Thanks for posting a photograph showing an un-camouflaged Panther D, but as you mention this Panther and those in the background are also not yet sporting any markings. I wonder if there are photographs depicting the early Panther already committed to units at Kursk without any camouflage? However, I’ll be keeping an eye open to see how you go about doing the camouflage on your Panther.

~ Eddy
tread_geek
Visit this Community
Ontario, Canada
Joined: March 23, 2008
KitMaker: 2,847 posts
Armorama: 2,667 posts
Posted: Wednesday, December 19, 2012 - 05:17 AM UTC
@Braille - Eddy,

Now that you bring up these two items I recall that both the idler and sprocket fit rather loosely on their respective pins (shafts). The idler was worse and didn't want to orientate itself properly. I used a #57 drill to deepen the hole in part(s) D1(D2) just enough to provide the shaft with somewhere to sit into. BTW, the idlers are a three piece assembly. I did something similar to the outer piece of the sprocket and used gap filling CA to anchor all four of these suspension components.

Despite other people complaining about them, the DS tracks I've worked with are absolutely gorgeous, detail wise. Just be gentle in the stretching process. Oh, and I almost always join the tracks before placing them on and the overlap joint on the Panther tracks was near perfect.

Cheers,
Jan
weathering_one
Visit this Community
Ontario, Canada
Joined: April 04, 2009
KitMaker: 458 posts
Armorama: 456 posts
Posted: Wednesday, December 19, 2012 - 04:56 PM UTC
Jan, those tracks look really great but all the issues with this simple kit make me apprehensive about trying it. I wonder if the earlier Panther kits are any better. I'm curious to see which paint scheme you choose and how it turns out.

Regards
AJ
tread_geek
Visit this Community
Ontario, Canada
Joined: March 23, 2008
KitMaker: 2,847 posts
Armorama: 2,667 posts
Posted: Thursday, December 20, 2012 - 03:52 PM UTC
@AJB,

Thanks for the interest but the tracks are still no where near done. As for some other Panther kit, I can't really offer much. If you go to the Henk of Holland site you can have a look at the previous Dragon Panthers. The earlier ones do look as if they might be more complete (PE is included) and certain parts appear like they might go together easier. The Revell offerings might also not be a bad first choice but I've never built one. I'm still not sure which camo scheme I'll be doing.

Cheers,
Jan
panzerman1
Visit this Community
Maryland, United States
Joined: September 30, 2010
KitMaker: 430 posts
Armorama: 291 posts
Posted: Thursday, December 20, 2012 - 04:52 PM UTC
Nice build Jan. The upgrading and details you added really enhances the look of your Panther. Looking forwards to seeing which camo scheme you use. Bill
Snorri23
Visit this Community
Ontario, Canada
Joined: March 25, 2010
KitMaker: 514 posts
Armorama: 261 posts
Posted: Thursday, December 20, 2012 - 04:54 PM UTC
I feel your pain, I just finished placing the running gear on my Jagdpanther. It was tedious to say the least. To top it all off it will mostly be all covered up with dirt and such. It just had to be done for if it was not I would know and that means a lot. Love the progress. As for reference material I have found A.J. Press books quite useful, all nine volumes.
wing_nut
Visit this Community
New Jersey, United States
Joined: June 02, 2006
KitMaker: 1,212 posts
Armorama: 674 posts
Posted: Friday, December 21, 2012 - 12:11 AM UTC
I know I'm coming in late on this one and you may have made your decision but my vote is for the top scheme.
Braille
#135
Visit this Community
California, United States
Joined: August 05, 2007
KitMaker: 1,501 posts
Armorama: 1,485 posts
Posted: Friday, December 21, 2012 - 05:41 PM UTC
@tread_geek – Jan,

Thanks for the detailed tip on reworking the drive and idler wheels. If we’re still here, I’m sure I will be using your build log as a reference when I go and start on my Panther (according to the Mayan calendar today’s the end of the world as we know it), hihi!

Jan, you are correct in that the DS tracks are super detailed. I found this to be true of the tiny ‘Ke-Nu’ DS tracks! As you mention I too joined the tracks together first and let them set up before placing them on the running gear.

Happy Holidays Jan,
~ Eddy
tread_geek
Visit this Community
Ontario, Canada
Joined: March 23, 2008
KitMaker: 2,847 posts
Armorama: 2,667 posts
Posted: Saturday, December 22, 2012 - 05:50 AM UTC
@panzerman1 - Bill,

I appreciate you dropping in and leaving a comment. The camo scheme is still up in the air, as is how I'm going to apply it. I tried a few experiments at airbrushing on an older model but wasn't too happy with the results.

@Snorri23 - Trevor,

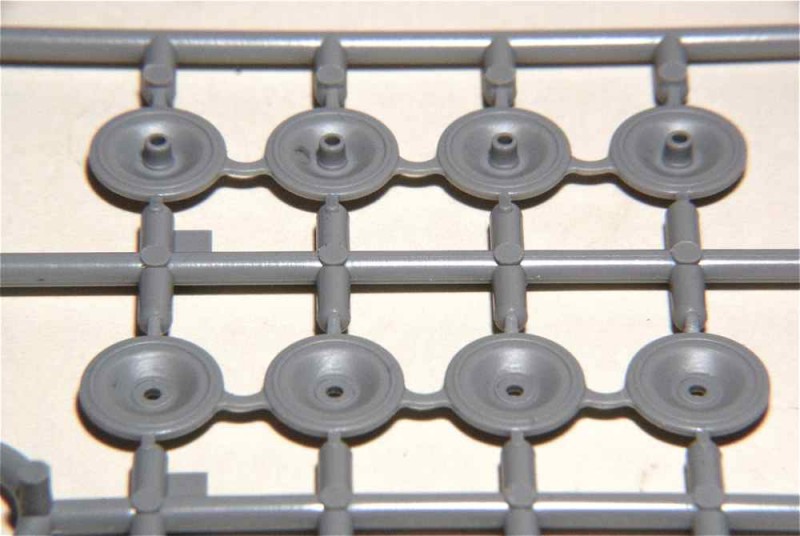
Glad you like how this is turning out and thanks for the reference info. Some of the older Dragon Panther variants and Tiger I variants had rather tedious running gear but thankfully this one had three rows on each side that were moulded in a single piece.


It made things easier for at least that part.

@wing_nut - Marc,

Glad to have you drop in and I was toying with the idea of the first camo myself. As I mention above, I tried spraying freehand on an old Tiger I to practise but wasn't happy with the results. After the holidays I'll try doing it using some form of masking.

@Braille - Eddy,

Thanks for the comments and I wasn't too concerned about the Mayan calendar thing as they probably just stopped their calendar because they couldn't count any higher.


=====================================================

To all those that have celebrations this time of year, Happy Holidays!

Cheers,
Jan
Removed by original poster on 12/28/12 - 23:45:23 (GMT).
tread_geek
Visit this Community
Ontario, Canada
Joined: March 23, 2008
KitMaker: 2,847 posts
Armorama: 2,667 posts
Posted: Monday, January 14, 2013 - 09:14 AM UTC
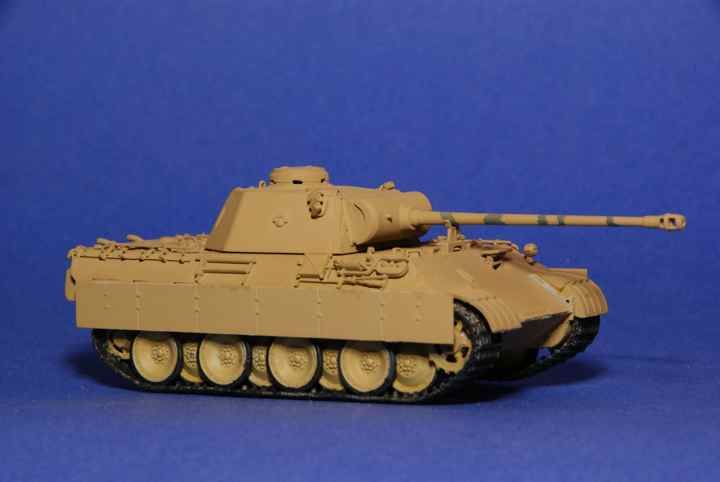
Unexpected serious life events kept me away from the workbench since before what proved to be rather sombre holidays. It was only today that I had an opportunity to actually put in some hobby time.

For most practical purposes the major bulk of construction on my Panther D was completed today. The engine bay was filled (not that one can see much through the grills) and all major components are glued. I still have a couple of towing eyes to place and the vehicle jack but that is trivial. Next up will be the alternating red-borwn and olivgrun striping. Below are the status pictures as of today.


The only annoying problem that I ran into was the spue gates that held the side skirts. They were quite thick and required a fair amount of sanding and filing.

Cheers,
Jan
tread_geek
Visit this Community
Ontario, Canada
Joined: March 23, 2008
KitMaker: 2,847 posts
Armorama: 2,667 posts
Posted: Thursday, January 17, 2013 - 05:55 AM UTC
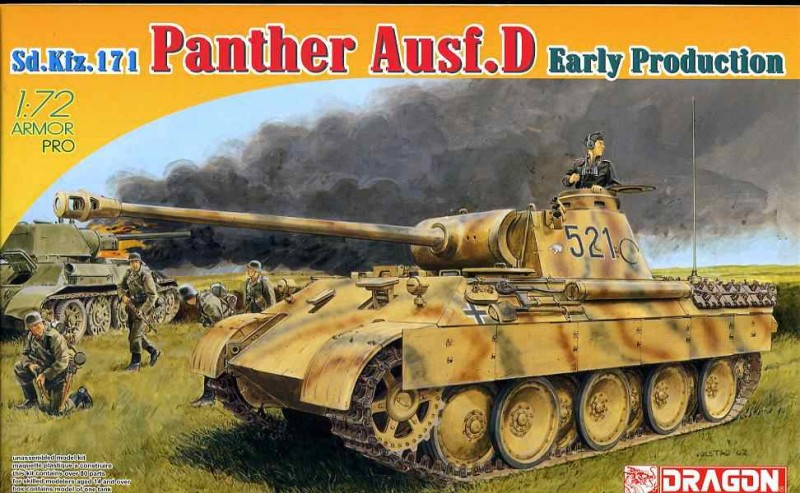
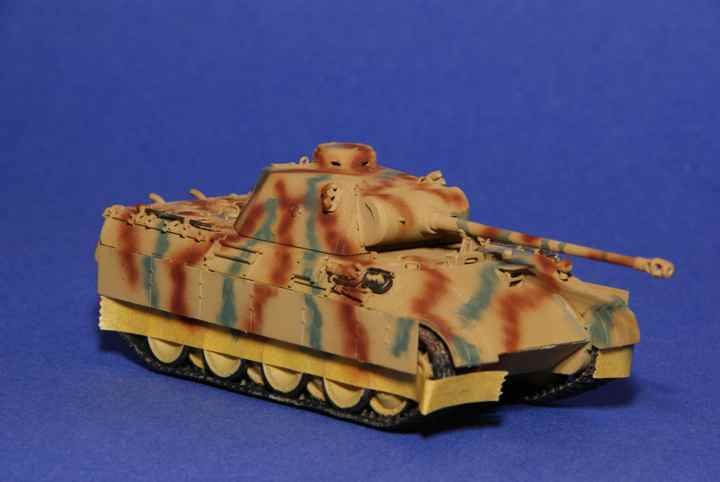
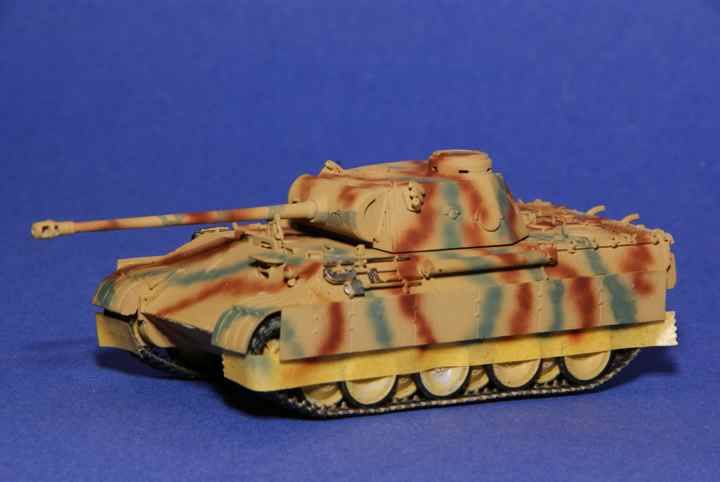
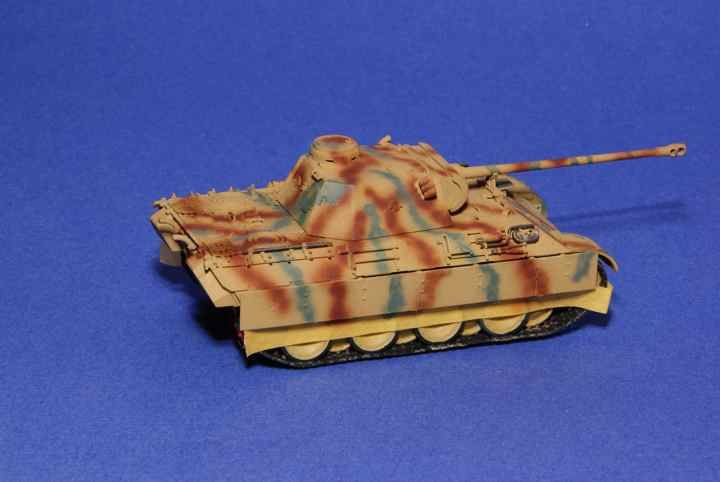
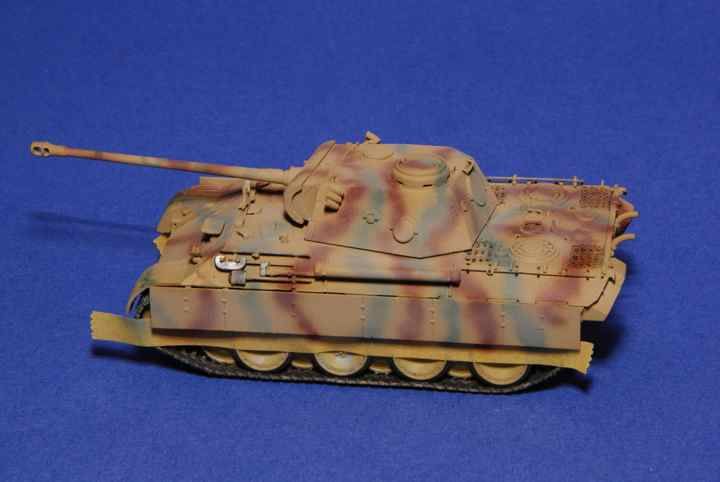
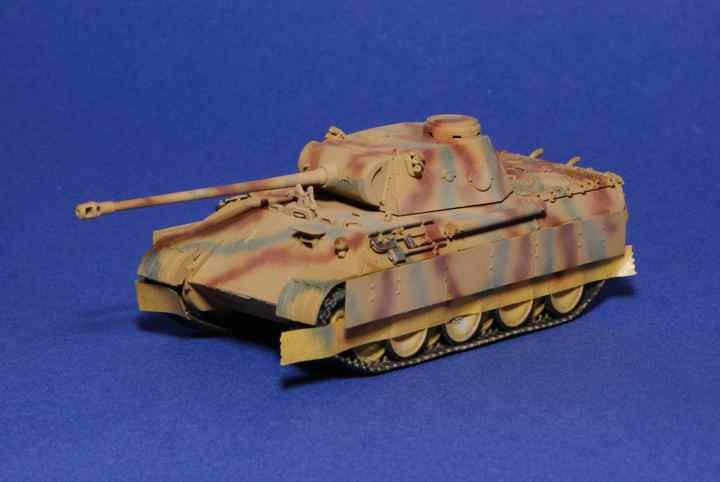
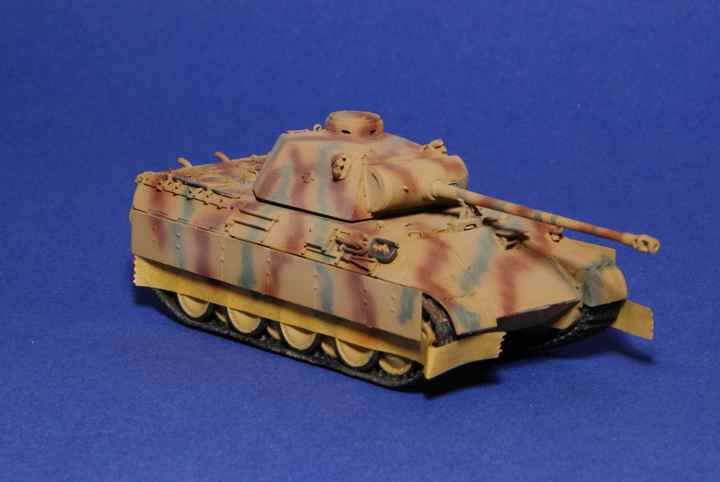
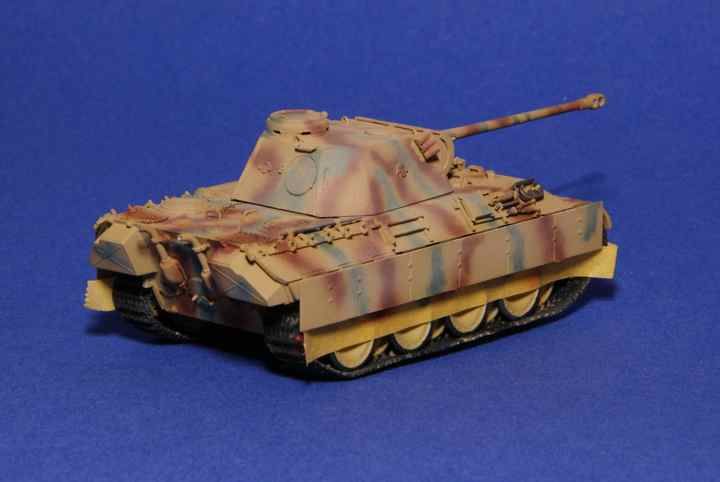
I spent an afternoon practising with my airbrush prior to trying to spray my Panther camo to as close as possible to match the vehicle on the box top.


Whilst not perfect, I think that I got things in the proverbial "ballpark." As the box image shows, the crew did what appears to be a hasty and less then uniform job. Here's a few images of my rendition as it currently stands.


The colours on mine are still a bit bold in areas but I intend to tone them down with a "dusting" or two of a lightened coat of the base sand colour. There's also a few spots that I need to modify a bit but it's finally progressing.

Cheers,
Jan
tread_geek
Visit this Community
Ontario, Canada
Joined: March 23, 2008
KitMaker: 2,847 posts
Armorama: 2,667 posts
Posted: Saturday, January 19, 2013 - 09:26 AM UTC
Today seems to be a successful update day. I took a suggestion made to me and decided to practice with some glaze/filter/wash (whatever?) and tested the effect on some cardboard. It looked pretty promising so I tried it on the tank. I used two separate types based first on a colour called Mud-Stone and the second with Buff at the proportion of about 5% paint and 95 % thinner.


It still needs some touch ups and then I'll start the details followed by the decals and final weathering.

Cheers,
Jan
PedroA
Visit this Community
Valencia, Spain / España
Joined: December 27, 2010
KitMaker: 324 posts
Armorama: 322 posts
Posted: Saturday, January 19, 2013 - 11:41 AM UTC
Great progress. Sometimes I have used Buff painting to make some effect but you must be careful because this painting must be applicated in fine layers and small areas.

Best regards.